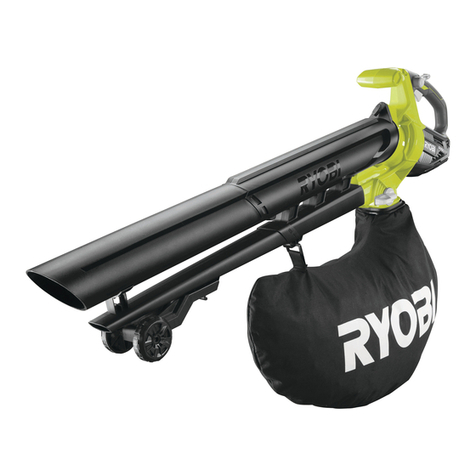
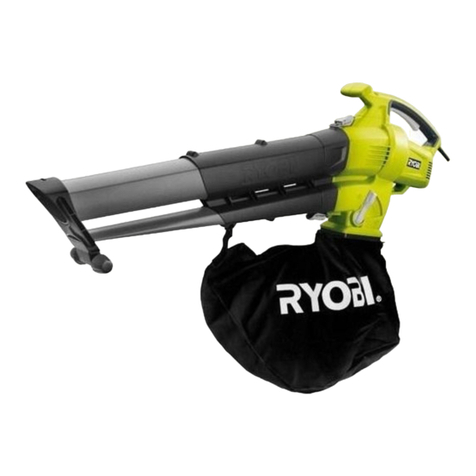
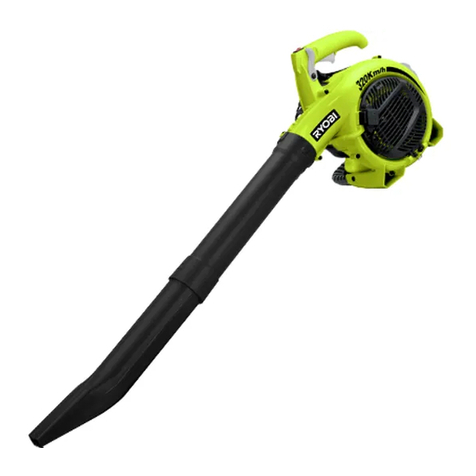
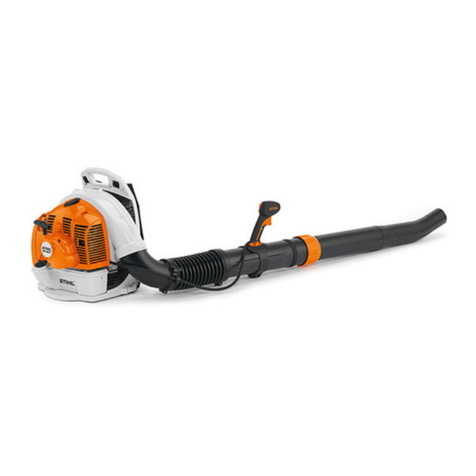
Ryobi RBV26B User manual

SOUFFLEUR/ASPIRATEUR MANUEL D’UTILISATION 1
BLOWER/VACUUM USER’S MANUAL 13
GEBLÄSE/LAUBSAUGER BEDIENUNGSANLEITUNG 24
ASPIRADOR/SOPLADOR MANUAL DE UTILIZACIÓN 37
ASPIRATORE/SOFFIATORE MANUALE D’USO 49
SOPRADOR/ASPIRADOR MANUAL DE UTILIZAÇÃO 61
BLAZER/ZUIGER GEBRUIKERSHANDLEIDING 73
LÖVBLÅS/-SUG INSTRUKTIONSBOK 85
HAVEBLÆSER OG -STØVSUGER BRUGERVEJLEDNING 96
LØBLÅSER/LØVSUGER BRUKSANVISNING 107
PUHALLIN/IMURI KÄYTTÄJÄN KÄSIKIRJA 118
LOMBFÚVÓ/LOMBSZÍVÓ HASZNÁLATI ÚTMUTATÓ 129
NÁVOD K OBSLUZE 141
152
MANUAL DE UTILIZARE 167
DMUCHAWA/ODKURZACZ OGRODOWY
PUHALNIK-SESALNIK LISTJA UPORABNIŠKI PRIRO NIK 192
PUHUR-IMUR KASUTAJAJUHEND 215
NAUDOJIMO VADOVAS 226
260
ÜFLEME/TOPLAMA KULLANICI KILAVUZU 286
FR
EN
DE
ES
IT
PT
NL
SV
DA
NO
FI
HU
CS
RU
RO
PL
SL
HR
ET
LT
LV
SK
BG
UK
TR
RBV26B

Important!
It is essential that you read the instructions in this manual before assembling, maintaining and operating
the product.
Attention!
Il est essentiel que vous lisiez les instructions contenues dans ce manuel avant dassembler, dentretenir
et dutiliser le produit.
Achtung!
Es ist wichtig, dass Sie vor Zusammenbau, Wartung und Benutzung des Produktes die Anweisungen in
dieser Anleitung lesen.
¡Atención!
Resulta fundamental que lea este manual de instrucciones antes de realizar el montaje, el mantenimiento
y de utilizar este producto
Attenzione!
E importante leggere le istruzioni contenute nel presente manuale prima di montare il prodotto, svolgere
le operazioni di manutenzione sullo stesso e metterlo in funzione.
Let op!
Het is van essentieel belang dat u de instructies in deze gebruiksaanwijzing leest voor u het product
monteert, onderhoudt en gebruikt.
Atenção!
É fundamental que leia as instruções deste manual antes da montagem, manutenção e operação do
aparelho.
OBS!
Det er vigtigt, at man læser instrukserne i denne brugsanvisning, inden man samler, vedligeholder og
betjener produktet.
Observera!
Det är viktigt att du läser instruktionerna i manualen före montering, användning och underhåll av
produkten.
Huomio!
On tärkeää, että luet tämän käsikirjan ohjeet ennen tuotteen kokoamista, huoltoa ja käyttöä.
Advarsel!
Det er viktig at du leser instruksjonene i denne manualen før sammensetning, vedlikehold og bruk av
produktet
!
,
.
Uwaga!
Koniecznie nale y przeczyta instrukcje zawarte w tym podr czniku przed monta em, obs ug oraz
konserwacj produktu.
D leité
upozorn ní!
Neinstalujte, neprovád jte údrbu ani nepouívejte tento výrobek d íve, ne si p e tete pokyny uvedené
v tomto návodu.
Figyelem!
Fontos, hogy a termék összeszerelése, karbantartása és használata el tt elolvassa a kézikönyvben
található utasításokat.
Aten ie!
Este esen ial s citi i instruc iunile din acest manual înainte de asamblare, efectuarea între inerii i
operarea produsului.
Uzman bu!
Ir svar gi izlas t s rokasgr matas instrukcijas pirms uzst d anas, apkopes un preces darbin anas.
D mesio!
Prie surenkant, prii rint ir naudojant gamin , b tina perskaityti iame vadove pateiktus nurodymus.
Tähtis!
Enne masina kokkupanekut, hooldamist ja kasutama hakkamist tuleb käesolevas juhendis esitatud
juhised kindlasti läbi lugeda.
Upozorenje!
Vrlo je vano da ste prije sklapanja, odravanja i rada s ovim proizvodom pro itali upute u ovom priru niku.
Pomembno!
Pomembno je da pred montao vzdrevanjem in uporabo tega izdelka preberete navodila v tem priro niku.
Upzornenie!
Je dôleité, aby ste si pred montáou, údrbou a obsluhou produktu pre ítali pokyny v tomto návode.
!
,
, .
!
, ,
.
Önemli!
Ürünü monte etmeden, kullanmadan ve bakmn yapmadan önce bu klavuzdaki talimatlar okumanz
önemlidir.
Subject to technical modi cation | Sous réserve de modi cations techniques | Technische Änderungen vorbehalten | Bajo
reserva de modi caciones técnicas | Con riserva di eventuali modi che tecniche | Technische wijzigingen voorbehouden
| Com reserva de modi cações técnicas | Med forbehold for tekniske ændringer | Med förbehåll för tekniska ändringar |
Tekniset muutokset varataan | Med forbehold om tekniske endringer | | Z
zastrze eniem mody kacji technicznych | Zm ny technických údaj vyhrazeny | A m szaki módosítás jogát fenntartjuk |
Sub rezerva modi ca iilor tehnice | Paturam ties bas main t tehniskos raksturlielumus | Pasiliekant teis daryti techninius
pakeitimus | Tehnilised muudatused võimalikud | Podloæno tehniëkim promjenama | Tehni ne spremembe dopu ene |
Právo na technické zmeny je vyhradené | | | Teknik
de i ikli e tabidir.

13
English (Original instructions)
Safety, performance, and dependability have been given
top priority in the design of your petrol blower/vacuum.
INTENDED USE
The petrol blower/vacuum is only intended for use
outdoors in dry and well-illuminated conditions.
The product is not intended to be used by children
or persons with reduced physical, mental, or sensory
capabilities.
The product is designed for blowing or vacuuming light
debris, such as leaves, grass, and other garden refuse. It
is intended to vacuum and mulch debris and deposit it into
the collection bag.
The product is not designed to suck in water or other
liquids. Do not use the product for any other purpose.
WARNING
Read all safety warnings and all instructions. Failure
to follow the warnings and instructions may result
in electric shock, re, and/or serious injury. Save all
warnings and instructions for future reference.
WARNING
Never allow children or people unfamiliar with these
instructions to use the product. Local regulations may
restrict the age of the operator.
GENERAL SAFETY WARNINGS
Some regions have regulations that restrict the use of
the product to some operations. Check with your local
authority for advice.
Do not allow children or untrained individuals to use
the product.
Read the instructions carefully. Be familiar with the
controls and the correct use of the product.
Never start or run the engine in a closed or poorly
ventilated area. Breathing exhaust fumes can kill.
Clear the work area before each use. Remove all
objects such as rocks, broken glass, nails, wire, or
string that can be blown a considerable distance by
high-velocity air.
Wear hearing protection at all times while operating
the product. The product is noisy, and permanent
hearing injury may result if precautions to limit your
exposure, reduce noise, and wear hearing protection
are not strictly adhered to.
Wear full eye protection at all times while operating
the product. The manufacturer strongly suggests
a full face mask or fully enclosed goggles. Normal
spectacles or sunglasses are not adequate protection.
Objects can be thrown at high speed by the powerful
air jet at any time and may rebound from hard surfaces
toward the operator.
While operating the product, always wear substantial
footwear and long trousers. Do not operate the
product when barefoot or wearing open sandals. Avoid
wearing clothing with loose fitting or that has hanging
cords or ties.
Do not wear loose clothing or jewellery that can be
drawn into the air inlet. Secure long hair so it is above
shoulder level to prevent entanglement in moving
parts.
Beware of thrown objects. Keep all bystanders,
children, and pets at least 15 m away from work area.
Operate the product only at reasonable hours not
early in the morning or late at night when people might
be disturbed.
Use rakes or brooms to loosen the debris before
operating the product.
Never operate the product in an explosive atmosphere.
Never use the product when you are tired, ill, or under
the influence of alcohol, drugs, or medicine.
Before each use, ensure that all controls and safety
devices function correctly.
Operate the product in a recommended position and
only on a firm and level surface.
Do not operate the product on a paved or gravel
surface where ejected material could cause injury.
Before each use, always inspect the housing for
damage. Ensure that guards and handles are in place
and properly secured. Replace worn or damaged
components in sets to preserve balance. Replace
damaged or unreadable labels.
Keep all cooling air inlets clear of debris.
Never operate the product while people, especially
children, or pets are nearby.
Avoid using the product in bad weather conditions
especially when there is a risk of lightning.
Do not operate in poor lighting. The operator requires
a clear view of the work area to identify potential
hazards.
Operating similar tools nearby increases both the risk
of hearing injury and the potential for other persons to
enter your working area.
Always be sure of your footing on slopes. Walk, never
run.

14
English (Original instructions)
Keep proper footing and balance. Do not overreach.
Overreaching can result in loss of balance.
Do not allow hands or any other part of the body or
clothing inside the feeding chamber, discharge chute,
or near any moving part.
Never use the product with defective guards or shields,
or without safety devices, such as debris collector, in
place.
Do not modify the product in any way or use parts
and accessories that are not recommended by the
manufacturer.
WARNING
Before using the product in vacuum mode, you must
assemble the upper and lower vacuum tubes together.
This is a one-time operation only. Never operate the
vacuum with only the upper vacuum tube tted. The risk
of personal injury is signi cantly increased if you fail to
follow this warning.
WARNING
If the product is dropped, suffers heavy impact, or
begins to vibrate abnormally, immediately stop the
engine and inspect for damage or identify the cause of
the vibration. Any damage should be properly repaired
or replaced by an authorised service centre.
Do not touch the area around the silencer or engine
of the product. These parts get hot during operation.
Stop the engine and allow the product to cool down
before refuelling.
For refuelling and fuel mixing, chose an area that is
well-ventilated, and is away from ignition sources,
such as sparks or flames, and flammable materials.
Do not smoke when mixing fuel or filling the fuel tank.
Mix and store fuel in a container approved for fuel.
Keep an appropriate type of fire extinguisher nearby
for dealing with fuel fires.
Remember to securely refit the fuel tank cap before
starting the engine.
Wipe away any fuel spillage. Move 9 m away from
refuelling site before starting engine.
To reduce the risk of injury associated with contacting
rotating parts, always stop the engine and disconnect
the spark plug boot. Make sure all moving parts have
come to a complete stop before:
leaving the product unattended
clearing blockages or unclogging chute
checking, cleaning, or working on the product
inspecting the product after striking a foreign object
Immediately stop the engine in an event of accident
or breakdown. Do not operate the product again until
it has been fully checked by an authorised service
centre.
BLOWER SAFETY WARNINGS
Wear a face filter mask in dusty conditions to reduce
the risk of injury associated with the inhalation of dust.
Slightly dampen surfaces in dusty conditions.
Do not use the product near open windows.
Use the full blower nozzle extension so that the air
stream can work close to the ground and perform
effectively.
In blower mode, use the product with the vacuum
tubes fitted, or you may choose to remove them and
close the fan guard. You must never separate the
vacuum tubes and operate with only the upper tube
fitted. These tubes are designed to be a one-time fit.
If you attempt to separate the fitted vacuum tubes, the
tubes will be damaged. This significantly increases the
potential for serious injury by contact with the rotating
fan.
Do not point the blower nozzle in the direction of
people or pets.
Never place objects inside the blower tubes.
Do not place the product on top of or near loose debris.
Debris can be sucked into the intake vent, resulting in
possible damage to the product.
VACUUM SAFETY WARNINGS
WARNING
Never operate the vacuum with only the upper vacuum
tube fitted. Failure to follow this warning increases the
risk of personal injury.
NOTE: Without the lower vacuum tube fitted, it is much
easier to reach up inside the tube towards the fan blade.
Do not operate the vacuum without the debris collector
bag assembly installed. Flying debris could cause
serious injury. Make sure that the debris collector bag
is in good condition and completely closed before
operating the product.
Move the vacuum from side to side along the outer
edge of the debris. To avoid clogging, do not place the
vacuum tube directly into the debris pile.

15
English (Original instructions)
Hold the engine higher than the inlet end of the
vacuum tube.
To avoid serious injury to the operator or damage to
the product, do not try to vacuum up rocks, broken
glass, bottles, or similar objects.
Avoid situations that could cause fire in the debris
collector bag. Do not operate the product near an open
flame. Do not vacuum up warm ash from fireplaces
and barbecue pits. Do not vacuum up discarded cigars
or cigarettes unless the cinders are completely cool.
Keep all parts of your body away from any moving
part. Rotating fan blades can cause severe injury. Stop
the engine and ensure that fan blades have stopped
rotating before opening the vacuum door, installing or
changing tubes, or opening or removing debris bag.
When feeding material into the product, make sure
that the pieces of metal, rocks, bottles, cans, or other
foreign objects are not included.
Do not allow processed material to build up in the
discharge zone. This may prevent proper discharge
and can result in kickback of material through the
intake opening.
If the product becomes clogged, stop the engine and
remove the spark plug boot before cleaning the debris.
RESIDUAL RISKS
Even when the product is used as prescribed, it is still
impossible to completely eliminate certain residual risk
factors. The following hazards may arise in use, and
the operator should pay special attention to avoid the
following:
Injury caused by vibration
Always use the right tool for the job, use designated
handles and use the lowest speed necessary to
achieve the task.
Hearing injury caused by exposure to noise
Wear ear protection and limit exposure.
Injury from flying objects from the blower tube airflow
if the debris collection bag is not fitted or is damaged
Wear eye protection at all times.
RISK REDUCTION
It has been reported that vibrations from handheld tools
may contribute to a condition called Raynauds Syndrome.
Symptoms may include tingling, numbness, and blanching
of the ngers, usually apparent upon exposure to cold.
Hereditary factors, exposure to cold and dampness, diet,
smoking, and work practices are all thought to contribute to
the development of these symptoms. There are measures
that can be taken by the operator to possibly reduce the
effects of vibration:
Keep your body warm in cold weather. When operating
the product, wear gloves to keep the hands and wrists
warm.
After each period of operation, exercise to increase
blood circulation.
Take frequent work breaks. Limit the amount of
exposure per day.
If you experience any of the symptoms of this condition,
immediately discontinue use and see your physician.
WARNING
Injuries may be caused or aggravated by prolonged use
of a tool. When using any tool for prolonged periods,
ensure you take regular breaks.
MAINTENANCE
WARNING
Use only original manufacturers replacement parts,
accessories, and attachments. Failure to do so can
cause possible injury and poor performance, and may
void your warranty.
WARNING
Servicing requires extreme care and knowledge
and should be performed only by a quali ed service
technician. For service, bring the product to an
authorised service centre. When servicing, use only
original replacement parts.
Stop the engine, allow the product to cool down, and
make sure all moving parts have come to a complete
stop. Disconnect the spark plug boot before conducting
any maintenance or cleaning work.
You may make adjustments and repairs described in
this manual. For other repairs, contact an authorised
service centre.
After each use, clean the product with a soft, dry cloth.
Check all nuts, bolts, and screws at frequent intervals
for proper tightness to ensure that the product is in safe
working condition. Any part that is damaged should be
properly repaired or replaced by an authorised service
centre.
Bring the product to an authorised service centre to
replace damaged or unreadable labels.


16
English (Original instructions)
CLEARING A BLOCKAGE
To reduce the risk of injury associated with contacting
rotating parts, always stop the engine, and make sure
all moving parts have come to a complete stop.
Remove the blower tubes to inspect for blockage.
Clear the tubes if required.
Remove the debris collector bag. Check that the bag
adaptor is free from obstruction.
Inspect the opening to the fan enclosure and the tube
to the debris bag for evidence of a blockage. Keep
fingers away from the fan or mulching blades at all
times.
Do not attempt to remove the fan or mulching blade. If
it is necessary to remove the fan or mulching blades,
bring the product to an authorised service centre.
Reinstall the tubes and the debris collector bag before
starting the product.
CLEANING THE AIR FILTER
See gure 12 - 13.
A wet or dirty air lter causes starting dif culty, loss of
performance, and shorten the life span of the engine. The
air lter should be checked and cleaned after 5 hours of
operation. Inspect and clean more frequently if used in
dusty dirty conditions.
For best performance, the air lter should be replaced
yearly.
Remove the air filter cover by turning the dial counter
clockwise while gently pulling out the cover.
Rinse the filter with clean water.
Gently squeeze filter until excess water is removed.
Replace the filter.
Place the air filter cover back on the product. Turn dial
clockwise until the cover is secured.
NOTE: Make sure the filter is seated properly inside
the cover. Installing the filter incorrectly will allow dirt to
enter the engine, causing rapid engine wear.
CLEANING THE EXHAUST PORT, MUFFLER, AND
SPARK ARRESTOR
NOTE: Depending on the type of fuel used, the type
and amount of lubricant used, and/or your operating
conditions, the exhaust port, muf er, and/or spark arrestor
screen may become blocked with carbon deposits.
If you notice a power loss with your petrol-powered
product, you may need to remove these deposits to
restore performance. We highly recommend that only
quali ed service technicians perform this service.
The spark arrestor must be cleaned or replaced every 50
hours or yearly to ensure proper performance of your product.
Spark arrestors may be in different locations depending on
the model purchased. Please contact your nearest service
dealer for the location of the spark arrestor for your model.
WARNING
To avoid a re hazard, never run the blower without the
spark arrestor in place.
FUEL CAP
WARNING
A leaking fuel cap is a re hazard and must be replaced
immediately.
The fuel cap contains a sealing gasket and a check
valve to allow air in. A clogged check valve will cause
poor engine performance. If performance improves when
the fuel cap is loosened, the check valve may be faulty.
Replace fuel cap if required.
When re tting the fuel cap ensure it is not cross-threaded,
otherwise it will leak.
VACUUM BAG
A dirty bag will reduce performance. To clean the bag,
turn it inside out and shake. Wash the bag in soapy water
at least once a year.
FUEL FILTER
The fuel supplied to the engine is passed through a lter
to remove any contaminants from entering the engine.
Contaminants in the fuel can cause poor performance and
damage to the engine.
The fuel lter is a non-serviceable item and, if needed,
should be replaced by an authorised service centre.
SPARK PLUG REPLACEMENT
This engine uses a Ryobi AC00160, Champion RCJ-6Y,
or NGK BPMR7A spark plug with a 0,63 mm (0,025 in.)
electrode gap. Use an exact replacement and replace
annually.
Remove the spark plug boot.
Loosen the spark plug by turning it counter-clockwise
with a socket.
Remove the spark plug.
Inspect the new spark plug. The spark plug must be
properly gapped and free of deposits in order to ensure
proper engine operation. The correct gap is 0,63 mm
(0,025 in.). To widen gap, if necessary, carefully bend
the ground (top) electrode. To lessen gap, gently tap
ground electrode on a hard surface.

17
English (Original instructions)
Hand thread the new spark plug into the cylinder,
turning it clockwise.
Tighten with a socket. Torque to 24,40 Nm (216 lb.in.)
minimum, 29,82 Nm (264 lb.in.) maximum. Do not
over-tighten.
TRANSPORTATION AND STORAGE
Stop the engine and allow the product to cool down
before storing or transporting.
Clean all foreign materials from the product.
Drain all fuel from the tank into a container approved
for petrol. Remember to properly replace and tighten
the fuel cap.
Run the engine until it stops, this will remove all fuel
that could become stale and leave varnish and gum
in the fuel system.
If applicable, drain all lubricant from the engine into
a container approved for lubricant. Remember to
properly replace the lubricant cap.
Store the product in a cool, dry, and well-ventilated
place that is inaccessible to children. Keep away from
corrosive agents, such as garden chemicals and de-
icing salts.
Do not store outdoors.
When transporting the product in a vehicle, secure
it against movement or falling to prevent injury to
persons or damage to the product.
Never transport the product while the engine is
running.
Abide by all government and local regulations for the
safe storage and handling of petrol.
Short term (less than 1 month)
Stop the engine and allow the product to cool down
before storing or transporting.
Clean all foreign materials from the product.
Store the product in a cool, dry, and well-ventilated
place that is inaccessible to children.
Keep away from corrosive agents such as garden
chemicals and de-icing salts.
Do not store outdoors.
SYMBOLS
Some of the following symbols may be used on this
tool. Please study them and learn their meaning. Proper
interpretation of these symbols will allow you to operate
the tool better and safer.
Read this safety and operating instructions
in this manual and keep it in a safe place
for future reference.
Beware of thrown or ying objects. Keep
all bystanders at least 15 m away.
Wear eye protection.
Wear ear protection.
Do not run product without the tubes in
place.
Risk of long hair being drawn into the air
inlet.
Risk of loose clothing being drawn into the
air intake.
To reduce the risk of injury or damage,
avoid contact with any hot surface.
Warning! Hot surface.
Dangerous feed ori ce and rotating fans.
Keep hands and feet out of the openings
while the product is running.
Use unleaded petrol intended for motor
vehicle with an octane rating of 91
([R+M]/2) or higher.
Use 2-stroke oil for air-cooled engines.
Mix the fuel mix thoroughly before
refuelling.
Full choke
Half choke
Run position
Unlock the cruise control lever.
Pull the starter grip until the engine
attempts to start. Do not pull the starter
grip more than 8 times.
6
Pull the starter grip until the engine
attempts to start. Do not pull the starter
grip more than 6 times.
Press the primer bulb 10 times.

18
English (Original instructions)
Allow the engine to run for 10 seconds
before using the product.
To start a cold engine
To start a warm engine
Blower mode
If the quick change lever is pointing on
this symbol, the product operates in blow
mode.
Vacuum mode
If the quick change lever is pointing on
this symbol, the product operates in
vacuum mode
Conforms to all regulatory standards in
the country in the EU where the product
is purchased.
EurAsian conformity mark
Ukrainian mark of conformity
Guaranteed sound power level is 107 dB.
KNOW YOUR PRODUCT
See Fig 1a and 1b.
1. Lower vacuum tube
2. Vacuum bag
3. Adaptor
4. Cruise control
5. Throttle trigger
6. Upper vacuum tube
7. Fuel cap
8. Starter grip
9. Choke lever
10. Upper handle
11. On/Off switch
12. Positive switch at blowing side
13. Primer bulb
14. Vacuum handle
15. Upper blower tube
16. Door tab
17. Inlet cover
18. Lower blower tube
19. Positive switch at vacuuming side
20. Raised slot
21. Adaptor installed in vacuum bag
22. Raised locking tab with switch insert metal plate
23. Vacuum bag assembly
24. Vacuum Inlet cover tab
25. Vacuum opening
26. Locking tab
27. Vacuum tube assembly
28. Screw for holding vacuum tube assembly
29. Quick start label
30. High velocity nozzle
31. Air lter cover
32. Air lter dial - turn to open or close air lter
33. Air lter
34. Wrench
ASSEMBLY
UNPACKING
This product requires assembly.
Carefully remove the product and any accessories
from the box. Make sure that all items listed in the
packing list are included.
WARNING
Do not use the product if any parts on the packing list
are already assembled when you rst open the box.
The parts on the packing list are not assembled by the
manufacturer and require customer installation. Use of
a product that may have been improperly assembled
could result in serious personal injury.
Carefully inspect the product to make sure no
breakage or damage occurred during shipping.
Do not discard the packing material until you have
carefully inspected and satisfactorily operated the
product.
If any parts are damaged or missing, please call your
Ryobi service centre for assistance.
PACKING LIST
Blower/vacuum
Blower tube
Nozzle
Upper blower tube
Lower blower tube
Adaptor installed in vacuum bag
Upper vacuum tube
Lower vacuum tube
Bottle of 2-stroke lubricant
Operators manual

19
English (Original instructions)
Figure sheet
NOTE: Read and remove all hang tags and store with your
operators manual.
ASSEMBLING THE BLOWER TUBES
See gure 2.
Close the vacuum inlet cover securely. Make sure the
metal contact on the inlet cover is inserted into the
positive switch.
Align the raised tabs on the blower housing outlet to
the slots at the upper tube; slide and tighten securely
by twisting; press slider plate into the slot of the
positive switch to make sure the switch is engaged
and ready to operate.
Connect the lower and upper tubes together.
Connect the nozzle.
To remove the blower tube, pull out the slider from the
positive switch, then rotate the tubes to remove them
from the blower housing outlet.
INSTALLING THE VACUUM BAG
See gure 3-4.
Unzip the vacuum bag and place the adaptor inside
as shown. Push the vacuum bag adaptor through the
open ing in a direction opposite to the zipper. The wider
end of the adaptor will remain in the vacuum bag when
installed properly.
Align the raised slots on the vacuum bag adaptor with
the raised locking tabs on the blower housing outlet;
push the bag adaptor onto the housing. Twist to lock
into place, press the metal contact into the positive
switch slot to make sure the switch is engaged and
ready to operate.
Rotate the vacuum bag until the shoulder strap is
upright.
Make sure the vacuum bag is zipped and closed
before starting the product.
INSTALLING THE VACUUM TUBES
See gure 5 - 6.
WARNING
Rotating impeller blades can cause severe injury.
Always stop the engine and ensure impeller blades
have stopped rotating before opening the vacuum
door or installing/changing tubes. Do not put hands or
any other object into the vacuum tubes while they are
installed on the product.
INSTALLING THE VACUUM TUBES
Secure the upper and lower vacuum tubes together
by aligning the raised locking tabs with the matching
orifice on the upper vacuum tube. The two tubes
become one tube assembly after inserting them
together.
Depress door tab using a flathead screwdriver to open
the vacuum inlet cover.
Align tabs on housing with the tube assembly.
Tighten screws on the upper vacuum tube to secure
to the blower housing. Make sure the metal contact on
the vacuum tube is inserted into the positive switch.
REMOVING THE VACUUM TUBES
Loosen screws of the upper vacuum tube by turning
counterclockwise.
Remove the vacuum tube assembly from the blower
housing.
Close the vacuum inlet cover securely. Make sure the
metal contact on the inlet cover is inserted into the
positive switch.
OPERATION
NOTE: The product has positive switches at the blowing
and vacuuming opening sides. The product will only run
if both the metal contacts are inserted into the positive
switches. When running the product in blower mode (Fig.
8), the metal contact on the blower tube and the inlet cover
must be inserted into their respective positive switches.
When running the product in vacuum mode (Fig. 11), the
metal contact on the adapter tube and the vacuum tube
must be inserted into their respective positive switches.
WARNING
Petrol is extremely ammable and explosive. A re or
explosion from petrol will burn you and others.
MIXING THE FUEL
The product is powered by a 2-stroke engine and
requires pre-mixing petrol and 2-stroke oil. Pre-mix
unleaded petrol and 2-stroke engine oil in a clean
container approved for petrol.
The engine is certified to operate on unleaded petrol
intended for automotive use with an octane rating of
91 ([R + M] / 2) or higher.
Do not use any type of pre-mixed petrol/oil from fuel
service stations, this includes the pre-mixed petrol/oil
intended for use in mopeds, motorcycles, etc.

20
English (Original instructions)
Use synthetic 2-stroke oil only. Do not use automotive
oil or 2-stroke outboard oil.
Mix 2% synthetic 2-stroke into the petrol. This is a 50:1
ratio.
Mix the fuel thoroughly and also each time before
refuelling.
Mix in small quantities. Do not mix quantities larger
than usable in a 30-day period. Synthetic 2-stroke oil
containing a fuel stabilizer is recommended.
1 L + 20 mL = }
2 L + 40 mL =
3 L + 60 mL = 50:1
4 L + 80 mL =
5 L + 100 mL =
FILLING THE TANK
Clean surface around fuel cap to prevent
contamination.
Loosen the fuel cap slowly to release pressure and to
keep the fuel from escaping around the cap.
Carefully pour the fuel mixture into the tank. Avoid
spillage. Prior to replacing the fuel cap, clean and
inspect the gasket.
Immediately replace the fuel cap and hand tighten.
Wipe away any fuel spillage. Move 9m away from
refuelling site before starting engine.
NOTE: It is normal for smoke to be emitted from a new
engine during and after first use.
WARNING
Always shut off engine before fuelling. Never add fuel to
a machine with a running or hot engine. Move at least
9 m from refuelling site before starting engine. Do not
smoke!
STARTING AND STOPPING
WARNING
Never start or run the engine inside a closed or poorly
ventilated area. Breathing exhaust fumes can cause
death.
x 10
x 10
1
4
3
7
12 3
8 9
5 6
2
To start a cold engine:
1. Lock the cruise control.
2. Press slider plate into positive switch's slot to allow the
positive switch to engage and be ready to work.
3. Press the primer bulb 10 times.
4. Set the choke lever to choke position.
5. Pull the starter grip until the engine attempts to start.
Do not pull the starter grip more than 8 times.
6. Set the choke lever to choke position.
7. Pull the starter grip until the engine starts. Do not pull
the starter grip more than 6 times.
8. Wait 10 seconds.
9. Set the choke lever to choke position.
To start a warm engine:
1. Press the primer bulb 10 times.
2. Set the choke lever to choke position.
3. Pull the starter grip until the engine starts.
To stop the engine:
Press the on/off switch to off position (O).
ETHANOL-BLENDED FUELS
Fuel system damage or performance problems resulting
from the use of an ethanol-blended fuel containing a
percentage of ethanol more than the stated below are not
covered under the warranty.
Petrol containing up to 10% ethanol by volume (commonly
referred to as E10) or 15% ethanol by volume (commonly
referred to as E15) are acceptable. Do not use E85 fuel, it
will void your warranty.
BLOWER OPERATION
See gure 8 - 9.

21
English (Original instructions)
WARNING
Do not place blower on top of or near loose debris or
gravel. Debris may be sucked into the blower intake
vent resulting in possible damage to the product and
serious personal injury.
Operate power equipment at reasonable hours only
not early in the morning or late at night when people
might be disturbed. Comply with the times listed in
local ordinances.
To reduce sound levels, limit the number of pieces of
equipment used at any time.
Operate the blower at the lowest possible throttle
speed to do the job.
Check your equipment before operation, especially
the muffler, air intakes, and air filters.
Use rakes or brooms to loosen the debris before
operating the product. Slightly dampen surfaces in
dusty conditions.
Conserve water by using power blowers instead
of hoses for many lawn and garden applications,
including areas such as gutters, screens, patios, grills,
porches, and gardens.
Watch out for children, pets, open windows, or freshly
washed cars, and blow debris safely away.
NOTE: The high velocity nozzle is speci cally designed
for wet sticky leaves. It allows you to scrape wet leaves or
debris while operating the blower.
CRUISE CONTROL
See gure 10.
The cruise control can be used to operate the blower
without holding the throttle trigger.
To engage the cruise control, pull the cruise control
lever back towards the user and stop at the desired
throttle setting.
To release the cruise control, push the cruise control
lever all the way towards the front of product.
VACUUM OPERATION
See gure 11.
WARNING
Keep the silencer and all hot surfaces of the blower/
vacuum away from your body. Failure to do so could
result in possible serious personal injury.
Install the vacuum tubes and the vacuum bag. Refer to
the As sembly section earlier in this manual.
Start the engine. Refer to the Starting and Stopping
section earlier in this manual.
Place the vacuum bag strap over your right shoulder.
Hold the upper handle with your left hand and the
vacuum handle with your right hand.
Move the product from side to side along the outer
edge of the debris. To avoid clogging, do not place the
vacuum tube directly into the debris pile.
Hold the engine higher than the inlet of the vacuum
tube.
Always point the vacuum tube downhill when working
on a hillside.
To avoid serious injury to the operator or damage
to the product, do not attempt to vacuum up rocks,
broken glass, bottles, or other similar objects.
If the vacuum tubes get clogged, stop the engine,
ensure the impeller blades have come to a complete
stop. Disconnect the spark plug wire before cleaning
out the obstruction. Remove the vacuum tubes and
clear the debris from the fan housing. Remove the
bag and clear the tube. A small rod or stick may be
required to clear the entire tube length. Ensure that
all debris has been cleared before reassembling the
vacuum tubes.
20161111v3d2

22
English (Original instructions)
TROUBLESHOOTING
If these solutions do not solve the problem contact your authorised service dealer.
PROBLEM POSSIBLE CAUSE SOLUTION
Engine will not start.
No spark
Check spark. Remove spark plug. Reattach
the spark plug cap and lay spark plug on metal
cylinder. Pull the starter rope and watch for
spark at spark plug tip. If there is no spark,
repeat test with a new spark plug.
No fuel
Push primer bulb until bulb is full of fuel. If bulb
does not ll, primary fuel delivery sys tem is
blocked. Con tact a servicing dealer. If prim er
bulb lls, engine may be ooded, proceed to
next item.
Engine is ooded.
1. Remove spark plug, then turn the product so
the spark plug hole is aimed at the ground.
2. Set the choke lever to « B » position and
pull starter cord 10-15 times. This will clear
excessive fuel from the engine.
3. Remove any fuel from the product.
4. Clean and reinstall the spark plug.
5. Clean up any spilled fuel and move at least
9 m away before restarting.
6. Pull starter handle 3 times with the choke
lever at « B » position.
7. If the engine does not start, set the choke
lever to « B » choke position and repeat the
normal starting procedure.
8. If the engine still fails to start, repeat the
procedure using a new spark plug.
Starter rope is hard to pull. Contact a servicing dealer.
Engine starts but will not
ac cel er ate.
Engine requires approximately
three minutes to warm up.
Allow engine to completely warm up. If engine
does not accelerate after three minutes,
contact a servicing dealer.
Engine starts but will only run at
high speed at half choke.
Carburettor requires
adjustment.
Contact a servicing dealer.
Engine does not reach full speed
and emits excessive smoke.
Lubricant and fuel mixture is
incorrect.
Use fresh fuel and the correct 2-stroke
lubricant mix.
Air lter is dirty. Clean air lter. Refer to Cleaning the Air Filter
section earlier in this manual.
Spark arrestor screen is dirty. Contact a servicing dealer.
Engine starts, runs, and
accelerates but will not idle.
Idle speed screw on carburettor
requires adjustment. Contact a servicing dealer.

23
English (Original instructions)
MAINTENANCE SCHEDULE
Before each
use
After rst
month or
20 hours of
operation
Every 3
months or
50 hours of
operation
Every 6
months or
100 hours of
operation
Every year
or after 300
hours or
operation
Check engine lubricant
Change engine lubricant
Check air lter
Clean air lter
Change air lter
Check or adjust spark plug
Replace spark plug
Check or adjust idle speed
Clean spark arrestor1
Replace spark arrestor1
Check or adjust valve
clearance1
Clean fuel tank and filter1
Check fuel hose
Inspect fuel filter
Replace fuel filter
Check all hose connections
Inspect fuel tank vapour vent
(if equipped)
Inspect carbon canister
(carburettor models only)
1. These items should only be carried out by an authorised service centre.
NOTES:
Maintenance should be performed more frequently when product is used in dusty areas.
When product has exceeded the maximum figures specified in the table, maintenance should still be cycled according
to the intervals of time or hours stated herein.

English Français Deutsch Español Italiano Português
producto prodotto
Blower/vacuum Laubbläser/Laubsauger Soplador/aspirador Soprador/aspirador
Model Modèle Modell Modelo Modello Modelo
Engine displacement Cylindrée du moteur Motorhubraum Volumen del motor Cilindrata motore Cilindrada do motor
Air Velocity Luftgeschwindigkeit Velocidad del aire Velocidade do Ar
Air volume Luftvolumen Volumen del aire Volume aria Volume de Ar
-
mance du moteur del motor motore do motor
frequency of the engine
-
del motor motor
Recommended Engine
speed at idling
Régime moteur recom-
mandé au ralenti
Empfohlene Leer- Velocidad recomendada
del motor a ralentí motore al minimo
Velocidade do motor reco-
mendada em ralenti
Fuel tank volume Capacité du réservoir de
carburant
Tankvolumen Volumen del depósito de
combustible
Volume serbatoio
carburante
Volume do depósito de
combustível
Weight (without fuel) Poids (sans carburant) Gewicht (ohne Treibstoff) Peso (sin combustible) Peso (sem combustível)
A-weighted sound pres-
sure level at the operator
position (in accordance
15503:2009+A1:2013)
(blower / vacuum)
Niveau de pression
sonore pondéré A au
15503:2009+A1:2013)
( )
A-bewerteter Schalldruck-
pegel an der Position des
-
end Anhang A von EN
15503:2009+A1:2013)
(
Laubbläser/Laubsauger
)
Nivel de presión sonora
ponderado A en la posición
del operario (según el
15503:2009+A1:2013)
(
Soplador/aspirador
)
Livello di pressione
sonora ponderata A alla
(secondo quanto indicato
EN 15503:2009+A1:2013)
( )
Nível de pressão sonora
ponderada A na posição
do operador (segundo o
15503:2009+A1:2013)
(Soprador/aspirador)
Racing En fonctionnement En funcionamiento Em funcionamento
Idling Au ralenti Leerlauf Al ralentí Al minimo Ao ralenti
Equivalent équivalent Entspricht Equivalente Equivalente Equivalente
Uncertainty Incertitude Unsicherheit Incertidumbre
A-weighted sound
power level (in accord-
15503:2009+A1:2013)
(blower / vacuum)
Niveau de puissance
sonore pondéré-A
15503:2009+A1:2013)
( )
A-bewerteter Schall-
leistungspegel (entspre-
chend Anhang A von EN
15503:2009+A1:2013)
(
Laubbläser/Laubsauger
)
Nivel de potencia acústica
ponderada en A (según el
15503:2009+A1:2013)
(
Soplador/aspirador
)
pesato A (secondo quanto
A della norma EN
15503:2009+A1:2013)
( )
Nível de potência sonora
ponderada A (segundo
15503:2009+A1:2013)
(Soprador/aspirador)
Racing En fonctionnement En funcionamiento Em funcionamento
Idling Au ralenti Leerlauf Al ralentí Al minimo Ao ralenti
Equivalent équivalent Entspricht Equivalente Equivalente Equivalente
Uncertainty Incertitude Unsicherheit Incertidumbre

Nederlands Svenska Dansk Norsk Suomi Magyar
tiedot
Utblås/Insug Blæser/suge Blåser/støvsuger Puhallin/imuri
Model Modell Model Modell Malli Típus RBV26B
Cilinderinhoud motor Motorförskjutning Motor, slagvolumen Motorens slagvolum Moottorin iskutilavuus 26 cc
Luchtsnelheid Lufthastighed Lufthastighet Ilman nopeus 325 km/h
Luchtvolume Luftvolym Luftvolumen Luftvolum Ilmamäärä 11 m
3
/min
-
estaties
Maksimum motory-
deevne
Maksimal motorytelse Moottorin maksimi
tehokkuus
A motor legnagyobb
teljesítménye 0,75 kW
de motor hos motorn
Motorens maksimale
rotationsfrekvens
Maksimalt turtall på
motoren
Moottorin maksimikier-
rosluku forgási frekvenciája 10 000/min
stationair draaien
Recommenderad
motorhastighet vid
tomgångskörning
Anbefalet mo-
torhastighed i tomgang
Anbefalt motorturtall på
tomgang
Suositeltu moottorin
tyhjäkäyntinopeus
Javasolt motorfordut- 2 800 - 4
600/min
Brandstoftankvolume Bränsletanksvolym Brændstoftank-volumen Drivstofftankvolum Polttoainesäiliön tilavuus
térfogata 30,57 L
brandstof)
Vikt (utan bränsle) Vægt (uden brændstof) Vekt (uten drivstoff) Paino (ilman polt-
toainetta) 4,4 kg
A-gewogen gelu-
idsdrukniveau bij
positie van gebruiker
(in overeenstemming
met bijlage A van EN
15503:2009+A1:2013)
( )
A-viktad ljudtrycksnivå
vid operatörsplats (enligt
2009+A1:2013) (
Utblås/
Insug
)
A-vægtet lydtryksniveau
ved operatørens position
(i henhold til
bilag A til EN
15503:2009+A1:2013)
(
Blæser/suge
)
Støynivåvekting ved
operatørens posisjon
(hennhold til
Tillegg A i EN
15503:2009+A1:2013)
(
Blåser/støvsuger
)
A-painotettu käyttäjään
kohdistuva äänenpain-
etaso (standardin EN
15503:2009 +A1:2013
liitteen A mukaan)
(
Puhallin/imuri
)
-
-
+A1:2013 A. függeléke
)
Draaiende motor Racing Tophastighed Rusing Huipponopeudella 91,7 dB (A) /
95,2 dB(A)
Motor in vrijloop Tomgångskörning Tomgang Tomgang Tyhjäkäynnillä Alapjárat 75,8 dB (A) /
74,5 dB(A)
Equivalent Motsvarande) Ækvivalent Tilsvarende Ekvivalentti 91,1 dB (A) /
94,5 dB (A)
Osäkerhet Usikkerhed Usikkerhet Epätarkkuus 3,0 dB
A-gewogen
geluidsniveau (in
overeenstemming
met bijlage A van EN
15503:2009+A1:2013)
( )
A-vägd ljudeffektsnivå
15503: 2009+A1:2013)
(
Utblås/Insug
)
A-vægtet lydeffektniveau
(i henhold til
bilag A til EN
15503:2009+A1:2013)
(
Blæser/suge
)
A-vektet lydeffektnivå
(hennhold til
Tillegg A i EN
15503:2009+A1:2013)
(
Blåser/støvsuger
)
A-painotettu äänenteho
(standardin EN
15503:2009 +A1:2013
liitteen A mukaan)
(
Puhallin/imuri
)
-
15503:2009 +A1:2013
( )
Draaiende motor Racing Tophastighed Rusing Huipponopeudella 105,7 dB
(A) / 106,0
dB(A)
Motor in vrijloop Tomgångskörning Tomgang Tomgang Tyhjäkäynnillä Alapjárat 89,7 dB (A) /
87,9 dB(A)
Equivalent Motsvarande) Ækvivalent Tilsvarende Ekvivalentti 105,7 dB
(A) / 106,0
dB (A)
Osäkerhet Usikkerhed Usikkerhet Epätarkkuus 3,0 dB

English Français Deutsch Español Italiano Português
Vibration value at right
handle (in accordance
15503:2009+A1:2013)
Valeur des vibrations
15503:2009+A1:2013)
Vibrationswert an dem
rechten Griff (in accord-
15503:2009+A1:2013)
Valor de vibración en
el asa derecha (según
15503:2009+A1:2013)
destro (Secondo quanto in-
Valor de vibração no
manípulo direito (segundo
15503:2009+A1:2013)
Blower mode (upper
handle)
Mode du souffleur (levier
supérieur)
Blasmodus (oberer Griff) Modo soplador (asa
superior) (manico superiore)
Modo de soprador (pega
superior)
Racing En fonctionnement En funcionamiento Em funcionamento
Idling Au ralenti Leerlauf Al ralentí Al minimo Ao ralenti
Equivalent vibration
total value
Valeur totale équivalente
des vibrations
Entspricht Gesamtwert
der Vibration
Valor total de vibración
equivalente
Valore totale delle Valor total da vibração
equivalente
Uncertainty of vibration
measurement
Incertitude de la mesure
des vibrations
Unsicherheit der Vibra-
tionsmessung
Incertidumbre en la
medición de vibración vibração
Vacuum mode (upper
handle / vacuum handle)
Mode aspirateur (levier
supérieur/levier de vie
Saugbetrieb (oberer Griff/
Saugergriff)
Modo de aspiración
(asa superior / asa del
aspirador)
(manico superiore /
manico aspiratore)
Modo de aspiração
(pega superior/pega do
aspirador)
Racing En fonctionnement En funcionamiento Em funcionamento
Idling Au ralenti Leerlauf Al ralentí Al minimo Ao ralenti
Equivalent vibration
total value
Valeur totale équivalente
des vibrations
Entspricht Gesamtwert
der Vibration
Valor total de vibración
equivalente
Valore totale delle Valor total da vibração
equivalente
Uncertainty of vibration
measurement
Incertitude de la mesure
des vibrations
Unsicherheit der Vibra-
tionsmessung
Incertidumbre en la
medición de vibración vibração

FR RYOBI® CONDITIONS D'APPLICATION DE LA GARANTIE
En plus des droits statutaires liés à l'achat, ce produit est couvert par une garantie
telle que décrite ci-dessous.
1. La durée de la garantie accordée au consommateur est de 24 mois à partir de
preuve d'achat. Le produit a été conçu en vue d'une utilisation strictement
ou commerciale.
2. Il existe pour une partie de la gamme « jardin » (AC/DC), une possibilité
d'étendre la période de garantie au-delà de la période précédemment décrite
son/ses outil(s) nouvellement acheté(s) en ligne dans les 30 jours qui suivent
la date d'achat. L'utilisateur a la possibilité de s'enregistrer pour l'extension
son consentement pour l'enregistrement des données requises pour accéder au
date d'achat serviront de preuve de l'extension de garantie.
3.
mais sans s'y limiter, les dommages accessoires ou indirects. La garantie est
non valable en cas de mauvaise utilisation du produit, d'utilisation contraire
aux instructions du mode d'emploi, ou en cas de branchement incorrect. Cette
garantie ne s'applique pas pour :
– tout dommage au produit résultant d'un mauvais entretien
–
–
de série) ont été dégradés, altérés ou retirés
– tout dommage causé par le non-respect des instructions du mode d'emploi
– tout produit non CE
– tout produit ayant subi une tentative de réparation par du personnel non
–
– tout produit utilisé avec un mélange inapproprié (essence, huile,
pourcentage d'huile)
–
physiques, chocs) ou par des substances étrangères
– l'usure normale des pièces consommables
– une utilisation inappropriée, une surcharge de l'outil
– l'utilisation de pièces ou accessoires non agréés
–
carburateurs
– les composants (pièces et accessoires) sujets à une usure naturelle,
transmission, les embrayages, les lames des taille-haies ou des tondeuses
à gazon, les harnais, les câbles d'accélérateur, les charbons, les cordons
lanières, les guides-chaîne, les chaînes de tronçonneuses, les tuyaux et
raccords, les buses et lances de nettoyeurs haute pression, les roues, les
4. Si le produit doit être réparé, envoyez-le à un service après-vente agréé RYOBI
dont vous trouverez ci-dessous la liste pour chaque pays. Dans certains
pays, votre revendeur RYOBI se chargera d'envoyer le produit à un centre de
réparation RYOBI. Lorsque vous envoyez un produit à un service après-vente
RYOBI, celui-ci doit être correctement emballé, sans contenir aucun produit
dangereux tel que de l'essence, et vous devez indiquer votre adresse ainsi
qu'une courte description du problème.
5. Une réparation / un remplacement sous garantie est gratuit(e). Ceci ne
constituera pas une extension de garantie ni un nouveau départ de la période de
garantie. Les pièces ou les outils remplacés deviennent notre propriété. Dans
statutaires restent inchangés.
6. Cette garantie est valable au sein de l'Europe, de la Suisse, de l'Islande, de la
veuillez contacter votre distributeur agréé RYOBI pour déterminer si une autre
garantie s'applique.
SERVICE APRÈS-VENTE AGRÉÉ
Pour trouver le service après-vente agréé le plus proche, rendez-vous sur http://
EN RYOBI® WARRANTY APPLICATION CONDITIONS
1.
2.
the data that are required to be entered online, and they have to accept the
3.
is limited to repair and/or replacement and does not include any other
obligations including but not limited to incidental or consequential damages.
not apply to:
–
–
–
–
– any non CE product
–
–
–
–
–
–
–
–
–
including but not limited to bump knobs, drive belts, clutch, blades
mulching blades, etc.
4. For servicing, the product must be sent or presented to a RYOBI authorized
addresses. In some countries your local RYOBI dealer undertakes to send
the product to the RYOBI service organisation. When sending a product
5.
parts or tools become our property. In some countries delivery charges or
6.
applies.
AUTHORISED SERVICE CENTRE
service-and-support/service-agents.

DE EC KONFORMITÄTSERKLÄRUNG
Techtronic Industries GmbH
Max-Eyth-Straße 10, 71364 Winnenden, Germany
Hiermit erklären wir, dass die Produkte
Gebläse / Laubsauger
Marke: Ryobi
Modellnummer: RBV26B
Seriennummernbereich: 46208101000001-46208101999999
entspricht den folgenden europäischen Richtlinien
2006/42/EC, 2014/30/EU, 2000/14/EC, 2005/88/EC, 97/68/EC,
2002/88/EC, 2004/26/EC, 2010/26/EU, 2011/88/EU, 2012/46/EU,
EN 15503:2009+A1:2013, EN ISO 14982:2009, EN ISO 3744:2010
Gemessener Schallleistungspegel: 106.2 dB (A)
Garantierter Schallleistungspegel: 107 dB (A)
Konformitätsbeurteilungsmethode zu Anhang V Richtlinie 2000/14/EC.
Floyd Jeffrey Nesom (BSME)
Generaldirektor Technik
Winnenden, Apr. 30, 2016
Autorisiert die technische Datei zu erstellen:
Alexander Krug, Geschäftsführer
Techtronic Industries GmbH
Max-Eyth-Straße 10, 71364 Winnenden, Germany
FR DÉCLARATION DE CONFORMITÉ EC
Techtronic Industries GmbH
Max-Eyth-Straße 10, 71364 Winnenden, Germany
Déclarons par la présente que le produit
Souffleur / Aspirateur
Marque: Ryobi
Numéro de modèle: RBV26B
Étendue des numéros de série: 46208101000001-46208101999999
est conforme aux Directives Européennes suivantes
2006/42/EC, 2014/30/EU, 2000/14/EC, 2005/88/EC, 97/68/EC,
2002/88/EC, 2004/26/EC, 2010/26/EU, 2011/88/EU, 2012/46/EU,
EN 15503:2009+A1:2013, EN ISO 14982:2009, EN ISO 3744:2010
Niveau de puissance sonore mesuré: 106.2 dB (A)
Niveau de puissance sonore garanti: 107 dB (A)
Méthode d'évaluation de conformité de l'Annexe V Directive 2000/14/EC
Floyd Jeffrey Nesom (BSME)
Directeur Principal de l'ingénierie
Winnenden, Apr. 30, 2016
Autorisé à rédiger le dossier technique:
Alexander Krug, Directeur Général
Techtronic Industries GmbH
Max-Eyth-Straße 10, 71364 Winnenden, Germany
ES DECLARACIÓN EC DE CONFORMIDAD
Techtronic Industries GmbH
Max-Eyth-Straße 10, 71364 Winnenden, Germany
Por la presente declaramos que los productos
Aspirador / Soplador
Marca: Ryobi
Número de modelo: RBV26B
Intervalo del número de serie: 46208101000001-46208101999999
está en conformidad con las siguientes Directivas Europeas
2006/42/EC, 2014/30/EU, 2000/14/EC, 2005/88/EC, 97/68/EC,
2002/88/EC, 2004/26/EC, 2010/26/EU, 2011/88/EU, 2012/46/EU,
EN 15503:2009+A1:2013, EN ISO 14982:2009, EN ISO 3744:2010
Nivel de potencia acústica medido: 106.2 dB (A)
Nivel de potencia acústica garantizado: 107 dB (A)
Método de evaluación de la conformidad con el anexo V la Directiva 2000/14/
CE.
Floyd Jeffrey Nesom (BSME)
Director sénior de Ingeniería
Winnenden, Apr. 30, 2016
Autorizado para elaborar la ficha técnica:
Alexander Krug, Administrador Ejecutivo
Techtronic Industries GmbH
Max-Eyth-Straße 10, 71364 Winnenden, Germany
EN EC DECLARATION OF CONFORMITY
Techtronic Industries GmbH
Max-Eyth-Straße 10, 71364 Winnenden, Germany
Herewith we declare that the product
Blower / Vacuum
Brand: Ryobi
Model number: RBV26B
Serial number range: 46208101000001-46208101999999
is in conformity with the following European Directives
2006/42/EC, 2014/30/EU, 2000/14/EC, 2005/88/EC, 97/68/EC,
2002/88/EC, 2004/26/EC, 2010/26/EU, 2011/88/EU, 2012/46/EU,
EN 15503:2009+A1:2013, EN ISO 14982:2009, EN ISO 3744:2010
Measured sound power level: 106.2 dB (A)
Guaranteed sound power level: 107 dB (A)
Conformity assessment method to Annex V Directive 2000/14/EC.
Floyd Jeffrey Nesom (BSME)
Senior Director of Engineering
Winnenden, Apr. 30, 2016
Authorised to compile the technical file:
Alexander Krug, Managing Director
Techtronic Industries GmbH
Max-Eyth-Straße 10, 71364 Winnenden, Germany

Techtronic Industries GmbH
Max-Eyth-Straße 10,
71364 Winnenden, Germany
Other manuals for RBV26B
4
Table of contents
Other Ryobi Blower manuals

Ryobi
Ryobi RBL360 User manual

Ryobi
Ryobi PowerMulching RBV2800S User manual

Ryobi
Ryobi RY40403VN User manual

Ryobi
Ryobi RY404011CAN User manual

Ryobi
Ryobi OBL-1801 User manual

Ryobi
Ryobi P2170 User manual

Ryobi
Ryobi RY36BLXA User manual

Ryobi
Ryobi RY18BLXC User manual

Ryobi
Ryobi RY09465 How to use

Ryobi
Ryobi RY08576 User manual

Ryobi
Ryobi OBL-1801 User manual

Ryobi
Ryobi EXPAND-IT ABE04 User manual

Ryobi
Ryobi OBL1820S User manual

Ryobi
Ryobi RY08544 User manual

Ryobi
Ryobi RY36BPXA-0 User manual

Ryobi
Ryobi RY09605 User manual

Ryobi
Ryobi RY08420 User manual

Ryobi
Ryobi RBL1802Li4 User manual

Ryobi
Ryobi RY09800 User manual

Ryobi
Ryobi RY09056 Quick setup guide