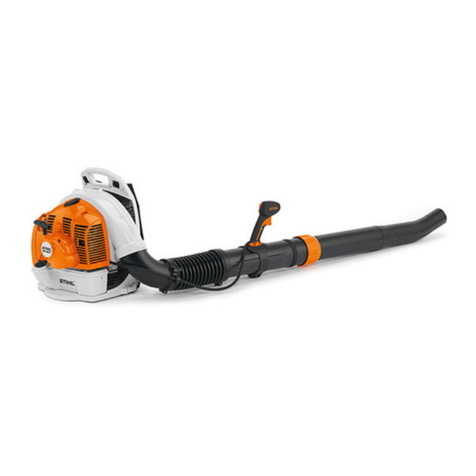
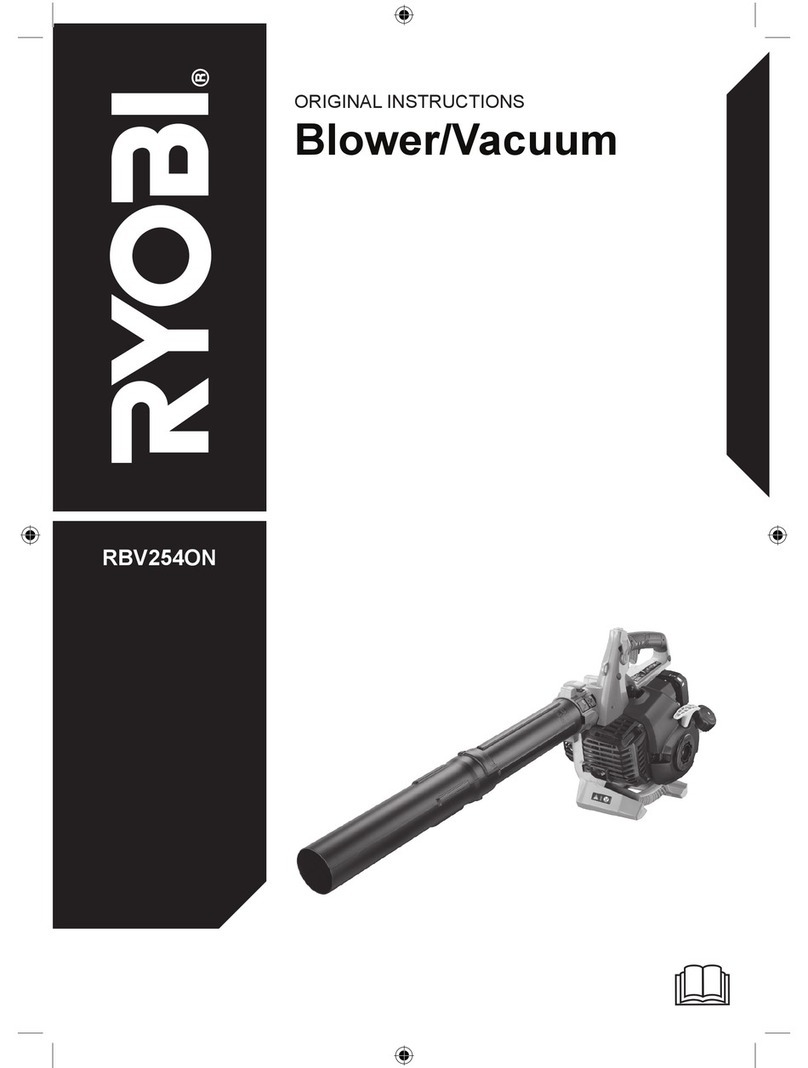
Ryobi RBL30MVB User manual

RBL30MVB
ASPIRATEUR / SOUFFLEUR THERMIQUE MANUEL D’UTILISATION 1
PETROL BLOWER VAC USER’S MANUAL 8
MOTOR-LAUBSAUGER / -BLÄSER BEDIENUNGSANLEITUNG 14
ASPIRADOR / SOpLADOR TÉRMICO MANUAL DE UTILIZACIÓN 21
ASPIRATORE / SOFFIATORE TERMICO MANUALE D’USO 28
ASPIRADOR / SOPRADOR TÉRMICO MANUAL DE UTILIZAÇÃO 36
MOTOR BLADZUIGER / BLAZER GEBRUIKERSHANDLEIDING 44
BENSINDRIVEN LÖVSUG / LÖVBLÅS INSTRUKTIONSBOK 52
BENZINDREVEN SUGER / BLÆSER BRUGERVEJLEDNING 59
MOTORDREVET SUGER/BLÅSER BRUKSANVISNING 66
LÄMPÖVOIMAIMURI-PUHALLIN KÄYTTÄJÄN KÄSIKIRJA 72
MOTOROS LOMBSZÍVÓ / FÚVÓ / SZECSKÁZÓ GÉP HASZNÁLATI ÚTMUTATÓ 80
BENZÍNOVÝ VYSAVAČ/FOUKAČLISTÍ NÁVOD K OBSLUZE 88
ÅÖçáéèõãÖëéë-ÇéáÑìïéÑìÇäÄ êìäéÇéÑëíÇé èé ùäëèãìÄíÄñàà 96
SPIRATOR / SUFLĂTOR TERMIC MANUAL DE UTILIZARE 104
ODKURZACZ / ZDMUCHIWACZ TERMICZNY INSTRUKCJA OBSŁUGI 112
MOTORNI PUHALNIK/SESALNIK UPORABNIŠKI PRIROČNIK 120
MOTORNI USISAVA»-PUHALICA KORISNI»KI PRIRU»NIK 126
BENSIINIMOOTORIGA IMUR-PUHUR KASUTAJAJUHEND 133
BENZININIS SURINKĖJAS NUPŪTĖJAS NAUDOJIMO VADOVAS 139
GRUŽU PŪTĒJS UN SŪCĒJS AR IEKŠDEDZES DZINĒJU
LIETOTĀJA ROKASGRĀMATA 147
BENZÍNOVÝ VYSÁVAČ/FÚKAČLÍSTIA NÁVOD NA POUŽITIE 157
äéåÅàçàêÄçÄ åéíéêçÄ åÖíãÄ ë ÅÖçáàçéÇ ÑÇàÉÄíÖã
êöäéÇéÑëíÇé áÄ ìèéíêÖÅÄ 163
FR
EN
DE
ES
IT
PT
NL
SV
DA
NO
FI
HU
CS
RU
RO
PL
SL
HR
ET
LT
LV
SK
BG
IMPORTANT! It is essential that you read the instructions in this manual before assembling,
maintaining and operating this machine.
960725012-01.indd AI960725012-01.indd AI 14/02/2011 10:35 AM14/02/2011 10:35 AM

Attention ! Il est indispensable que vous lisiez les instructions contenues dans ce manuel avant
le montage et la mise en service de l’appareil.
Important! It is essential that you read the instructions in this manual before assembling, maintaining
and operating this machine.
Achtung! Bitte lesen Sie unbedingt vor Montage und Inbetriebnahme die Hinweise dieser
Bedienungsanleitung.
¡Atención! Es imprescindible que lea las instrucciones de este manual antes del montaje y de la
puesta en servicio.
Attenzione! Prima di procedere al montaggio e alla messa in funzione, è indispensabile leggere
attentamente le istruzioni del presente manuale.
Atenção! É indispensável ler as instruções deste manual antes de montar e pôr em serviço.
Let op ! Het is absoluut noodzakelijk vóór montage en inbedrijfstelling de aanwijzingen in deze
handleiding te lezen.
Observera! Det är nödvändigt att läsa instruktionerna i denna bruksanvisning före montering och
driftsättning.
OBS! Denne brugsanvisning skal læses igennem inden montering og ibrugtagning.
Advarsel! Vennligst les instruksjonene i denne bruksanvisningen før du monterer og tar i bruk
maskinen.
Huomio! On ehdottoman välttämätöntä lukea tässä käyttöohjeessa annetut ohjeet ennen
asennusta ja käyttöönottoa.
Figyelem! Feltétlenül fontos, hogy a jelen használati útmutatóban foglalt előírásokat az
összeszerelés és az üzembe helyezés ellőt elolvassa!
Důležité upozornění! Před montáží nářadí a uvedením do provozu je nutné si přečíst následující pokyny.
ÇÌËχÌËe! èee‰ Ò·ÓÍÓÈ Ë Á‡ÔÛÒÍÓÏ ËÌÒÚÛÏeÌÚ‡ ÌeÓ·ıÓ‰ËÏÓ ÔÓ˜eÒÚ¸ ËÌÒÚÛ͈ËË ËÁ ̇ÒÚÓfl˘e„Ó
ÛÍÓ‚Ó‰ÒÚ‚‡.
Atenţie! Este indispensabil sã citiţi instrucţiunile conţinute în acest mod de utilizare înainte de montaj
şi de punerea în funcţiune.
Uwaga! Przed montowaniem i uruchomieniem, koniecznie musicie sięPaństwo zapoznać
z zaleceniami zawartymi w niniejszym sposobie użycia.
Pomembno! Zelo pomembno je, da pred namestitvijo in prvo uporabo te naprave preberete
navodila v tem priročniku.
Upozorenje!
Vaæno je da upute u ovom KorisniËkom priruËniku proËitate prije postavljanja i uporabe
ovog alata.
Tähtis! Lugege enne seadme kokkupanekut ja kasutamist kindlasti läbi selles juhendis
sisalduvad eeskirjad ja juhised!
Dėmesio! Prieš surinkdami ir paleisdami aparatąįdarbą, reikia, kad jūs perskaitytumėte šiame
vadove esančias instrukcijas.
Uzmanību! Ir ļoti būtiski, lai jūs izlasītu norādījumus, kas sniegti šajārokasgrāmatā, pirms ķeraties
pie ierīces montēšanas un iedarbināšanas!
Upzornenie! Je dôležité, aby ste si pred montážou a spustením zariadenia prečítali pokyny, ktoré sa
nachádzajú v tomto návode.
ÇÌËχÌËÂ! èÂ‰Ë Ò„ÎÓ·fl‚‡ÌÂ Ë ÔÛÒ͇Ì ̇ χ¯Ë̇ڇ  ‚‡ÊÌÓ ‰‡ ÔÓ˜ÂÚÂÚ ËÌÒÚÛ͈ËËÚ ‚
˙ÍÓ‚Ó‰ÒÚ‚ÓÚÓ Á‡ ÛÔÓÚ·‡.
960725012-01.indd AII960725012-01.indd AII 14/02/2011 10:35 AM14/02/2011 10:35 AM

8
English (original instructions)
EN
FR DE ES IT PT NL SV DA NO FI HU CS RU RO PL SL HR ET LT LV SK BG
INTENDED USE:
This product is only intended for use outdoors.
It is intended for blowing light debris including leaves, grass
and other garden refuse. It is intended to vacuum and mulch
light debris as above and collect in the debris bag. It is not
designed to suck or vacuum water or other liquid.
GENERAL SAFETY RULES
WARNING
READ AND UNDERSTAND ALL INSTRUCTIONS.
Failure to follow all instructions listed below,
may result in electric shock, fire and/or serious
personal injury.
SAVE THESE INSTRUCTIONS.
■Do not allow children or infirm persons or untrained
individuals to use this unit.
■Do not allow children to play with the machine.
■Do not use this machine for water suction cleaning or
animal grooming.
■Never start or run the engine inside a closed area;
breathing exhaust fumes can kill.
■Wear eye and hearing protection when operating
this product.
■Keep all bystanders, children, and pets at least
15 m away.
■Wear heavy long pants, boots, and gloves.
Do not wear loose fitting clothing, short pants,
jewelry of any kind, or go barefoot.
■To reduce the risk of injury associated with objects
being drawn into rotating parts, do not wear loose
clothing, scarves, neck chains, and the like.
■Secure long hair so it is above shoulder level to
prevent entanglement in any rotating parts.
■Do not operate this unit when you are tired, ill,
or under the influence of alcohol, drugs, or medication.
■Do not operate in poor lighting.
■Keep all parts of your body away from any moving
parts and all hot surfaces of the unit.
■Wear a face filter mask in dusty conditions to reduce
the risk of injury associated with the inhalation of dust.
■Check the work area before each use. Remove all
objects such as rocks, broken glass, nails, wire,
or string which can be thrown or become entangled in
the machine.
■Keep firm footing and balance. Do not overreach.
Overreaching can result in loss of balance or
exposure to hot surfaces.
■Never operate the unit without a spark arrestor
screen; this screen is located inside the silencer.
■Before storing, allow the engine to cool.
■Empty fuel tank and restrain the unit from moving
before transporting in a vehicle.
■To reduce the risk of fire and burn injury, handle fuel
with care. It is highly flammable.
■Do not smoke while handling fuel.
■Mix and store fuel in a container approved for
gasoline.
■Mix fuel outdoors where there are no sparks or
flames.
■Select bare ground, stop engine, and allow to cool
before refueling.
■Loosen fuel cap slowly to release pressure and to
keep fuel from escaping around the cap.
■Tighten the fuel cap securely after refueling.
■Wipe spilled fuel from the unit. Move 9 m away from
refueling site before starting engine.
■Never attempt to burn off spilled fuel under any
circumstances.
■Use only identical manufacturer’s replacement parts
and accessories. Use of any other parts may create a
hazard or cause product damage.
■Maintain the unit per maintenance instructions in this
Operator’s Manual.
■Inspect the unit before each use for loose fasteners,
fuel leaks, etc. Replace damaged parts.
■Use this machine outdoors only due to the dangerous
exhausted gases.
■It has been reported that vibrations from hand-held
tools may contribute to a condition called Raynaud’s
Syndrome in certain individuals. Symptoms may
include tingling, numbness and blanching of the
fingers, usually apparent upon exposure to cold.
Hereditary factors, exposure to cold and dampness,
diet, smoking and work practices are all thought to
contribute to the development of these symptoms.
■There are measures that can be taken by the
operator to possibly reduce the effects of vibration:
a) Keep your body warm in cold weather. When
operating the unit wear gloves to keep the hands
and wrists warm. It is reported that cold weather is a
major factor contributing to Raynaud’s Syndrome.
b) After each period of operation, exercise to increase
blood circulation.
c) Take frequent work breaks. Limit the amount of
exposure per day.
■If you experience any of the symptoms of this
condition, immediately discontinue use and see your
doctor about these symptoms.
SPECIFIC SAFETY RULES
■Always hold the control handle in your right hand,
refer to the Operation section, later in this manual for
additional instructions.
■To reduce the risk of hearing damage, ear protection
should be worn.
■To reduce the risk of injury associated with contacting
rotating parts, stop the engine before installing or
removing attachments. Always disconnect the spark
plug before performing maintenance or accessing
any movable parts.
960725012-01.indd 8960725012-01.indd 8 14/02/2011 10:35 AM14/02/2011 10:35 AM

9
English (original instructions)
EN
FR DE ES IT PT NL SV DA NO FI HU CS RU RO PL SL HR ET LT LV SK BG
■Do not point the blower nozzle in the direction of
people or pets.
■Never run the unit without the proper equipment
attached. Always ensure the blower tubes are
installed.
■Avoid situations that could catch the vacuum bag
on fire. Do not operate near an open flame. Do not
vacuum warm ash from fireplaces, barbeque pits,
brush piles, etc. Do not vacuum discarded cigars or
cigarettes.
■Do not operate vacuum without vacuum bag installed;
flying debris could cause serious injury. Always close
vacuum bag completely before operating.
■Rotating impeller blades can cause severe injury.
Stop the engine before opening the vacuum door or
installing / changing tubes. Do not put hands or any
other object into the vacuum tubes while they are
installed on the unit.
■When used as a vacuum, always install the vacuum
tubes and vacuum bag. Make sure the vacuum bag
is completely zipped when the unit is running to avoid
flying debris.
SYMBOLS
Some of the following symbols may be used on this product. Please study them and learn their meaning. Proper
interpretation of these symbols will allow you to operate the product better and safer.
SYMBOL NAME DESIGNATION/EXPLANATION
Safety Alert Indicates a potential personal injury hazard.
Read the Operator’s
manual
To reduce the risk of injury, user must read and understand
operator’s manual before using this product.
Wear Eye and Hearing
Protection
Always wear eye protection with side shields marked to comply
with EN 166 as well as hearing protection when operating this
equipment.
Vacuum Door Do not run unit while vacuum door is unsecured.
Long Hair Risk of long hair being drawn into air inlet.
Blower Tubes Do run unit without tubes in place.
Loose Clothing Risk of loose clothing being drawn into air intake.
Petrol and lubricant
Use unleaded petrol intended for motor vehicle use with an octane
rating of 91 [(R + M) / 2] or higher. This product is powered by a
2-cycle engine and requires pre-mixing petrol and 2-cycle lubricant.
Keep Bystanders Away Keep all bystanders at least 15m (50ft) away.
Ricochet Danger of ricochet.
Hot Surface To reduce the risk of injury or damage, avoid contact with any hot
surface.
Rotating fans Rotating impeller blades can cause serious injury.
960725012-01.indd 9960725012-01.indd 9 14/02/2011 10:35 AM14/02/2011 10:35 AM
10
English (original instructions)
EN
FR DE ES IT PT NL SV DA NO FI HU CS RU RO PL SL HR ET LT LV SK BG
The following signal words and meanings are intended to explain the levels of risk associated with this product.
Symbol Signal Meaning
DANGER Indicates an imminently hazardous situation, which, if not
avoided, will result in death or serious injury.
WARNING Indicates a potentially hazardous situation, which, if not
avoided, could result in death or serious injury.
CAUTION Indicates a potentially hazardous situation, which, if not
avoided, may result in minor or moderate injury.
CAUTION (Without safety alert symbol) Indicates a situation that may
result in property damage.
SERVICE
Servicing requires extreme care and knowledge and
should be performed only by a qualified service technician.
For service we suggest you return the product to your
nearest AUTHORIZED SERVICE CENTER for repair.
When servicing, use only identical replacement parts.
WARNING
To avoid serious personal injury, do not attempt
to use this product until you read thoroughly
and understand completely the operator’s
manual. Save this operator’s manual and review
frequently for continuing safe operation and
instructing others who may use this product.
SAVE THESE INSTRUCTIONS.
FEATURES
PRODUCT SPECIFICATIONS
Weight .................................................................... 7.5 kg
Engine displacement ............................................... 30 cc
Air Velocity......................................................... 250 km/h
Air Volume ........................................................13 m3/min
Sound power level............................................ 110 dB(A)
Sound pressure level..........................................95 dB(A)
Maximum engine performance.............................0.75 kw
Maximum rotational frequency
of the engine..................................................... 8500 /min
Engine speed at idling ............................ 2800~3500 /min
Fuel consumption at max. engine performance ...0.5 L/h
Fuel tank volume ...................................................... 0.4 L
Mulch ratio ................................................................ 12:1
Equivalent vibration total value (according to EN 15503
Annex B)
Blowe Front handle…………………………....1.9 m/s²
Rear handle………………………….....3.4 m/s²
Vacuum Front handle…………………………....2.3 m/s²
Rear handle………………………….....3.1 m/s²
Leaf bag capacity ..................................................... 40 L
Uncertainty of sound level measurement .........3.0 dB(A)
Uncertainty of vibration measurement ................1.5 m/s²
DESCRIPTION
1. Rear handle
2. Throttle
3. ON/OFF switch
4. Cruise control
5. Front handle
6. Handle knob
7. Blower tube
8. Vacuum bag
9. Blower / Vac mode switch
10. Fuel cap
11. Starter grip
12. Shoulder strap
13. Primer bulb
14. Carburetor cover knob
ASSEMBLY
PACKING LIST
■Blower
■Blower tube
■Vacuum bag
■Harness
■Bottle of 2-stroke lubricant
■Operator’s manual
■Figure sheet
UNPACKING
This product requires assembly.
■Carefully remove the tool and any accessories from
the box. Make sure that all items listed in the packing
list are included.
■Inspect the tool carefully to make sure no breakage
or damage occurred during shipping.
■Do not discard the packing material until you have
carefully inspected and satisfactorily operated the
tool.
960725012-01.indd 10960725012-01.indd 10 14/02/2011 10:35 AM14/02/2011 10:35 AM

11
English (original instructions)
EN
FR DE ES IT PT NL SV DA NO FI HU CS RU RO PL SL HR ET LT LV SK BG
■If any parts are damaged or missing do not operate
this product until the parts are replaced. Failure to
heed this warning could result in serious personal
injury.
WARNING
If any parts are missing do not operate this tool
until the missing parts are replaced. Failure to
do so could result in possible serious personal
injury.
WARNING
Do not attempt to modify this tool or create
accessories not recommended for use with
this tool. Any such alteration or modification is
misuse and could result in a hazardous condition
leading to possible serious personal injury.
NOTE: Read and remove all hang tags and store with
your Operator’s Manual.
WARNING
Stop the engine and disconnect the spark plug
wire before installing parts, making adjustments,
cleaning, or when not in use. Failure to do so
could result in possible serious personal injury.
WARNING:
Beware of revolving parts. Allow the machine to
properly stop before opening the zipper of the
bag.
OPERATION
WARNING
Petrol is extremely flammable and explosive. A
fire or explosion from gasoline will burn you and
others.
MIXING THE FUEL (Fig. 2)
■This product is powered by a 2-stroke engine and
requires premixing petrol and 2-stroke lubricant. Pre-
mix unleaded petrol and 2-stroke engine lubricant in a
clean container approved for petrol.
■This engine is certified to operate on unleaded petrol
intended for automotive use with an octane rating of
87 ([R + M] / 2) or higher.
■Do not use any type of pre-mixed petrol/lubricant
from fuel service stations, this includes the pre-
mixed petrol/lubricant intended for use in mopeds,
motorcycles, etc.
■Use synthetic 2-stroke lubricant only. Do not use
automotive lubricant or 2-stroke outboard lubricant.
■Mix 2% synthetic 2-stroke lubricant into the petrol.
This is a 50:1 ratio.
■Mix the fuel thoroughly and also each time before
fueling.
■Mix in small quantities. Do not mix quantities larger
than usable in a 30 day period. A synthetic 2-stroke
lubricant containing a fuel stabiliser is recommended.
FILLING THE TANK
■Clean the surface around the fuel cap to prevent
contamination.
■Loosen the fuel cap slowly to release pressure and to
keep fuel from escaping around the cap.
■Carefully pour the fuel mixture into the tank.
Avoid spillage. Prior to replacing the fuel cap,
clean and inspect the gasket.
■Immediately replace the fuel cap and hand tighten.
Wipe up any fuel spillage. Move 9m away from
refueling site before starting engine.
NOTE: It is normal for smoke to be emitted from a
new engine during first use.
WARNING
Always shut off engine before fueling. Never add
fuel to a machine with a running or hot engine.
Move at least 9 m from refueling site before
starting engine. Do not smoke!
1 litre + 20 ml =
2 litres + 40 ml =
3 litres + 60 ml = 50:1
4 litres + 80 ml =
5 litres + 100 ml =
STARTING AND STOPPING (Fig. 4)
WARNING
Keep away from all hot surfaces of the blower.
Failure to do so could result in possible serious
personal injury.
NOTE: If the engine does not start, return to "Full" choke
position and repeat the process beginning at step 3.
OPERATING THE BLOWER (Fig. 5)
WARNING
Always hold the blower away from your body,
keeping clearance between your body and the
product. Any contact with the housing can result
in burns and/or other serious personal injury.
Rotate blower / vac mode switch anti-clockwise until a
"click" is heard.
■Wear the shoulder harness and adjust it to a
comfortable position.
960725012-01.indd 11960725012-01.indd 11 14/02/2011 10:35 AM14/02/2011 10:35 AM

12
English (original instructions)
EN
FR DE ES IT PT NL SV DA NO FI HU CS RU RO PL SL HR ET LT LV SK BG
■Hold the blower with both hands.
■To avoid from scattering debris, blow around the outer
edges of a debris pile. Never blow directly into the
center of a pile.
■Operate power equipment during normal hours only –
not early in the morning or late at night when people
might be disturbed. Comply with the operating hours
listed in local ordinances.
■To reduce sound levels, limit the number of equipment
used at any one time.
■Operate blower at the lowest possible throttle speed.
■Check your equipment before operation, especially
the silencer, air intakes and air filters.
■Loosen debris before blowing. In dusty conditions,
slightly dampen surfaces.
■Watch out for children, pets, open windows or freshly
washed cars.
■After using blowers or other equipment, clean up!
Dispose of debris in trash receptacles.
MAINTENANCE
WARNING
When servicing, use only identical Homelite
replacement parts. Use of any other parts may
create a hazard or cause product damage.
WARNING
Always wear safety goggles or safety glasses
with side shields during power tool operation
or when blowing dust. If operation is dusty,
also wear a dust mask.
GENERAL MAINTENANCE
Avoid using solvents when cleaning plastic parts. Most
plastics are susceptible to damage from various types of
commercial solvents and may be damaged by their use.
Use clean cloths to remove dirt, dust, z, grease, etc.
WARNING
Do not at any time let brake fluids, gasoline,
petroleumbased products, penetrating oils, etc.,
come in contact with plastic parts. Chemicals can
damage, weaken or destroy plastic which may
result in serious personal injury.
LUBRICATION
All of the bearings in this tool are lubricated with a
sufficient amount of high grade lubricant for the life of
the unit under normal operating conditions. Therefore,
no further lubrication is required.
CLEANING THE AIR FILTER SCREEN (Fig. 6)
SPARK ARRESTOR
The silencer is equipped with a spark arrestor screen
inside silencer body. After extended use the screen can
become dirty and may need to have the silencer replaced
by an authorized servicing dealer.
WARNING
Never run the blower without the spark arrestor
in place. Failure to do so could result in a fire that
could cause serious personal injury.
CLEANING THE EXHAUST PORT AND
SILENCER
Depending on the type of fuel used, the type and amount
of oil used, and/or your operating conditions, the exhaust
port and silencer may become blocked with carbon
deposits. If you notice low power from the blower, have
a qualified service technician check the exhaust port
and silencer for carbon deposits. Removing the carbon
deposits should restore performance to the blower.
FUEL CAP
WARNING
A leaking fuel cap is a fire hazard and must be
replaced immediately. Failure to do so could result
in a fire that could cause serious personal injury.
SPARK PLUG
This engine uses a Champion RCJ-6Y and Torch L7RTC
with 0.63 mm (0.025 in.) electrode gap. Use an exact
replacement and replace annually.
WARNING
Be careful not to cross-thread the spark plug.
Cross-threading will seriously damage the
product.
STORAGE (1 MONTH OR LONGER)
■Drain all fuel from the tank into a container approved
for gasoline. Run engine until it stops.
■Clean all foreign material from the blower. Store it in
a well-ventilated place that is inaccessible to children.
Keep away from corrosive agents such as garden
chemicals and de-icing salts.
■Abide by all Federal and local regulations for the safe
storage and handling of petrol. Excess fuel should be
used up in other 2-stroke engine powered equipment.
960725012-01.indd 12960725012-01.indd 12 14/02/2011 10:35 AM14/02/2011 10:35 AM

13
English (original instructions)
EN
FR DE ES IT PT NL SV DA NO FI HU CS RU RO PL SL HR ET LT LV SK BG
IF THESE SOLUTIONS DO NOT SOLVE THE PROBLEM CONTACT YOUR AUTHORISED SERVICE DEALER.
PROBLEM POSSIBLE CAUSE SOLUTION
Engine will not start. No spark. The spark plug may be damaged, remove it
and check for dirt and cracks. Replace with a
new spark plug.
No fuel.
Push primer bulb until bulb is full of fuel. If bulb
does not fill, primary fuel delivery system is
blocked. Contact a servicing dealer. If primer
bulb fills, engine may be flooded, proceed to
next item.
Engine is flooded.
Remove spark plug, turn blower so spark plug
hole is aimed at the ground. Adjust the choke
lever to “ ” position and pull starter cord
10-15 times. This will clear excess fuel from
engine. Remove any fuel which splashed on
the product. Clean and reinstall spark plug.
Clean up any spilled fuel and move at least 9m
away before restarting. Pull starter 3 times with
choke lever at “ ”. If engine does not start,
rotate choke lever to “ ” position and repeat
normal starting procedure. If engine still fails to
start, repeat procedure with a new spark plug.
Starter rope now harder to
pull than when new. Contact a servicing dealer.
Engine starts but will not
accelerate.
Carburetor requires adjust-
ment.
Contact a servicing dealer.
Engine starts but will only run at
high speed at half choke.
Carburetor requires adjust-
ment.
Contact a servicing dealer.
Engine does not reach full speed
and emits excessive smoke.
Check lubricant fuel mixture.
Use fresh fuel and the correct 2-stroke
lubricant mix.
Air filter is dirty. Clean air filter. Refer to Cleaning the Air Filter
Screen earlier in this manual.
Spark arrestor screen is dirty. Contact a servicing dealer.
Engine starts, runs, and
accelerates but will not idle.
Idle speed screw on carbure-
tor requires adjustment.
Turn idle speed screw clockwise to increase
idle speed.
13
960725012-01.indd 13960725012-01.indd 13 14/02/2011 10:35 AM14/02/2011 10:35 AM

Other manuals for RBL30MVB
1
Table of contents
Other Ryobi Blower manuals

Ryobi
Ryobi P2808 User manual

Ryobi
Ryobi RBL36B User manual

Ryobi
Ryobi RY404017 User manual

Ryobi
Ryobi OBL1802 User manual

Ryobi
Ryobi RY36BLXA User manual

Ryobi
Ryobi RBV-2200 User manual

Ryobi
Ryobi RY09051 User manual

Ryobi
Ryobi R18SW3 User manual

Ryobi
Ryobi RY36BPXA-0 User manual

Ryobi
Ryobi RBV2400CSV User manual

Ryobi
Ryobi RBV3000VPG User manual

Ryobi
Ryobi PBV-30A Owner's manual

Ryobi
Ryobi P21014 User manual

Ryobi
Ryobi OBL1800BL User manual

Ryobi
Ryobi R18TB User manual

Ryobi
Ryobi SB720R User manual

Ryobi
Ryobi RBL26BP User manual

Ryobi
Ryobi PowerMulching RBV2800S User manual

Ryobi
Ryobi RBL1850S User manual

Ryobi
Ryobi RBV-2200 User manual