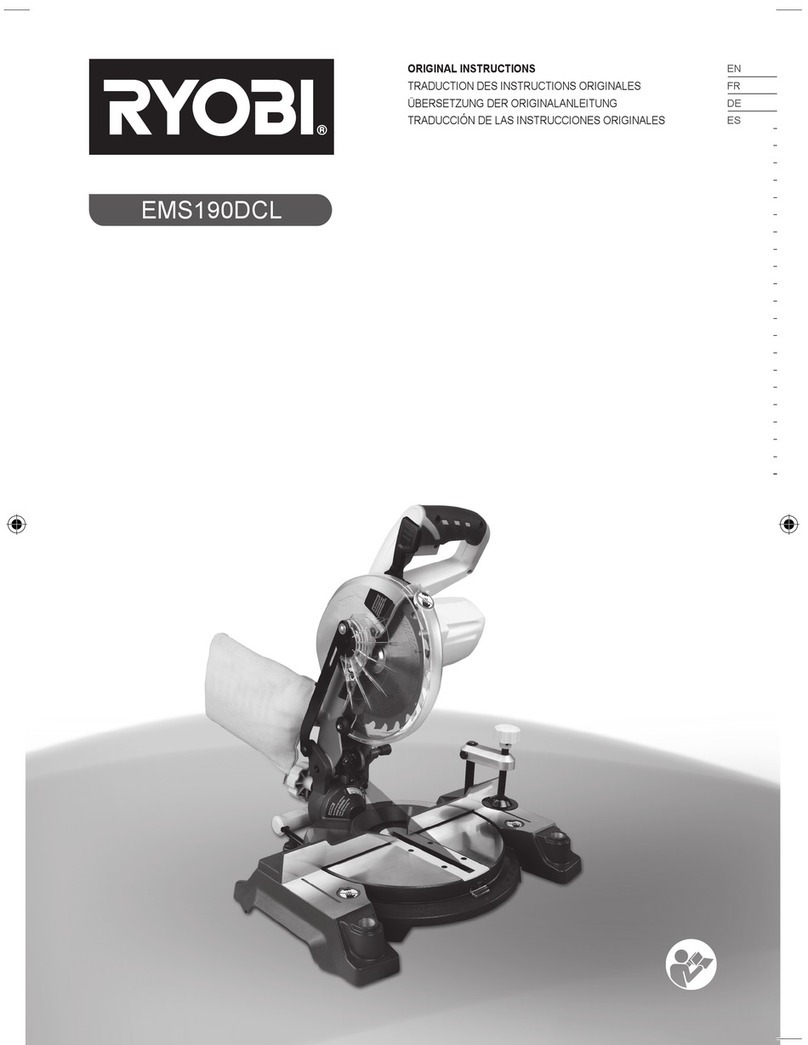
Ryobi EMS254L-LSG User manual

EMS254L-LSG
ORIGINAL INSTRUCTIONS
TRADUCTION DES INSTRUCTIONS ORIGINALES
ÜBERSETZUNG DER ORIGINALANLEITUNG
TRADUCCIÓN DE LAS INSTRUCCIONES ORIGINALES
TRADUZIONE DELLE ISTRUZIONI ORIGINALI
VERTALING VAN DE ORIGINELE INSTRUCTIES
TRADUÇÃO DAS INSTRUÇÕES ORIGINAIS
OVERSÆTTELSE AF DE ORIGINALE INSTRUKTIONER
ÖVERSÄTTNING AV DE URSPRUNGLIGA INSTRUKTIONERNA
ALKUPERÄISTEN OHJEIDEN SUOMENNOS
OVERSETTELSE AV DE ORIGINALE INSTRUKSJONENE
ɂɇɋɌɊɍɄɐɂəɉɈɗɄɋɉɅɍȺɌȺɐɂɂ
7à80$&=(1,(,16758.&-,25<*,1$/1(-
3ě(./$'25,*,1È/1Ë&+32.<1ģ
$=(5('(7,Ò7087$7Ï)25'Ë7È6$
75$'8&(5($,16758&ğ,81,/2525,*,1$/(
78/.2761225,Ʀ,1Ɩ/Ɩ6,16758.&,-$6
25,*,1$/,Ǐ,16758.&,-Ǐ9(57,0$6
ORIGINAALJUHENDI TÕLGE
PRIJEVOD ORIGINALNIH UPUTA
PREVOD ORIGINALNIH NAVODIL
35(./$'25,*,1È/1<&+32.<129
ɉɊȿȼɈȾɈɌɈɊɂȽɂɇȺɅɇɂɌȿɂɇɋɌɊɍɄɐɂɂ
ɉȿɊȿɄɅȺȾɈɊɂȽȱɇȺɅɖɇɂɏȱɇɋɌɊɍɄɐȱɃ
ORIJINAL TALIMATLARIN TERCÜMESI
ȂǼȉDZĭȇǹȈǾȉȍȃȆȇȍȉǵȉȊȆȍȃȅǻǾīǿǷȃ
EN
FR
DE
ES
IT
NL
PT
DA
SV
FI
NO
RU
PL
CS
HU
RO
LV
LT
ET
HR
SL
SK
BG
UK
TR
EL

Important!
It is essential that you read the instructions in this manual before assembling, maintaining and operating
the product.
Attention!
Il est essentiel que vous lisiez les instructions contenues dans ce manuel avant d’assembler, d’entretenir
et d’utiliser le produit.
Achtung!
Es ist wichtig, dass Sie vor Zusammenbau, Wartung und Benutzung des Produktes die Anweisungen in
dieser Anleitung lesen.
¡Atención!
Resulta fundamental que lea este manual de instrucciones antes de realizar el montaje, el mantenimiento
y de utilizar este producto
Attenzione!
E’ importante leggere le istruzioni contenute nel presente manuale prima di montare il prodotto, svolgere
le operazioni di manutenzione sullo stesso e metterlo in funzione.
Let op!
Het is van essentieel belang dat u de instructies in deze gebruiksaanwijzing leest voor u het product
monteert, onderhoudt en gebruikt.
Atenção!
É fundamental que leia as instruções deste manual antes da montagem, manutenção e operação do
aparelho.
OBS!
Det er vigtigt, at man læser instrukserne i denne brugsanvisning, inden man samler, vedligeholder og
betjener produktet.
Observera!
Det är viktigt att du läser instruktionerna i manualen före montering, användning och underhåll av
produkten.
Huomio!
On tärkeää, että luet tämän käsikirjan ohjeet ennen tuotteen kokoamista, huoltoa ja käyttöä.
Advarsel!
Det er viktig at du leser instruksjonene i denne manualen før sammensetning, vedlikehold og bruk av
produktet
ȼɧɢɦɚɧɢɟ
ɇɟɨɛɯɨɞɢɦɨ ɩɪɨɱɢɬɚɬɶ ɢɧɫɬɪɭɤɰɢɢ ɜ ɞɚɧɧɨɦ ɪɭɤɨɜɨɞɫɬɜɟ ɩɟɪɟɞ ɫɛɨɪɤɨɣ ɨɛɫɥɭɠɢɜɚɧɢɟɦ ɢ
ɷɤɫɩɥɭɚɬɚɰɢɟɣɷɬɨɝɨɢɡɞɟɥɢɹ
Uwaga!
.RQLHF]QLH QDOHĪ\ SU]HF]\WDü LQVWUXNFMH ]DZDUWH Z W\P SRGUĊF]QLNX SU]HG PRQWDĪHP REVáXJą RUD]
NRQVHUZDFMąSURGXNWX
'ĤOHåLWp
XSR]RUQČQt
1HLQVWDOXMWHQHSURYiGČMWH~GUåEXDQLQHSRXåtYHMWHWHQWRYêUREHNGĜtYHQHåVLSĜHþWHWHSRN\Q\XYHGHQp
v tomto návodu.
Figyelem!
)RQWRV KRJ\ D WHUPpN |VV]HV]HUHOpVH NDUEDQWDUWiVD pV KDV]QiODWD HOĘWW HOROYDVVD D Np]LN|Q\YEHQ
WDOiOKDWyXWDVtWiVRNDW
$WHQĠLH
(VWH HVHQ܊LDO Vă FLWL܊L LQVWUXF܊LXQLOH GLQ DFHVW PDQXDO vQDLQWH GH DVDPEODUH HIHFWXDUHD vQWUH܊LQHULL ܈L
operarea produsului.
8]PDQƯEX
,UVYDUƯJLL]ODVƯWãƯVURNDVJUƗPDWDVLQVWUXNFLMDVSLUPVX]VWƗGƯãDQDVDSNRSHVXQSUHFHVGDUELQƗãDQDV
'ơPHVLR
3ULHãVXUHQNDQWSULåLnjULQWLUQDXGRMDQWJDPLQƳEnjWLQDSHUVNDLW\WLãLDPHYDGRYHSDWHLNWXVQXURG\PXV
Tähtis!
Enne masina kokkupanekut, hooldamist ja kasutama hakkamist tuleb käesolevas juhendis esitatud juhised
kindlasti läbi lugeda.
Upozorenje!
9UORMHYDåQRGDVWHSULMHVNODSDQMDRGUåDYDQMDLUDGDVRYLPSURL]YRGRPSURþLWDOLXSXWHXRYRPSULUXþQLNX
Pomembno!
3RPHPEQRMHGDSUHGPRQWDåRY]GUåHYDQMHPLQXSRUDERWHJDL]GHONDSUHEHUHWHQDYRGLODYWHPSULURþQLNX
Upzornenie!
-HG{OHåLWpDE\VWHVLSUHGPRQWiåRX~GUåERXDREVOXKRXSURGXNWXSUHþtWDOLSRN\Q\YWRPWRQiYRGH
ȼɚɠɧɨ
ɂɡɤɥɸɱɢɬɟɥɧɨɜɚɠɧɨɟɞɚɩɪɨɱɟɬɟɬɟɢɧɫɬɪɭɤɰɢɢɬɟɜɧɚɫɬɨɹɳɨɬɨɪɴɤɨɜɨɞɫɬɜɨɩɪɟɞɢɞɚɩɪɟɦɢɧɟɬɟ
ɤɴɦɫɝɥɨɛɹɜɚɧɟɩɨɞɞɪɴɠɤɚɢɥɢɪɚɛɨɬɚɫɩɪɨɞɭɤɬɚ
ȼɚɠɥɢɜɨ
Ⱦɭɠɟɜɚɠɥɢɜɨɳɨɛɜɢɩɪɨɱɢɬɚɥɢɿɧɫɬɪɭɤɰɿʀɜɰɶɨɦɭɤɟɪɿɜɧɢɰɬɜɿɩɟɪɟɞɫɤɥɚɞɚɧɧɹɦɨɛɫɥɭɝɨɜɭɜɚɧɧɹɦ
ɬɚɟɤɫɩɥɭɚɬɚɰɿɽɸɰɿɽʀɦɚɲɢɧɢ
Dikkat!
hUQQ PRQWDMÕQÕ EDNÕPÕQÕ \DSPDGDQ YH UQ oDOÕúWÕUPDGDQ |QFH EX NÕODYX]GD \HU DODQ WDOLPDWODUÕ
RNXPDQÕ]|QHPOLGLU
ȆȡȠıȠȤȒ
ǼȓȞĮȚʌȠȜȪıȘȝĮȞIJȚțȩȞĮįȚĮȕȐıİIJİIJȚȢȠįȘȖȓİȢıIJȠʌĮȡȩȞİȖȤİȚȡȓįȚȠʌȡȚȞıȣȞĮȡȝȠȜȠȖȒıİIJİıȣȞIJȘȡȒıİIJİ
ȒȜİȚIJȠȣȡȖȒıİIJİIJȠʌȡȠȧȩȞ
6XEMHFWWRWHFKQLFDOPRGL¿FDWLRQ_6RXVUpVHUYHGHPRGL¿FDWLRQVWHFKQLTXHV_7HFKQLVFKHbQGHUXQJHQYRUEHKDOWHQ_%DMR
UHVHUYDGHPRGL¿FDFLRQHVWpFQLFDV_&RQULVHUYDGLHYHQWXDOLPRGL¿FKHWHFQLFKH_7HFKQLVFKHZLM]LJLQJHQYRRUEHKRXGHQ
_&RPUHVHUYDGHPRGL¿FDo}HVWpFQLFDV_0HGIRUEHKROGIRUWHNQLVNHQGULQJHU_0HGI|UEHKnOOI|UWHNQLVNDlQGULQJDU_
7HNQLVHWPXXWRNVHWYDUDWDDQ_0HGIRUEHKROGRPWHNQLVNHHQGULQJHU_ɦɨɝɭɬɛɵɬɶɜɧɟɫɟɧɵɬɟɯɧɢɱɟɫɤɢɟɢɡɦɟɧɟɧɢɹ_
=]DVWU]HĪHQLHPPRG\¿NDFMLWHFKQLF]Q\FK_=PČQ\WHFKQLFNêFK~GDMĤY\KUD]HQ\_$PĦV]DNLPyGRVtWiVMRJiWIHQQWDUWMXN
_6XEUH]HUYDPRGL¿FDĠLLORUWHKQLFH_3DWXUDPWLHVƯEDVPDLQƯWWHKQLVNRVUDNVWXUOLHOXPXV_3DVLOLHNDQWWHLVĊGDU\WLWHFKQLQLXV
SDNHLWLPXV_7HKQLOLVHGPXXGDWXVHGY}LPDOLNXG_3RGORQRWHKQLsNLPSURPMHQDPD_7HKQLþQHVSUHPHPEHGRSXãþHQH
_3UiYRQDWHFKQLFNp]PHQ\MHY\KUDGHQp_ɉɨɞɥɟɠɢɧɚɬɟɯɧɢɱɟɫɤɢɦɨɞɢɮɢɤɚɰɢɢ_ȯɨɛ¶ɽɤɬɨɦɞɥɹɬɟɯɧɿɱɧɢɯɡɦɿɧ_
7HNQLNGH÷LúLNOLNKDNNÕVDNOÕGÕU_ȊʌȩIJȘȞİʌȚijȪȜĮȟȘIJİȤȞȚțȫȞIJȡȠʌȠʌȠȚȒıİȦȞ

English
1
EN
FR
DE
ES
IT
NL
PT
DA
SV
FI
NO
RU
PL
CS
HU
RO
LV
LT
ET
HR
SL
SK
BG
UK
TR
EL
Safety, performance, and dependability have been given
top priority in the design of your mitre saw.
INTENDED USE
The mitre saw is intended for sawing solid and bonded
wood, materials similar to wood, with or without glued
veneer and plastics.
The mitre saw is intended to be used only by adult operators
who have read the instruction manual and understand the
risks and hazards.
7KHPLWUHVDZLVGHVLJQHGWREH¿[HGDWWKHEDVHWRHLWKHU
a solid bench top, or a dedicated work stand. If the base
LVQRWVHFXUHO\¿[HGWKHZKROHPDFKLQHPD\PRYHGXULQJ
cutting operations, which increases the possibility of
serious personal injury.
The mitre saw is designed to make bevel and mitre cuts.
The capacities for the various cuts are provided in the
SURGXFWVSHFL¿FDWLRQVLQWKLVPDQXDO
7KHPLWUHVDZLVWREHXVHGLQGU\FRQGLWLRQVZLWKH[FHOOHQW
ambient lighting and adequate ventilation.
The mitre saw is intended for consumer use and should
only be used as described above and is not intended for
any other purpose.
GENERAL POWER TOOL SAFETY WARNINGS
WARNING
Read all safety warnings, instructions, illustrations
and specifications provided with this power tool.
Failure to follow all instructions listed below may result in
HOHFWULFVKRFN¿UHDQGRUVHULRXVLQMXU\
Save all warnings and instructions for future reference.
The term “power tool” in the warnings refers to your mains-
operated (corded) power tool or battery-operated (cordless)
power tool.
WORK AREA SAFETY
ŶKeep work area clean and well lit. Cluttered or dark
areas invite accidents.
ŶDo not operate power tools in explosive
atmospheres, such as in the presence of flammable
liquids, gases or dust. Power tools create sparks
which may ignite the dust or fumes.
ŶKeep children and bystanders away while operating
a power tool. Distractions can cause you to lose
control.
ELECTRICAL SAFETY
ŶPower tool plugs must match the outlet. Never
modify the plug in any way. Do not use any adapter
plugs with earthed (grounded) power tools.
Unmodified plugs and matching outlets will reduce risk
of electric shock.
ŶAvoid body contact with earthed or grounded
surfaces, such as pipes, radiators, ranges and
refrigerators. There is an increased risk of electric
shock if your body is earthed or grounded.
ŶDo not expose power tools to rain or wet conditions.
Water entering a power tool will increase the risk of
electric shock.
ŶDo not abuse the cord. Never use the cord for
carrying, pulling or unplugging the power tool.
Keep cord away from heat, oil, sharp edges or
moving parts. Damaged or entangled cords increase
the risk of electric shock.
ŶWhen operating a power tool outdoors, use an
extension cord suitable for outdoor use. Use of a
cord suitable for outdoor use reduces the risk of electric
shock.
ŶIf operating a power tool in a damp location is
unavoidable, use a residual current device (RCD)
protected supply. Use of an RCD reduces the risk of
electric shock.
PERSONAL SAFETY
ŶStay alert, watch what you are doing and use
common sense when operating a power tool. Do
not use a power tool while you are tired or under the
influence of drugs, alcohol or medication. A moment
of inattention while operating power tools may result in
serious personal injury.
ŶUse personal protective equipment. Always wear
eye protection. Protective equipment such as a dust
mask, non-skid safety shoes, hard hat, or hearing
protection used for appropriate conditions will reduce
personal injuries.
ŶPrevent unintentional starting. Ensure the switch
is in the off -position before connecting to power
source and/or battery pack, picking up or carrying
the tool. Carrying power tools with your finger on the
switch or energising power tools that have the switch
on invites accidents.
ŶRemove any adjusting key or wrench before turning
the power tool on. A wrench or a key left attached to
a rotating part of the power tool may result in personal
injury.
ŶDo not overreach. Keep proper footing and balance
at all times. This enables better control of the power
WRROLQXQH[SHFWHGVLWXDWLRQV
ŶDress properly. Do not wear loose clothing or
jewellery. Keep your hair and clothing away from
moving parts. Loose clothes, jewellery or long hair can
be caught in moving parts.
ŶIf devices are provided for the connection of dust
extraction and collection facilities, ensure these are
connected and properly used. Use of dust collection
can reduce dust-related hazards.
ŶDo not let familiarity gained from frequent use of
tools allow you to become complacent and ignore
tool safety principles. A careless action can cause

English
2
severe injury within a fraction of a second.
POWER TOOL USE AND CARE
ŶDo not force the power tool. Use the correct power
tool for your application. The correct power tool will
do the job better and safer at the rate for which it was
designed.
ŶDo not use the power tool if the switch does not turn
it on and off. Any power tool that cannot be controlled
with the switch is dangerous and must be repaired.
ŶDisconnect the plug from the power source and/
or remove the battery pack, if detachable, from
the power tool before making any adjustments,
changing accessories, or storing power tools. Such
preventive safety measures reduce the risk of starting
the power tool accidentally.
ŶStore idle power tools out of the reach of children
and do not allow persons unfamiliar with the power
tool or these instructions to operate the power tool.
Power tools are dangerous in the hands of untrained
users.
ŶMaintain power tools and accessories. Check for
misalignment or binding of moving parts, breakage
of parts and any other condition that may affect the
power tool’s operation. If damaged, have the power
tool repaired before use. Many accidents are caused
by poorly maintained power tools.
ŶKeep cutting tools sharp and clean. Properly
maintained cutting tools with sharp cutting edges are
less likely to bind and are easier to control.
ŶUse the power tool, accessories and tool bits etc.
in accordance with these instructions, taking into
account the working conditions and the work to
be performed. Use of the power tool for operations
different from those intended could result in a
hazardous situation.
ŶKeep handles and grasping surfaces dry, clean
and free from oil and grease. Slippery handles and
grasping surfaces do not allow for safe handling and
FRQWURORIWKHWRROLQXQH[SHFWHGVLWXDWLRQV
SERVICE
ŶHave your power tool serviced by a qualified repair
person using only identical replacement parts.
This will ensure that the safety of the power tool is
maintained.
SAFETY INSTRUCTIONS FOR MITRE SAWS
ŶMitre saws are intended to cut wood or wood-like
products, they cannot be used with abrasive cut-
off wheels for cutting ferrous material such as bars,
rods, studs, etc. Abrasive dust causes moving parts
such as the lower guard to jam. Sparks from abrasive
cutting will burn the lower guard, the kerf insert and
other plastic parts.
ŶUse clamps to support the workpiece whenever
possible. If supporting the workpiece by hand, you
must always keep your hand at least 100 mm from
either side of the saw blade. Do not use this saw to
cut pieces that are too small to be securely clamped
or held by hand. If your hand is placed too close to
the saw blade, there is an increased risk of injury from
blade contact.
ŶThe workpiece must be stationary and clamped or
held against both the fence and the table. Do not
feed the workpiece into the blade or cut “freehand”
in any way. Unrestrained or moving workpieces could
be thrown at high speeds, causing injury.
ŶPush the saw through the workpiece. Do not pull the
saw through the workpiece. To make a cut, raise the
saw head and pull it out over the workpiece without
cutting, start the motor, press the saw head down
and push the saw through the workpiece. Cutting on
the pull stroke is likely to cause the saw blade to climb
on top of the workpiece and violently throw the blade
assembly towards the operator.
ŶNever cross your hand over the intended line of
cutting either in front or behind the saw blade.
Supporting the workpiece “cross handed” i.e. holding
the workpiece to the right of the saw blade with your left
hand or vice versa is very dangerous.
ŶDo not reach behind the fence with either hand
closer than 100 mm from either side of the saw
blade, to remove wood scraps, or for any other
reason while the blade is spinning. 7KH SUR[LPLW\
of the spinning saw blade to your hand may not be
obvious and you may be seriously injured.
ŶInspect your workpiece before cutting. If the
workpiece is bowed or warped, clamp it with the
outside bowed face toward the fence. Always make
certain that there is no gap between the workpiece,
fence and table along the line of the cut. Bent or
warped workpieces can twist or shift and may cause
binding on the spinning saw blade while cutting. There
should be no nails or foreign objects in the workpiece.
ŶDo not use the saw until the table is clear of all
tools, wood scraps, etc., except for the workpiece.
Small debris or loose pieces of wood or other objects
that contact the revolving blade can be thrown with high
speed.
ŶCut only one workpiece at a time. Stacked multiple
workpieces cannot be adequately clamped or braced
and may bind on the blade or shift during cutting.
ŶEnsure the mitre saw is mounted or placed on a
level, firm work surface before use. A level and
firm work surface reduces the risk of the mitre saw
becoming unstable.
ŶPlan your work. Every time you change the bevel or
mitre angle setting, make sure the adjustable fence
is set correctly to support the workpiece and will
not interfere with the blade or the guarding system.
Without turning the tool “ON” and with no workpiece
on the table, move the saw blade through a complete
simulated cut to assure there will be no interference or
danger of cutting the fence.

English
3
EN
FR
DE
ES
IT
NL
PT
DA
SV
FI
NO
RU
PL
CS
HU
RO
LV
LT
ET
HR
SL
SK
BG
UK
TR
EL
ŶProvide adequate support such as table extensions,
saw horses, etc. for a workpiece that is wider or
longer than the table top. Workpieces longer or
wider than the mitre saw table can tip if not securely
supported. If the cut-off piece or workpiece tips, it can
lift the lower guard or be thrown by the spinning blade.
ŶDo not use another person as a substitute for a
table extension or as additional support. Unstable
support for the workpiece can cause the blade to bind
or the workpiece to shift during the cutting operation
pulling you and the helper into the spinning blade.
ŶThe cut-off piece must not be jammed or pressed
by any means against the spinning saw blade. If
confined, i.e. using length stops, the cut-off piece could
get wedged against the blade and thrown violently.
ŶAlways use a clamp or a fixture designed to
properly support round material such as rods or
tubing. Rods have a tendency to roll while being cut,
causing the blade to “bite” and pull the work with your
hand into the blade.
ŶLet the blade reach full speed before contacting the
workpiece. This will reduce the risk of the workpiece
being thrown.
ŶIf the workpiece or blade becomes jammed, turn the
mitre saw off. Wait for all moving parts to stop and
disconnect the plug from the power source and/
or remove the battery pack. Then work to free the
jammed material. Continued sawing with a jammed
workpiece could cause loss of control or damage to the
mitre saw.
ŶAfter finishing the cut, release the switch, hold the
saw head down and wait for the blade to stop before
removing the cut-off piece. Reaching with your hand
near the coasting blade is dangerous.
ŶHold the handle firmly when making an incomplete
cut or when releasing the switch before the saw
head is completely in the down position. The
braking action of the saw may cause the saw head to
be suddenly pulled downward, causing a risk of injury.
ADDITIONAL SAFETY WARNINGS FOR THE STAND
(LSG ONLY)
ŶThe stand is designed only for the RYOBI EMS254L
Sliding Compact Mitre Saw. Do not attach any other
power tool to the stand. Do not use the stand in any
way other than what is stated in the instructions.
ŶSet up the stand on a firm level surface. A smooth
surface (tiles or wood) may cause the feet to skid
during operation. Wherever possible site the stand on
concrete or similar non slip surface.
ŶFollow the instructions for mounting the tool carefully,
see graphics later in this manual. An improperly
mounted tool will increase the risk of serious personal
injury.
ŶMake sure that all bolts and connecting elements of the
stand are securely tightened. Improper assembly may
result in the collapse of the stand. Frequently check the
tightness of the bolts.
ŶAlways balance the load to prevent the stand from
tipping over. If the work piece is too long, use another
means of support to balance the load. Support the work
piece before making the cut to ensure that the load on
both sides of the cut is balanced.
ŶDo not use the stand to climb on, or use as a platform to
reach heights. Do not place heavy items on this stand.
ŶDo not use any attachments or accessories not
recommended by the manufacturer of the product. This
practice can result in serious personal injury.
SAFETY INSTRUCTIONS FOR WOOD CUTTING
BLADE
ŶPlease read the manual and instructions carefully
before using the saw blade and the machine.
ŶThe product must be in good condition, the spindle
without deformation and vibration.
ŶDo not use the product without the guards in position.
Keep guards in good working order and properly
maintained.
ŶEnsure the operator is adequately trained in safety
precautions, adjustment and operation of the product.
ŶAlways wear goggles and ear protection when using the
product. It is recommended to wear gloves, sturdy non
slipping shoes and apron.
ŶBefore using any accessory, consult the instruction
manual. The improper use of an accessory can cause
damage and increase the potential for injury.
ŶUse only blades specified in this manual, complying
with EN 847-1.
Ŷ2EVHUYH WKH PD[LPXP VSHHG PDUNHG RQ WKH VDZ
blade. Ensure the speed marked on the saw blade is at
least equal to the speed marked on the saw.
ŶAlways use blades with correct size and shape of
arbour holes. Blades that do not match the mounting
hardware of the saw will run eccentrically, causing loss
of control.
ŶDo not use blades of larger or smaller diameter than
recommended. Do not use any spacers to make the
blade fit onto the spindle.
ŶCheck the tips of the saw blade for damage or abnormal
appearance before each use. Tips that are damaged or
loose can become flying objects in use and increase the
chance of personal injury.
ŶDo not use cracked or distorted saw blades. Do not use
saw blades that are damaged or deformed.
ŶScrap the saw blade if damaged, deformed, distorted or
cracked, repairing is not permitted.
ŶDo not use HSS blades.
ŶEnsure the saw blade is mounted correctly, tighten the
DUERUQXWVHFXUHO\EHIRUHXVHWLJKWHQLQJWRUTXHDSSUR[
12-15 Nm).
ŶFastening screw and nuts shall be tightened using the
appropriate spanner, etc.

English
4
Ŷ([WHQVLRQRIWKHVSDQQHURUWLJKWHQLQJXVLQJKDPPHU
blows is not permitted.
ŶMake sure the blade and flanges are clean and the
recessed sides of the collar are against the blade.
ŶMake sure the blade rotates in the correct direction.
ŶBefore work, make a dummy cut without the motor
turned on so the position of the blade, operation of
the guards with respect to other machine parts and
workpiece may be checked.
ŶNever leave the product unattended.
ŶDo not apply lubricants on the blade when it is running.
ŶNever perform any cleaning or maintenance work when
the machine is still running and the head is not in the
rest position.
ŶNever attempt to stop a machine in motion rapidly
by jamming a tool or other means against the blade,
serious accidents can be caused unintentionally in this
way.
ŶDisconnect the product from the mains supply or
remove battery pack before changing blades or
carrying out maintenance.
ŶPay attention to blade packing and unpacking, it is easy
to be injured by the sharp blade tips.
ŶUse a blade holder or wear gloves when handling a
saw blade.
ŶKeep and store the blade in original packaging or other
suitable packaging, keep in dry conditions and away
from chemicals which may damage the blade.
ADDITIONAL SAFETY WARNINGS
ŶAlways clamp the workpiece safely and securely.
ŶEnsure that the machine is always stable and secure
HJIL[HGWRDEHQFK,IXVLQJWKHVWDQGSURYLGHGVHH
additional warnings in this manual.
Ŷ$OZD\V ZHDU HDU SURWHFWRUV ([SRVXUH WR QRLVH FDQ
cause hearing loss.
ŶAlways wear safety goggles when using the product.
It is recommended to wear gloves for handling blades
and rough material, plus sturdy non slip shoes to
protect the feet from workpieces which may fall from
the cutting area.
ŶDisconnect the product from the mains supply
or remove battery pack before carrying out any
maintenance or cleaning the product.
ŶOnly connect to the mains supply when the product is
switched off.
ŶKeep the mains lead clear from the working range of
the machine. Keep it out of the area the operator stands
in.
ŶNever reach into the area near the blade unless the
blade has completely stopped.
ŶBefore use, thoroughly check the product, cable, and
plug for any damage or material fatigue. Repairs to the
whole machine, including the power cable should only
be carried out by authorised service agents.
ŶAlways use the guards on the product. Do not use
the product if the guards are not in place and working
correctly.
ŶThe lower blade guard should only open when the
blade is lowered to the workpiece and must always be
able to move freely and close automatically.
Ŷ$OZD\V IL[ DQG XVH H[WHQVLRQ EDUV IRU ZRUNSLHFH
support during operation.
ŶNever alter of modify the product or its function. Your
safety may be compromised.
ŶDo not use saw blades which are cracked, damaged
or deformed.
ŶDo not use saw blades made of high-speed steel.
ŶOnly use blades that are sharp. Replace dull blades.
ŶAlways use blades with correct size and shape of
arbour holes. Blades that do not match the mounting
hardware of the saw will run eccentrically, causing loss
of control.
ŶUse only woodworking blades specified in this manual,
which comply with EN 847-1.
ŶDo not use any flanges, washers and nuts to secure the
saw blade other than those supplied or indicated in the
instruction manual.
ŶIt is necessary to select a saw blade which is suitable
for the material being cut. Never use the product to cut
materials other than those specified in the intended use
section in this manual.
ŶIt is important to avoid overheating the blade and
melting the plastic when cutting.
Ŷ,W LV HVVHQWLDO WR DGKHUH WR WKH PD[LPXP VSHHG
specified on the saw blade, only use saw blade that are
marked with a speed equal or higher than the speed
marked on the tool.
ŶReplace the table insert when worn or damaged.
ŶBefore work, make a dummy cut without the motor
turned on so the position of the blade, operation of
the guards with respect to other machine parts, and
workpiece may be checked.
ŶWhen performing mitre, bevel or compound mitre cuts,
adjust the sliding fence or sub-fence to ensure the
correct clearance from the blade.
ŶThe handle lock must always be engaged when
transporting the product.
ŶKeep the floor area free of loose materials, such as
chips and cut-offs.
ŶRefrain from removing any cut-offs or other parts of the
workpiece from the cutting area whilst the product is
running and the saw head is not in the rest position.
ŶLong workpieces must be adequately supported. The
ZRUNLQJDUHDRIWKHVDZLQFOXGHVWKHZKROHH[WHQWRI
the workpiece. The operator should secure this area
from accidental contact from other persons or objects
which may move the workpiece during operation.

English
5
EN
FR
DE
ES
IT
NL
PT
DA
SV
FI
NO
RU
PL
CS
HU
RO
LV
LT
ET
HR
SL
SK
BG
UK
TR
EL
ŶThe dust produced when using the product may be
harmful to health. Use a dust suction system and wear
a suitable dust protection mask. Remove deposited
dust thoroughly with a vacuum cleaner.
ŶDo not replace the laser or LED with a different type. Any
repairs must only be carried out by the manufacturer or
authorised service agent.
ŶThe unit should be connected to a power circuit
protection device (fuse or circuit breaker).
ŶWhen using the mitre saw outdoors, the manufacturer
recommends the use of an RCD device with a trip set
at 30mA.
ŶWhen using this tool, voltage fluctuations may affect
other electrical products or lighting on the same
power circuit. Connect the tool to a power source with
DQ LPSHGDQFH HTXDO WR ȍ WR PLQLPLVH YROWDJH
fluctuations. Contact your electric power supplier for
further clarification.
LASER SAFETY RULES
ŶThe laser radiation used in this saw is Class 2 with
PD[LPXPP:DQGQPZDYHOHQJWKV'RQRWVWDUH
into the laser beam. Failure to comply with the rules
could result in serious personal injury.
ŶDo not stare into beam during operation.
ŶDo not project the laser beam directly into the eyes of
others. Serious eye injury could result.
ŶDo not place the laser in a position that may cause
anyone to stare into the laser beam intentionally or
unintentionally.
ŶDo not use optical tools to view the laser beam.
ŶDo not operate the laser around children or allow
children to operate the laser.
ŶDo not attempt to repair the laser device by yourself.
ŶDo not attempt to change any parts of the laser device
by yourself.
ŶAny repairs must only be carried out by the laser
manufacturer or authorised service agent.
ŶDo not replace the laser with a different type.
RESIDUAL RISKS
Even when the product is used as prescribed, it is still
impossible to completely eliminate certain residual risk
factors. The following hazards may arise and the operator
should pay special attention to avoid the following:
ŶRisk of contact with uncovered parts of the rotating saw
blade
ŶKick-back of workpieces or parts of workpieces due to
improper adjustment or handling
ŶCatapulting of faulty carbide tips from the saw blade
ŶDamage to the respiratory system
NOTE: Wear respiratory protection masks containing
filters appropriate to the materials being worked.
Ensure adequate workplace ventilation. Do not eat,
drink or smoke in the work area.
ŶDamage to hearing if effective hearing protection is not
worn.
WARNING
Dust from certain paints, coatings and materials may
cause irritation or allergic reactions to the respiratory
system. Dust from wood such as oak, beech, MDF and
others are carcinogenic. Material containing asbestos
VKRXOGRQO\ HYHU EHZRUNHG RU SURFHVVHGE\ TXDOL¿HG
specialist operators.
WARNING
Injuries may be caused, or aggravated, by prolonged
use of a tool. When using any tool for prolonged periods,
ensure you take regular breaks.
KNOW YOUR PRODUCT
See page 226 - 227.
1. Handle, insulated gripping surface
2. Power switch
3. Safety lock handle
4. Upper guard
5. Saw blade
6. Lower guard
7. Main fence
8. Clamp
9. Turntable
10. Base
11. Table insert
12. Turntable lock handle
13. Balancing foot
14. Rubber foot
15. Laser switch
16. LED switch
17. Top handle
18. Lower guard cover
19. Bevel angle lock knob
20. Sliding fence
21. Mounting hole
22. ([WHQVLRQEDU
23. Stand
24. Screws for adjusting the bevel angle limit stop
25. Spindle lock knob
26. Dust bag
27. Cutting depth adjustment knob
28. Bracket stop
29. 0D[LPXPFXWWLQJGHSWKVWRS
30. Linear rod stop knob
31. Winding support
32. Screws for adjusting mitre angle

English
6
OPERATION
The product features a moving saw blade that can be set at
various angles by the operator when cutting a work piece
ZKLFKLVVHFXUHO\¿[HGWRWKHEDVHRIWKHSURGXFW,WPXVW
be operated by only one person to prevent unintentional
contact with the moving saw blade.
The principles for safe operation of the product are as
follows:
ŶMaintain saw, blades and work area in good condition.
ŶSecure the mitre saw base to either a sturdy work
bench or its dedicated stand. The product may move
and tip if it is not adequately secured.
ŶSet up and lock the cutting angles and depth before
making the cut.
ŶSecure the work piece to the mitre saw base. Use the
clamp provided and, where necessary, use additional
clamps or holding mechanisms to prevent unintentional
movement of the work piece while cutting.
ƔCheck that the operation of the blade guards are not
restricted by the position of the work piece.
ƔEnsure that the fence and other parts of the product
will not be cut as the blade lowers to the cutting
position.
ŶStart the motor and allow the blade to reach full speed
before slowly lowering it to cut the work piece. Slide
WKH EODGH DVVHPEO\ EDFNZDUGV DQGRU IRUZDUGV WR
complete the cut as necessary.
ŶAllow the blade assembly to rise to its upper position
where the blade guards are fully closed. Switch off the
motor and allow the blade to come to a complete stop
before removing the work piece or off-cuts, or before
reaching into the area of the blade.
%HIRUH¿UVWXVHHQVXUHWKDWWKHDQJOHRIWKHEHYHORUPLWUH
set on the product matches the angle to be produced on
the work piece. Check this on a discarded piece of wood by
using a carpenter’s set or mitre square.
WARNING
The manufacturer strongly recommends that the
product is always securely mounted to a bench top or
its dedicated stand.
:KHQWKHEDVHRIWKHSURGXFWLV¿UPO\VHFXUHGWRDEHQFK
top or the dedicated stand by the four nuts, bolts and
ZDVKHUVSURYLGHGWKHSURGXFWFDQEHXVHGDWPD[LPXP
bevel and mitre setting without the possibility of it tipping
over. If the product is not secured properly, the product may
over balance when large bevel angles are selected.
$WWKHIURQWRIWKHPLWUHVDZEDVHWKHUHLVDQH[WHQGLQJEDU
ZKLFKVKRXOGEHSXOOHGRXWWRLWVIXUWKHVWH[WHQW7KLVZLOO
help prevent the mitre saw from over balancing.
There is also an adjustable screw (balancing foot) that
H[WHQGV IURP WKH ERWWRP RI WKH H[WHQVLRQ WXUQWDEOH 7KLV
VFUHZVKRXOGEHDGMXVWHGVRWKDWLWWRXFKHVWKHÀDWVXUIDFH
that the product is resting upon. This will also prevent the
SURGXFWIURPRYHUEDODQFLQJZKHQFXWWLQJDWWKHIXOOH[WHQW
of the slide and bevel. Beware, this part of the saw table
moves when different mitre angles are selected, so the
screw needs to be frequently adjusted and reset.
MAINTENANCE
ŶDo not modify the product in any way or use accessories
not approved by the manufacturer. Your safety and that
of others may be compromised.
ŶDo not use the product if any switches, guards or
other functions does not work as intended. Return to
an authorised service centre for professional repair or
adjustment.
ŶDo not make any adjustments whilst the saw blade is
in motion.
ŶAlways make sure the power plug has been
removed from the mains power source before
making adjustments, lubricating or when doing any
maintenance on the product.
ŶBefore and after each use, check the product for
damage or broken parts. Keep the product in top
working condition by immediately replacing parts with
spares approved by the manufacturer.
ŶThe blade has sharp edges and may also remain hot
DIWHUFXWWLQJRSHUDWLRQV([HUFLVHH[WUHPHFDXWLRQZKHQ
FOHDQLQJ DQ H[SRVHG EODGH :HDU JORYHV WR SURWHFW
yourself from personal injury.
ŶClean the saw and its accessories from dust regularly,
especially moving parts including the blade guard.
Use a hand brush or vacuum cleaner to remove dust
effectively. Do not use compressed air.
ŶTo assure safety and reliability, all repairs, including
changing brushes, should be performed by an
authorised service centre.
ŶIf the power cord is damaged, it must be replaced by
an authorised service center in order to avoid a hazard.
WARNING
Do not attempt to disassemble the blade guard assembly
for cleaning or repair. Damaged guards should not be
used. Return to an authorised service centre for repair
or replacement.
WARNING
For greater safety and reliability, all repairs should be
performed by an authorised service centre.
Maximum cutting depth stop
7KH PD[LPXP FXWWLQJ GHSWK VWRS LV WR SUHYHQW WKH VDZ
blade from cutting into the metal base of the unit.

English
7
EN
FR
DE
ES
IT
NL
PT
DA
SV
FI
NO
RU
PL
CS
HU
RO
LV
LT
ET
HR
SL
SK
BG
UK
TR
EL
WARNING
7KHPD[LPXPFXWWLQJGHSWKVWRSLVQRWXVHUDGMXVWDEOH
'RQRWDGMXVWWKHPD[LPXPFXWWLQJGHSWKVWRS
TRANSPORTATION AND STORAGE
ŶWhen storing the product, disconnect the power
cord. Store the product in a secure place that is not
accessible to children. Store the power cord as shown
in the illustration on page 253 - 256 of this manual.
ŶClean the product using a brush and vacuum cleaner
before storage.
ŶIf you remove the saw blade or keep spares with
the unit, ensure they are in the original packaging to
prevent injury.
To secure the product prior to movement:
ŶThe product should be stored at the zero degree mitre
and bevel angle and locked in position. The slide should
be locked. The handle should be locked in the lower
(safe) position with the guards closed.
ŶOne or both sides of the work piece supports can be
removed for ease of carrying.
7RPRYHWKHSURGXFWVKRUWGLVWDQFHVZKHQ¿[HGWRWKH
legs:
ŶSecure the product prior to movement as described in
the manual.
Ŷ0RYLQJWKHSURGXFWWKDWLVIL[HGRQWKHVWDQGUHTXLUHV
two operators wearing heavy duty gloves. One operator
should stand at the front while the second operator is
at the back of the saw stand. Both operators must hold
the top of each leg and carefully lift the whole assembly.
To move longer distance or in a vehicle:
ŶSecure the product prior to movement as described in
the manual.
ŶThe stand must be removed by releasing the 4 bolts,
one at each corner. Secure the bolts for future use. Lift
the product using the handle at the top.
ŶWhen lifting to a height, two persons wearing heavy
gloves are needed to lift the base of the product.
ŶWhen transporting in a vehicle, set the product on its
base and secure against movement.
ŶLay the stand on its side or dismantle and secure
against movement.
ENVIRONMENTAL PROTECTION
Recycle raw materials instead of disposing
of as waste. The machine, accessories
and packaging should be sorted for
environmental-friendly recycling.
SYMBOL
Safety alert
CE conformity
EurAsian conformity mark
Ukrainian mark of conformity
Please read the instructions
carefully before starting the
machine.
Class II tool, double insulation
Wear ear protection
Always wear eye protection.
Keep hands away from the cutting
area and sharp blade.
Wear safety gloves
Blade rotation direction (shown on
saw blade)
Blade rotation direction (shown on
blade guard)
Blade width of cut (Kerf)
Number of teeth on this saw blade
For cutting wood and analogous
material
Not for cutting metals
LASER
2
Laser radiation.
Do not stare into beam.
Class 2 laser product

English
8
Waste electrical products should
not be disposed of with household
waste. Please recycle where
IDFLOLWLHV H[LVW &KHFN ZLWK \RXU
Local Authority or retailer for
recycling advice.
SYMBOLS IN THIS MANUAL
Plug in the product.
Unplug the product.
Lock
Unlock
Locking mechanism is not working
A sound is heard
Waiting time for blade to reach full speed
or stop completely.
Parts or accessories sold separately
Note
Warning
The following signal words and meanings are intended to
H[SODLQWKHOHYHOVRIULVNDVVRFLDWHGZLWKWKLVSURGXFW
DANGER
Indicates an imminently hazardous situation, which, if not
avoided, will result in death or serious injury.
WARNING
Indicates a potentially hazardous situation, which, if not
avoided, could result in death or serious injury.
CAUTION
Indicates a potentially hazardous situation, which, if not
avoided, may result in minor or moderate injury.
CAUTION
(Without Safety Alert Symbol) Indicates a situation that may
result in property damage.

Français
9
EN
FR
DE
ES
IT
NL
PT
DA
SV
FI
NO
RU
PL
CS
HU
RO
LV
LT
ET
HR
SL
SK
BG
UK
TR
EL
Votre scie à onglet a été conçue en donnant priorité à la
VpFXULWpjODSHUIRUPDQFHHWjOD¿DELOLWp
UTILISATION PRÉVUE
/DVFLHjRQJOHWPL[WHHVWFRQoXHSRXUVFLHUGXERLVPDVVLI
RXDJJORPpUpGHVPDWpULDX[ VLPLODLUHVDXERLV DYHFRX
sans placage collé et plastiques.
L’outil est conçu pour être utilisé par des adultes qui ont lu
le mode d’emploi et comprennent les risques et dangers.
/HSURGXLWHVWGHVWLQpHjrWUH¿[pHSDUVDEDVHjVRLWXQ
établi solide, ou à son pied dédié. Si la base n’est pas
ELHQ ¿[pH O¶HQVHPEOH GH OD PDFKLQH HVW VXVFHSWLEOH GH
bouger en cours de coupe, ce qui augmente les risques de
blessures graves.
Le produit est conçu pour réaliser des coupes en biseau
et d’onglet. Les capacités pour les différentes coupes sont
IRXUQLHVGDQVOHVVSpFL¿FDWLRQVGXSURGXLWGHFHPDQXHO
/H SURGXLW GRLW rWUH XWLOLVp DX VHF DYHF XQ H[FHOOHQW
éclairage ambiant et une ventilation adéquate.
Ce produit est destiné à une utilisation par des particuliers
et ne doit être utilisé que comme décrit ci-dessus, à
O¶H[FOXVLRQGHWRXWHDXWUHXWLOLVDWLRQ
AVERTISSEMENTS DE SÉCURITÉ GÉNÉRAUX
POUR L’OUTIL ÉLECTRIQUE
AVERTISSEMENT
Lire tous les avertissements de sécurité, les
instructions, les illustrations et les spécifications
fournis avec cet outil électrique. Ne pas suivre les
instructions énumérées ci-dessous peut provoquer un
FKRFpOHFWULTXHXQLQFHQGLHHWRXXQHEOHVVXUHVpULHXVH
Conserver tous les avertissements et toutes les
instructions pour pouvoir s’y reporter ultérieurement.
Le terme «outil électrique» dans les avertissements fait
référence à votre outil électrique alimenté par le secteur
(avec cordon d’alimentation) ou votre outil électrique
fonctionnant sur batterie (sans cordon d’alimentation).
SÉCURITÉ DE LA ZONE DE TRAVAIL
ŶConserver la zone de travail propre et bien éclairée.
/HV]RQHVHQGpVRUGUHRXVRPEUHVVRQWSURSLFHVDX[
accidents.
ŶNe pas faire fonctionner les outils électriques en
atmosphère explosive, par exemple en présence
de liquides inflammables, de gaz ou de poussières.
Les outils électriques produisent des étincelles qui
peuvent enflammer les poussières ou les fumées.
ŶMaintenir les enfants et les personnes présentes
à l’écart pendant l’utilisation de l’outil électrique.
Les distractions peuvent vous faire perdre le contrôle
de l’outil.
SÉCURITÉ ÉLECTRIQUE
ŶIl faut que les fiches de l’outil électrique soient
adaptées au socle. Ne jamais modifier la fiche
de quelque façon que ce soit. Ne pas utiliser
d’adaptateurs avec des outils électriques à
branchement de terre. Des fiches non modifiées
et des socles adaptés réduisent le risque de choc
électrique.
ŶÉviter tout contact du corps avec des surfaces
reliées à la terre telles que les tuyaux, les
radiateurs, les cuisinières et les réfrigérateurs. Il
H[LVWHXQULVTXHDFFUXGHFKRFpOHFWULTXHVLYRWUHFRUSV
est relié à la terre.
ŶNe pas exposer les outils électriques à la pluie ou
à des conditions humides. La pénétration d‘eau à
l’intérieur d’un outil électrique augmente le risque de
choc électrique.
ŶNe pas maltraiter le cordon. Ne jamais utiliser le
cordon pour porter, tirer ou débrancher l’outil
électrique. Maintenir le cordon à l’écart de la
chaleur, du lubrifiant, des arêtes vives ou des
parties en mouvement. Des cordons endommagés
ou emmêlés augmentent le risque de choc électrique.
ŶLorsqu’on utilise un outil électrique à l’extérieur,
utiliser un prolongateur adapté à l’utilisation
extérieure. L’utilisation d’un cordon adapté à l’utilisation
H[WpULHXUHUpGXLWOHULVTXHGHFKRFpOHFWULTXH
ŶSi l’usage d’un outil électrique dans un
emplacement humide est inévitable, utiliser une
alimentation protégée par un dispositif à courant
différentiel résiduel (RCD). L’usage d’un RCD réduit
le risque de choc électrique.
SÉCURITÉ DES PERSONNES
ŶRester vigilant, regarder ce que vous êtes en train
de faire et faire preuve de bon sens dans votre
utilisation de l’outil électrique. Ne pas utiliser
un outil électrique lorsque vous êtes fatigué ou
sous l’emprise de drogues, de l’alcool ou de
médicaments. Un moment d’inattention en cours
d’utilisation d’un outil électrique peut entraîner des
blessures graves.
ŶUtiliser un équipement de protection individuelle.
Toujours porter une protection pour les yeux. Les
équipements de protection individuelle tels que les
masques contre les poussières, les chaussures de
sécurité antidérapantes, les casques ou les protections
auditives utilisés pour les conditions appropriées
réduisent les blessures.
ŶÉviter tout démarrage intempestif. S’assurer
que l’interrupteur est en position arrêt avant
de brancher l’outil au secteur et/ou au bloc de
batteries, de le ramasser ou de le porter. Porter les
outils électriques en ayant le doigt sur l’interrupteur ou
brancher des outils électriques dont l’interrupteur est en
position marche est source d’accidents.
ŶRetirer toute clé de réglage avant de mettre l’outil
électrique en marche.8QHFOpODLVVpH IL[pHVXUXQH

Français
10
partie tournante de l’outil électrique peut donner lieu à
des blessures.
ŶNe pas se précipiter. Garder une position et un
équilibre adaptés à tout moment. Cela permet un
meilleur contrôle de l’outil électrique dans des situations
inattendues.
ŶS’habiller de manière adaptée. Ne pas porter
de vêtements amples ou de bijoux. Garder les
cheveux et les vêtements à distance des parties en
mouvement.'HVYrWHPHQWVDPSOHVGHVELMRX[RXOHV
FKHYHX[ORQJV SHXYHQW rWUHSULV GDQV GHVSDUWLHV HQ
mouvement.
ŶSi des dispositifs sont fournis pour le raccordement
d’équipements pour l’extraction et la récupération
des poussières, s’assurer qu’ils sont connectés
et correctement utilisés. Utiliser des collecteurs de
SRXVVLqUHSHXWUpGXLUHOHVULVTXHVGXVDX[SRXVVLqUHV
ŶRester vigilant et ne pas négliger les principes de
sécurité de l’outil sous prétexte que vous avez
l’habitude de l’utiliser. Une fraction de seconde
d’inattention peut provoquer une blessure grave.
UTILISATION ET ENTRETIEN DE L’OUTIL ÉLECTRIQUE
ŶNe pas forcer l’outil électrique. Utiliser l’outil
électrique adapté à votre application. L’outil
pOHFWULTXHDGDSWpUpDOLVHPLHX[OHWUDYDLOHWGHPDQLqUH
plus sûre au régime pour lequel il a été construit.
ŶNe pas utiliser l’outil électrique si l’interrupteur ne
permet pas de passer de l’état de marche à arrêt et
inversement. Tout outil électrique qui ne peut pas être
FRPPDQGpSDUO¶LQWHUUXSWHXUHVWGDQJHUHX[HWLOIDXWOH
réparer.
ŶDébrancher la fiche de la source d’alimentation et/
ou enlever le bloc de batteries, s’il est amovible,
avant tout réglage, changement d’accessoires
ou avant de ranger l’outil électrique. De telles
mesures de sécurité préventives réduisent le risque de
démarrage accidentel de l’outil électrique.
ŶConserver les outils électriques à l’arrêt hors de
la portée des enfants et ne pas permettre à des
personnes ne connaissant pas l’outil électrique ou
les présentes instructions de le faire fonctionner.
/HVRXWLOVpOHFWULTXHVVRQWGDQJHUHX[HQWUHOHVPDLQV
d’utilisateurs novices.
ŶObserver la maintenance des outils électriques et
des accessoires. Vérifier qu’il n’y a pas de mauvais
alignement ou de blocage des parties mobiles, des
pièces cassées ou toute autre condition pouvant
affecter le fonctionnement de l’outil électrique. En
cas de dommages, faire réparer l’outil électrique
avant de l’utiliser.'HQRPEUHX[DFFLGHQWVVRQWGXVj
des outils électriques mal entretenus.
ŶGarder affûtés et propres les outils permettant de
couper. Des outils destinés à couper correctement
entretenus avec des pièces coupantes tranchantes
sont moins susceptibles de bloquer et sont plus faciles
à contrôler.
ŶUtiliser l’outil électrique, les accessoires et les
lames etc., conformément à ces instructions, en
tenant compte des conditions de travail et du travail
à réaliser. L’utilisation de l’outil électrique pour des
opérations différentes de celles prévues peut donner
lieu à des situations dangereuses.
ŶIl faut que les poignées et les surfaces de
préhension restent sèches, propres et dépourvues
d’huiles et de graisses. Des poignées et des surfaces
de préhension glissantes rendent impossibles la
manipulation et le contrôle en toute sécurité de l’outil
dans les situations inattendues.
ENTRETIEN
ŶFaire entretenir l’outil électrique par un réparateur
qualifié utilisant uniquement des pièces de
rechange identiques. Cela assure le maintien de la
sécurité de l’outil électrique.
CONSIGNES DE SÉCURITÉ POUR LES SCIES À
ONGLET
ŶLes scies à onglet sont conçues pour couper du
bois ou des objets en bois. Elles ne peuvent être
utilisées avec des disques à tronçonner destinés à
la coupe de matériaux ferreux comme des barres,
des tiges, des goujons, etc. La poussière abrasive
provoque le blocage des pièces mobiles telles
que la protection inférieure. Les étincelles issues
d’une découpe abrasive peuvent brûler la protection
inférieure, l’insert de trait de scie et d’autres pièces en
plastique.
ŶBloquez la pièce à usiner avec des serre-joints
lorsque cela est possible. Si le soutien de la pièce
à usiner s’effectue manuellement, il convient de
tenir vos mains à au moins 100 mm de la lame de
scie. N’utilisez pas la scie pour couper des pièces
trop petites pour être soutenues manuellement ou
fixées correctement. Le fait d’approcher votre main de
la lame de scie augmente le risque de blessures dues
au contact avec la lame.
ŶLa pièce à usiner doit être immobile et fixée ou
bloquée contre le guide et la table. Il ne faut en
aucun cas avancer la pièce vers la lame ou effectuer
de coupe « à la main ». Les pièces non retenues ou
en mouvement peuvent être projetées à très grande
vitesse et provoquer des blessures.
ŶAvancez la scie vers la pièce à usiner. Ne tirez pas
la scie vers vous. Pour effectuer une coupe, levez la
tête de la scie, positionnez-la au-dessus de la pièce
à usiner, mettez le moteur sous tension, abaissez
la tête de la scie et avancez la scie vers la pièce à
usiner. Effectuer une coupe tirante peut faire monter
la lame de scie au-dessus de la pièce à usiner et la
projeter vers l’opérateur.
ŶNe placez jamais votre main au-dessus de la ligne
de coupe, que ce soit devant ou derrière la lame de
scie.,OHVWH[WUrPHPHQWGDQJHUHX[GHVRXWHQLUODSLqFH
à usiner de façon « croisée », c’est-à-dire en utilisant
votre main gauche pour tenir la pièce à droite de la

Français
11
EN
FR
DE
ES
IT
NL
PT
DA
SV
FI
NO
RU
PL
CS
HU
RO
LV
LT
ET
HR
SL
SK
BG
UK
TR
EL
lame de scie ou vice-versa.
ŶLorsque la lame est en mouvement, n’essayez pas
d’atteindre l’autre côté du guide si vos mains se
trouvent à moins de 100 mm d’un des côtés de la
lame de scie, que ce soit pour retirer des chutes de
bois ou pour toute autre raison./DSUR[LPLWpGHYRWUH
main avec la lame de scie en mouvement est difficile à
évaluer, ce qui présente un risque de blessures graves.
ŶInspectez la pièce à usiner avant de procéder
à la coupe. Si la pièce à usiner est courbée ou
déformée, il convient de la fixer avec la face
courbée extérieure contre le guide. Veillez toujours
à ce qu’il n’y ait aucun écart entre la pièce à usiner,
le guide et la table le long de la ligne de coupe. Les
pièces à usiner courbées ou déformées peuvent vriller
ou se tordre et provoquer le grippage de la lame de scie
en mouvement lors de la coupe. La pièce à usiner doit
rWUHH[HPSWHGHFORXVRXGHWRXWDXWUHREMHWpWUDQJHU
ŶN’utilisez pas la scie s’il reste des outils, des chutes
de bois ou autres sur la table. Les petites chutes de
bois, les pièces libres ou tout autre objet entrant en
contact avec la lame rotative peuvent être projetés à
grande vitesse.
ŶNe coupez qu’une seule pièce à usiner à la fois.
Des pièces à usiner empilées ne peuvent pas être
FRUUHFWHPHQWIL[pHVRXPDLQWHQXHVHWSHXYHQWJULSSHU
la lame ou dévier pendant la coupe.
ŶAvant utilisation, veillez toujours à ce que la scie
à onglet soit montée ou placée sur une surface de
travail ferme et plane. Une surface de travail ferme et
plane réduit le risque d’instabilité de la scie à onglet.
ŶPlanifiez les tâches. À chaque changement
de réglage de l’angle de biseau ou d’onglet,
veillez toujours à ce que le guide ajustable soit
correctement positionné afin de soutenir la pièce
à usiner et à ce qu’il n’entre pas en contact avec la
lame ou le système de protection. Avec l’outil hors
tension et en l’absence de pièce à usiner sur la table,
simulez une coupe avec la lame de scie afin de vous
assurer qu’il n’y aura aucun contact avec le guide et
aucun danger de le couper.
ŶPour une pièce à usiner plus large ou longue que
la table, prévoyez un support adapté (rallonges de
table, chevalets de sciage, etc.). Les pièces à usiner
plus larges ou plus longues que la table de la scie à
RQJOHW SHXYHQW EDVFXOHU VL HOOHV QH VRQW SDV IL[pHV
correctement. Le basculement de la chute ou de la
pièce à usiner peut provoquer le soulèvement de la
protection inférieure ou sa projection par la lame en
mouvement.
ŶNe faites jamais appel à une personne pour servir
de substitut à une rallonge de table ou à un support
complémentaire. Lors de l’opération de coupe, un
support de pièce à usiner instable peut provoquer le
grippage de la lame ou la déviation de la pièce à usiner,
ce qui vous entraînera, votre assistant et vous, vers la
lame.
ŶEn aucun cas la chute ne doit être bloquée ou
appuyée contre la lame de scie en mouvement.
6L O¶HVSDFH HVW UpGXLW FRPPH SDU H[HPSOH HQ FDV
d’utilisation de butées, la chute pourrait se coincer
contre la lame et être projetée violemment.
ŶUtilisez toujours une bride ou un dispositif conçu
pour correctement soutenir les matériaux ronds
comme des tiges ou des tubes. Lors de la coupe,
les tiges ont tendance à rouler et la lame peut alors
« mordre » et entraîner la pièce à usiner et vos mains
vers la lame.
ŶAttendez que la lame atteigne sa pleine vitesse
avant d’y apposer la pièce à usiner. Cela réduira le
risque de projection de la pièce à usiner.
ŶSi la pièce à usiner ou la lame se coince, arrêtez
la scie à onglet. Attendez que toutes les pièces
en mouvement se soient immobilisées puis
débrancher l’outil et/ou retirer le bloc de batterie.
Procédez ensuite au déblocage du matériau coincé.
Poursuivre la coupe avec une pièce bloquée peut
provoquer une perte de contrôle ou endommager la
scie à onglet.
ŶAprès la coupe, relâchez le bouton, tenez la scie
tête vers le bas et attendez l’arrêt de la lame avant
de passer au retrait de la chute. ,O HVW GDQJHUHX[
d’approcher votre main de la lame encore en rotation.
ŶTenez fermement la poignée en cas de coupe
incomplète ou lorsque le bouton est relâché avant
que la tête de la scie ne soit complètement abaissée.
L’action de freinage de la scie peut soudainement tirer
la tête de la scie vers le bas et provoquer un risque de
blessures.
AVERTISSEMENTS DE SÉCURITÉ SUPPLÉMEN-
TAIRES CONCERNANT LE PIED (LSG UNIQUEMENT)
ŶLe pied n’est destiné qu’à la Scie à Onglet Compacte
j *OLVVLqUH 5<2%, (06/ 1H IL[H] DXFXQ DXWUH
outil électrique sur le pied. Ne vous servez pas du pied
pour d’autres utilisations que celles décrites dans les
instructions.
ŶInstallez le pied sur une surface ferme et horizontale.
Une surface lisse (carrelage ou bois) peut entraîner
un dérapage des pieds en cours d’opération. Lorsque
cela est possible, faites reposer le pied sur du béton ou
autre surface similaire non-glissante.
ŶBarre de rallongeSuivez attentivement les instructions
concernant le montage de l’outil ; reportez-vous
DX[ LOOXVWUDWLRQV SOXV EDV GDQV FH PDQXHO 7RXW RXWLO
monté de façon incorrecte augmentera les risques de
blessures graves.
ŶAssurez-vous que tous les boulons et éléments
GH IL[DWLRQ GX SLHG VRQW ELHQ VHUUpV 8Q PDXYDLV
assemblage peut entraîner l’effondrement du pied.
Vérifiez fréquemment le bon serrage des boulons.
ŶRépartissez toujours la charge pour éviter que le
pied ne bascule. Si la pièce à couper est trop longue,
supportez-la par d’autres moyens afin d’équilibrer la
charge. Supportez la pièce à couper avant d’effectuer la
coupe afin de vous assurer que la charge est équilibrée
de chaque côté de la coupe.

Français
12
ŶN’utilisez pas le pied pour grimper dessus ou comme
marchepied pour atteindre des éléments en hauteur.
Ne posez aucun élément lourd sur ce pied.
ŶN’utilisez pas de pièces ou accessoires autres que
FHX[ UHFRPPDQGpV SDU OH IDEULFDQW SRXU FHW RXWLO
Cette pratique est susceptible d’entraîner de graves
blessures.
INSTRUCTIONS DE SÉCURITÉ CONCERNANT LA
LAME DE COUPE DU BOIS
ŶIl est important de lire attentivement le manuel et les
instructions avant d’utiliser la lame de scie et le produit.
ŶL’outil électrique doit être en bon état, l’arbre sans
déformation ni vibration.
ŶN’utilisez pas le produit si les protections ne sont
pas en place. Gardez les protections en bon état de
fonctionnement et bien entretenues.
Ŷ9HLOOH] j FH TXH O¶RSpUDWHXU VRLW ELHQ IRUPp DX[
SUpFDXWLRQVGHVpFXULWpDX[UpJODJHVHWjO¶XWLOLVDWLRQ
du produit.
ŶLors de l’utilisation du produit, portez toujours des
lunettes et des protections auditives. Des gants
de sécurité, des chaussures solides et à semelles
antidérapantes et un tablier sont recommandés.
ŶAvant toute utilisation d’un accessoire, consultez
le manuel utilisateur. La mauvaise utilisation d’un
accessoire peut entraîner des dommages et augmenter
le risque de blessure.
ŶN’utilisez que les lames spécifiées dans ce manuel,
répondant à la norme EN 847-1.
Ŷ5HVSHFWH]ODYLWHVVHPD[LPDOHGHURWDWLRQLQGLTXpHVXU
la lame. Assurez-vous que la vitesse marquée sur la
lame de scie est au moins égale à la vitesse marquée
sur la scie.
ŶUtilisez toujours des lames dont la taille et la forme
sont adaptées à l’alésage de l’arbre. Des lames non
adaptées à l’arbre sur lequel elles doivent être montées
ne tourneront pas correctement et peuvent vous faire
perdre de contrôle de l’outil.
ŶN’utilisez pas de lames d’un diamètre supérieur
ou inférieur à celui recommandé. N’utilisez pas de
rondelles ou d’entretoises pour adapter la lame à la
broche.
ŶVérifiez que les dents de la lame de scie sont en bon
état et d’apparence normale avant chaque utilisation.
Les dents endommagées ou instables peuvent, à
l’utilisation, devenir des projectiles et augmenter le
risque de blessures.
ŶN’utilisez pas de lames de scie fissurées ou déformées.
N’utilisez pas de lames de scie qui sont endommagées
ou déformées.
ŶMettez la lame de scie au rebut si elle est endommagée,
déformée, tordue ou fendue ; aucune réparation n’est
permise.
ŶN’utilisez pas de lames HSS.
ŶAvant utilisation, veillez à ce que la lame de scie soit
correctement montée et serrez fermement l’écrou du
mandrin (couple de serrage d’environ 12-15 Nm).
Ŷ/HVYLVHWOHVpFURXVGHIL[DWLRQGRLYHQWrWUHVHUUpVj
l’aide d’une clé adaptée, etc.
ŶNi l’utilisation d’une rallonge de clé ni le serrage à l’aide
de coups de marteau ne sont autorisés.
ŶAssurez-vous que toutes les lames et tous les flasques
sont propres et que les parties épaulées des colliers
sont orientées vers la lame.
ŶAssurez-vous que la lame tourne dans le bon sens.
ŶAvant de travailler, faites une coupe à blanc moteur
arrêté afin de pouvoir vérifier la position de la lame, le
IRQFWLRQQHPHQWGHVSURWHFWLRQVSDUUDSSRUWDX[DXWUHV
éléments de la machine ainsi que la pièce à couper.
ŶNe laissez jamais le produit sans surveillance.
ŶN’appliquez pas de lubrifiant sur la lame lorsqu’elle est
en rotation.
ŶN’effectuez jamais aucune opération de nettoyage
ou d’entretien lorsque la machine est toujours en
mouvement et que la tête n’est pas en position de
repos.
ŶNe tentez jamais d’arrêter rapidement une machine en
rotation en coinçant un outil ou autre élément contre
la lame, vous risqueriez de provoquer de graves
accidents.
ŶDébranchez l’appareil de la prise secteur ou retirez
le bloc de batterie avant de changer les lames ou
d’effectuer l’entretien.
ŶPrenez garde lors de l’emballage et du déballage de la
lame, il est facile de se blesser avec les dents affûtées.
ŶUtilisez un porte-lame ou portez des gants lorsque vous
manipulez une lame de scie.
ŶConservez et stockez la lame dans son emballage
d’origine ou autre emballage adapté, au sec et à l’abri
des produits chimiques susceptibles de l’endommager.
INSTRUCTIONS DE SÉCURITÉ ADDITIONNELLES
Ŷ)L[H]WRXMRXUVODSLqFHjFRXSHUGHIDoRQIHUPHHWVUH
ŶS’assurer que la machine présente toujours une bonne
VWDELOLWp SDU H[ SDU XQH IL[DWLRQ VXU O¶pWDEOL (Q FDV
d’utilisation du pied fourni, consultez les avertissements
supplémentaires présents dans ce manuel.
ŶPortez une protection acoustique. L’influence du bruit
peut provoquer la surdité.
ŶPortez toujours des lunettes de sécurité lors de
l’utilisation du produit. Il est recommandé de porter des
JDQWVSRXUPDQLSXOHUOHVODPHVHWOHVPDWpULDX[EUXWV
ainsi que de solides chaussures antidérapantes pour
protéger les pieds de la chute de pièces coupées de la
zone de coupe.
ŶDébranchez l’appareil de la prise secteur ou retirez le
bloc de batterie avant d’entretenir ou de nettoyer le
produit.

Français
13
EN
FR
DE
ES
IT
NL
PT
DA
SV
FI
NO
RU
PL
CS
HU
RO
LV
LT
ET
HR
SL
SK
BG
UK
TR
EL
ŶNe branchez le câble d’alimentation sur le secteur que
si l’outil est arrêté.
ŶLe câble d’alimentation doit toujours se trouver en
dehors du champ d’action de la machine. Gardez-le à
l’écart de la zone dans laquelle se tient l’opérateur.
ŶNe tentez jamais d’atteindre l’entourage de la lame
sans qu’elle ne soit totalement immobile.
ŶAvant toute utilisation, vérifiez que la machine, le
câble d’alimentation, le câble de rallonge et la fiche ne
sont pas endommagés ni usés. Les réparations de la
machine ou de son câble d’alimentation ne doivent être
effectuées que par des réparateurs agréés.
ŶUtilisez toujours les protections du produit. N’utilisez
pas le produit si les protections ne sont pas en place ou
ne fonctionnent pas correctement.
ŶLa protection de lame inférieure ne doit s’ouvrir que
lorsque la lame est abaissée sur la pièce à usiner. Elle
doit toujours être en mesure de se déplacer librement
et de se fermer automatiquement.
ŶPour le soutien de la pièce à usiner lors de l’opération,
YHLOOH]jWRXMRXUVIL[HUHWXWLOLVHUGHVEDUUHVG¶H[WHQVLRQ
ŶN’altérez et ne modifiez jamais le produit ou son
fonctionnement. Votre sécurité pourrait en être affectée.
ŶN’utilisez pas une lame de scie fêlée, endommagée ou
déformée.
ŶN’utilisez pas une lame de scie fabriquée en acier à
coupe rapide.
ŶN’utilisez que des lames bien affûtées. Remplacez
toute lame émoussée.
ŶUtilisez toujours des lames dont la taille et la forme
sont adaptées à l’alésage de l’arbre. Des lames non
adaptées à l’arbre sur lequel elles doivent être montées
ne tourneront pas correctement et peuvent vous faire
perdre de contrôle de l’outil.
ŶN’utilisez que les lames à bois indiquées dans ce
manuel et conformes à la norme EN 847-1.
ŶN’utilisez aucun autre collet, aucune autre rondelle, ni
DXFXQDXWUHpFURXTXHFHX[IRXUQLVRXLQGLTXpVGDQVOH
manuel pour verrouiller la lame.
ŶChoisissez une lame de scie qui convient au matériau
à couper. N’utilisez jamais le produit pour couper des
PDWpULDX[DXWUHVTXHFHX[LQGLTXpVGDQVODVHFWLRQ©
Utilisation prévue » de ce manuel.
ŶPendant la coupe, il est important d’éviter la surchauffe
de la lame et la fonte du plastique.
Ŷ,O HVW HVVHQWLHO GH UHVSHFWHU OD YLWHVVH PD[LPXP
indiquée sur la lame de scie et d’utiliser uniquement
une lame de scie dont la vitesse indiquée est égale ou
supérieure à celle indiquée sur l’outil.
ŶRemplacez l’insert de plateau une fois usé ou
endommagé.
ŶAvant de travailler, faites une coupe à blanc moteur
arrêté afin de pouvoir vérifier la position de la lame, le
IRQFWLRQQHPHQWGHVSURWHFWLRQVSDUUDSSRUWDX[DXWUHV
éléments de la machine ainsi que la pièce à couper.
ŶLors de la réalisation de coupes en biseau, d’onglets
RX G¶RQJOHWV PL[WHV LO FRQYLHQW GH UpJOHU OH JXLGH
coulissant ou le sous-guide afin garantir le dégagement
complet de la lame.
ŶLe verrouillage de la poignée doit toujours être engagé
lors du transport du produit.
Ŷ*DUGH] OH VRO H[HPSW GH FRUSV pWUDQJHUV WHOV TXH
FKXWHVHWFRSHDX[
ŶN’enlevez pas des restes de sciage ou d‘autres parties
de pièces à usiner de la zone de sciage lorsque la
machine tourne et que la tête de sciage n‘est pas dans
la position de repos.
ŶLes longues pièces à usiner doivent être soutenues
de manière appropriée. L’espace de travail de la
scie comprend toute l’étendue de la pièce à couper.
L’opérateur doit sécuriser cet espace contre tout
contact accidentel par d’autres personnes ou objets qui
seraient susceptibles de faire bouger la pièce en cours
de coupe.
ŶLa poussière générée lors de l’utilisation du produit
pourrait entraîner des risques pour la santé. Utilisez
un dispositif d’aspiration de la poussière et portez un
masque de protection adapté. Retirez soigneusement
ODVFLXUHSDUH[jO¶DLGHG¶XQDVSLUDWHXU
ŶNe remplacez pas le laser ou la LED par un modèle
d’un autre type. Les réparations ne doivent être
effectuées que par le fabricant du laser ou par un
réparateur agréé.
ŶL’appareil doit être alimenté par l’intermédiaire d’un
dispositif de protection (fusible ou disjoncteur).
Ŷ3RXU O¶XWLOLVDWLRQ GH OD VFLH j RQJOHW j O¶H[WpULHXU OH
fabricant recommande l’utilisation d’un interrupteur
différentiel d’une sensibilité de 30mA.
ŶLorsque vous utilisez cet outil, des variations de tension
sont susceptibles d’être subies par d’autres produits
ou éclairages branchés sur le même circuit. Branchez
l’outil sur une source d’alimentation électrique dont
O¶LPSpGDQFH HVW pJDOH j ȍ DILQ GH PLQLPLVHU
les variations de tension. Contactez votre compagnie
de distribution d’électricité pour de plus amples
informations.
SÉCURITÉ RELATIVE AU LASER
ŶLe rayonnement du guide laser utilisé par cette scie est
GHW\SH&ODVVHDYHFXQHSXLVVDQFHPD[LPDOHP:
et une longueur d’onde de 650 nm. Ne regardez pas
directement le rayon laser. Le non-respect des règles
pourrait entraîner de graves blessures.
ŶNe regardez pas le rayon au cours de l’opération.
ŶNe projetez pas le rayon laser directement vers les
\HX[G¶DXWUXL'HJUDYHVEOHVVXUHVRFXODLUHVSRXUUDLHQW
en résulter.
ŶNe placez pas le laser de telle façon que quiconque
puisse diriger son regard vers le rayon laser, que ce
soit intentionnellement ou pas.

Français
14
ŶN’utilisez pas d’outils optiques pour voir le rayon laser.
ŶN’utilisez pas le laser en présence d’enfants et ne
laissez pas les enfants l’utiliser.
ŶNe tentez pas de réparer le laser par vous-même.
ŶNe tentez de changer aucune pièce du laser par vous-
même.
ŶLes réparations ne doivent être effectuées que par le
fabricant du laser ou par un réparateur agréé.
ŶNe remplacez pas le laser par un modèle d’un autre
type.
RISQUES RÉSIDUELS
Même lorsque le produit est utilisé selon les prescriptions,
il reste impossible d’éliminer totalement certains facteurs
de risque résiduels. Les dangers suivants risquent de se
présenter en cours d’utilisation et l’utilisateur doit prêter
SDUWLFXOLqUHPHQWJDUGHDX[SRLQWVVXLYDQWV
ŶRisque d’entrée en contact avec les parties non
couvertes de la lame en rotation.
ŶRebond des pièces à couper et de fragments des
pièces à couper dû à un mauvais réglage ou à une
mauvaise manipulation.
ŶProjection de plaquettes au carbure défectueuses de
la lame de scie.
ŶAtteinte du système respiratoire.
REMARQUE : Portez un masque de protection
UHVSLUDWRLUHDGDSWpDX[PDWpULDX[FRXSpV$VVXUH]XQH
ventilation correcte à l’espace de travail. Ne mangez
pas, ne buvez pas, et ne fumez pas dans l’espace de
travail.
ŶAtteinte à l’audition en cas de non-port d’une protection
auditive.
AVERTISSEMENT
La sciure en provenance de certaines peintures, vernis
HWPDWpULDX[HVWVXVFHSWLEOHGHSURYRTXHUGHVLUULWDWLRQV
ou des réactions allergiques au système respiratoire. La
sciure de bois tels que le chêne, le hêtre, l’aggloméré
HWDXWUHVHVWFDQFpULJqQH/HVPDWpULDX[FRQWHQDQWGH
l'amiante ne doivent être travaillés ou traités que par du
personnel spécialisé.
AVERTISSEMENT
L’utilisation prolongée d’un outil est susceptible de
provoquer ou d’aggraver des blessures. Assurez-vous
de faire des pauses de façon régulière lorsque vous
utilisez tout outil de façon prolongée.
APPRENEZ À CONNAÎTRE VOTRE PRODUIT
Voir pages 226 - 227.
1. Poignée, surface de préhension isolée
2. Interrupteur d’alimentation
3. Poignée de verrouillage de sécurité
4. Protège-lame supérieur
5. Lame de scie
6. Protège-lame inférieur
7. Guide principal
8. Serre-joint
9. Plateau tournant
10. Semelle
11. Insert de plateau
12. Poignée de verrouillage du plateau tournant
13. Pied d’équilibrage
14. Pied caoutchouc
15. Interrupteur du laser
16. Interrupteur à LED
17. Poignée supérieure
18. Carter inférieur de protection
19. Bouton de verrouillage de l’angle de biseau
20. Guide de coupe
21. Trou de montage
22. %DUUHG¶H[WHQVLRQ
23. Pied
24. Vis de réglage de la butée de limitation de l’angle de
biseau
25. Bouton de verrouillage de broche
26. Sac à poussière
27. Bouton de réglage de la profondeur de coupe
28. Butée de bride
29. %XWpHGHSURIRQGHXUPD[LPDOHGHFRXSH
30. Bouton de butée de la tige
31. Enrouleur
32. Vis de réglage de l’angle d’onglet
UTILISATION
Le produit est équipé d’une lame de scie en mouvement
pouvant être réglée à différents angles par l’opérateur pour
ODFRXSHG¶XQHSLqFHIHUPHPHQW¿[pHjODEDVHGXSURGXLW
,OQHGRLWrWUHPDQLSXOpTXH SDUXQHVHXOHSHUVRQQHD¿Q
d’éviter tout contact involontaire avec la lame en rotation.
Les principes d’utilisation du produit en toute sécurité sont
les suivants :
ŶGardez la scie, les lames et l’espace de travail en bon
état.
Ŷ)L[H]ODEDVHGHODVFLHjRQJOHWVRLWjXQVROLGHpWDEOL
ou sur son pied dédié. Le produit est susceptible
GH ERXJHU HW GH EDVFXOHU V¶LO Q¶HVW SDV IL[p GH IDoRQ
adéquate.
ŶRéglez et verrouillez les angles et la profondeur de
coupe avant d’effectuer la coupe.
ŶVerrouillez la pièce à couper sur la base de la scie à
onglet. Utilisez le serre-joint fourni et, lorsque cela est
nécessaire, utilisez d’autres serre-joints ou dispositifs
de serrage pour empêcher tout mouvement intempestif
de la pièce en cours de coupe.
ƔVérifiez que le fonctionnement du carter de lame
n’est pas gêné par la position de la pièce à couper.
ƔAssurez-vous que le guide et autres parties du

Français
15
EN
FR
DE
ES
IT
NL
PT
DA
SV
FI
NO
RU
PL
CS
HU
RO
LV
LT
ET
HR
SL
SK
BG
UK
TR
EL
produit ne seront pas coupés lors de l’abaissement
de la lame en position de coupe.
ŶDémarrez le moteur et laissez la lame atteindre sa
YLWHVVH PD[LPDOH DYDQW GH O¶DEDLVVHU OHQWHPHQW VXU
la pièce à couper. Au besoin, faites glisser l’ensemble
GHOD ODPHHQDUULqUH HWRXHQDYDQW SRXU WHUPLQHUOD
coupe.
ŶLaissez l’ensemble de la lame remonter à sa position
la plus haute où le carter de protection est totalement
fermé. Arrêtez le moteur et laissez la lame s’arrêter
complètement avant de retirer la pièce coupée ou les
chutes, ou avant d’accéder à la zone proche de la lame.
Avant première utilisation, assurez-vous que l’angle
d’onglet ou de biseau réglé sur le produit correspond bien
jO¶DQJOHREWHQXVXUODSLqFHFRXSpH9pUL¿H]FHFLVXUXQH
chute de bois à l’aide d’outils de charpentier ou d’une
équerre à onglet.
AVERTISSEMENT
Le fabricant conseille fortement de laisser le produit
monté en permanence sur un établi ou sur son pied
dédié.
/RUVTXH OD EDVH GX SURGXLW HVW VROLGHPHQW ¿[pH j XQ
établi ou au pied dédié avec les quatre écrous, boulons et
rondelles fournis, le produit peut être utilisé a ses angles de
ELVHDXHWG¶RQJOHWPD[LPXPVVDQVULVTXHGHEDVFXOHPHQW
6LOHSURGXLWQ¶HVWSDVELHQ¿[pLOHVWVXVFHSWLEOHGHEDVFXOHU
lorsque de grands angles de biseau sont sélectionnés.
8QHEDUUHG¶H[WHQVLRQVHWURXYHjO¶DYDQWGHODEDVHGHOD
scie, vous devez la déployer entièrement. Ceci évitera que
la scie à onglet ne bascule trop.
Une vis de réglage est également présente (pied
d’équilibrage) qui se trouve dans le prolongement du
plateau tournant de la rallonge. Cette vis doit être réglée
de façon à entrer en contact avec la surface horizontale sur
laquelle repose le produit. Cela aura également pour effet
d’empêcher le produit de basculer de façon trop importante
ORUV GHV FRXSHV DX[ UpJODJHV H[WUrPHV GH ELVHDX HW
d’onglet. Prenez garde, cette partie du plateau de la scie
bouge lorsque différents angles d’onglet sont sélectionnés,
la vis doit donc être fréquemment réglée et remise à zéro.
ENTRETIEN
ŶNe modifiez le produit d’aucune façon et n’utilisez
aucun accessoire non recommandé par le fabricant.
Votre sécurité et celle des autres pourrait en être
affectée.
ŶN’utilisez pas le produit si un de ses interrupteurs, une
de ses protections ou autre élément ne fonctionne pas
correctement. Retournez-le à un centre de service
agréé pour le faire remplacer ou réparer de façon
professionnelle.
ŶNe faites aucun réglage pendant que la lame est en
mouvement.
ŶAssurez-vous toujours que la prise à été débranchée
du secteur avant d’effectuer des réglages, de procéder
à une lubrification ou d’effectuer toute opération
d’entretien sur le produit.
ŶAvant et après chaque utilisation du produit, vérifiez
l’absence de dommages et d’éléments abîmés.
Gardez le produit en parfait état de fonctionnement en
remplaçant immédiatement les pièces avec des pièces
détachées agréées par le fabricant.
ŶLa lame a des bords tranchants et peut aussi rester
chaude après les opérations de découpe. Soyez
H[WUrPHPHQW SUXGHQW TXDQG YRXV QHWWR\H] XQH ODPH
H[SRVpH3RUWH]GHVJDQWVSRXUYRXVSURWpJHUHWpYLWHU
de vous blesser.
ŶNettoyez régulièrement la scie et ses accessoires de
façon à retirer toute la poussière, notamment au niveau
des pièces en mouvement telles que la protection de
la lame. Pour retirer efficacement la poussière, utilisez
une balayette ou un aspirateur. N’utilisez pas d’air
comprimé.
ŶPour plus de sécurité et de fiabilité, toutes les
réparations, changement des charbons compris,
doivent être effectuées par un centre de service agréé.
ŶSi le câble d’alimentation est endommagé, faites-le
remplacer par un Centre Service agréé afin d’éviter les
risques d’accidents.
AVERTISSEMENT
N’essayez pas de démonter la protection de lame pour
nettoyer ou effectuer des réparations. N’utilisez pas de
protections endommagées. Retournez le produit à un
centre de service agréé en vue de sa réparation ou de
son remplacement.
AVERTISSEMENT
3RXUSOXVGHVpFXULWpHWGH¿DELOLWpWRXWHVOHVUpSDUDWLRQV
doivent être effectuées par un centre de service agréé.
Butée de profondeur maximale de coupe
/DEXWpHGHSURIRQGHXUGHFRXSHPD[LPDOHHVWGHVWLQpHj
empêcher que la lame de la scie ne puisse entamer la base
métallique de l’appareil.
AVERTISSEMENT
/DEXWpHGHSURIRQGHXUGHFRXSHPD[LPDOHQHSHXWSDV
être réglée par l’utilisateur. Ne réglez pas la butée de
SURIRQGHXUPD[LPDOHGHFRXSH
TRANSPORT ET STOCKAGE
ŶLors du stockage du produit, débranchez le câble
d’alimentation. Rangez le produit dans un endroit

Français
16
sûr, hors de portée des enfants. Rangez le câble
d’alimentation comme illustré pages 253 - 256 de ce
manuel.
ŶNettoyez le produit à l’aide d’un pinceau ou d’un
aspirateur avant de le ranger.
ŶSi vous retirez la lame de scie ou si vous gardez des
lames de rechange avec l’appareil, assurez-vous
qu’elles sont dans leur emballage d’origine afin d’éviter
toute blessure.
Pour verrouiller le produit avant de le déplacer :
ŶLe produit doit être rangé avec les angles de biseau
et d’onglet à zéro, poignée en position verrouillée.
La glissière doit être verrouillée. La poignée doit être
verrouillée en position basse (de sécurité), protections
fermées.
Ŷ/¶XQGHVF{WpVRXOHVGHX[F{WpVGHVVXSSRUWVGHOD
pièce à couper peuvent être retirés pour faciliter le
transport.
Pour déplacer le produit sur une courte distance
ORUVTX¶LOHVW¿[pjVRQSLHG
ŶVerrouillez le produit avant tout mouvement comme
décrit dans le manuel.
Ŷ/H GpSODFHPHQW GX SURGXLW IL[p DX SLHG GHPDQGH
O¶LQWHUYHQWLRQ GH GHX[ RSpUDWHXUV SRUWDQW GHV JDQWV
solides. Un opérateur doit se tenir devant et l’autre
GHUULqUH OH SLHG GH OD VFLH /HV GHX[ RSpUDWHXUV
doivent maintenir le haut de chaque jambe et soulever
précautionneusement tout l’ensemble.
Pour un déplacement sur une plus longue distance ou
dans un véhicule :
ŶVerrouillez le produit avant tout mouvement comme
décrit dans le manuel.
ŶLe pied doit être retiré en desserrant les 4 boulons, un
à chaque angle. Verrouillez les écrous pour utilisation
ultérieure. Soulevez le produit à l’aide des poignées
situées sur le dessus.
Ŷ'HX[ SHUVRQQHV pTXLSpHV GH JDQWV VROLGHV VRQW
nécessaires pour soulever la base du produit en
hauteur.
ŶLors de son transport dans un véhicule, posez le produit
sur sa base et empêchez qu’il puisse bouger.
Ŷ&RXFKH]OHSLHGVXUOHF{WpRXGpPRQWH]OHHWIL[H]OH
pour empêcher tout mouvement.
PROTECTION DE L’ENVIRONNEMENT
Recyclez les matières premières au lieu
de les jeter avec les ordures ménagères.
Pour protéger l’environnement, l’outil, les
accessoires et les emballages doivent être
triés.
SYMBOLE
Alerte de sécurité
Conformité CE
Marque de conformité d’Eurasie
Marque de conformité ukrainienne
Veuillez lire attentivement les
instructions avant de mettre
l’appareil en marche.
Équipement à isolation de classe
II,
double isolation
Portez une protection auditive.
Portez toujours une protection
oculaire.
Éloignez vos mains de la lame et
de la zone de coupe.
Portez des gants de sécurité.
Sens de rotation de la lame
(indiqué sur la lame de scie)
Sens de rotation de la lame
(indiqué sur le carter de protection
de la lame)
Largeur de coupe de la lame (trait
de coupe)
Nombre de dents de cette lame
de scie

Français
17
EN
FR
DE
ES
IT
NL
PT
DA
SV
FI
NO
RU
PL
CS
HU
RO
LV
LT
ET
HR
SL
SK
BG
UK
TR
EL
Pour la coupe du bois et des
PDWpULDX[VHPEODEOHV
Ne convient pas à la coupe des
PpWDX[
LASER
2
Radiation laser.
Ne regardez pas directement le
rayon laser.
Laser de classe 2
Les produits électriques hors
d’usage ne doivent pas être jetés
avec les ordures ménagères.
Recyclez-les par l’intermédiaire
des structures disponibles.
Contactez les autorités locales
ou votre distributeur pour vous
renseigner sur les conditions de
recyclage.
SYMBOLES DE CE MANUEL
Raccorder au secteur.
Débrancher du secteur.
Verrouillage
Déverrouillage
Le mécanisme de blocage ne fonctionne
pas
Un son se fait entendre
Temps d’attente avant que la lame
atteigne sa pleine vitesse ou s’arrête
complètement.
Pièces détachées et accessoires vendus
séparément
Remarque:
AVERTISSEMENT
Les symboles suivants, et les noms qui leur sont associés,
SHUPHWWHQWG¶H[SOLTXHUOHVGLIIpUHQWVQLYHDX[GHULVTXHVOLpV
à l’utilisation de cet outil.
DANGER
Imminence d’un danger qui, si l’on n’y prend garde, peut
entraîner des blessures graves voire mortelles.
AVERTISSEMENT
Situation potentiellement dangereuse qui, si l’on n’y prend
garde, peut entraîner des blessures graves voire mortelles.
ATTENTION
Situation potentiellement dangereuse qui, si l’on n’y prend
garde, peut entraîner des blessures moyennes ou légères.
ATTENTION
(Sans symbole de sécurité) Indique une situation pouvant
provoquer des dommages matériels.

Deutsch
18
Sicherheit, Leistung und Zuverlässigkeit hatten oberste
Priorität bei der Entwicklung Ihrer Gehrungskappsäge.
BESTIMMUNGSGEMÄSSE VERWENDUNG
Die Gehrungskappsäge ist zum Sägen von massivem und
verleimtem Holz, holzähnlichen Werkstoffen mit oder ohne
Furnier und Kunststoffen ausgelegt.
Das Produkt darf nur von Erwachsenen verwendet werden,
die die Bedienungsanleitung gelesen und die Risiken und
Gefahren verstanden haben.
Das Produkt ist so konzipiert, um entweder auf einer soliden
Arbeitsplatte oder dem zugehörigen Gestell befestigt zu
werden. Wenn die Basisplatte nicht sicher befestigt ist,
kann sich die ganze Maschine beim Sägen bewegen und
die Gefahr schwerer Verletzungen vergrößern.
Das Produkt ist für Neigungs- und Gehrungsschnitte
ausgelegt. Die Schnittmaße für die verschiedenen Schnitte
sind in der Produktbeschreibung in diesem Handbuch
aufgeführt.
Das Produkt muss bei trockenen Bedingungen eingesetzt
werden, mit sehr guter Umgebungsbeleuchtung und einer
ausreichenden Belüftung.
Das Produkt ist für den Hausgebrauch und sollte nur wie
oben beschrieben, und für keine anderen Zwecke, benutzt
werden.
ALLGEMEINE SICHERHEITSHINWEISE FÜR
ELEKTROWERKZEUGE
WARNUNG
Lesen Sie alle Sicherheitshinweise und
Anweisungen. Versäumnisse bei der Einhaltung
der Sicherheitshinweise und Anweisungen können
HOHNWULVFKHQ 6FKODJ %UDQG XQGRGHU VFKZHUH
Verletzungen verursachen.
Bewahren Sie alle Sicherheitshinweise und
Anweisungen für die Zukunft auf. Der in den
Sicherheitshinweisenverwendete Begriff „Elektrowerkzeug”
bezieht sich auf netzbetriebene Elektrowerkzeuge (mit
Netzleitung) oder auf akkubetriebene Elektrowerkzeuge
(ohne Netzleitung).
ARBEITSPLATZSICHERHEIT
ŶHalten Sie Ihren Arbeitsbereich sauber und
gut beleuchtet. Unordnung oder unbeleuchtete
Arbeitsbereiche können zu Unfällen führen.
ŶArbeiten Sie mit dem Elektrowerkzeug nicht in
explosionsgefährdeter Umgebung, in der sich
brennbare Flüssigkeiten, Gase oder Stäube
befinden. Elektrowerkzeuge erzeugen Funken, die den
Staub oder die Dämpfe entzünden können.
ŶHalten Sie Kinder und andere Personen während
der Benutzung des Elektrowerkzeugs fern. Bei
Ablenkung können Sie die Kontrolle über das Gerät
verlieren.
ELEKTRISCHE SICHERHEIT
ŶDer Anschlussstecker des Elektrowerkzeugs muss
in die Steckdose passen. Der Stecker darf in keiner
Weise verändert werden. Verwenden Sie keine
Adapterstecker gemeinsam mit schutzgeerdeten
Elektrowerkzeugen. Unveränderte Stecker und
passende Steckdosen verringern das Risiko eines
elektrischen Schlages.
ŶVermeiden Sie Körperkontakt mit geerdeten
Oberflächen wie von Rohren, Heizungen, Herden
und Kühlschränken. Es besteht ein erhöhtes Risiko
durch elektrischen Schlag, wenn Ihr Körper geerdet ist.
ŶHalten Sie Elektrowerkzeuge von Regen oder
Nässe fern. Das Eindringen von Wasser in ein
Elektrowerkzeug erhöht das Risiko eines elektrischen
Schlages.
ŶZweckentfremden Sie die Anschlussleitung nicht,
um das Elektrowerkzeug zu tragen, aufzuhängen
oder um den Stecker aus der Steckdose zu
ziehen. Halten Sie die Anschlussleitung fern von
Hitze, Öl, scharfen Kanten oder sich bewegenden
Geräteteilen. Beschädigte oder verwickelte
Anschlussleitungen erhöhen das Risiko eines
elektrischen Schlages.
ŶWenn Sie mit einem Elektrowerkzeug
im Freien arbeiten, verwenden Sie nur
Verlängerungsleitungen, die auch für den
Außenbereich geeignet sind. Die Anwendung einer
für den Außenbereich geeigneten Verlängerungsleitung
verringert das Risiko eines elektrischen Schlages.
ŶWenn der Betrieb des Elektrowerkzeugs in feuchter
Umgebung nicht vermeidbar ist, ver-wenden Sie
einen Fehlerstromschutzschalter. Der Einsatz eines
Fehlerstromschutzschalters vermindert das Risiko
eines elektrischen Schlages.
SICHERHEIT VON PERSONEN
ŶSeien Sie aufmerksam, achten Sie darauf, was
Sie tun, und gehen Sie mit Vernunft an die
Arbeit mit einem Elektrowerkzeug. Benutzen
Sie kein Elektrowerkzeug, wenn Sie müde sind
oder unter dem Einfluss von Drogen, Alkohol
oder Medikamenten stehen. Ein Moment der
Unachtsamkeit beim Gebrauch des Elektrowerkzeugs
kann zu ernsthaften Verletzungen führen.
ŶTragen Sie persönliche Schutzausrüstung und
immer eine Schutzbrille. Das Tragen persönlicher
Schutzausrüstung, wie Staubmaske, rutschfeste
Sicherheitsschuhe, Schutzhelm oder Gehörschutz, je
nach Art und Einsatz des Elektrowerkzeugs, verringert
das Risiko von Verletzungen.
ŶVermeiden Sie eine unbeabsichtigte
Inbetriebnahme. Vergewissern Sie sich, dass
das Elektrowerkzeug ausgeschaltet ist, bevor Sie
es an die Stromversorgung und/oder den Akku
anschließen, es aufnehmen oder tragen. Wenn Sie
Other manuals for EMS254L-LSG
1
Table of contents
Languages:
Other Ryobi Saw manuals

Ryobi
Ryobi CSB124 User manual

Ryobi
Ryobi RJ161V User manual

Ryobi
Ryobi SC162VS User manual

Ryobi
Ryobi TS1355LA User manual

Ryobi
Ryobi RY18HT40A User manual

Ryobi
Ryobi BTS20 User manual

Ryobi
Ryobi TS1340 Quick setup guide

Ryobi
Ryobi R18XPCS10 User manual

Ryobi
Ryobi ECS1285 Operation manual

Ryobi
Ryobi CSS1000 Operation manual

Ryobi
Ryobi RA-RS6300-B User manual

Ryobi
Ryobi TS1345L User manual

Ryobi
Ryobi TS1300 User manual

Ryobi
Ryobi ESW1846 Operation manual

Ryobi
Ryobi P530 User manual

Ryobi
Ryobi RCS1935 User manual

Ryobi
Ryobi RBS-5518 User manual

Ryobi
Ryobi csb140lz User manual

Ryobi
Ryobi RTS1800 User manual

Ryobi
Ryobi TS1552DXL User manual