manuals.online logo
Brands
  1. Home
  2. •
  3. Brands
  4. •
  5. Ryobi
  6. •
  7. Trimmer
  8. •
  9. Ryobi AC14RL3 Parts list manual

Ryobi AC14RL3 Parts list manual

Other Ryobi Trimmer manuals

Ryobi RLT430CES User manual

Ryobi

Ryobi RLT430CES User manual

Ryobi PBC-3046YE User manual

Ryobi

Ryobi PBC-3046YE User manual

Ryobi P2608 User manual

Ryobi

Ryobi P2608 User manual

Ryobi RLT36 User manual

Ryobi

Ryobi RLT36 User manual

Ryobi RLT5027 User manual

Ryobi

Ryobi RLT5027 User manual

Ryobi RXBC01 User manual

Ryobi

Ryobi RXBC01 User manual

Ryobi HT920Dr User manual

Ryobi

Ryobi HT920Dr User manual

Ryobi RY4CSS User manual

Ryobi

Ryobi RY4CSS User manual

Ryobi RY40640 User manual

Ryobi

Ryobi RY40640 User manual

Ryobi RHT8065RL User manual

Ryobi

Ryobi RHT8065RL User manual

Ryobi RBC1226I Operation instructions

Ryobi

Ryobi RBC1226I Operation instructions

Ryobi RY40601 User manual

Ryobi

Ryobi RY40601 User manual

Ryobi 770rEB User manual

Ryobi

Ryobi 770rEB User manual

Ryobi CS30, SS30, BC30 User manual

Ryobi

Ryobi CS30, SS30, BC30 User manual

Ryobi RPT400 User manual

Ryobi

Ryobi RPT400 User manual

Ryobi OHT1850 User manual

Ryobi

Ryobi OHT1850 User manual

Ryobi RLT1831H25 User manual

Ryobi

Ryobi RLT1831H25 User manual

Ryobi RHT4550 User manual

Ryobi

Ryobi RHT4550 User manual

Ryobi RY18LTX38A User manual

Ryobi

Ryobi RY18LTX38A User manual

Ryobi RBC26SESB User manual

Ryobi

Ryobi RBC26SESB User manual

Ryobi Expand-It RY15704 User manual

Ryobi

Ryobi Expand-It RY15704 User manual

Ryobi P2603 User manual

Ryobi

Ryobi P2603 User manual

Ryobi RY252CS User manual

Ryobi

Ryobi RY252CS User manual

Ryobi RBCGM25SS User manual

Ryobi

Ryobi RBCGM25SS User manual

Popular Trimmer manuals by other brands

LawnMaster LML261 Safety and operating manual

LawnMaster

LawnMaster LML261 Safety and operating manual

McCulloch TrimMac ST+ instruction manual

McCulloch

McCulloch TrimMac ST+ instruction manual

Gardena EasyCut 48 PLUS operating instructions

Gardena

Gardena EasyCut 48 PLUS operating instructions

Gardena ComfortCut 450/25 user manual

Gardena

Gardena ComfortCut 450/25 user manual

Twose TF500 Operator's manual

Twose

Twose TF500 Operator's manual

Echo SRM-230 parts catalog

Echo

Echo SRM-230 parts catalog

netta PHTEG06AA-450 manual

netta

netta PHTEG06AA-450 manual

Total TGTLI20301 manual

Total

Total TGTLI20301 manual

Maestro MR680 owner's manual

Maestro

Maestro MR680 owner's manual

Andis Experience D4X specification

Andis

Andis Experience D4X specification

Flymo EASICUT 5500 Original instructions

Flymo

Flymo EASICUT 5500 Original instructions

Troy-Bilt AST TB25CS Operator's manual

Troy-Bilt

Troy-Bilt AST TB25CS Operator's manual

Homelite F-3040 user manual

Homelite

Homelite F-3040 user manual

Ozito LTR-301 instruction manual

Ozito

Ozito LTR-301 instruction manual

Flymo Contour Cordless 24 V Original instructions

Flymo

Flymo Contour Cordless 24 V Original instructions

McCulloch T22 LS Operator's manual

McCulloch

McCulloch T22 LS Operator's manual

COCKRAFT PRO HL36-S Original instructions

COCKRAFT

COCKRAFT PRO HL36-S Original instructions

Weed Eater BC2400 instruction manual

Weed Eater

Weed Eater BC2400 instruction manual

manuals.online logo
manuals.online logoBrands
  • About & Mission
  • Contact us
  • Privacy Policy
  • Terms and Conditions

Copyright 2025 Manuals.Online. All Rights Reserved.

WARNING:
To reduce the risk of injury, user must read and understand the
operator’s manual for their tool. Always wear eye protection
with side shields marked to comply with ANSI Z87.1. Failure
to do so could result in objects being thrown into your eyes,
resulting in possible serious injury.
Remove the battery pack.
Push in tabs on side of spool retainer.
Pull spool retainer up to remove.
Remove the old spool.
To install the new spool, make sure the string is captured in the slot on the new spool. Make
sure the end of the string is extended approximately 6 in. beyond the slot.
Install the new spool so that the string and slot align with the eyelet in the
string head. Thread the string into the eyelet.
Pull the string extending from the string head so the string releases from the
slot in the spool.
Reinstall the spool retainer by depressing tabs into slots and pushing down
until spool retainer clicks into place.
987000-877
9-23-09 (REV:01)
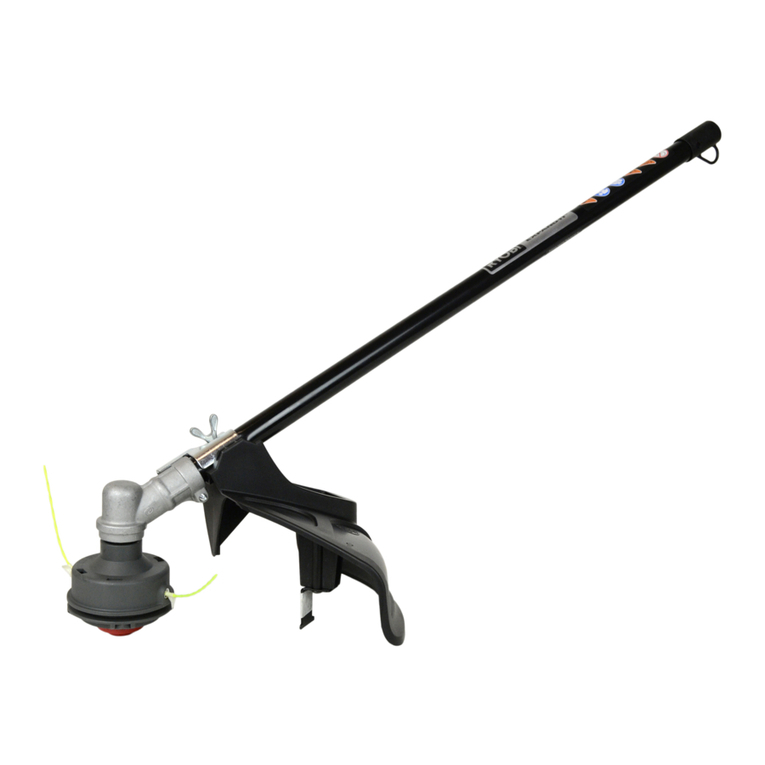
DC TRImmeR
RePLACemeNT SPOOL
AC14RL3
AVeRTISSemeNT :
Pour réduire les risques de blessures, l’utilisateur doit
lire et veiller à bien comprendre le manuel d’utilisation
de l’outil. Toujours porter protection oculaire avec écrans
latéraux certifiée conforme à la norme ANSI Z87.1. Si cette
précaution n’est pas prise, des objets peuvent être projetés
dans les yeux et causer des lésions graves.
Retirer le bloc de piles.
Enfoncer les languettes sur le côté de la retenue de bobine.
Tourner la retenue de bobine vers le haut, pour la retirer.
Retirer la tête de coupe.
Lors de l’installation d’une bobine neuve, s’assurer que les
deux fils sont engagés dans les deux fentes diamétralement
opposées de la bobine neuve. Veiller à ce que les deux fils
dépassent chaque fente d’environ 152 mm (6 po).
Installer la nouvelle bobine de sorte que le fil et les fentes
soient alignés avec l’oeillet le plus proche de la tête de coupe.
Passer les fils dans les œillet de la tête de coupe.
Tirer sur les fils qui dépassent de la tête de coupe afin de
dégager le fil des fentes de la bobine.
Réinstaller la retenue de bobine en insérant les languettes
dans les fentes et en enfonçant jusqu’à ce que la retenue de
bobine s’insère en place.
Besoin d’aide? Appeler le 1-800-860-4050
BOBINe De RemPLACemeNT De
TAILLe-BORDuReS De C.C.
AC14RL3
CARReTe DeL ReemPLAZO
De ReCORTADORA De LA C.C.
AC14RL3
ADVeRTeNCIA:
Para reducir el riesgo de lesiones, el usuario debe leer y
comprender el manual del operador correspondiente a la
herra mienta. Siempre use protección ocular con protección
lateral con la marca de cumplimiento de la norma ANSI
Z87.1. La inobservancia de esta advertencia puede permitir
que los objetos lanzados hacia los ojos puedan provocarle
lesiones graves.
Retire el paquete de baterías.
Presione hacia dentro las pestañas laterales del retén del
carrete.
Empuje el retén del carrete hacia arriba para extraerlo.
Extraiga el cabezal de hilo.
Para instalar el nuevo carrete, asegúrese de que se
capturen los dos hilo en las ranuras opuestas entre sí en
el nuevo carrete. Asegúrese de que los extremos de cada
hilo sobresalgan aproximadamente 152 mm (6 in.) de cada
ranura.
Instale el nuevo carrete de manera que el hilo y las ranuras
queden alineados con el ojillo más cercano del cabezal del
hilo. Pase los hilo por los ojales.
Tire de los hilo desde el cabezal del hilo para que el hilo se
suelte de las ranuras del carrete.
Vuelva a instalar el retén del carrete presionando las pestañas
en sus ranuras y empujándolas hacia abajo hasta que el retén
quede sujeto en su lugar.
¿Necesita ayuda? Llame al 1-800-860-4050