SAESHIN Traus ENDO User manual

www.saeshin.com
INSTRUCTION MANUAL
ENDO

INTRODUCTION
USER GUIDELINES
PRODUCT FEATURES & ADVANTAGE
PRODUCT COMPONENTS
PART NAME OF PRODUCT
BUTTONS ON THE OPERATION PANEL
LCD WINDOW
CONNECTION OF EACH PART
OPERATION PROCESS
MAINTENANCE OF THE PRODUCT
ATTENTION
PRODUCT SPECIFICATION
ELECTROMAGNETIC COMPATIBILITY INFORMATION
WARRANTY
SYMBOL
Table of contents
This product is cordless handpiece for root canal treatment. This motor has to be used only in hospital
environment, clinics or dental offices by qualified dental personnel. Read this operation Manual carefully
before use for operation instructions, care and maintenance. Keep this operation Manual for future reference.

INTRODUCTION
This product is medical device.
Make sure to read this user manual before using.
This user manual is to assure proper installation and use.
Pay attention to read this user manual in order to making the best use of this product and
to assure the prolonged lifespan before using.
Specially, pay attention the contents with marks such as , and .
<User>
• Qualified Professional
<Intended use>
• ACL(B)-41EP, ACL(B)-42EP, ACL(B)-45EP, ACL(B)-46EP are for indicated for use by dentists in standard
endodontic procedures using rotary files and rotary endodontic drills(Gates-Glidden)
• TRAUS TRP12NN is prophy head connecting DPA Burs.
<Classification of Equipment>
• Type of protection against electric shock: Class II equipment
• Degree of protection against electric shock: Type BF applied part
• Classification according to the degree of protection against ingress of water as detailed
in the current edition of IEC 60529.
- Motor handpiece: IPX0
- Charger: IPX0
• Not suitable product in the atmosphere that exist flammable anesthetic mixture with air or with oxygen.
• User sterile product (non-sterile product at shipment)
• Classification according to mode of operation: Non-continuous operation
• Applied parts: bur
<Use Time>
• Loading Time: max. 3 minutes
• Resting Time: min. 10 minutes
<Operation & Storage Condition>
1
Operation Condition
Temperature (℃) 10~30
Relative Humidity (%) 10~80
Atmospheric Pressure (hPa)
Temperature (℃)
Relative Humidity (%)
Atmospheric Pressure (hPa)
700~1,060
Transport and Storage
Condition
-20~60
10~90
500~1,060

USER GUIDELINES
CAUTION
· Please consider the safety of patient first and take care during the product operating.
· Only qualified person in dental surgery can be allowed to use the product.
· Please purchase the battery recommended by manufacturer and take care of the usage manual of
battery manufacturer before use it for the product.
· Do not use the machine with the file which is bended, damaged, deformed and/or not in ISO standard,
otherwise, it might cause injury by some possible fragments.
· Do not place or maintain the battery in the place in high temperature such as the place exposed to
direct sunlight, inside of a car in high temperature or beside of stove and fire and so on.
· Please take care of shaving, vibration, noise and heat of the product before use and test by rotating
naturally. Stop to use the product if fell abnormal condition of the product and contact to representative.
· Keep bur or file clean, otherwise dust might cause poor chucking power and it may cause vibrations during operation.
· Before changing the head or bur, turn off the power of the motor handpiece. Changing it during
power on may cause unintended rotation by accidental activation of the ON/OFF button.
· When inserting the motor handpiece into the battery charger, position the handpiece correctly.
Pushing it into the charger forcibly in the incorrect direction may cause damage.
· Take care not to put needle, pin into the charging terminal of the battery charger.
· Place the motor handpiece into the charger after clean the liquid or dust off. If the charging terminal is
in dirty, it can be rusted and cannot be charged properly.
· Users are responsible for operation, maintenance and inspection.
· Applications of machine is restricted by this manual and not-recommended applications by
a manufacturer should be avoided.
· Keep the speed of the usage tool as recommend by tool manufacturer. The excess speed limitation
might cause the accident.
· Contact dealer when display shows wrong message, it might cause an accident.
· Only recommended product and consumable parts by manufacturer have to be used with the product,
otherwise, it may cause the accident.
· Manufacturer may change specification and design of this product in order to improve the quality.
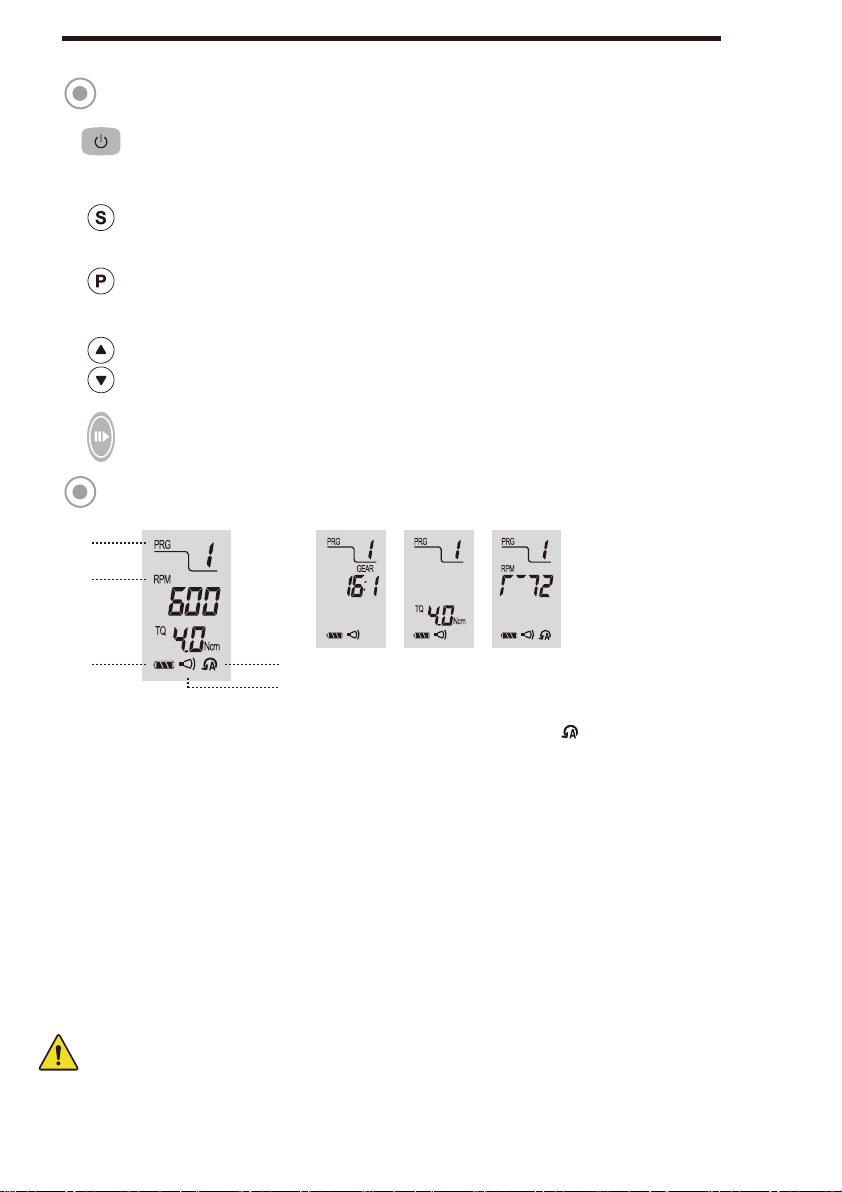
· Before use, please check if the control unit has set the gear ratio to match with the gear ratio in the contra angle.
· If motor operating speed is too fast or stop during operation, contact dealer.
· Take care not to drop or damage the motor and contra angle handpiece. Do not operate the product if
product is not operated properly after drop on the floor or water, contact the head office or dealer.
That case may cause bur vibration, excessive heat and damage to the ball bearings.
2

Warning
Prohibition
· The motor handpiece designed as Ni-MH battery(rechargeable). The Ni-Cd battery is possible to use but
the charging time and usage period can be shorten because the charging current is different.
· The motor handpiece spend even small electric power during power off. And genially, rechargeable battery is discharging
little by little when the product is not in use after charged fully. The product is recommended to be charged before use.
· This product is not in sterilization once release by manufacturer. Please certainly sterilize before using.(sterilization by user)
· Only Rechargeable battery(Ni-MH battery) is allowed to be used. Do not use manganese and alkaline battery.
If mishandled, that causes leakage or ruptures.
·Do not touch the AC power plug with wet hands. There are shock hazard.
·Do not drop any kind of liquid and water on the motor handpiece and adapter. The short circuit may cause
fire, electric shock or corrosion of the product.
·Unauthorized modification and dismantling is prohibited.
· Be sure to use designated bur by ISO 1797.
·Do not drop the motor handpiece or adapter. Install the adapter on flat ground and safe place.
·If the batteries leak, do not allow the liquid to come into contact with your skin, eyes or clothes.
·If the batteries leak from the motor handpiece or there change of the exterior or part discolor of the
motor handpiece, please stop to use and contact to dealer.
·If the product is not in use for long period, please put out the battery. There is possible leakage.
·Please change the same battery kinds together to use. Otherwise, it may cause leakage and battery rupture.
·Please use the designated battery and charger for the product.
·The system damages occurred if the product is used near of electromagnetic interference.
·Do not use the product near of the flammable product or nitrous oxide.
·The product has circuit which can protect of file damage, but the file can be damaged by strong torque or resistance.
·Please do not leave the child alone with the product and keep attention to child, elderly and disabled person
to be close to the product or not.
·Do not touch signal input, signal output or other connectors and the patient simultaneously.
·External equipment intended for connection to signal input, signal output or other connectors shall comply
with relevant IEC Standard. (e.g., IEC60950 for IT equipment and IEC60601-1 or IEC60601-1-1 series for
medical electrical equipment) If in doubt, contact qualified technician or local representative.
3

<Feature>
- Simple interface design for easy control
- Freedom of activity during operation by wireless handpiece
- Ergonomic and compact body
<Program function>
- 1~5 programs are available to set
- 5 memory programs of (gear ratio, torque, rpm, auto reverse ) are available to set.
<Setting torque limit function>
- During the treatment, if the actual load exceeds the set torque value, the motor will reverse rotate automatically.
At this time again of exceeding the existing set torque value, E1 will appear and the rotation will stop automatically.
<Auto reverse mode>
- Users can choose auto-mode according to operation condition.
- If the load reaches to torque limit value, it start reverse with “beep” sound. At this time,
tow auto reverse modes are available.
PRODUCT FEATURES & ADCANTAGES
* Torque :
- Gear Ratio : 4:1, 10:1, 16:1, 20:1, 32:1
- The free-running speed of the angle handpiece shall be in accordance with the manufacturer’s
instructions at a tolerance of ±10% as specified. (Refer to ISO 14457)
- Prophy products must be used at 4:1 gear ratio.
Gear Ratio
rpm
Gear Ratio
rpm
500 ~ 2,300 rpm 200 ~ 1,000 rpm 100 ~ 600 rpm 100 ~ 600 rpm
4:110:1 16:1 20:1
100 ~ 600 rpm
32:1
-- (MAX) -- (MAX) 1 ~ 4 N·cm 1 ~ 4 N·cm
4:110:1 16:1 20:1
1 ~ 4 N·cm
32:1
* rpm
Auto stop
: Motor handpiece move in reverse movement. After removing the load, handpiece stops.
To operate it forward movement, pass On/Off button again.
2. Auto reversing
: If the load is removed after auto reverse rotation, it returns to the normal rotation again.
* Operation within the
setting torque value
Forward
* Reverse rotation when exceeds
setting torque value
Reverse
* Stop when a load is removed
Stop
* Operation within the
Setting torque value
Forward
* Reverse rotation when exceeds
setting torque value
Reverse
* Forward rotation when a
Load is removed
Forward
No display
4

<Auto-OFF function>
- Power is off with “beep” sound after 4 minutes without operation. (During the motor operation even without use,
power is not off automatically)
•When the batteries go down (when the remaining amount of the batteries mark indicates), the actual load
may not reach the setting torque limit value. In this case (in the case of operation by batteries), this auto
reverse function will not be activated. When high torque is required, use the adaptor or use
(when the mark of the remaining amount of the batteries indicates).
•If a load is continuously applied to the motor, it may automatically step to prevent overheating. In this case,
leave the motor for a while until it cools down.
* Please check all components are included.
PRODUCT COMPONENTS
PART NAME OF PRODUCT
①
②
③
④
⑤
ComponentNo No Component
Angle Handpiece (Optional) 4Charger
Prophy Head (Optional) Power cord
Motor Handpiece
* The disposable prophy bur(DPA Bur) is a separate purchase items.
5
1
2
3
(1) Angle Handpiece
(2) Motor Handpiece
(3) Motor ON/OFF Button
(4) Charging LED
(5) LCD Operation Panel
(6) Operation Button
(7) Power button
(8) Charger
(9) Charger ON/OFF Switch
(1) Prophy Head
(2) Motor Handpiece
(3) Motor ON/OFF Button
(4) Charging LED
(5) LCD Operation Panel
(6) Operation Button
(7) Power button
(8) Charger
(9) Charger ON/OFF Switch
1
2
3
45
6
7
8
9
1
2
3
45
6
7
8
9
5

BUTTON ON THE OPERATION PANEL
LCD WINDOW
Power Button
: Push the power button until the power is on and the LCD panel lights.
Push the power button until turn off over the 1 second.
Select-S Button
- The button is to select the setting for gear ratio, torque, auto reverse
Program-P and Memory Button
: Select a program from 1 to 5 and use this button to save the memory.
UP/Down Button
: To set needed rpm, gear ratio, auto reverse by using the Up/Down button.
※ The setting range of rpm and torque are different from gear ratio.
Motor ON/OFF Button
: Push the button, then motor runs and stops.
1. Auto reverse mode display
: Shows the currently selected auto reverse mode. (no display on the screen or )
2. Battery display
: Shows 3 steps for charging amount.
3. Beep display
: Beep sound function each operating condition.
4. Program display
: Shows the program number currently selected. 1~5 are displayed and 5 can be saved.
If you turn the power off and on again, it will always return to the last program you started.
5. RPM display
: The currently set rotational speed is displayed.
6. Gear ratio selection screen
: The currently set gear ratio is displayed. Used to change gear ratio.
7. Torque selection screen
: The currently set torque value is displayed. Used to change torque value. (Unit N.cm)
8. Auto reverse mode selection screen
: The currently set auto reverse mode is displayed. Used to change auto reverse mode.
- Be careful that the LCD on the motor handpiece could be damaged by impacting or dropping.
<LCD>
1 [ Picture 1 ] [ Picture 3 ][ Picture 2 ]
3
2
4
5
6

- Check if the angle handpiece/prophy head connected properly to the motor handpiece.
CONNECTION OF EACH PART
1. Connection of charger
① Connector the power cord to the power cord connection socket on the back of the charger. (Picture 1)
② Insert the power cord and plug in.
③ Plug the motor handpiece into the charger with it facing forward. (Picture 2)
2. Connection of angle handpiece/prophy head
Angle handpiece/prophy head can be connected to motor handpiece at any position.
Align angle handpiece/prophy head positioning pins with the positioning slots of motor handpiece and
insert the head until “Click” pull it out axially for removing.
When removing, hold the motor handpiece and pull the angle handpiece/prophy head.
3. Connection and disconnection with file
① Connection : Slide the file inwards by matching the home position until the angle handpiece clicks.
② Disconnection : Press the button on the head to pull out the file.
- Turn off the power when insert or remove the file.
- Pull out the file to confirm locking it after connecting the file.
- Clean the chuck of angle handpiece at all times. The file can lose its balance or chucking power can
be weakened if there is rust inside of the chuck.
① Remove the rubber cap from the product.
② Use a cross screwdriver to loosen the screw in that portion.
③ Open the battery cover to remove the battery. Check the positive and negative poles of the product and install
new batteries properly. Reassemble the battery cover in reverse order.
Prophy head
Angle handpiece
Prophy head
Angle handpiece
(Picture 1) (Picture 2)
DPA burProphy head
① ②
4. Battery change
- Use batteries of the correct rating. (DC 1.2V, 750mAh / 2 pcs)
- When replacing the battery, make sure to check the direction of the + poles and – poles.
Rubber cap Battery coverScrew
① ② ③
7

1. Turn on the power by pressing down the Power button ( ).
2. Press the Program button ( ) to find the appropriate program for your file.
3. If no program has been set, set as below.
※ The program can be used from 1 to 5 and the user can set up to the desired value.
4. Press the Up/Down buttons ( ) to set the rotation speed you want to use..
5. Press the Select-S button ( ) to set the gear ratio, torque and auto reverse mode you want to use.
Each mode uses the Up/Down buttons ( ) to set the desired value.
6. After setting, press and hold the Program button ( ) for 1 second or longer to memorize the program with a beep.
7. Press the Motor ON/OFF button ( ) to operate.
8. When the treatment is complete, press the Motor ON/OFF button ( ) to stop the operation and
press the Power button ( ) to turn it off.
OPERATION PROCESS
■ Battery charge
1. Connector the power cord to the power cord connection socket on the back of the charger.
2. Insert the power cord and plug in.
3. Turn the power switch ON. At this time, the power lamp is turned on and a beep sounds.
4. Plug the motor handpiece into the charger with it facing forward.
The charging lamp lights up and charging starts.
5. Orange light is on during charging and green light is on when fully charged.
※ Orange light blinks in case of short circuit or battery failure. In this case, charge new battery after replacing it.
If the same symptom occurs after the battery is replaced, consult your dealer or manufacturer.
* If you do not press the program button for more than 1 second and you do not hear a beep, the program
will not be saved. In this case, the initially stored value is retained.
* When the power is turned off after driving the handpiece, the last use status is saved.
Please use it after confirming the setting value you want to use.
* The power will turn off automatically after 4 minutes without ON/OFF button operation. (Auto power off function)
However, if the motor is running regardless of whether it is used, the power will not be turned off automatically.
- Never use the charger for other purpose except the motor handpiece.
- If the battery is left in the motor handpiece for a long time and then charged, the battery may not be charged.
Charging Fully charged Battery failure/short circuit
8

■ Error and remedy
■ Problem and remedy
* When trouble is found, check the following before contacting the manufacturer. If none of these are
applicable or the trouble is not remedied even after action has been taken, please contact the manufacturer.
Error code Cause & Remedy
Cause: Torque is overloaded than the setting values during the procedure.
Remedy: Press the Motor ON/OFF button to release the error.
Contact the manufacturer if the remedies do not activated.
Problem RemedyCause
Charge the battery.
The power of
motor handpiece
is not turned on
Battery has been discharged.
It is normal that the batteries become a little bit
warm right after charging.
If the batteries are hot while normal operating
conditions, there may be an abnormality.
Contact dealer.
The temperature of
motor handpiece
is high.
The temperature of
battery is high.
The charger
does not work.
(The charge lamp
does not light.)
The plug of the charger is
not inserted into the outlet, or
there is no electricity in the outlet.
Internal fuse has burnt.
Check the connections.
Contact dealer.
The motor handpiece
does not rotate.
Head of contra angle was stuck.
Bonding of motor gear
was detached.
Clean the head or change it.
Contact dealer.
Insert the battery.Battery has not been inserted.
- The full charge time is about 2.5 hours, but it may be different depending on the battery usage, new and old batteries,
and general operating environment (temperature and humidity). Older batteries may have a shorter charging life.
- While charging, the battery part may get slightly heated, but this is not a malfunction.
- Charging completion time may vary depending on the remaining battery charge.
- Charge the handpiece during the motor resting time.
9

2. Sterilization
Sterilization product list
● Angle handpiece, Prophy head
Sterilization method
① Dry the applicable protucts completely after cleaning.
② Put the product in a sterile bag and seal tightly.
③ Put the sterile bag in the sterilizer and sterilization for 4 minutes with 132℃, and let it dry for 30 minutes.
- This product is designed to withstand 250 times of re-sterilization processes.
- This product recommends the moist heat sterilization (autoclave), other sterile methods are not
guaranteed the effectiveness.
- Make sure to use the sterilization bag and seal tightly.
- Make sure to dry the applicable products before sterilization.
- If sterilization is performed with blood or etc. remaining inside, it may break down. Be sure to clean and
lubricate the angle handpiece and prophy head before sterilization.
- Before using, dry the product completely.
- Do not sterilize the motor handpiece as it is not target to sterilization.
TemperatureSterilization Time Dry time
132℃ 4 minutes 30 minutesMoist heat sterilization
132
1. Cleaning
■Angle handpiece
① Rotate the head in a tap water about 10 seconds with maximum speed to remove the remains
(blood, physiologic saline solution, etc.) and rinse.
※ Do not put tap water in the motor handpiece.
② Disconnect the angle handpiece to the motor handpiece.
③ Remove contaminants on the angle handpiece using a nylon brush after soaking for 20 minutes
in Enzymatic Detergent.
④ Rinse the angle handpiece using the tap water for 3 minutes to remove Enzymatic Detergent.
⑤ Wash the angle handpiece for 10 minutes in the ultrasonic cleaner containing Enzymatic Detergent.
⑥ Rinse the angle handpiece for 3 minutes in the ultrasonic cleaner containing purified water repeatedly
subjected 3 times. (Change the purified water each time.)
⑦ Wipe using dust-absorbent after the product soaked in alcohol(70%) for 30 seconds.
■Prophy head
① Rinse the using the tap water after disconnect the prophy head to the angle handpiece.
② Remove contaminants on the handpiece using a nylon brush after soaking for 20 minutes
in Enzymatic Detergent.
③ Rinse the prophy head using the tap water for 3 minutes to remove Enzymatic Detergent.
④ Wash the prophy head for 10 minutes in the ultrasonic cleaner containing Enzymatic Detergent.
⑤ Rinse the prophy head for 3 minutes in the ultrasonic cleaner containing purified water repeatedly
subjected 3 times. (Change the purified water each time.)
⑥ Wipe using dust-absorbent after the prophy head soaked in alcohol(70%) for 30 seconds.
※ If foreign substances around the prophy head are not easily removed, use a brush to remove it.
■Motor handpiece & Charger
Wipe the surface of motor handpiece and charger with alcohol swab or paper towel after removing the dirt.
※ Pay attention to not enter the water into the motor handpiece and charger.
MAINTENANCE OF THE PRODUCT
- Do not use solubilizers like thinner or benzene for cleaning.
10

1. Please read the notice below before operating the product.
1) Make sure that the motor handpiece is fully charged.
2) Make sure to check any contact part to patient.
3) Check the sterile condition of any autoclavable parts.
2. Please read the notice below during the product use.
1) Constantly check the status of the product and patient during surgery.
2) When product or patient has any problem, stop the operation for the patient’s safety and take the proper action.
3) Do not let patient approach or touch the product.
3. Please read the notice below after operating the product.
1) Charge the motor handpiece by plugging it into the charger.
4. When the products are not using for a long term, please be advised to the followings.
1) Remove the battery in the motor handpiece.
2) Turn off the charger power and unplug the cord. Check the cord regularly and replace it when it is damaged.
3) Clean and sterilize.
4) Keep the products in the recommended condition.
ATTENTION
* If the continuous operation, please put the oil every an hour.
* When lubrication, please hold the angle handpiece firmly because the angle handpiece can go out by the spray pressure.
* Do not insert the oil into the motor handpiece. It may cause failure.
* When cleaning handpiece, do not use solvent systems such as benzene or thinner, but do not wash plastic
products (charger, motor handpiece) with aldehyde.
* Place the angle handpiece in a suitable place or tilt it to allow oil to escape. After the oil is completely dry,
connect to the motor handpiece.
* Be sure to remove any residual oil before fitting the lubricated angle handpiece to the motor handpiece.
* Lubrication spray is not included in the component.
* Caution: Lubrication spray present combustible hazard.
* Use FDA approved lubricant. (K052700 equivalent lubricant is available.)
3. Lubrication
Lubrication product list
● Angle handpiece, Prophy head
Lubrication method
① Insert the nozzle to motor handpiece assembly part (the end part of angle handpiece/prophy head)
and spray lubricant 2~3 seconds.
② Insert the nozzle tip to head part and spray lubricant 2~3 seconds. (Angle handpiece only)
* Nozzle tip and spray nozzle for angle handpieces are not provided by us.
* Spray nozzle for prophy head are provided by us.
Spray nozzle
Nozzle tip
Spray nozzle
11

1. Motor handpiece
2. Angle handpiece/Prophy head
3. Charger
Model name
Input
Output
Battery charging time
Battery discharging time
TRAUS MCE10XX
DC 4.5V
DC 2.4V
Approx. 2.5 hours
Approx. 9 hours (No load)
PRODUCT SPECIFICATION
Model name
Input
Output
Power consumption
TRAUS XEW10
AC100-240V, 50/60HZ, 0.1A
DC 4.5V
7.5VA
Model name
Gear ratio
Bur replacement type
Bur dimension
ACL(B)-41EP
20:1
ACL(B)-42EP
16:1
ACL(B)-46EP
10:1
ACL(B)-45EP
32:1
Button type
CA Bur (Ø 2.35)
TRAUS TRP12NN
4:1
Angle handpiece Prophy head
12

ELECTROMAGNETIC COMPATIBILITY INFORMATION
In IEC/EN 60601-1-2 4th edition. These limits are designed to provide reasonable protection against harmful
interference in a typical medical installation. This equipment generate, use and can radiate radio frequency
energy and, if not installed and used in accordance with the instructions, may cause harmful interference
to other devices in the vicinity. However, there is no guarantee that interference will not occur in a particular
installation. If this equipment does cause harmful interference to other devices, which can be determined
by turning the equipment off and on, the user is encouraged to try to correct the interference by one
or more of the following measures:
- Reorient or relocate the receiving device.
- Increase the separation between the equipment.
- Connect the equipment into an outlet on a circuit different from that to which the other device(s) are connected.
- Consult the manufacturer or filed service technician for help.
Electromagnetic Emissions
The TRAUS ENDO is intended for use in the electromagnetic environment specified below. The customer
or the user of the TRAUS ENDO should assure that is used in such an environment.
Emission test Compliance Electromagnetic environment - guide
RF emission – CISPR 11
EN 55011 Group 1
TRAUS ENDO uses RF energy for internal operation.
Therefore, its radiofrequency emissions are very low and
are not likely to cause any interference in nearby equipment.
RF emission – CISPR 11
EN 55011 Class A
Harmonic emission –
IEC 61000-3-2
EN 61000-3-2
Class A
Voltage fluctuations
Flicker emission –
IEC 61000-3-3
EN 61000-3-3
Compliance
TRAUS ENDO covers devices for usage in all establishments
other than domestic and that are not directly connected to
a low voltage power supply network, which supplies
domestic environment.
This is a class A product. In a domestic environment this
product may cause radio interference in which case the
user may be required to take adequate measures.
13

Electromagnetic Immunity
The TRAUS ENDO is intended for use in the electromagnetic environment specified below. The customer
or the user of the TRAUS ENDO should assure that is used in such an environment.
Emission test IEC 60601
test level Compliance level Electromagnetic environment – guidance
Electrostatic discharge (ESD)
IEC 61000-4-2
EN 61000-4-2
±8kV contact
±15kV air
Floors should be wood, concrete or ceramic tile.
If floors are covered with synthetic material,
the relative humidity should be at least 30%.
Electrical fast transients
IEC 61000-4-4
EN 61000-4-4
±2kV for power
supply lines ±1kV
for input/output lines
Surges
IEC 61000-4-5
EN 61000-4-5
±1kV differential
mode ±2kV
common mode
Voltage dips,
short interruptions and
voltage variations
IEC 61000-4-11
EN 61000-4-11
0 % UT for 0.5 cycle
at 8 Φ angles
0% UT for 1 cycle
70 % UT for 25/30 cycles
0 % UT for 250/300 cycle
±8kV contact
±15kV air
±2kV for power
supply lines ±1kV for
input/output lines
±1kV differential
mode ±2kV
common mode
0 % UT for 0.5 cycle
at 8 Φ angles
0% UT for 1 cycle
70 % UT for 25/30 cycles
0 % UT for 250/300 cycle
Mains power quality should be that of a typical
commercial or hospital environment.
Mains power quality should be that of a typical
commercial or hospital environment.
Mains power quality should be that of a typical
commercial or hospital environment. If the user
requires continued operation during power mains
interruptions, it is recommended that
the TRAUS ENDO got power from an uninterruptible
power supply or battery.
Power frequency (50/60Hz)
magnetic field
IEC 61000-4-8
EN 61000-4-8
NOTE: UT is the a.c. mains voltage prior to application of the test level.
30 A/m 30 A/m
Power frequency magnetic fields should be at levels
characteristic of a typical location in a typical
commercial or hospital environment.
14

Electromagnetic Immunity
The TRAUS ENDO is intended for use in the electromagnetic environment specified below. The customer or the user of
the TRAUS ENDO should assure that is used in such an environment.
Immunity test IEC 60601
test level Compliance level Electromagnetic environment – guidance
Conducted RF
IEC 61000-4-6
EN 61000-4-6
3 Vrms
150 kHz to 80 MHz
6 Vrms
In ISM bands from
150 kHz to 80 MHz
Portable and mobile RF communications equipment
should be used no closer to any part of the TRAUS ENDO
including cables, than the recommended separation
distance calculated from the equation applicable to
the frequency of the transmitter.
Radiated RF
IEC 61000-4-3
EN 61000-4-3
3 V/m
80 MHz to 2.7 GHz
Note 1: At 80 MHz and 800 MHz, the higher frequency range applies.
Note 2: These specifications may not be applicable in all situations. Electromagnetic propagation is affected by absorption and reflection from structures,
objects and persons.
(a): The electromagnetic field strength of fixed radiofrequency emitters, such as base stations for mobile telephones (cellular / cordless), mobile radio,
AM/FM radio broadcasts and TV broadcasts cannot be determined exactly by theory.
To assess the electromagnetic environment due to fixed radiofrequency emitters, an electromagnetic environment measurement must be made.
If the measured radiofrequency field strength in the immediate environment where the product is used exceeds the compliance level specified above,
the performance of the product must be tested to verify whether it conforms to the specification. If abnormal performance is observed, additional
measures may be necessary, such as reorienting or relocating the product.
(b): In the 150 kHz to 80 MHz frequency range, the electromagnetic field strengths must be less than 3V/m.
3 Vrms
150 kHz to 80 MHz
6 Vrms
In ISM bands from
150 kHz to 80 MHz
3 V/m
80 MHz to 2.7 GHz
Recommended separation distance
d = 1.2 √P
d = 1.2 √P 80MHz to 800MHz
d = 2.3 √P 800MHz to 2.7GHz
Where ‘P’ is the maximum output power rating of the transmitter in watt (W)
according to the transmitter manufacturer
‘d’ is the recommended separation distance (m).
The electromagnetic field strength of fixed radiofrequency emitters, which is
determined by an electromagnetic environment measurement (a), must be
less than the compliance level in each frequency range (b).
Interference may occur near equipment marked with the symbol below:
15

Recommended separation distances between portable and mobile RF
communications equipment and the TRAUS ENDO
The TRAUS ENDO is intended for use in an electromagnetic environment in which radiated RF disturbances are controlled.
The customer or the user of the TRAUS ENDO can help prevent electromagnetic interference by maintaining a minimum
distance between portable and mobile RF communications equipment (transmitters) and the TRAUS ENDO as recommended
below, according to the maximum output power of the communications equipment
Rated maximum output
Power of transmitter
(W)
For transmitters rated at a maximum output power not listed above, the recommended separation distance ‘d’ in meters (m) can
be estimated using the equation applicable to the frequency of the transmitter, where P is the maximum output power rating of
the transmitter in watts (W) according to the transmitter manufacturer.
Note 1: At 80 MHz and 800 MHz, the higher frequency range applies.
Note 2: These specifications may not be applicable in all situations. Electromagnetic propagation is affected by absorption and reflection
from structures, objects and persons.
150 kHz ~ 80 MHz
d = 1.2 √P
Separation distance according to frequency of transmitter (m)
800 MHz ~ 2.7 GHz
d = 2.3 √P
0.01 0.12 0.12 0.23
0.1 0.38 0.38 0.73
11.2 1.2 2.3
10 3.8 3.8 7.3
100 12 12 23
80 MHz ~ 800 MHz
d = 1.2 √P
Cables and accessories Maximum length Shield Complies with
AC power cord 1.8 M Unshielded
RF emissions, CISPR11 Class A / Group 1
Harmonic emissions IEC 61000-3-2
EN 61000-3-2
Voltage fluctuations / flicker emissions IEC 61000-3-3
EN 61000-3-3
Electrostatic discharge (ESD) IEC 61000-4-2
EN 61000-4-2
Electrical fast transient / burst IEC 61000-4-4
EN 61000-4-4
Surge IEC 61000-4-5
EN 61000-4-5
Voltage dips, short interruptions
and voltage variations on
power supply input lines
IEC 61000-4-11
EN 61000-4-11
Power frequency (50/60Hz)
magnetic field
IEC 61000-4-8
EN 61000-4-8
Conducted RF IEC 61000-4-6
EN 61000-4-6
Radiated RF IEC 61000-4-3
EN 61000-4-3
16

SAESHIN guarantees out product for 1 year from invoice date, and product warranty means that SAESHIN
has responsibility of defective material or operation failure. The product warranty does not cover user’s misuse,
wrong installation, inappropriate maintenance and repair, and normal wear of consumables such as bearings,
spindle, gear, and motor. To check the warranty requires the operating condition, environment, serial number
of the product and stamped invoice. The warranty will be performed as repairs or exchanges by manufacturer’s
judgement and analysis of product.
Exception of warranty
User’s misuse or improper use and treatment
Use the product with incorrect input voltage (AC voltage)
Drop the device during setting, moving, using
Use the not recommended consumables or accessories
Malfunction after repairing the product at the not recommended repair shop
Normal wear of the consumables such as ball bearing, gear, chuck, spindle case ass’y, motor, etc.
Faulty by Act of God
Foreign language manual support
This manual is offered in Korean and English. If other languages are needed, please contact Saeshin will offer
a final version of the manual.
WARRANTY
SYMBOL
132
SN
Power button
Select-S button
Program-P/Memory button
Manufacturer
EU Representative
Serial Number
Autoclave
Type BF
This product should not be mixed with
other commercial wastes for disposal.
Up/Down Button
Motor On/Off button
Consult instruction for use
General mandatory action sign
General warning sign
General prohibition sign
CE Marking
Class II equipment
Non sterile
1639
NON
STERILE
17

SOM-S059S-E Rev.0 2020-03-01
Tel. 053-587-2345 / Fax. 053-580-0918
Tel. 82-53-587-2341 / Fax. 82-53-580-0999
본 제품은 의료기기 입니다. / This product is medical device.
MERIDIUS MEDICAL EUROPE LIMITED
Unit 3D, North Point House North point
Business Park New Mallow Road CORK,
T23AT2P, Ireland
+353 212066448
1639
Other manuals for Traus ENDO
1
Table of contents
Other SAESHIN Dental Equipment manuals

SAESHIN
SAESHIN TRAUS SSG10 User manual

SAESHIN
SAESHIN Traus SIP10 User manual

SAESHIN
SAESHIN Implant X Cube i User manual

SAESHIN
SAESHIN TRAUS SIP20 User manual

SAESHIN
SAESHIN TRAUS ATN400 User manual

SAESHIN
SAESHIN FORTE 100 User manual

SAESHIN
SAESHIN Traus ENDO User manual

SAESHIN
SAESHIN E-CUBE PLUS User manual