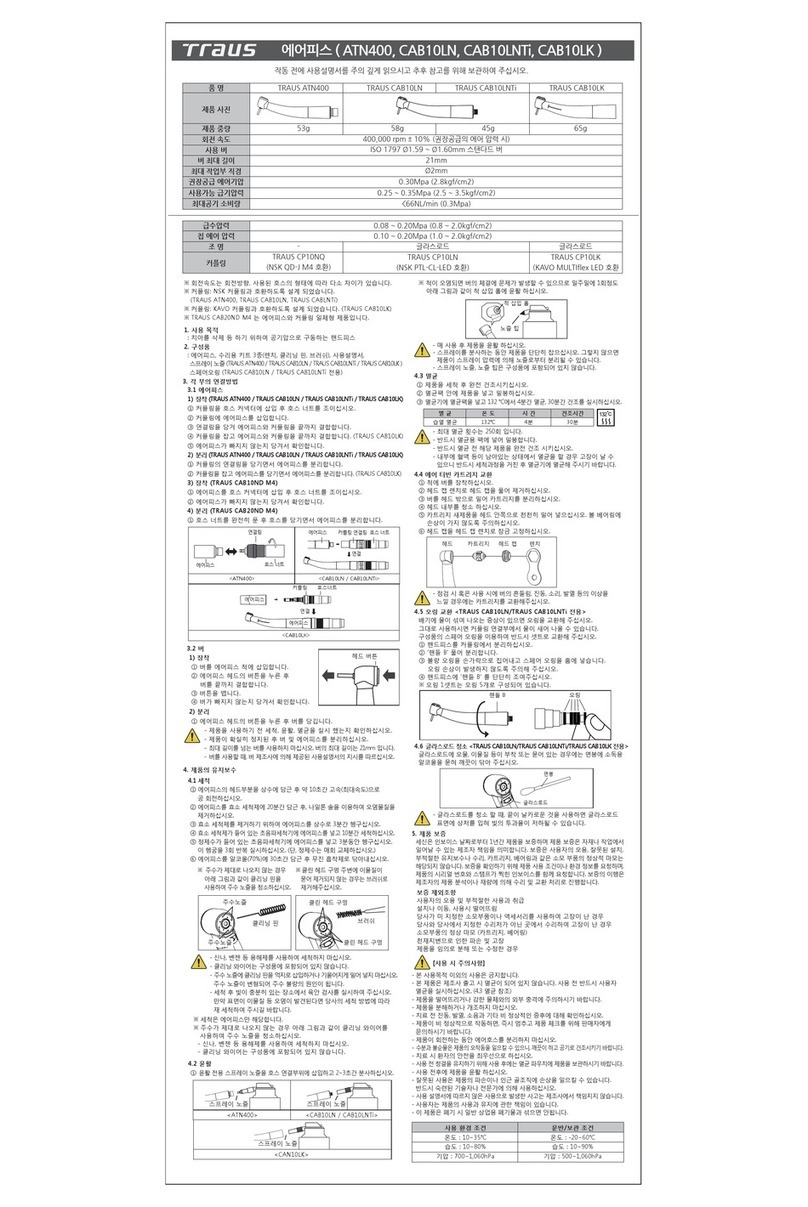
SAESHIN TRAUS SIP20 User manual

USER MANUAL
www.saeshin.com
SIP20

SIP20
INTRODUCTION
USER GUIDELINES
PRODUCT FEATURES & ADVANTAGE
PRODUCT COMPONENTS
PART NAME OF CONTROL BOX
BUTTONS ON THE OPERATION PANEL
LCD WINDOW
BUTTONS ON THE FOOT CONTROLLER
CONNECTION OF EACH PART
OPERATION PROCESS
MAINTENANCE OF THE PRODUCT
ATTENTION
PRODUCT SPECIFICATION
ELECTROMAGNETIC COMPATIBILTY INFORMATION
WARRANTY
SYMBOL
Table of contents

1
This product is medical device.
(Model name : TRAUS SIP20)
Make sure to read this user manual before using.
This user manual is to assure proper installation and use.
Pay attention to read this user manual in order to making the best use of this product
and to assure the prolonged lifespan before using.
Specially, pay attention the contents with marks such as , and .
<User>
• Qualified Professional
<Intended use>
• TRAUS SIP20 is intended for use in dental surgery, implantology, maxilla-facial surgery and
endodontics for treatment of dental hard tissue and mechanical rotating root canal preparation.
<Classification of Equipment>
• Type of protection against electric shock: ClassⅠ equipment
• Degree of protection against electric shock: Type B applied part
• Classification according to the degree of protection against ingress of water as detailed
in the current edition of IEC 60529
- Control Box: IPX0
- Foot Controller: IPX8
• Not suitable product in the atmosphere that exist flammable anesthetic mixture with air
or with oxygen.
• User sterile product (non-sterile product at shipment)
• Classification according to mode of operation: : Non-continuous operation
• Applied parts: Bur
<Use Time>
• Loading time: 2 minutes
• Resting time: 15 minutes
<Operation & Storage Condition>
INTRODUCTION
Operating Condition
Temperature (℃) 10~40
Relative Humidity (%) 10~80
Atmospheric Pressure (hPa) 700~1,060
Transport and Storage Condition
Temperature (℃) -20~60
Relative Humidity (%) 10~90
Atmospheric Pressure (hPa) 500~1,060

2
USER GUIDELINES
CAUTION
· Please pay attention when using to consider the patient’s safety most importantly.
· Check the condition of the product before use.
· Stop using and inspect the product when an abnormal sign occurs such as calescence, vibration
or noise before or during operation.
· Please contact manufacturer if problem cannot be solved.
· Prepare extra consumables before use for safety.
· Change or insert bur after the motor is completely stopped. Otherwise, inside of the angle
could be damaged by bur, and it could cause an accident.
· Please sterilize and lubricate the angle handpiece right after use. Otherwise, it could be damaged
due to coagulation of blood inside the product.
· The control box and foot controller are a not steam sterilization objects.
· The input power is available at AC 100-120V / 220-240V.
(Check input voltage before connecting the AC power.)
· Dispose the irrigation tube as a medical waste after use.
· Contact manufacturer if an incorrect display appears on the screen.
· Do not drop or bang the product.
· Do not damage the irrigation tube, as it will not work properly due when the tube is broke
or dislodges.
· Do not insert oil into the motor. It will damage bearing or cause calescence.
· The product is designed to be used indoors; do not use outdoors.
· Do not use the product in a humid or dusty environment.
· Use only regulated products and consumables by the manufacturer. Otherwise,there could
be a risk of an accident or failure.
· Replace the cords immediately when it is worn-out or damaged to prevent electric shock to the user
or patient.
· Manufacturer may change specification and design of this product in order to improve the quality.
· User has responsibility to operate and maintain this product.
· The company did not sterilize the product. Please make sure to sterilize before operation.
(User sterilization)
· US Federal law restricts this device to sales by or on the order of a dentist.
· Do not sterilize with different methods other than moist heat sterilization. It may cause damage
to the product

3
WARNING
PROHIBITIED
· Please watch old person, children, or disabled person near the place that the product is installed.
If so, do not let them alone.
· Do not drop or damage the angle handpiece. In case of malfunction, dropping or falling in water,
do not use it and contact the manufacturer.
· The equipment is automatically stopped when the machine load is higher than Torque value.
· Do not damage or drop the LCD part of the control box.
· Portable and mobile Radio Frequency communications equipment can affect the product.
Do not use Radio Frequency equipment outskirts for the product.
· The system may present a possibility of malfunction when used in the presence of an electromagnetic
interference wave. Do not install the system in the vicinity of the device which emits magnetic waves.
Turn off the power switch of the Control box when an ultrasonic oscillation device or an electrode
knife is located in the vicinity is used.
· For safety, install the control box in a place where the power cord can be easily removed.
(It is possible to disconnect the control box from the power source by removing the power cord.)
· Do not use a damaged or broken power cord, plug, or outlet. It may cause fire and/or electric shock.
· When unplugging the power cord, do not touch cord with wet hand.
· Do not damage the power cord (do not bend too hard, or put heavy objects on it). That may cause
electric shock and/or fire.
· Unauthorized modification and dismantling is prohibited.
· Do not use a solvent such as thinner or benzene for cleaning.
※ Please use an absorbent or alcohol to wipe the controller box. Do not wipe with wet cloth.
※ Be careful not to drop liquid on control box.
· Do not place the product near any heated equipment and do not put candles or cigarettes on it.
· Use only a grounded outlet. Please contact electrical technician or manufacturer regarding the
ground connection.
· Be sure to use designated bur by ISO 1797.
· Follow the user manual by manufacturer of bur to use bur.
· Keep the recommended speed limit by manufacturer of bur to use bur. If exceed the speed limit,
it might cause an accident.
· The product must be used by specialist or dentist. If not, patient might get hurt from improper use.
· If patient is taking antibiotics, patient needs to consult with doctor before operation.
· Keep product away from spray containing flammable material.
· Manufacturer does not have any responsibility for defects or loss to property in the following cases:
1. User did not follow the user manual when using the product.
2. Used the product in a place of unregulated wire condition.
3. Unauthorized person repaired the product.
4. Did not follow the user manual for this product.
· Do not use on the following patients.
1. Those with medical complications or allergies.
2. Those who have pre-existing conditions. (E.g. Cardiac, Pulmonary, Renal disturbance or
High blood pressure)
3. Those who are pregnant or lactating.
4. Patients with cardiac pacemakers and infants.

4
<BLDC motor designed by SAESHIN’s own technology and know-how>
- Provide the optimized performance by BLDC motor and standard angle handpiece.
<Program Memory Function>
- 9 programmable memories for setting Gear Ratio, RPM, Torque, Rotating Direction, Irrigation Pump, Optic.
<Automatic Overload Protection Function>
- If the actual loading gets higher than the preset torque value, the motor stops automatically, and the error
code is displayed on the screen.
- To release the overload function, release the foot controller.
<Realtime RPM View System>
- Actual RPM is displayed on the screen.
<Motor Auto-Calibration Function>
- Motor auto-calibration function is that controller check the angle handpiece status to reconcile speed and
torque that user wants with angle handpiece for accurate and safe operation.
<Beep Sound Function>
- When using reverse direction, ring the beep sound for protecting user confusion.
<Ergonomic Foot Controller>
- The ergonomically designed Foot Controller with main functions can be used during any surgery for user’s convenience.
<Setting with SETUP Mode>
- Auto Calibration, Sound Volume Control and Program Reset are available.
<Optic Function – (Optional)>
- LED: 25,000 lx
- Optic Function is only operated by the optic angle handpieces(TRAUS CRB26LX, TRAUS CRB27LX,
TRAUS CRB46LN) and optic micro motor (TRAUS MBP10SL).
PRODUCT FEATURES & ADVANTAGES
Gear Ratio
RPM
1:11:21:5 16:1 20:1 32:1
1,000 ~
40,000 rpm
2,000 ~
80,000 rpm
5,000 ~
200,000 rpm
30 ~
2,500 rpm
15 ~
2,000 rpm
10 ~
1,250 rpm
- RPM :
- Torque :
- Gear Ratio: 1:1, 1:2, 1:5, 16:1, 20:1, 32:1
- The free-running speed of the handpiece shall be in accordance with the manufacturer’s instructions
at a tolerance of ±10 % as specified. (Refer to ISO 14457)
- The function is set up when the product is released by manufacturer.
And use the function when user repair or change the product.
Basic Components TRAUS MBP10SX + Non-Optic Angle Handpiece : Except Optic Function
TRAUS MBP10SL + Optic Angle Handpiece : Optic FunctionOptional
Gear Ratio
Torque -.- -.- -.- 5 ~ 50 N·cm 5 ~ 80 N·cm
1:11:21:5 16:1 20:1
5 ~ 80 N·cm
32:1

No. No.
19
2
3
10
4
11
5
12
6
13
7
8
14
15
* Please check all components are included. (Some components may be changed by the manufacture.)
PRODUCT COMPONENTS
- Saline solution is not included in a set.
- Irrigation tube and Y-Tube are disposable, Do not use them again.
Component Component
Control BoxInternal Spray Nozzle (Optional)
Angle Handpiece
BLDC Motor (Optional)
Motor Cap (For Sterilization of motor)
Foot Controller
Tube Holder
Motor Stand
Tube Clamp
Hanger
AC Power Cord
Irrigation Tube
A-Sleeve
Spray Nozzle
Y-Tube (Optional)
①
⑧
②
⑨
③
⑩
④
⑪
⑤
⑫
⑥
⑬
⑦
⑭
⑮
5

6
Irrigation Pump
PART NAME OF CONTROL BOX
Foot Controller ConnectorFuse Box
Main Power Switch
Menu Button
OK Button
Control Button
Gear Ratio Button
Optic Button
Irrigation Button
Rotation Direction
Button
LCD Display
Hanger Hole
Motor Connector
Main Power Socket

7
BUTTONS ON THE OPERATION PANEL
Rotation Direction Select Button
: This is used for selecting the direction of rotation (Forward, Reverse). During reverse
operation, it beeps continuously.
Optic Button
: When press the speed control pedal on the foot controller after operating the optic
function, LED is turned on at the angle head part. Release the speed control pedal, turn off
the LED after 3 seconds. Turn off the optic function, LED is not operated regardless
pressing the speed control pedal. Optic function is only operated by Optic angle and Optic
motor.
Control Button
: This is used for selecting the program number, SETUP menu and adjusting the rpm, torque.
※ The setting range of rpm and torque are different from gear ratio.
OK Button
: This is used for completing the setting.
Menu Button
: This is used for selecting the desired menu.
The right menu is selected sequentially per each press the button.
> 1:1 -> 1:2 -> 1:5 -> 16:1 -> 20:1 -> 32:1
Gear Ratio Button
: This is used for selecting the gear ratio of the handpiece used during the procedure.
Irrigation Button
: This is used for selecting the irrigation volume.
It can control stage 0 to 5 (Max. 90 mℓ/min ± 20%).
Stage 0: STOP
Stage 1: 35 ml/min ± 25%
Stage 2: 50 ml/min ± 25%
Stage 3: 65 ml/min ± 20%
Stage 4: 80 ml/min ± 20%
Stage 5: 90 ml/min ± 20%
543210
Stage Volume

8
15
Torque
ON
FWD
N.CM
Set upSet up
N.cm
RPM RPM
Set
80
SETUP
1
2
3
4
5
6
7
8
911
1012
1. Gear Ratio Display
: It shows current set of gear ratio.
2. Rotation Direction Display
: It shows the selected direction.
3. Irrigation Volume Display
: It shows selected irrigation stage. The stage is 0 to 5 (Stage 0 = No volume / stage 5 = Maximum volume).
Number of Water drop shows the volume stage.
4. Optic Display
: The optic function is working when bulb symbol display on the screen.
* Optic function is only operated with optic angle handpiece.
* When press the speed control pedal on the foot controller after operating the optic function, LED is turned on.
5. Program Number Display
: It shows current set of program number. It display Program 1 to 9 and can save 9 programs. After restart
the device, it displays program number 1.
6. RPM Menu Display
: When the corresponding menu is selected, the RPM can be adjusted using the and buttons.
7. Torque Menu Display
: When the corresponding menu is selected, the torque can be adjusted using the and buttons.
8. SETUP Menu Display
: When the corresponding menu is selected, it can be move to setup menu using the button.
9. RPM Display
: It shows the initial setup RPM when it is on standby. The actual value is displayed in real-time during operation.
The number is same as set RPM level when pressing foot controller to the end.
10. Torque Display
: It shows the setup torque value. If an actual load is higher than set torque value, the set torque value is
on the screen and the motor is stopped automatically with ‘E3’ on the screen and beep sound.
11. Foot Controller Gauge Display
: The gauge indicates the degree to which the foot controller is pressed during operation.
12. Torque Gauge Display
: The gauge indicates the actual load value during operation.
- Be careful that the LCD on the control box could be damaged by impacting or dropping.
LCD WINDOW
20:1

9
1. Program Button
: Use the button to select the program. 1 stage increases per each press. 1 stage decreases when press
this button above 1 second. (Program decrease function is not operated continuously. If you want to
decrease program over the 2 stage, press the button after releasing the button.)
2. Operation Direction Button
: Use the button for selecting the operation direction. Press the button, change the rotary direction.
3. Irrigation Pump Button
: Use the button for selecting the irrigation volume. 1 stage increases per each press.
Press the button above 1 second, set the 0 stage (stop condition).
4. Speed Control Pedal
: The motor speed is controlled by pressing and releasing the foot controller.
3
2
1
4
BUTTONS ON THE FOOT CONTROLLER

10
1. Motor Connection
: Insert the motor connector. Check if the holes and pins of motor connector are lined-up.
(Place the arrow mark on top. See the picture below.)
- When connecting the motor, foot controller and power cord,
please make sure the power is off.
(Otherwise, it might cause a malfunction.)
CONNECTION OF EACH PART
2. Foot Controller Connection
: Insert the foot controller connector. Check if the holes and pins of foot controller connector are lined-up.
Then screw the connector lock.
3. Power Cord Connection
: Insert the power cord into the main power inlet of the control box.
③① ②④
⑤
connector lock.
15
Torque
ON
FWD
20:1
N.CM
SetupSetup
N.cm
RPM
RPM
Set
80
SETUP
( O ) ( X )

11
- When it is not in use for long term, open the pump cover.
Irrigation tube might change its shape and cause a malfunction.
4. Irrigation Tube Connection
Open the pump roller cover.
Close the pump roller cover.
(You must close the cover and use
it as your fingers may get stuck.)
Make sure the pump roller cover is correctly close.
Insert the irrigation tube correctly.
Locate the Irrigation tube correctly when insert
the irrigation tube. Otherwise,
Irrigation cannot be smoothly.
Make sure the irrigation tube is located correctly
when close the pump roller cover.
Saline connection
handpiece connection
AB
B-1 C
D
C-1

12
5. Hanger Setting
: Put the hanger into the hanger hole.
6. Irrigation Tube Insertion
: Insert the irrigation tube needle into the bottle and place with the bottle downward.
Lock the irrigation stopper and put it between the irrigation tube needle and bottle.
7. Irrigation Nozzle Connection
: The internal and external irrigation are available by the Y-tube. Connect the accessories
as in the picture according to the bur using and the surgery type.
- If the pump is in operation mode but water does not come out of the handpiece,
the tube may be broken or damaged.
- If the user did not remove the internal spray nozzle and pressed the button or open the lever
when replacing the nozzle may get damaged.
Irrigation tube needle
lrrigation Stopper
Breather needle
8. Tube holder connection
: Put the motor cord and irrigation tube together with the tube holders. Insert the tube holder
to the motor cord and then insert the irrigation tube in order to create a better working condition.
lrrigation tube
Motor cord
Tube holder
Tube clamp
Y-tube
Internal spray nozzle
External spray nozzle

13
9. Angle Handpiece Connection
1) Connect : Insert the groove (non-optic) or key (optic) of the angle handpiece into the pin (non-optic)
or groove (optic) position of the motor handpiece
2) Disconnect : Hold the motor handpiece and pull the angle handpiece.
1) Connecting the bur
① Insert the bur to the angle handpiece.
② Insert certainly the bur while pushing the head button on angle handpiece.
③ Release the button
④Pull out the bur to check it
2) Disconnecting the bur
①Pull out the bur while pushing the head button on angle handpiece.
10. Dental bur Connection
Handpiece Motor
connection
Handpiece & Motor connection Handpiece & Motor disconnection
Handpiece Motor
disconnection
Connecting the bur Disconnecting the bur
Head Button Head Button

14
OPERATION PROCESS
1. Press the Gear Ratio Button ( ) to select the gear ratio to use.
2. Press the Rotation Direction Button ( ) on the control box or Rotation Direction Button ( )
on the foot controller to select the rotation direction. Rotation direction is forward and reverse.
During the reverse operation, it beeps continuously.
(beeps let the user know the operation direction.)
3. Press the Irrigation Button ( ) on the control box or Irrigation Button ( ) on the foot
controller to select the irrigation volume. Irrigation volume per each stage refers to the below.
4. Press the Menu Button ( ) to go to the RPM Menu. Set the desired RPM value using and
button.
Keep pressing speed button to change rapidly. The setting range of rpm is different from gear ratio.
5. Press the Menu Button ( ) to go to the Torque Menu. Set the desired torque value using
and button.
The setting range of torque is different from gear ratio.
■ Program Setting
1. Press the Menu Button ( ) to go to program number menu.
2. Press the Control Button ( , ) to select the desired program number.
3. After setting the desired value by referring to the operation method, keep pressing OK Button ( )
for 3 seconds.
4. The ‘SAVING’ is displayed on LCD, program is memorized with beep sound.
Gear Ratio 1:11:2 1:5 16:120:132:1
RPM 1,000 ~
40,000 rpm
2,000 ~
80,000 rpm
5,000 ~
200,000 rpm
30 ~
2,500 rpm
15 ~
2,000 rpm
10 ~
1,250 rpm
Gear Ratio 1:11:2 1:5 16:120:132:1
Torque -.- 5~50 N·cm 5~80 N·cm 5~80 N·cm
- Before operating product, please check the connection of irrigation tube on the angle
handpiece. If irrigation tube isn’t connected and delivered to bur, there is risk of tissue necrosis
or bone damage. Because of the frictional heat between bur and operation site.
(Installation method of Irrigation tube: Refer to the connection of each part.)
6. Press the Optic Button ( ) to use optic function.
7. Use it by pressing the speed control pedal on the foot controller.
8. After the operation is finished, remove the foot from the speed control pedal, stop the product,
and turn off the product
Irrigation Stop 35 mℓ/min ± 25% 50 mℓ/min ± 25% 65 mℓ/min ± 20% 80 mℓ/min ± 20% 90 mℓ/min ± 20%
-.- -.-

15
Number of icon bar indicates loudness level of sound.
4 stages, set the sound volume by pressing or button.
Press the OK Button ( ) to complete the setting after setting the level of volume.
By using , button, determine the initialization.
Choose “NO” with button, the initialization will cancel.
Choose “YES” with button, the initialization will start.
Screen will off for 5-10 sec. And show reset screen with beep sound and message “RESET Completed”.
Then save and return to main.
1. AUTO CALIBRATION
Other Function (SETUP)
Press the Menu Button ( ) to go to SETUP Menu and press the OK Button. ( )
Press the Control Button ( , ) to the desired item.
Press the OK Button ( ) in SETUP to save and return to main.
After connecting the angle to the motor, hold the motor by hand tightly. Step the foot controller fully in order
to start the calibration.
Calibration will be completed with beep sound and display “Calibration Completed”.
- The calibration function sets up for all products from the first delivery or purchasing
by the manufacturer. It is recommended to calibrate the motor before using when the motor is
replaced or repaired.
- Beep sound shuts off in mute mode.
2. Sound Volume Control
3. Program Reset

16
■ Error and Remedy
: In case of stopping handpiece by not working & using error, each error code may be shown below.
■ Fuse replacement
Cause & RemedyError code
Cause : The foot controller connection is not proper or the foot controller is defective.
Remedy : Make sure that the foot controller is properly connected.
Contact the manufacturer if the remedies do not activated.
Cause : The motor connection is not proper or the motor is defective.
Remedy : Make sure that motor properly connected.
Contact the manufacturer if the remedies do not activated.
Cause : Torque is overloaded than the setting values during the surgery.
Remedy : Press the speed control pedal to release the error.
Contact the manufacturer if the remedies do not activated.
Motor Check!
Warning
E2
Torque Limit!
Warning
E3
Foot Check!
Warning
E1
- Check the fuse if the control box doesn’t work.
- If necessary contact the manufacturer.
Fuse Box

17
1. Cleaning
■ Angle Handpeice
① Rotate the head in a tap water about 10 seconds with maximum speed to remove the remains
(blood, physiologic saline solution, etc.) and rinse.
※Do not put tap water in the motor.
②Disconnect the angle handpiece to the motor.
③Remove contaminants on the angle handpiece using a nylon brush after soaking for 20 minutes
in Enzymatic Detergent.
④Rinse the angle handpiece using the tap water for 3 minutes to remove Enzymatic Detergent.
⑤ Wash the angle handpiece for 10 minutes in the ultrasonic cleaner containing Enzymatic Detergent.
⑥Rinse the angle handpiece for 3 minutes in the ultrasonic cleaner containing purified water repeatedly
subjected 3 times. (Change the purified water each time.)
⑦ Wipe using dust-absorbent after the product soaked in alcohol(70%) for 30 seconds.
⑧ Please visually inspect the angle handpiece in a bright place after cleaning. If the angle handpiece is
still soiled after cleaning, the cleaning process must be repeated .
■ Control Box, Foot Controller , Motor
Wipe the surface of motor with alcohol swab or paper towel after removing the dirt.
※ Pay attention to not enter the water into the motor.
- Proteolytic enzyme detergents are recommended as Enzymatic Detergent.
- It is recommended to use ethanol for alcohol (70%).
- If the device is determined not to be visually clean at the end of the cleaning step, the user
should either repeat the relevant previous cleaning steps or safely dispose of the device,
so that a visibly soiled device is not used again.
MAINTENANCE OF THE PRODUCT
2. Sterilization
■ Sterilization Product List
①Angle handpiece
②Motor (Assembling with motor cap)
■ Sterilization Method
① Dry the applicable products completely.
②Put the applicable products in a sterile bag and seal tightly.
※ Make sure to assemble the motor cap for autoclave on the motor.
※ Do not disassemble the motor and motor cord when sterilizing.
③ Put the sterile bag in the sterilizer and sterilization for 4 minutes with 132℃, and let it dry for 30 minutes.
* Maximum sterilization number is 250 times.
* Moist steam sterilization only. Otherwise the products might be damaged.
* Make sure to use the sterilization bag and seal tightly.
* Make sure to dry the applicable products before sterilization.
* Motor could be damaged in sterilization because of the moisture inflow or else,
so should be careful to handle it.
* Sterilizing the angle handpiece with blood or other remains may cause the breakage
of the angle handpiece
Therefore, it is necessary to clean the angle handpiece before sterilization
* Irrigation tube and Y-tube are disposable. Do not re-use
* Keep dry a connector and socket of the control box.
* Before using, dry the product completely.
Sterilization Temperature Time Dry
Moist heat sterilization 132℃4minutes 30 minutes

18
1. Please read the notice below before operating the product.
① Check the connection of all cords and correct operation when powering-on.
②Check if the ground connection is safe.
③Make sure to check any contact part to patient.
④Check the voltage.
⑤Check the sterile condition of autoclavable parts. If the packaging of the sterilized product is damaged,
discard the product.
- Irrigation Tube
- Y-Tube
- A-sleeve
2. Please read the notice below during the product use.
①Constantly check the status of the product and patient during surgery.
②When product or patient has any problem, stop the operation for the patient’s safety and
take the proper action.
③Do not let patient approach or touch the product.
3. Please read the notice below after operating the product.
①Do not put any physical pressure on the all cords.
4. When the products are not using for a long term, please be advised to the followings.
①Turn off the power and unplug the cord. Check the cord regularly and replace it when
it is damaged.
②Clean and sterilize.
③Keep the products in the recommended condition.
ATTENTION
3. Lubrication
Lubrication Product List
Angle handpiece
Lubrication method
Insert the nozzle to motor assembly part(the end part of angle) and spray lubricant 2~3 seconds.
- Do not insert the oil into the motor. It damages the bearing or causes fever.
- If the continuous operation, please put the oil every an hour.
- When lubrication, please hold the angle handpiece firmly because the angle handpiece can go out
by the spray pressure.
- Caution: Lubrication spray present combustible hazard.
- Use FDA approved lubricant. (K052700 equivalent lubricant is available.)
Spray Nozzle Spray
Spray Nozzle Spray
Optic type
Non-optic type
Table of contents
Other SAESHIN Dental Equipment manuals

SAESHIN
SAESHIN Traus ENDO User manual

SAESHIN
SAESHIN TRAUS ATN400 User manual

SAESHIN
SAESHIN Traus SIP10 User manual

SAESHIN
SAESHIN Implant X Cube i User manual

SAESHIN
SAESHIN TRAUS SSG10 User manual

SAESHIN
SAESHIN FORTE 100 User manual

SAESHIN
SAESHIN Traus ENDO User manual

SAESHIN
SAESHIN E-CUBE PLUS User manual