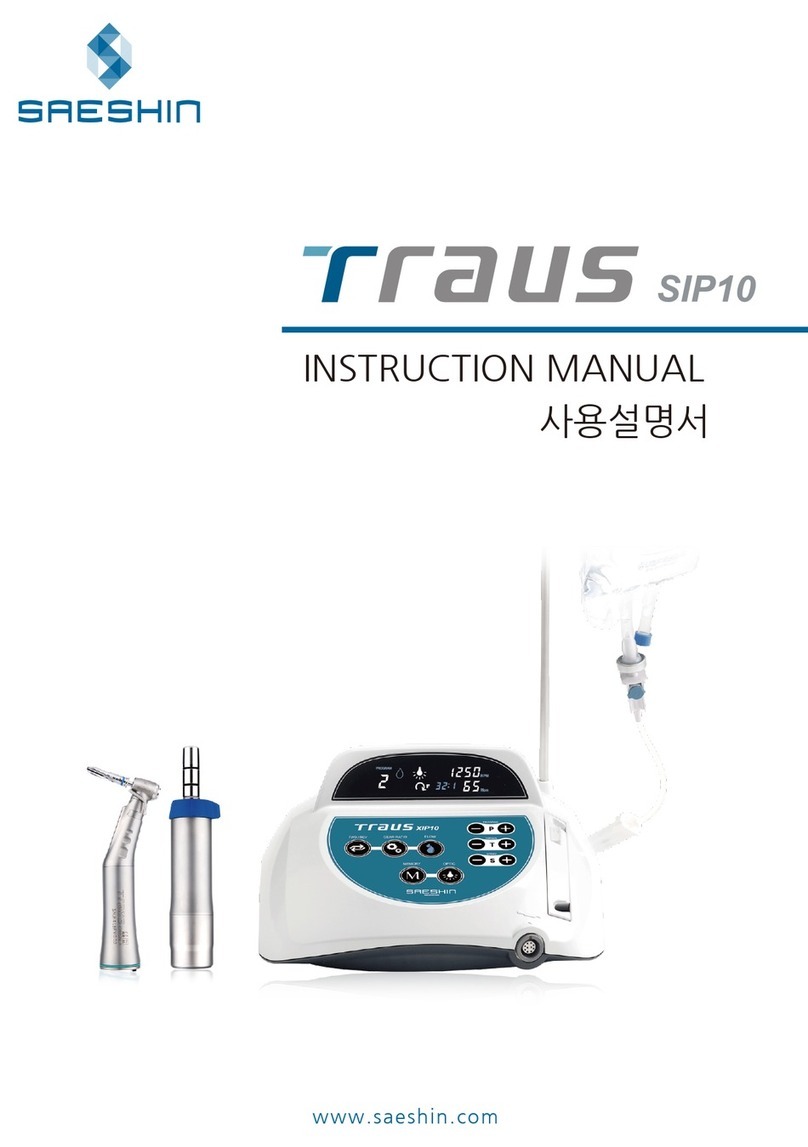
SAESHIN TRAUS SSG10 User manual

www.saeshin.com
USER MANUAL
SSG10

SSG10
목차
- 소개
- 주의 사항
- 제품의 특징 & 장점
- 제품 구성품
- 본체 유닛 각 부분 명칭
- 조작 패널상의 버튼
- 액정 표시부
- 풋 컨트롤러의 버튼
- 각 부의 연결 방법
- 작동 방법
- 제품의 유지보수
- 사용상 주의
- 제품 사양
- 제품 보증
- 심볼 마크

SSG10
Table of Contents
- INTRODUCTION
- USER GUIDELINES
- PRODUCT FEATURES & ADVANTAGES
- PRODUCT COMPONENTS
- PART NAME OF CONTROL BOX
- BUTTONS ON OPERATION PANEL
- LCD WINDOW
- BUTTONS ON THE FOOT CONTROLLER
- CONNECTION OF EACH PART
- OPERATION PROCESS
- MAINTENANCE OF THE PRODUCT
- ATTENTION
- PRODUCT SPECIFICATION
- ELECTROMAGNETIC COMPATIBILITY INFORMATION
- WARRANTY
- SYMBOL

본 제품은 의료기기입니다.
작업을 시작하기 전에 반드시 읽어주십시오.
이 사용자 매뉴얼은 제품의 올바른 설치와 사용을 보장하기 위한 것입니다.
이 제품을 최대한 활용하고 장기 수명을 보장하기 위해서는 제품을 설치하거나 사용하기 전에 주의 깊게 읽어주시기 바랍니다.
특히 , , 심볼이 표시 된 내용은 특별한 관심을 요청 드립니다.
<사용자>
• 자격을 갖춘 전문의
<사용 목적>
• 전기콘솔 등의 형태의 전동식 기구로, 핸드피스, 어태치먼트(절삭용 등) 등을 연결하여 절골, 절제, 천자, 천공 등을 하는데 사용하는
<기기의 분류>
• 전기 쇼크에 대한 보호 유형: I급 기기
• 전기 쇼크에 대한 보호 정도: BF형 장착부
• IEC 60529의 물 유입에 대한 보호 정도에 따른 분류:
- 본체 유닛: IPX0
- 풋 컨트롤러: IPX8
• 산소 노출 환경 또는 공기 중 마취제와 같은 가연성 물질이 있는 환경에 적합하지 않은 제품
• 사용자 멸균 제품 (공장 출하 시 비멸균 제품임)
• 작동모드에 의한 분류: 간헐적인 부하가 있는 연속 작동
• 장착부: DRILL 버, SAW 블레이드, SHAVER 블레이드
<제품 사용 시간>
• 작동시간: 3분
• 휴지시간: 10분
<사용 및 보관 조건>
소개
1
사용 환경 조건
수송/보관 조건
온도 (℃)
습도 (%)
기압 (hPa)
온도 (℃)
습도 (%)
기압 (hPa)
10~30
10~80
700~1,060
-20~60
10~90
500~1,060

This product is medical device.
Make sure to read this user manual before using.
This user manual is to assure proper installation and use.
Pay attention to read this user manual in order to making the best use of this product and to assure the prolonged lifespan before using
Specially, pay attention the contents with marks such as , and .
<User>
• Qualified Professional
<Intended use>
• Surgical bone cutting, shaving, polishing, grinding, drilling.
<Classification of equipment>
• Type of protection against electric shock: ClassⅠ equipment
• Degree of protection against electric shock: Type BF applied part
• Classification according to the degree of protection against ingress of water as detailed in the current edition of IEC 60529
- Control Box: IPX0
- Foot Controller: IPX8
• Not suitable product in the atmosphere that exist flammable anesthetic mixture with air or with oxygen.
• User sterile product (non-sterile product at shipment)
• Classification according to mode of operation: Intermittent operation
• Applied parts: DRILL bur, SAW blade, SHAVER blade
<Use time>
• Loading time: 3 minutes
• Resting time: 10 minutes
INTRODUCTION
2
Operating condition
Transport and storage condition
Temperature (℃)
Relative humidity (%)
Atmospheric pressure (hPa)
Temperature (℃)
Relative humidity (%)
Atmospheric pressure (hPa)
10~30
10~80
700~1,060
-20~60
10~90
500~1,060
<Operation & Storage condition>

● 환자의 안전을 제일로 하여, 사용시 충분한 주의를 기울여 주시기 바랍니다.
● 사용 전에 기기의 작동상태를 점검하고, 이상 유무를 확인 후 사용해 주시기 바랍니다.
● 사용 전, 또는 사용 도중 진동 및 발열, 소음 등의 이상 징후를 발견하면 즉시 사용을 멈추고 점검해 주십시오.
● 이상의 원인을 파악할 수 없거나, 간단히 해결을 하지 못할 경우 즉시 본사로 연락 주십시오.
● 소모성 부품은 반드시 여분을 준비해 두고 사용해 주시기 바랍니다. 특히 앵글 핸드피스의 헤드 내부로 혈액 및 생리 식염수가 유입되어
작동이 안 될 수도 있으니, 안전을 위해 반드시 여분을 준비해 두고 사용해 주시기 바랍니다.
● 모터의 회전이 완전히 정지된 후 버 또는 블레이드를 교환 및 장착 해 주십시오. 그렇지 않을 경우 버 또는 블레이드에 의해 앵글 내부가 손상을
입게 되고, 사고의 원인이 됩니다.
● 앵글 핸드피스는 사용 후 즉시 소독과 윤활을 한 다음 보관해 주십시오. 그렇지 않을 경우 혈액 등이 앵글의 내부에서 응고되어 고장 및 감염의
원인이 될 수 있습니다.
● 본체 유닛 및 풋 컨트롤러는 증기멸균 대상이 아닙니다.
● 전원 전압은 AC 100-120V / 220-240V 가 있습니다.
(파워 코드를 연결하기 전에 입력 전압이 실제 전압과 맞는지 확인하십시오.)
● 주수 튜브는 사용 후 의료폐기물로 처리해 주십시오.
● 잘못된 디스플레이가 표시될 경우 본사로 문의하여 주십시오. 사고의 위험이 있습니다.
● 높은 곳에서 떨어뜨리거나 강한 충격을 주지 마십시오. 고장의 원인이 됩니다.
● 주수 튜브를 구부리거나 접게 되면 튜브의 파손 및 빠짐으로 인해 정상적인 주수가 되지 않을 수 있습니다.
● 모터 내부로 오일을 절대 주입하지 마십시오. 베어링 고장 및 발열의 원인이 됩니다.
● 본 제품은 실내에서만 사용되도록 설계되었습니다. 실외에서는 사용하지 마십시오.
● 습기나 먼지가 많은 곳에서는 가급적 사용을 피해주십시오.
● 제조사에 의해 인증된 제품과 소모성 부품을 사용하십시오. 그렇지 않을 경우, 고장 또는 사고로 이어질 수 있습니다.
● 모터 코드가 손상 되었거나 많이 닳았을 경우 사용자 및 환자에게 감전의 위험이 있으므로 즉시 교체하십시오.
● 제품의 디자인과 사양은 품질 향상을 위해 변경될 수 있습니다.
● 사용자는 제품의 유지와 보수에 관한 책임이 있습니다.
● 본 제품은 제조사 출고 시 멸균 소독이 되어 있지 않습니다. 사용 전 반드시 멸균을 실시하십시오. (사용자 멸균)
주의
주의사항
3

CAUTION
● Pay attention to use considering a patient’s safety first.
● Check the working condition to see if there is any problem before operation.
● Stop working and verify the product if there is any signs of vibration, calescence or strange noise before or during operation.
● Contact the manufacturer if the problem is abnormal or difficult to solve.
● Prepare extra consumables before using for safety. In case blood or saline solution flows into the head of the angle, which may cause malfunctioning.
● Change Bur, Blade after the motor stops completely. Otherwise, Inside of angle could be damaged by the Bur, Blade, and it will cause an accident.
● Please sterilize and lubricate products immediately after use following the manual. Otherwise, the product can be damaged due to coagulation of blood
or remains from operation.
● The control box and foot controller are not steam sterilization objects.
● The input power is available at AC 100-120 V / 220-240 V.
(Check input voltage before connecting the AC power.)
● Dispose the irrigation tube after use as medical waste.
● Contact to manufacturer if it shows the fault display on the LCD. It may cause an accident.
● Do not drop from high or give a shock on the product. It can damage the product.
● Do not give any damage to irrigation tube, it will not work normally due to the tube is broken or taken off.
● Do not insert oil into the motor. It will damage bearing or cause calescence.
● This product is designed to be used indoors. Do not use outdoors.
● Do not place or use the product in humid or dusty places.
● Use products and consumables approved by manufacturer. Otherwise there might be a risk of malfunction or accident.
● Replace the motor cord immediately when it is worn out or damaged to prevent electric shock for user or patient.
● Product specification and design can be changed for improvement of the product.
● User is responsible for operation and maintenance of the product.
● The company did not sterilize the product. Please be sure to sterilize before operation. (User sterilization)
● US Federal law restricts this device to sale by or on the order of a dentist.
USER GUIDELINES
4

● 이 제품이 설치된 장소에 노약자나 장애자, 어린이가 가까이 있는지 주의 깊게 관찰하고, 어린이를 혼자 두지 마십시오.
● 핸드피스를 떨어뜨리거나 손상시키지 않도록 조심하십시오. 제대로 작동이 안되거나, 떨어뜨렸거나, 물에 빠뜨린 경우 절대 작동하지 말고,
본사로 문의하여 주십시오. (버의 떨림 현상과 과도한 열 발생, 베어링이 파손 될 수 있습니다.)
● 구동 중 설정 토크 값보다 부하량이 크면, 장비는 자동으로 운전을 멈춥니다.
● 본체 패널부의 LCD 부분은 충격 또는 낙하에 의해 파손되어 고장이 날 수 있으니 주의하시기 바랍니다.
● 제품은 EMC에 대한 특별한 주의가 필요합니다. EMC 대한 정보를 제공합니다. (Electromagnetic Compatibility 참조.)
● 휴대용 및 모바일 무선 주파수 통신 장비는 제품에 영향을 줄 수 있습니다. 제품을 위해 무선 주파수 장비를 가까이에서 사용하지 마십시오.
● 전자기파 간섭의 존재 하에 제품을 사용하면 시스템 오작동이 일어날 수 있습니다. 전자기파를 방출하는 장치 부근에서 제품을 사용하지 마십시오.
초음파 진동장치 또는 전극 나이프가 근방에 있는 경우 본체 유닛을 꺼주십시오.
● 안전을 위해, 전원을 쉽게 제거할 수 있는 위치에 본체 유닛을 설치하십시오. (전원코드를 제거하여 본체 유닛의 전원 공급을 차단할 수 있습니다.)
경고
● 전원코드, 플러그, 콘센트가 망가지거나 손상된 경우 사용하지 말고 본사에 문의하십시오. 감전, 쇼크, 화재의 위험이 있습니다.
● 전원코드를 뽑을 때는 반드시 플러그를 잡아서 뽑고 젖은 손으로는 플러그를 잡지 마십시오. 전원플러그가 헐거운 상태에서도 사용하지 마십시오.
감전, 화재의 위험이 있습니다.
● 전원코드를 무리하게 구부리거나 물건으로 눌러 망가뜨리지 않도록 하십시오. 감전, 쇼크, 화재의 위험이 있습니다.
● 본 제품을 분해, 개조, 변경을 하지 마십시오. 고장의 원인이 됩니다.
● 신나, 벤젠 등 용해제를 사용하여 세정하지 마십시오.
※ 본체 유닛은 알코올 솜이나 무진흡착제로 닦으십시오. 물걸레로 닦지 마십시오.
※ 본체 유닛에 액체가 떨어지지 않도록 주의하시오.
● 열기구 가까운 곳에 설치하거나 주위에 촛불, 담뱃불 등을 올려 놓지 마십시오. 화재의 위험이 있습니다.
● 반드시 접지가 있는 콘센트를 사용해 주십시오. 접지 관련 정보는 제조사나 전기 기술자에게 문의해 주십시오.
● 반드시 ISO 1797-1에 부합하는 버를 사용하십시오.
● 버 또는 블레이드를 사용할 때, 각 제조사에 의해 제공된 사용설명서의 지시를 따르십시오.
● 사용하는 버 또는 블레이드는 각 제조사에서 권장하는 속도를 유지 하십시오. 허용 속도를 초과할 시 사고의 위험이 있습니다.
● 본 기기는 부적절한 사용으로 인해 구강조직에 화상을 일으킬 수 있으므로, 전문의와 같은 숙련된 인력에 의해 사용되어야 합니다.
● 항생제를 복용하는 환자는 의사와 상의 후 사용하십시오.
● 인화성 물질이 포함된 스프레이는 불이 있는 곳에서 멀리 떨어져서 사용하십시오.
● 아래의 경우 제조사는 어떠한 장애 및 재산의 손실에 대해서도 책임을 지지 않습니다.
1. 치료 이외의 다른 용도로 사용한 경우나 설명서에 기재된 지시사항과 부합하지 않는 용도로 사용한 경우
2. 규격화 되지 않은 배선상태의 장소에서 사용한 경우
3. 지정되지 않은 자에 의한 기기의 조립 및 개조를 한 경우
4. 사용설명서의 기술사양서에서 지시한 보관조건 외에서 보관한 경우
● 아래의 환자에게는 사용하지 마십시오.
1. 의료 합병증 또는 알레르기가 있는 사람
2. 심장, 폐 질환, 신장 장애 또는 고혈압을 가진 사람
3. 임신 또는 수유중인 사람
4. 심장 박동기를 달고 있는 환자, 영유아 환자
금지
5

WARNING
● Please watch old person, children, or disabled person near the place that the product is installed. If so, do not let them alone.
● Do not drop or damage the handpiece. In case of malfunction, dropping, or dropping in water, do not use it and contact the manufacturer.
(It may cause vibration of bur, overheating, or damage of the bearings.)
● The equipment is automatically stopped when the machine load is higher than Torque value.
● Do not damage or drop the LCD part of the control box.
● TRAUS SSG10 needs special precautions regarding EMC and needs to be installed and put into service according to the EMC information.
(Refer to Electromagnetic Compatibility)
● Portable and mobile Radio Frequency communications equipment can affect TRAUS SSG10. Do not use Radio Frequency equipment outskirts for the product.
● The system may present a possibility of malfunction when used in the presence of an electromagnetic interference wave. Do not install the system
in the vicinity of the device which emits magnetic waves. Turn off the power switch of the Control box when an ultrasonic oscillation device or an
electrode knife is located in the vicinity is used.
● For safety, install the control box in a place where the AC power cord can be easily removed. (It is possible to disconnect the control box from the power
source by removing the AC power cord.)
PROHIBITION
● Do not use with damaged or faulty power cord, plug and outlet. Contact to manufacturer. It may cause the danger of fire, electric shock.
● When unplugging the power cord, hold the plug and do not touch with wet hand.
● Do not use with loose power plug. It may cause the danger of fire, electric shock..
● Unauthorized modification and dismantling is prohibited.
● Do not use the solvent such as thinner or benzene for cleaning.
※ Please use an absorbent or alcohol to wipe the controller box. Do not wipe with wet cloth.
※ Be careful not to drop liquid on control box.
● Do not place near heat equipment and candles or cigarette causing fire.
● Make sure to put a plug in an outlet with earth. Contact to electrician or manufacturer regarding ground.
● Be sure to use designated bur by ISO 1797-1.
● Follow the provided instruction manual by Bur, Blade manufacturer, when using Bur, Blade.
● Keep the speed limit recommended by Bur, Blade manufacturer. Operating beyond the recommended speed limit may cause an accident.
● This product should be used by specialist and expert because it could cause burn to patient at using improperly.
● If patient is taking antibiotics, patient needs to consult with doctor before operation.
● Keep away from fire or heat when using spray containing flammable material.
● Saeshin is not responsible for any defects and loss of property in the following cases
1. The product has been used in ways other than those specified in the instruction manual.
2. The manufacturer’s installation recommendations have not been followed such as electromagnetic environment
3. Repairs or other work have been done on the product by persons not authorized by manufacturer
4. The product has been stored in places other than those specified in the instruction manual.
● Do not use on the following patients.
1. Those with medical complications or allergies
2. Those who have pre-existing conditions (E.g. Cardiac, Pulmonary, Renal disturbance or High blood pressure)
3. Those who are pregnant or lactating
4. Patients with cardiac pacemakers and infants
6
<세신의 기술력으로 개발된 BLDC 모터 채택>
- BLDC 모터에 표준 앵글을 장착하여 시술 시 최적화된 성능을 제공합니다.
* 기어비율: 1:1, 1:3, 1:5, 10:1, 20:1, 32:1
* LED: 25,000 lx
- 앵글 핸드피스의 회전수는 제조사에서 지정한 회전수 ±10%의 오차가 있을 수 있습니다. (ISO 14457 참고)
<DRILL 모드>
* 최대 회전수
<SAW 모드>
* 최대 회전수: 12,500 cycle/min
* 토크: 10 N·cm
* 기어비율: 3:1
<SHAVER 모드>
* 최대 회전수: 6,000 rpm (정회전, 역회전 시)
* 주파수 (정/역 반복회전 시):
<프로그램 기능 탑재>
- 시술 전 기어비율, 회전수, 토크, 회전방향, 주수량, 옵틱 등을 단계별로 최대 9개까지 프로그래밍이 가능합니다.
<토크 과부하 방지 기능>
- 시술 중에 실제 부하량이 설정한 토크 값보다 높아지면 자동으로 회전을 멈추고 경고문구를 화면에 표시합니다.
- 풋 컨트롤러의 속도 조절 페달을 한번 눌러 주면 해제됩니다.
<실시간 RPM값 표시 시스템>
- 시술 중에 실제 RPM수치가 화면에 디스플레이 되므로 사용자는 더욱 더 정교한 시술을 할 수 있습니다.
<모터 Auto-calibration 기능>
- 사용자가 원하는 속도 및 토크를 앵글 핸드피스에 일치하도록 하여 정확하고 안전한 시술이 가능하도록 하는 모터자동 조정기능입니다.
- 본 기능은 제조사 제품 출고 당시 설정 완료하여 출고됩니다. 모터를 수리 받거나 교체 했을 때 사용하십시오.
<역회전 시 비프음 발생> (DRILL, SHAVER 모드)
- 역회전을 사용할 시 연속적으로 비프음이 울림으로써 소리를 통해 회전 방향의 혼동을 방지합니다.
<인체공학적 디자인의 풋 컨트롤러>
- 시술 중 본체 유닛의 주요 기능을 발로 쉽게 조정이 가능하도록 인체공학적으로 디자인하여 시술자의 편의를 도모합니다.
<SETUP을 통한 환경설정 기능>
- 음향 조절, Auto Calibration, 시간 설정, 프로그램 초기화 기능을 사용할 수 있습니다.
제품의 특징 & 장점
기어비율
회전속도
1:1
40,000 rpm
1:3
120,000 rpm
1:5
200,000 rpm
10:1
4,000 rpm
20:1
2,000 rpm
32:1
1,250 rpm
* 토크
기어비율
토크
1:1
1~6 N·cm
1:3
1~2 N·cm
1:5
1 N·cm
10:1
5~30 N·cm
20:1
5~80 N·cm
32:1
5~80 N·cm
회전속도
주파수
300~1,000 rpm
0.5 Hz
1,100~1,800 rpm
1.0 Hz
1,900~2,600 rpm
1.5 Hz
2,700~3,400 rpm
2.0 Hz
3,500~4,200 rpm
2.5 Hz
4,300~5,000 rpm
3.0 Hz
7

<BLDC motor designed by SAESHIN’s own technology and know>
- Provide the optimized performance by BLDC motor (0~40,000rpm) and Angle handpiece of several kinds.
<DRILL mode>
* Maximum speed
<SAW mode>
* Maximum speed: 12,500 cycle/min
* Torque: 10 N·cm
* Gear ratio: 3:1
<SHAVER mode>
* Maximum speed: 6,000 rpm (Forward, Reverse motion)
* Frequency (F/R repetition motion):
<Program memory function>
- 9 programmable memories for setting Gear ratio, Speed, Torque, Rotating direction, Irrigation pump and Optic.
<Automatic overload protection function>
- If the load on the bur is higher than set torque, the motor will stop automatically and an Error message will be displayed.
- To release the overload function, press the foot controller once.
<Realtime RPM view system>
- Actual RPM value is displayed on the screen. It makes user can do more delicate operation.
<Motor Auto-calibration function>
- Motor auto-calibration function is that controller check the angle handpiece status to reconcile speed and torque that user wants with
angle handpiece for accurate and safe operation.
- The function is set up when the product is released by manufacturer. And use the function when user repair or change the product.
PRODUCT FEATURES & ADVANTAGES
Gear ratio
Torque
1:1
1~6 N·cm
1:3
1~2 N·cm
1:5
1 N·cm
10:1
5~30 N·cm
20:1
5~80 N·cm
32:1
5~80 N·cm
- The free-running speed of the handpieces shall be in accordance with the manufacturer’s instructions at a tolerance of
±10 % as specified. (Refer to ISO 14457)
Gear ratio
RPM
1:1
40,000 rpm
1:3
120,000 rpm
1:5
200,000 rpm
10:1
4,000 rpm
20:1
2,000 rpm
32:1
1,250 rpm
* Torque
* Gear ratio: 1:1, 1:3, 1:5, 10:1, 20:1, 32:1
* LED: 25,000 lx
RPM
Frequency
300~1,000 rpm
0.5 Hz
1,100~1,800 rpm
1.0 Hz
1,900~2,600 rpm
1.5 Hz
2,700~3,400 rpm
2.0 Hz
3,500~4,200 rpm
2.5 Hz
4,300~5,000 rpm
3.0 Hz
<Beep sound function> (DRILL, SHAVER mode)
- When using reverse direction, ring the beep sound for protecting user confusion.
<Ergonomic foot controller>
- The foot controller is designed ergonomically to control all the functions. And the foot controller provides high convenience.
<Setting with SETUP mode>
- Volume control, Time set, Program reset, Auto Calibration is available.
8

제품 구성품을 확인하여 주십시오.
제품 구성품
1 2 3 4 5
67 8 9 10
11 12 13 14
17 18
21 22 23 24
19
15
16
20
No. 구성품 No. 구성품
1 본체 유닛
DRILL 핸드피스 (1:1 스트레이트 형) (선택사항)
DRILL 핸드피스 (1:1 콘트라 형) (선택사항)
DRILL 핸드피스 (10:1 콘트라 형) (선택사항)
SAW 핸드피스 (Reciprocating 형) (선택사항)
SAW 핸드피스 (Sagittal 형) (선택사항)
SAW 핸드피스 (Oscillating 형) (선택사항)
SHAVER 핸드피스 (선택사항)
BLDC 모터 (선택사항)
풋 컨트롤러
AC 전원코드
렌치
- 식염수, 석션 펌프 세트, DRILL버, SAW 블레이드, SHAVER 블레이드는 구성품에 포함되어 있지 않습니다.
- 주수튜브와 Y자 튜브는 일회용입니다. 사용 후 반드시 폐기하십시오.
9
12
수분유입 방지볼트
모터스탠드
DRILL 외부 주수 노즐 (선택사항)
SAW 외부 주수 노즐 (선택사항)
주수 튜브
튜브 홀더
튜브 클램프
수액 걸이
사용설명서
스프레이노즐
A-슬리브
Y자 튜브(선택사항)
2
13
3
14
4
15
5
16
6
17
7
18
8
19
9
10
11
23
24

Check if all components are included.
PRODUCT COMPONENTS
10
1 2 3 4 5
67 8 9 10
11 12 13 14
17 18
21 22
19
15
16
20
Control box
DRILL handpiece (1:1 straight type) (Option)
DRILL handpiece (1:1 contra type) (Option)
DRILL handpiece (10:1 contra type) (Option)
SAW handpiece (Reciprocating type) (Option)
SAW handpiece (Sagittal type) (Option)
SAW handpiece (Oscillating type) (Option)
SHAVER handpiece (Option)
BLDC motor (Option)
Foot controller
Power cord
Wrench
- Saline solution, Suction pump set, DRILL bur, SAW blade, SHAVER blade are not included in a set.
- Irrigation tube and Y-Tube are disposable, Do not use them again.
Motor cap for autoclave
Motor stand
DRILL external nozzle (Option)
SAW external nozzle (Option)
Irrigation tube
Tube holder
Tube clamp
Hanger
User manual
Spray nozzle
A-SLEEVE
Y-Tube (Option)
23 24
No. 구성품 No. 구성품
1
12
2
13
3
14
4
15
5
16
6
17
7
18
8
19
9
10
11
23
24

본체 유닛 각 부분 명칭
전원코드
접속소켓
풋 컨트롤러
커넥터 퓨즈 박스
전원스위치
모드 선택 버튼 프로그램 선택 버튼
프로그램 저장 /
SETUP 버튼
토크&주파수
설정 버튼 /
SETUP 설정
버튼
회전 속도
설정 버튼 /
SETUP 항목
선택 버튼
모터1
선택 버튼
모터2
선택 버튼
기어비율 선택 버튼
옵틱 버튼
회전 방향 선택 버튼
주수량 선택 버튼
11
수액걸이 삽입구
LCD 화면
주수 펌프
모터 커넥터
조작부

PART NAME OF CONTROL BOX
Hanger hole
LCD display
Main
Power
Inlet
Foot
Controller
Connector
Fuse Box
Main Power Switch
Irrigation
pump
Motor connector
Operation panel
Mode button Program button
Memory button / Setup button
Torque button / Setup - Setting buttonSpeed button / Setup - Item shifting button
Motor 1
button
Motor 2
button
Gear ratio button
Optic button
Operation direction button
Irrigation button
12

조작 패널상의 버튼
모드 선택버튼
: 모드(DRILL, SAW, SHAVER)를 선택할 때 사용합니다.
프로그램 선택버튼
: 설정값이 입력된 프로그램 번호를 선택할 때 사용합니다.
버튼을 한번 누를 때마다 프로그램이 순서대로 1단계씩 증가합니다.
프로그램 9단계(P9)에서 한번 더 누르면 다시 프로그램 1단계(P1)로 돌아갑니다.
기어비율 선택버튼 (DRILL 모드)
: 시술 시 사용할 앵글 핸드피스의 기어비율을 선택할 때 사용합니다.
회전방향 선택버튼 (DRILL, SHAVER 모드)
: 정회전, 역회전, 정/역 반복회전(SHAVER 모드) 선택 시 사용합니다. 역회전 구동 시 연속적으로 비프음이 울립니다.
옵틱 버튼 (DRILL 모드 – 모터 2)
: 옵틱 기능을 켠 후 스피드 조절 페달을 밟으면, 앵글 헤드부분의 LED가 켜집니다. 발을 떼면 약 3초 후 LED가 꺼집니다.
옵틱기능을 끄면 발판 동작과 관계없이 LED는 작동하지 않습니다. 이 기능은 옵틱 앵글과 옵틱 모터에 한하여 사용할 수 있습니다.
- 옵틱 기능은 M2 DRILL 모드에만 적용됩니다.
주수단계
주수량 선택버튼
: 주수량 선택 시 사용하며 5단계에서 최대(90 mℓ/min ± 20%)의 주수가 가능합니다.
0~5단계까지 주수량 조절이 가능합니다.
모터1 선택버튼
: 모터1을 선택할 때 사용합니다.
0
1
2
3
4
5
0단계: 주수정지
1단계: 약 35 ml/min ± 25%
2단계: 약 50 ml/min ± 25%
3단계: 약 65 ml/min ± 20%
4단계: 약 80 ml/min ± 20%
5단계: 약 90 ml/min ± 20%
모터2 선택버튼
: 모터2를 선택할 때 사용합니다.
회전속도 설정버튼 / SETUP 항목 선택버튼
- 회전속도 설정: 회전속도를 설정할 시에 사용합니다.
▶을 누르면 상승, ◀을 누르면 하강합니다.
키를 길게 누르면 숫자가 빨리 변합니다.
※ 모드, 기어 비율의 선택에 따라 회전속도의 설정가능범위가 다르게 나타납니다.
- SETUP 항목 선택: SETUP창에서 항목 선택 시 사용합니다.
토크 설정버튼 / SETUP 설정버튼
- 토크설정: DRILL 핸드피스의 토크를 설정할 때 사용합니다.
* DRILL 모드: ▲을 누르면 상승, ▼을 누르면 하강합니다.
※ 기어 비율에 따라 토크의 설정가능범위가 다르게 나타납니다.
- SETUP 설정: SETUP의 음향 조절, 시간 설정, 초기화 여부 설정 시 사용합니다.
프로그램 저장 / SETUP 버튼
- 프로그램 저장: 모드 별로 프로그램의 각 설정값을 입력한 후 버튼을 3초 이상 누르면
‘SAVING’ 창이 뜨면서 비프음과 함께 설정값이 해당 프로그램에 저장됩니다.
- SETUP 버튼: 음향 조절, Auto Calibration, 시간설정, 프로그램 초기화 기능을 사용할 수 있습니다.
- SETUP 완료: SETUP에서 각 기능을 설정한 후 버튼을 누르면 SETUP이 완료됩니다.
주수량
13

BUTTONS ON OPERATION PANEL
Mode button
: This is used for selecting the mode (DRILL, SAW, SHAVER).
Program button
: This is used for selecting the memorized program number.
By pressing the button, the program changes by 1 stage.
The program returns to number 1 (P1) after number 9 (P9).
Gear ratio button (DRILL mode)
: This is used for selecting the gear ratio of the handpiece used during the procedure.
Operation direction button (DRILL, SHAVER mode)
: This is used for selecting the direction of rotation (Forward, Reverse, F/R repetition motion).
During reverse operation, it beeps continuously.
Optic button (DRILL mode – Motor 2)
When press the speed control pedal on the foot controller after operating the optic function,
LED is turned on at the angle head part. Release the speed control pedal, turn off the LED after 3
seconds. Turn off the optic function, LED is not operated regardless pressing the speed control pedal.
Optic function is only operated by Optic angle and Optic motor.
Stage
Irrigation button
: This is used for selecting the irrigation volume.
It can control stage 0 to 5 (Max. 90 mℓ/min ± 20%).
Motor1 button
: This is used for selecting the motor 1.
0
1
2
3
4
5
Stage 0: STOP
Stage 1: 35 ml/min ± 25%
Stage 2: 50 ml/min ± 25%
Stage 3: 65 ml/min ± 20%
Stage 4: 80 ml/min ± 20%
Stage 5: 90 ml/min ± 20%
Motor2 button
: This is used for selecting the motor 2.
Speed button / Setup - Item shifting button
- Speed setting: This is used for setting the speed.
▶ button for increasing speed, ◀ button for decreasing speed
Keep pressing speed button to change rapidly.
※ The setting range of speed is different from mode and gear ratio.
- Setup mode - Item shifting: This is used for selecting the setup item.
Torque button / Setup - Setting button
- Torque setting: This is used for setting the torque of DRILL handpiece.
* DRILL mode: ▲button for increasing torque, ▼ button for decreasing torque
※ The setting range of torque is different from gear ratio.
- Setup mode - setting: This is used for setting the sound level, time and reset.
Memory button / Setup button
- Program memory: Keep pressing this button for 3 seconds after completed setting program,
program is memorized with beep sound.
- Setup mode: Volume control, Time set, Program reset, Auto Calibration is available.
- Setup complete: Press this button in order to memorize the program in SETUP mode.
Volume
14
- Optic function is applied to ‘M2 DRILL mode’ only.

액정 표시부
1. 주수량 표시부
:현재 선택된 주수량을 보여줍니다. 0~5단계까지 있으며 0단계가 주수량이 없음을 나타내고 5단계가 최대 주수량을 나타냅니다.
물방울의 개수로 0~5단계가 표시됩니다.
2. 프로그램 번호 표시부
: 현재 선택되어 있는 프로그램 번호를 보여줍니다. P1~P9까지 표시되며 9개가 저장 가능합니다. 전원을 끈 후 다시 켜면 항상
1번 프로그램으로 돌아갑니다.
3. 기어비율 표시부 (DRILL, SAW 모드)
: 현재 선택되어 있는 기어비율을 보여줍니다.
4. 회전방향 표시부 (DRILL, SHAVER 모드)
: 현재 선택되어 있는 회전방향을 보여줍니다.
5. 회전속도 표시부
: 대기상태일 경우에는 사용자가 초기 설정한 속도가 표시됩니다. 작동 중일 경우 실제 값이 실시간으로 표시됩니다.
풋 컨트롤러를 끝까지 밟았을 경우 설정한 속도 값과 같아집니다.
6. 옵틱 표시부 (옵틱버전)
: 전구표시가 활성화되는 경우 옵틱기능이 작동중임을 나타냅니다.
* 옵틱 앵글 핸드피스에 한해서 옵틱기능 가능
* 옵틱 기능을 켠 후 풋 컨트롤러의 스피드 조절 페달을 작동시키면 LED가 켜집니다.
7. 토크 / 주파수 표시부 (DRILL, SHAVER 모드)
- 토크 표시부 (DRILL 모드): 대기상태일 경우에는 사용자가 설정한 토크값이 표시됩니다. 실제부하가 설정한 값보다 크면
설정한 토크값이 표시된 후 자동으로 모터가 정지되면서 ‘E3’가 표시되며 비프음이 울립니다.
- 주파수 표시부 (SHAVER 모드 - 정/역 반복 회전 시): 회전속도에 따른 주파수 값이 표시됩니다.
8. 풋 컨트롤러 게이지 표시부
: 작동 중 풋 컨트롤러의 눌림 정도를 게이지로 나타냅니다.
9. 토크 게이지 표시부 (DRILL 모드)
: 작동 중 실제 토크 값을 게이지로 나타냅니다.
10. 모드 표시부
: 현재 선택되어 있는 모드를 나타냅니다.
- 옵틱 기능은 M2 DRILL 모드에만 적용됩니다
15
1
2
3
6
11
10
11
12
5 7
4
8 9
11. 모터 표시부
: 현재 선택되어 있는 모터(모터1 / 모터2)를 나타냅니다.
12. 시간 표시부
: 현재 시간을 나타냅니다.
- 본체 패널부의 LCD 부분은 충격 또는 낙하에 의해 파손되어
고장이 날 수 있으니 주의하시기 바랍니다.

LCD WINDOW
1. Irrigation volume display
: It shows selected irrigation level. The level is 0 to 5 (Level 0 = No volume / Level 5 = Maximum volume).
Number of water drop shows the volume level.
2. Program number display
: It shows current set of program number. It display P1 to P9 and can save 9 programs. After restart the device,
it displays program number 1.
3. Gear ratio display (DRILL, SAW mode)
: It shows current set of gear ratio.
4. Operation direction display (DRILL, SHAVER mode)
: It shows the selected rotary direction.
5. RPM display
: It shows the initial setup RPM when it is on standby. The actual value is displayed in real-time during operation.
The number is same as set RPM level when press foot controller to the end.
6. Optic display (Optic version)
: The optic function is working when bulb symbol display on the screen.
* Optic function is only operated with optic angle handpiece.
* When press the speed control pedal on the foot controller after operating the optic function, LED is turned on.
7. Torque / Frequency display (DRILL, SHAVER mode)
- Torque display (DRILL mode): It shows the setup torque value. If an actual load is higher than set torque value,
the set torque value is on the screen and the motor is stopped automatically with ‘E3’ on the screen and beep sound.
- Frequency display (SHAVER mode – F/R repetition motion): It shows the frequency value according to the speed.
8. Foot controller gauge display
: The gauge indicates the degree to which the foot controller is pressed during operation.
9. Torque gauge display (DRILL mode)
: The gauge indicates the actual load value during operation.
10. Mode display
: It shows current selected mode.
11. Motor display
: It shows current selected motor (MOTOR 1 / MOTOR 2).
12. Time display
: It shows current time.
- Be careful that the LCD on the control box could be damaged by impacting or dropping.
16
- Optic function is applied to ‘M2 DRILL mode’ only.
1
2
3
6
11
10
11
12
5 7
4
8 9

풋 컨트롤러의 버튼
각 부의 연결 방법
1. 프로그램 선택버튼
: 프로그램을 선택할 시에 사용합니다. 한 번 누를 때마다 1단계씩 상승하며, 1초 이상 길게 누르면 1단계 낮아집니다.
(아래 프로그램을 선택하는 기능은 연속으로 동작하지 않습니다. 2회 이상 프로그램을 낮추려면 버튼을 뗀 후 다시 누르십시오.)
2. 회전방향 선택버튼
: 한번 누를 때마다 회전방향이 변경되며, 1초 이상 길게 누르면 모터1 /모터2의 전환이 가능합니다.
3. 주수량 선택버튼
: 주수량 선택 시에 사용합니다. 한 번 누를 때마다 1단계씩 상승하며, 1초 이상 길게 누르면 0단계(주수정지)로 설정됩니다.
4. 속도 조절 페달
: 풋 컨트롤러를 밟고 떼는 동작을 통해 모터의 속도를 조정하는 것이 가능합니다.
- 반드시 전원을 끈 상태에서 모터와 풋 컨트롤러를 연결해 주십시오.
(전원이 켜진 상태에서 연결할 경우 제품에 결함이 나타날 수 있습니다.)
3
2
1
4
2 3
5
1
4
17
Table of contents
Other SAESHIN Dental Equipment manuals

SAESHIN
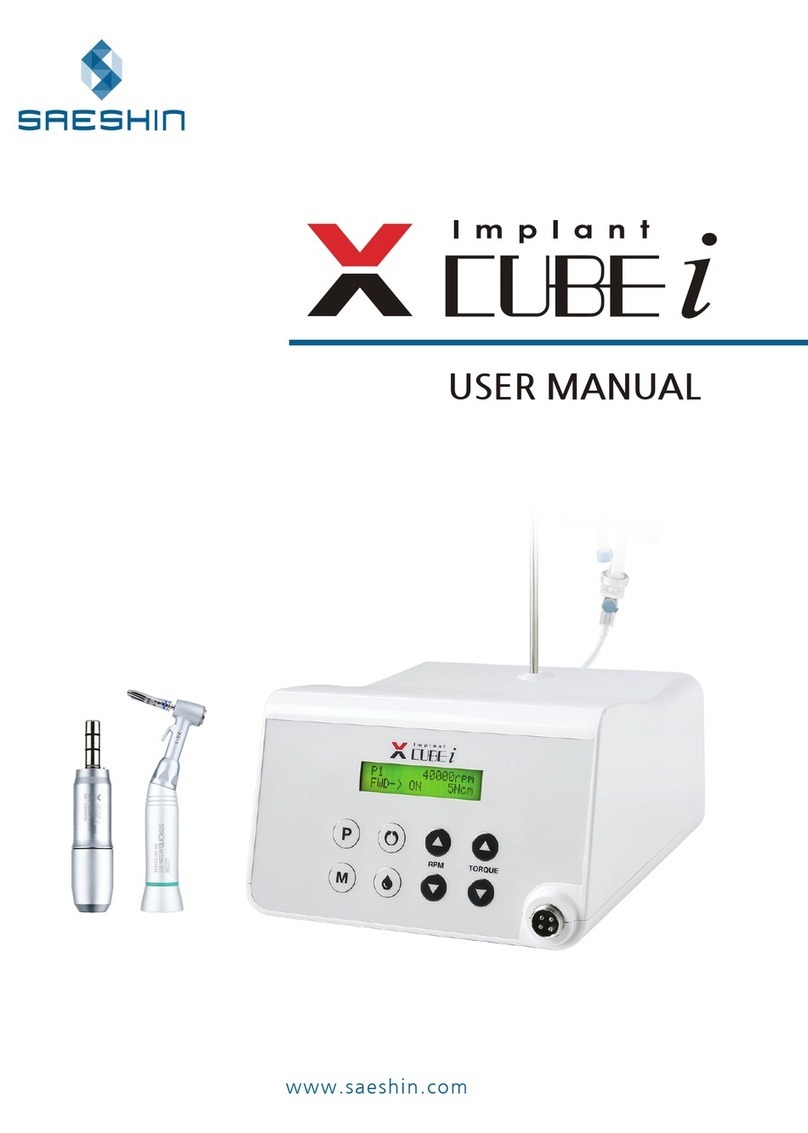
SAESHIN Implant X Cube i User manual

SAESHIN
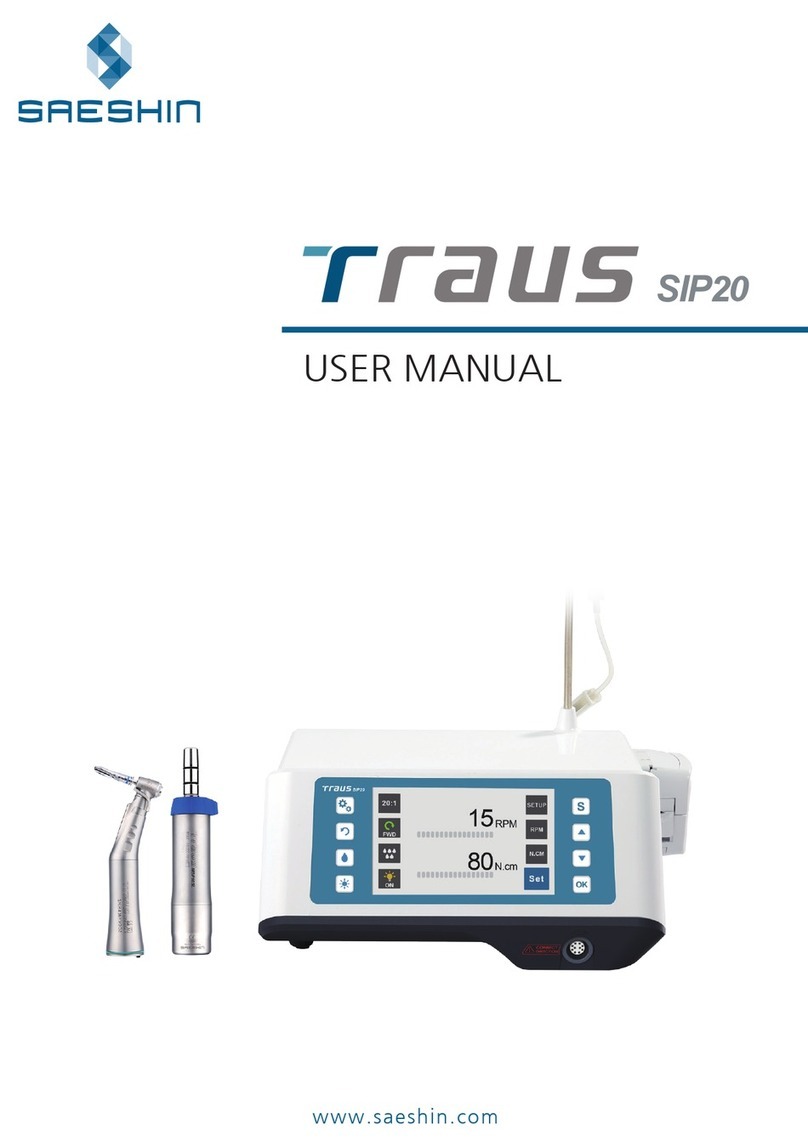
SAESHIN TRAUS SIP20 User manual

SAESHIN
SAESHIN Traus ENDO User manual

SAESHIN
SAESHIN TRAUS ATN400 User manual

SAESHIN
SAESHIN Traus ENDO User manual

SAESHIN
SAESHIN E-CUBE PLUS User manual

SAESHIN
SAESHIN FORTE 100 User manual

SAESHIN
SAESHIN Traus SIP10 User manual