manuals.online logo
Brands
  1. Home
  2. •
  3. Brands
  4. •
  5. Safavieh Furniture
  6. •
  7. Outdoor Furnishing
  8. •
  9. Safavieh Furniture SEA8014 User manual

Safavieh Furniture SEA8014 User manual

Other Safavieh Furniture Outdoor Furnishing manuals

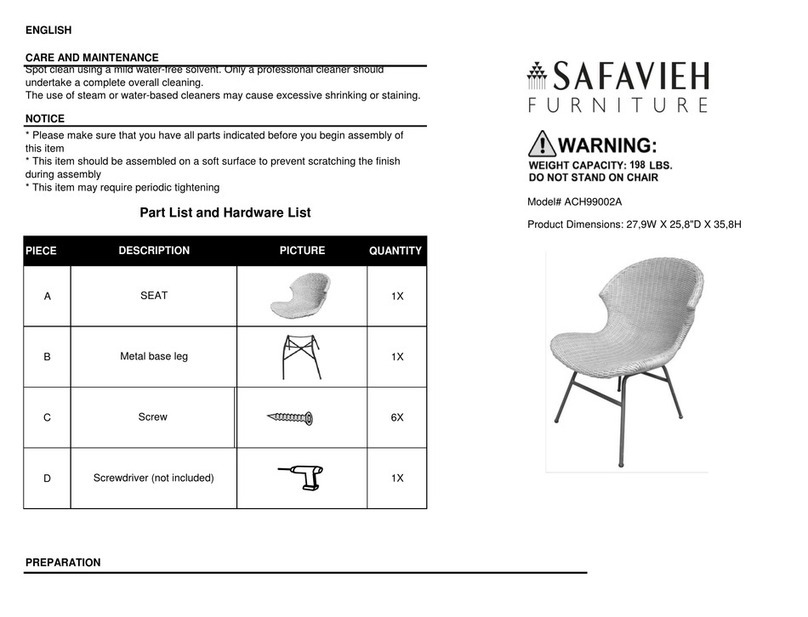
Safavieh Furniture Polina ACH99002A User manual

Safavieh Furniture

Safavieh Furniture Polina ACH99002A User manual

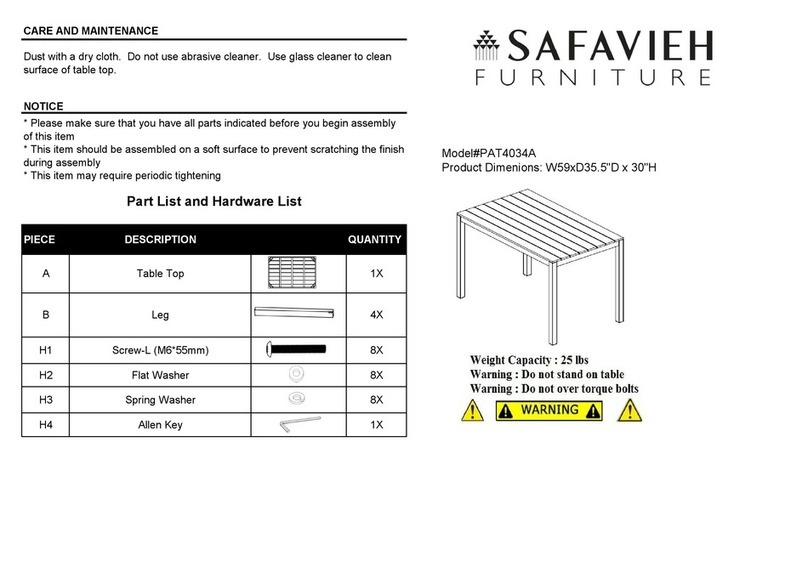
Safavieh Furniture Beldan PAT4034A User manual

Safavieh Furniture

Safavieh Furniture Beldan PAT4034A User manual

Popular Outdoor Furnishing manuals by other brands

felton industries FELEPG5T6 Assembly instruction

felton industries

felton industries FELEPG5T6 Assembly instruction

Dreamo OTF-503S quick start guide

Dreamo

Dreamo OTF-503S quick start guide

Garden Furniture Direct Borrowdale Assembly instructions

Garden Furniture Direct

Garden Furniture Direct Borrowdale Assembly instructions

Rowlinson Clarendon Assembly instructions

Rowlinson

Rowlinson Clarendon Assembly instructions

Garden Treasures 8201268 Assembly instructions

Garden Treasures

Garden Treasures 8201268 Assembly instructions

Safavieh Outdoor Marson PAT7062 quick start guide

Safavieh Outdoor

Safavieh Outdoor Marson PAT7062 quick start guide

SSC-LUXon 990070716 Assembly & operating instructions

SSC-LUXon

SSC-LUXon 990070716 Assembly & operating instructions

supremo LEISURE 2-Seat Stool 110*40cm Assembly instruction

supremo LEISURE

supremo LEISURE 2-Seat Stool 110*40cm Assembly instruction

Hatteras Hammocks DCA1-K-HH instructions

Hatteras Hammocks

Hatteras Hammocks DCA1-K-HH instructions

Lemeks Palmako PA120-5959 Assembly, installation and maintenance manual

Lemeks

Lemeks Palmako PA120-5959 Assembly, installation and maintenance manual

OLT 24 Assembly manual

OLT

OLT 24 Assembly manual

forest-style HACIENDA 2354 Building instructions

forest-style

forest-style HACIENDA 2354 Building instructions

Courtyard Creations RUS0188-WM Assembly instructions

Courtyard Creations

Courtyard Creations RUS0188-WM Assembly instructions

kingsley-bate MC-55 Assembly instructions

kingsley-bate

kingsley-bate MC-55 Assembly instructions

Weltevree Carrier product manual

Weltevree

Weltevree Carrier product manual

Grange Fencing Elite Arch Assembly instructions

Grange Fencing

Grange Fencing Elite Arch Assembly instructions

Grosfillex AUVENT YR14 Assembly instructions
Grosfillex

Grosfillex AUVENT YR14 Assembly instructions
X-METAL EAGLE 33511 Assembly instructions

X-METAL

X-METAL EAGLE 33511 Assembly instructions

manuals.online logo
manuals.online logoBrands
  • About & Mission
  • Contact us
  • Privacy Policy
  • Terms and Conditions

Copyright 2025 Manuals.Online. All Rights Reserved.

PIECE QUANTITY
A 1X
B 1X
Model # SEA8014
Product Dimensions : 18.5"W x 27.5"D x 39"H
Back Rest
Front leg-1
DESCRIPTION
PICTURE
Seat
CARE AND MAINTENANCE
Spot clean using a mild water-free solvent. Only a professional cleaner should
undertake a complete overall cleaning.
The use of steam or water-based cleaners may cause excessive shrinking or staining.
NOTICE
* Please make sure that you have all parts indicated before you begin assembly of this
item
* This item should be assembled on a soft surface to prevent scratching the finish
during assembly
* This item may require periodic tightening
Part List and Hardware List
E1 E2
A
B
A
E1
D
C
E1 E2
E3
E2 E1
E
E3
F
E1
E2
E3
B 1X
C 1X
D 1X
E1 6X
E2 6X Weight Capacity: 300 lbs
E3 1X
WARNING: DO NOT STAND ON CHAIR
WARNING: DO NOT OVER TORQUE BOLTS/SCREWS
Spanner
F
Black Fabric
The legs and hardware are located underneath the chair in the
zipper compartment.
1X
Bolt 8 X 60 mm
Flat Washer
Back Rest
Front leg-1
Front leg-2
E1 E2
A
B
A
E1
D
C
E1 E2
E3
E2 E1
E
E3
F
E1
E2
E3
The legs and hardware are located underneath the chair in the
zipper compartment.
Before beginning assembly of product, make sure all parts are present. Compare parts with package contents list and hardware contents list.
If any part is missing or damaged, do not attempt to assemble the product.
Estimated Assembly Time: 10 minutes.
Tools Required for Assembly (included): Spanner
STEP1 TAKE OUT LEGS AND HARDWARE WHICH PLACED
ON THE UNDERSIDE OF THE SEAT
STEP2 PUT THE WASHERS ON THE BOLT IN THE ORDER
SHOWN IN THE PICTURE
STEP3 INSERT THE FRONT LEGS AND SCREW IN THE BOLTS
BUT DON'T TIGHTEN COMPLETELY
PREPARATION
E1
E2
A
E1
D
C
E1
E2
E3
E2
E1
E3
The legs and hardware are located underneath the chair in the
zipper compartment.
STEP4 INSERT THE BACK LEGS AND SCREW IN THE BOLTS
BUT DON'T TIGHTEN COMPLETELY
STEP5 PUT THE CHAIR UPRIGHT AND MAKE SURE ALL LEGS
ARE LEVEL, THEN FIRMLY TIGHTEN BOLTS WITH SPANNER
WHILE THE CHAIR IS UPRIGHT AS PICTURED ABOVE
STEP6 FIX THE BLACK FABRIC ON THE UNDERSIDE OF THE
SEAT, THIS ITEM MAY REQUIRE PERIODIC TIGHTENING
STEP1 TAKE OUT LEGS AND HARDWARE WHICH PLACED
ON THE UNDERSIDE OF THE SEAT
STEP2 PUT THE WASHERS ON THE BOLT IN THE ORDER
SHOWN IN THE PICTURE
STEP3 INSERT THE FRONT LEGS AND SCREW IN THE BOLTS
BUT DON'T TIGHTEN COMPLETELY
A
B
F
E1
E2
E3
The legs and hardware are located underneath the chair in the
zipper compartment.
E2