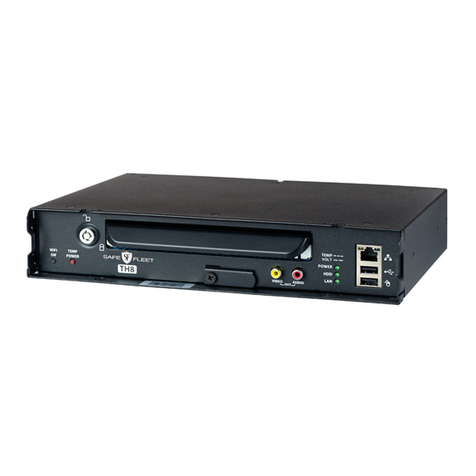
Safe Fleet DH6 User manual

DH6/DH8 48V POE Injector Kit
Quick Installation Guide
About
This guide covers installation procedures for connecting a POE (Power Over Ethernet) injector kit to a DH6 or
DH8 recorder.
A POE injector kit enables connection of a single IP camera to the recorder’s rear-panel LAN2 port.
Pre-requisites
Before proceeding, you must have a DH6 or DH8 recorder installed and functioning in a vehicle. Do not
proceed with this document if you haven’t installed the recorder. The DH6/DH8 installation documentation is
available on the Safe Fleet Community (https://community.safeeet.net).
Note: You will need login credentials to access the documentation. Please contact Safe Fleet Technical
Support if you do not have access to the Community.
Kit Contents
2002/96/EC (WEEE directive): This product cannot be disposed of as unsorted municipal waste
in the European Union. For proper recycling, return the product to your local supplier upon the
purchase of equivalent new equipment, or dispose of it at designated collection points, for more
information, see www.recyclethis.info.
2006/66/EC (battery directive): This product does not contain batteries.
2022 | Part #: 700-1279 R2
48 V POE Injector Kit (Part # DH-POEKIT48-A):
• POE Injector (Part #: 085-1106) - Qty 1
• POE Adapter Cable (Part #: APPINJ) - Qty 1
• F/F Inline Coupler (Part #: 444-1028) - Qty 1
• 1.5 ft CAT5e Cable (Part #: 085-0065) - Qty 2
• 1” Stainless Steel Philips Rounded Head Drilling
Screw (Part #: 600-1022) - Qty 1
Specications
48 V POE Injector
Input 12VDC/1.5A to 16VDC/1.1A.
Output 48 VDC, up to 15.4 W max. IEEE 802.3af compliant. Short circuit protection.
Ethernet Connectivity: RJ45, auto-crossover. Wire type: 4-pair CAT5e.
Distance: up to 100 m. Speed: 10/100BaseT, half/full duplex, auto negotiation.
Indicators (LED) Red LED: Port status.
Yellow & Green LED (by RJ45 jack): IP Link status, 10/100Base-T/active.
Agency Listings UL/cUL: UL60950-1 (Information Technology Equipment).
CE European Conformity.
Dimensions (W x L x H) 2.5” x 3.8” x 1” (63.5 mm x 96.52 mm x 25.4 mm).
Weight (approx.) Product Weight: 0.2 lbs. (0.1 kg). Shipping Weight: 0.25 lbs. (0.11 kg).
Temperature Operating: 0º C to 40º C (32º F to 104º F).
Storage: -40º C to 70º C (-40º to 158º F).
Relative Humidity 85% +/-5%.
Operating Altitude: -304.8 to 3,048 m (-1000 to 10,000 ft.).
Service & Support
If your POE device is to be returned for service, please contact the Safe Fleet technical support team, provide
the part and/or serial # of your unit, and ask for a Return Merchandise Authorization (RMA) number. An RMA
#allows the support team to better track your product when it comes in for service. Please show the RMA #
on the outside of the package.
ANY PRODUCT SENT WITHOUT AN RMA # MAY BE REFUSED!
Documentation and Warranty
Information is subject to change without notice. For the latest product details, please visit the Safe Fleet
Community. Additional copies of this guide along with other documentation and product warranty can also be
found on the Safe Fleet Community.
Safe Fleet Community Web site: https://community.safeeet.net
Technical Support
Phone: 1.844.899.7366 Email: PTsupport@safeeet.net
© Safe Fleet | All rights reserved

Conguring the Camera and Recorder
After connecting the camera, you’ll need to congure the recorder:
1. Congure the LAN2 rear panel port:
• Navigate to Network Port Functions and select IPC from the LAN2 dropdown menu.
For more information, see “Advanced Conguration - Port Functions” in the
DH6/DH8 Installation Guide.
2. Congure the camera:
a. Set the camera’s IP address mode to DHCP.
For instructions on conguring IP address mode, consult your camera’s installation guide.
b. Congure the recorder’s Camera settings:
• For an API-supported camera:
• Navigate to the Record Camera IPC tab, select the appropriate camera model from the
Type dropdown menu, and adjust other settings as required. For more information, see “Basic
Conguration - Camera Settings” in the DH6/DH8 Installation Guide.
48 V POE Kit Installation Diagram
WARNING: Always use compatible cameras
Adding an incompatible camera to a 48 V POE Injector can
damage the camera and void your warranty. Always ensure
that you’re connecting a compatible camera!
Installing the 48 V POE Kit
(Refer to the diagram on page 3)
1. Use one of the supplied Ethernet cables (085-0065) to connect the recorder’s PON-LAN1 rear-panel port to
the POE Adapter (APPINJ).
2. Cut off the 2x1 Microt connector from the POE Adapter Cable (APPINJ) and strip the red and black wires.
3. Connect the APPINJ red wire to the POE Injector’’s VDC Input (+), and the black wire to the VDC Input (–).
• The Injector’s VDC Inputs use screwless, quick-connect terminals. Press the tab below the terminal,
insert the wire, then release the tab to secure the connection.
4. Use the other supplied Ethernet cable to connect the recorder’s LAN2 rear-panel port to the POE Injector’s
IN port.
5. Connect an Ethernet cable from the POE Injector’s OUT port to the camera. Using the 48 V POE kit with
DH6/DH8 recorders, you can only connect the following camera models:
WARNING: Ensure Recorder is Powered Down
Do not proceed unless the recorder is shut down.
• C3W9PD
• C3Q9PD
• CHW8PD
• C12F2PD (via RTSP)
• C8Q2PD (via RTSP)
6. Secure the casing of the POE Injector to the vehicle using the provided screw.
7. <Optional>: Use the Inline Coupler (444-1028) to connect another device.
• Note: this connection will not be powered, and the PON-LAN1 port must be congured appropriately
(see “Advanced Conguration - Port Functions” in the DH6/DH8 Installation Guide (part #700--1278,
available from the Safe Fleet Community).
Conguring the Camera and Recorder
2. Congure the camera (continued):
• For an RTSP-supported camera:
• Navigate to the Record Camera RTSP tab
• Congure the camera channel and enter IP, port, and path data for the RTSP server. Check the
Safe Fleet Community for RTSP details required for the camera you are connecting.
For more information, see “To congure an RTSP device” in the “Basic Conguration - Camera
Settings” section of the DH6/DH8 Installation Guide.
GPS
https://community.safeeet.net
CAMERAS/ALARMS
LAN2PON-LAN1
CTRL
POWER
EXPANSION
G-SENSOR
SIGNALS
WIFI
1
2
4
5
6
DH6 or DH8
Recorder
POE Injector -
underside
(085-1106)
Inline
Coupler
(444-1028)
VDC
Input
POE
Adapter
(APPINJ)
Ethernet
Cables
(085-0065)
Camera
Harness
7
OUT
IN
3
VDC
Input
Power
Shutdown
IN OUT
+–
This manual suits for next models
1
Other Safe Fleet Laboratory Equipment manuals
Popular Laboratory Equipment manuals by other brands

cytiva
cytiva UV-900 operating instructions

ELGA
ELGA PURELAB 7000 - US Quick start manual

Electro-Voice
Electro-Voice 7110XC Specifications

Malvern Instruments
Malvern Instruments Zetasizer uV manual

Genlantis
Genlantis FirstResponder E900FRUR quick start guide

Cognex
Cognex DataMan 8072 Quick reference guide