Safetec 2510037 User manual

Safetec offers an Automatic and Manual Dispenser
for Instant Hand Sanitizer; and a Manual Dispenser
for SaniWash®Antimicrobial Hand Soap. The
Automatic Dispenser also has a floor stand option
that is easy to place and move around in any
facility where hand sanitizer is needed.
Automatic and
Manual Dispensers
For Hand Sanitizer & Hand Soap
Manual Dispenser
(Hand Sanitizer & Soap)
2510037
Automatic Dispenser
(Hand Sanitizer Only)
27508
Drip Tray
Automatic
Dispenser
Floor Stand
(only used with
Auto Dispenser)
Safetec of America, Inc.
1-800-456-7077 | safetec.com
KILL GERMS
INSTANTLY

Item# Description Case Qty.
17360 Fresh Scent 800ml Manual Dispenser Refill 12 /case
17369 Fresh Scent 800ml Auto Dispenser Refill 12 /case
Item# Description Case Qty.
2510037 Manual Dispenser 800ml 12 /case
27508 Automatic Dispenser 800ml 12 /case
Item# Description Case Qty.
27507 Floor Stand (Auto Dispensers Only) 1 each
2510122 Drip Tray 1 each
Choose a Dispenser
Manual Dispenser‡
(Hand Sanitizer or SaniWash®Hand Soap)
Automatic Dispenser‡
(Hand Sanitizer Only)
Hand Sanitizer
Manual Refill
17360
Hand Sanitizer
Automatic Refill
17369
Choose a Refill
Add Accessories
Drip Tray
• Drip Trays can be used on both Automatic and Manual Dispensers
• Adhesive tabs on the back easily adhere to surfaces, as an alternative
to using screws.
Floor Stand (For Automatic Dispensers only)
Order Information
Instant Hand Sanitizer*
• Kills 99.9% of germs (Contains 66.5% Ethyl Alcohol)
• Formula evaporates completely, leaving no sticky residue on hands
• Aloe vera adds moisture with each use
SaniWash Antimicrobial Hand Soap†
• Aids in reducing the risk of cross-contamination
• Uses PCMX for antimicrobial action and contains aloe vera for
added moisture with each use
Compliance
*Meets OSHA, APIC and CDC hand washing recommendations in the absence of soap and water
†Meets OSHA and APIC hand washing recommendations
‡Meets ADA operability
Drip Tray
2510122
Floor Stand
27507

Manual Dispenser Instructions
Mounting Instructions
Tape Mounting
1. Clean the flat surface with towelette and
an abrasive cleanser prior to mounting. Dry
surface thoroughly. Only recommended for
mirrors or other similar flat surfaces
2. Remove backing from tape and press firmly
against mounting surface for 10 seconds.
Open cover and press directly on back plate
for additional 10 seconds. Allow 8 hours be-
fore loading unit.
3. Opening Instructions: Push up on two release
buttons on each side of base with thumb and
forefinger. With other hand, gently pull cover
away from wall at top of dispenser.
(For locking units – insert provided key into key-
hole in right-hand release button and press
upward; key must remain in keyhole while closing
dispenser)
Screw Mounting
Recommended for surfaces that are not ideal for tape
mounting
1. Hold dispenser against wall in desired position,
open cover and mark screw hole location on wall,
insuring screw heads will not interfere with release
bar.
2. Use appropriate anchors and drill size for #10 x 1"
self-taping screws to attach dispenser firmly to the
wall.
Refill Instructions
1. Press finger into perforated area and remove key-hole perforated shaped area.
2. Locate nozzle and pull down through bottom of box.
3. Place cartridge on dispenser platform. Pull nozzle with thumb and forefinger to rotate top of tub so Arc of
Half Moon Pump is facing toward you.
4. Place top of tube firmly in neck of upper locator and fit Ears of Half Moon Pump into Lower Locator Slots.
5. Before closing the cover, check to make sure Arc of Half Moon Pump is facing toward you and Ears of
Half Moon Pump are firmly seated in slots of lower locator.
Upper Locator
Ears of
Half Moon
Pump
Lower Locator Slots
Arc of
Half Moon
Pump
to open and
close locking
unit, insert key
in this release
button release
buttons
screw mounting holes (5)
tape
mounting
clearance,
1 ⁄" mini-
mum

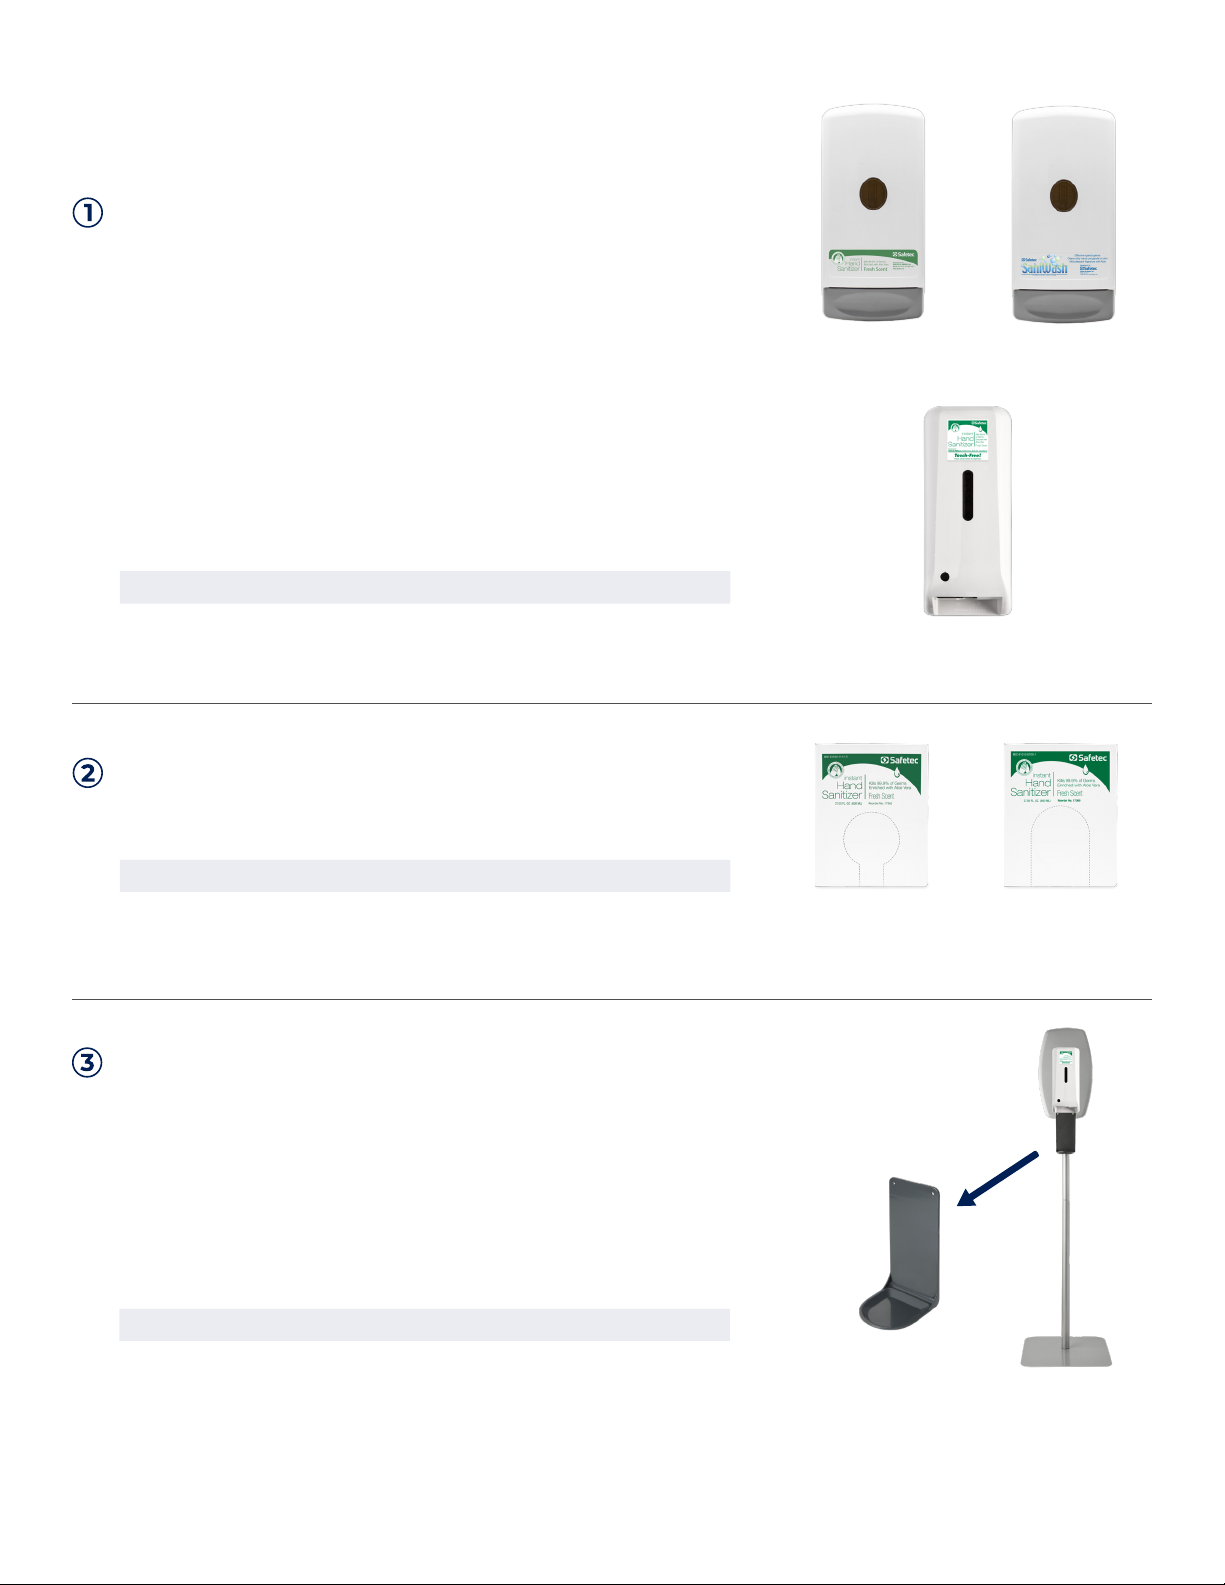
Installing Hand Sanitizer Refill
1. Press finger into perforated
area and remove key-hole
perforated shaped area.
2. Locate nozzle and pull down
through bottom of box.
3. Place cartridge on dispenser
platform. Pull nozzle with
thumb and forefinger, pull
round disk of nozzle all the
way to bottom of lower
locator.
4. Before closing cover, check
to make sure round disc of
nozzle is firmly in place at
bottom of lower locator.
5. After Refill is properly placed,
close dispenser cover. LED
indicatior will blink GREEN/
RED 3 times.
6. Place hand underneath
dispenser, within 8cm of sensor. LED will blink GREEN and
dispense hand sanitizer into hand.
*To Reset: Open and close cover
Round Disk
of Nozzle
Quick Visual Automatic Installation Instructions
Mounting Instructions
To Open Dispenser
Use provided key to press down at top of
front cover where key lock is located. Grab
the dispenser cover from the top and pull
toward you. Cover is hinged at bottom.
Tape Mounting
1. Only recommended for mirrors or other
similar flat surfaces.
2. Dispenser must be mounted at least 10" above
any counter or object surfaces.
3. Remove backing from tape and press firmly against
mounting surface for 10 seconds. Open cover and press
directly on back plate for additional 10 seconds.
Allow 1 hour before loading unit.
Screw Mounting
1. Hold dispenser against wall in desired location,
open cover and mark screw hole location on wall.
2. Install provided anchors into drywall and secure
dispenser with provided screws.
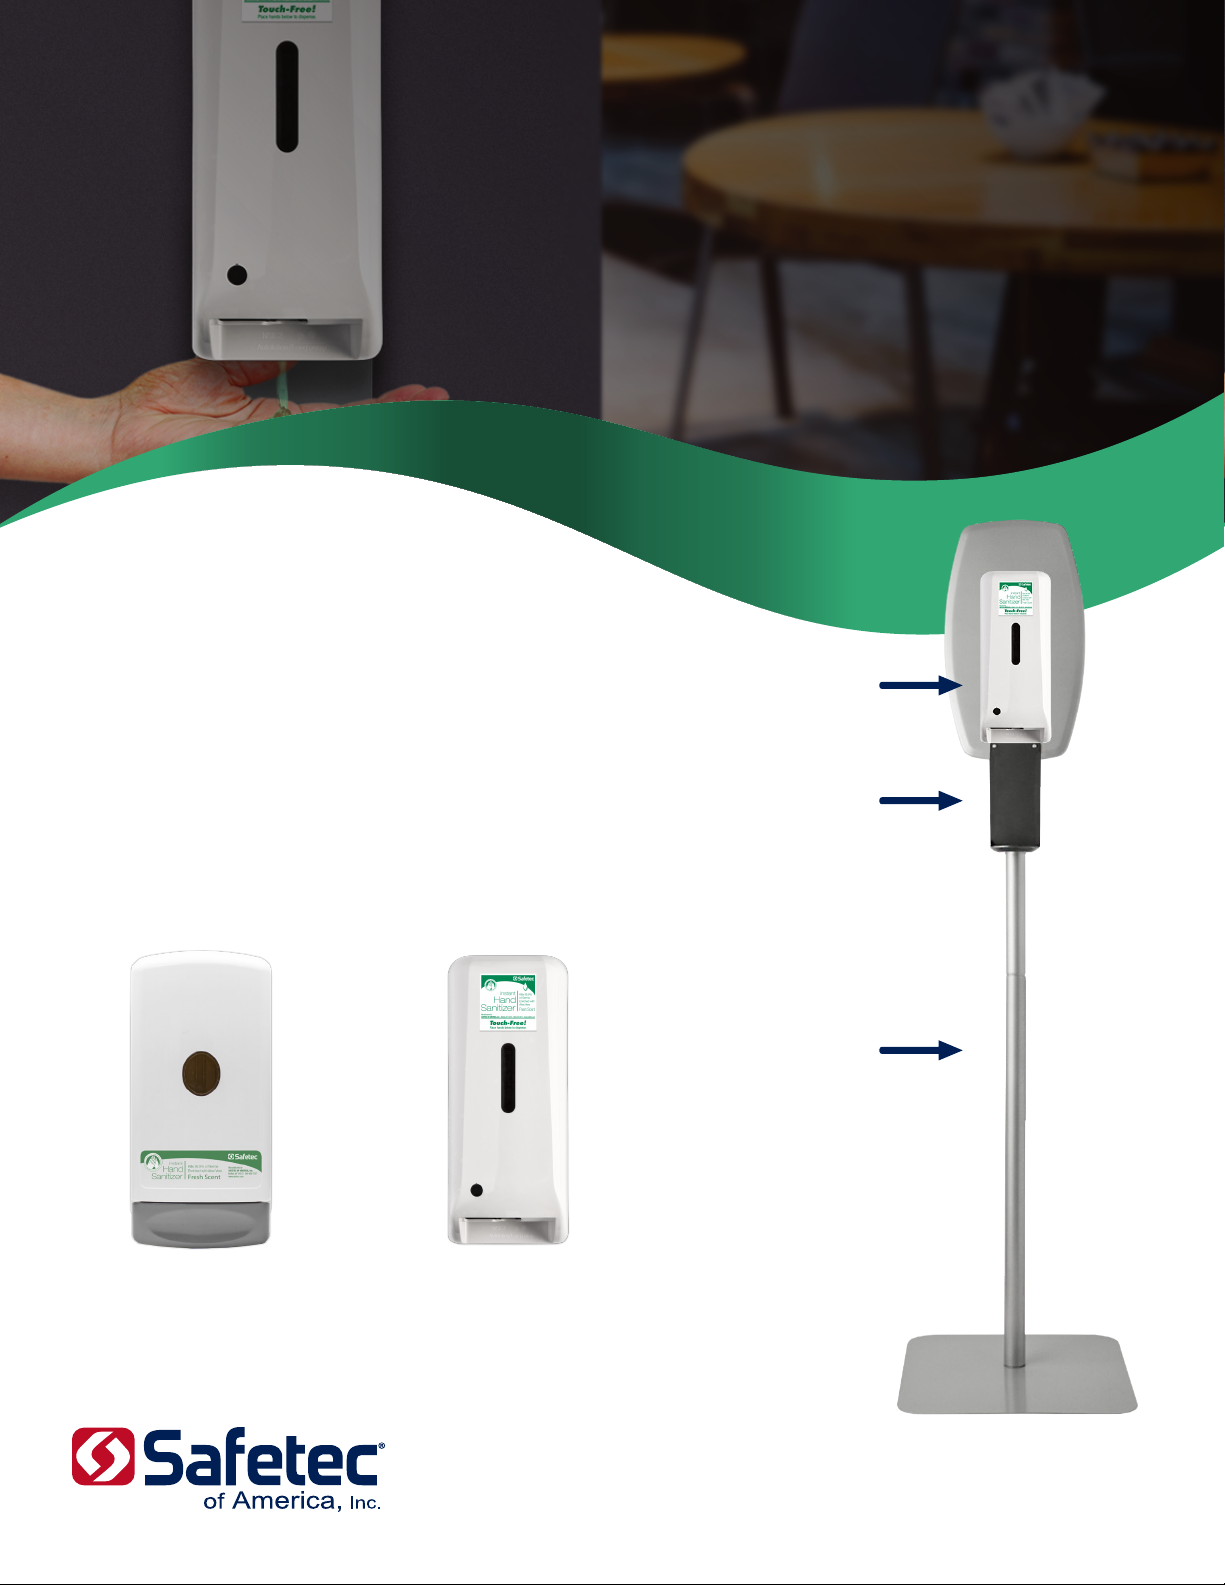
Automatic Dispenser Instructions (Also available with floor stand option)
Automatic Dispenser Installation Instructions
Recommended Installation Height Open Dispenser
Installation with Screws
Installation with Adhesive
Backing (no screws) Installation Cartridge Install Batteries
1. 2. 1. 2.
1. 2. 3.
Sensitivity Adjustment: If sensor is too sensitive, remove black sticker that is covering Sensor Adjustment screw. Turn screw counterclockwise
slightly. (i.e. like a dial on a clock, turn in 15 minute intervals to desired setting)
Refill Instructions
Installing Batteries (batteries not included)
Open dispenser, locate battery compartment on the right side of the
dispenser and slide cover forward, away from wall. Place (3) C-cell Al-
kaline batteries in proper orientation and slide cover back into place.
Lower
Locator Slots
Upper
Locator

Floor Stand Instructions
This manual suits for next models
1
Table of contents
Other Safetec Dispenser manuals
Popular Dispenser manuals by other brands

agape
agape 369 A369224 Assembly instructions

Coca-Cola
Coca-Cola FREESTYLE 9000 user guide

Franke
Franke XINX625 Installation and operating instructions

Miomare
Miomare MES 330 A1 operating instructions

KWC
KWC RODAN RODX672E Installation and operating instructions

Franke
Franke STRX670 Installation and operating instructions