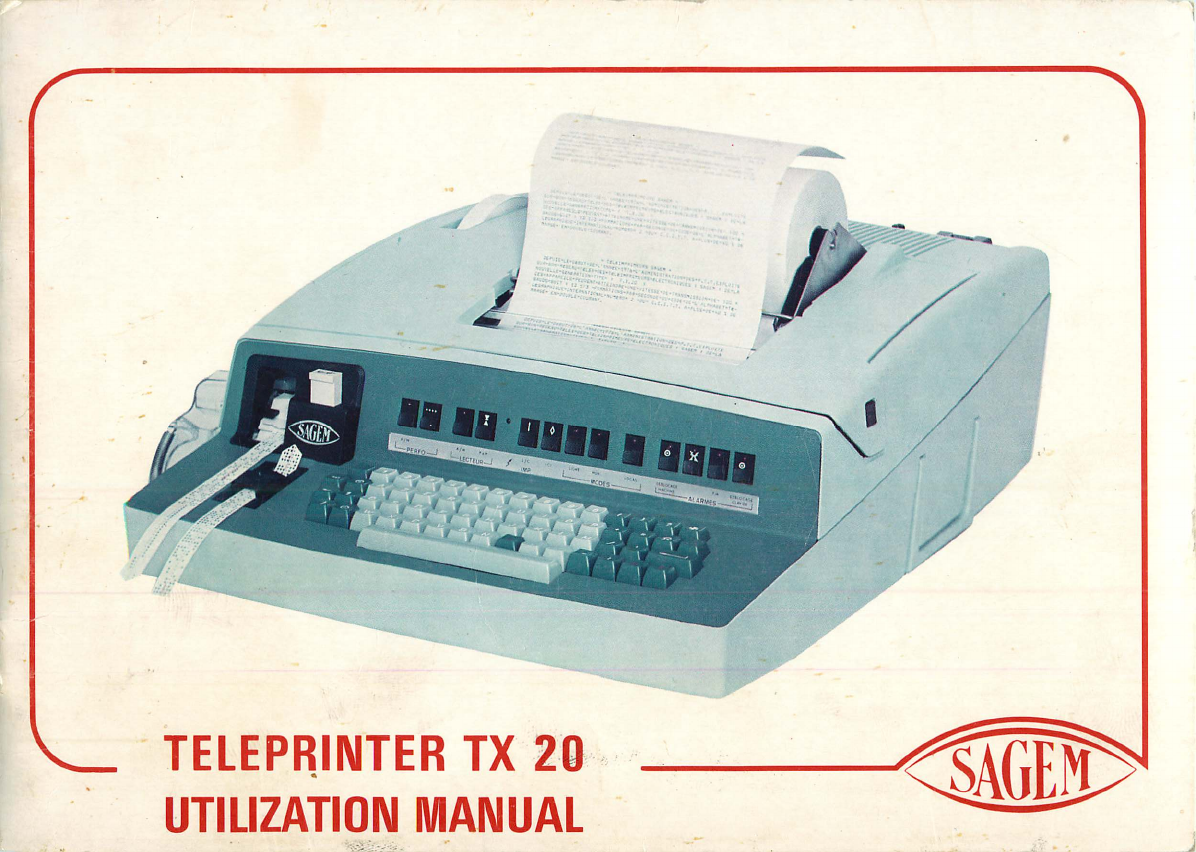
Sagem TX 20 User manual
n
CM <
X 2
CC S
rsj
j

contents
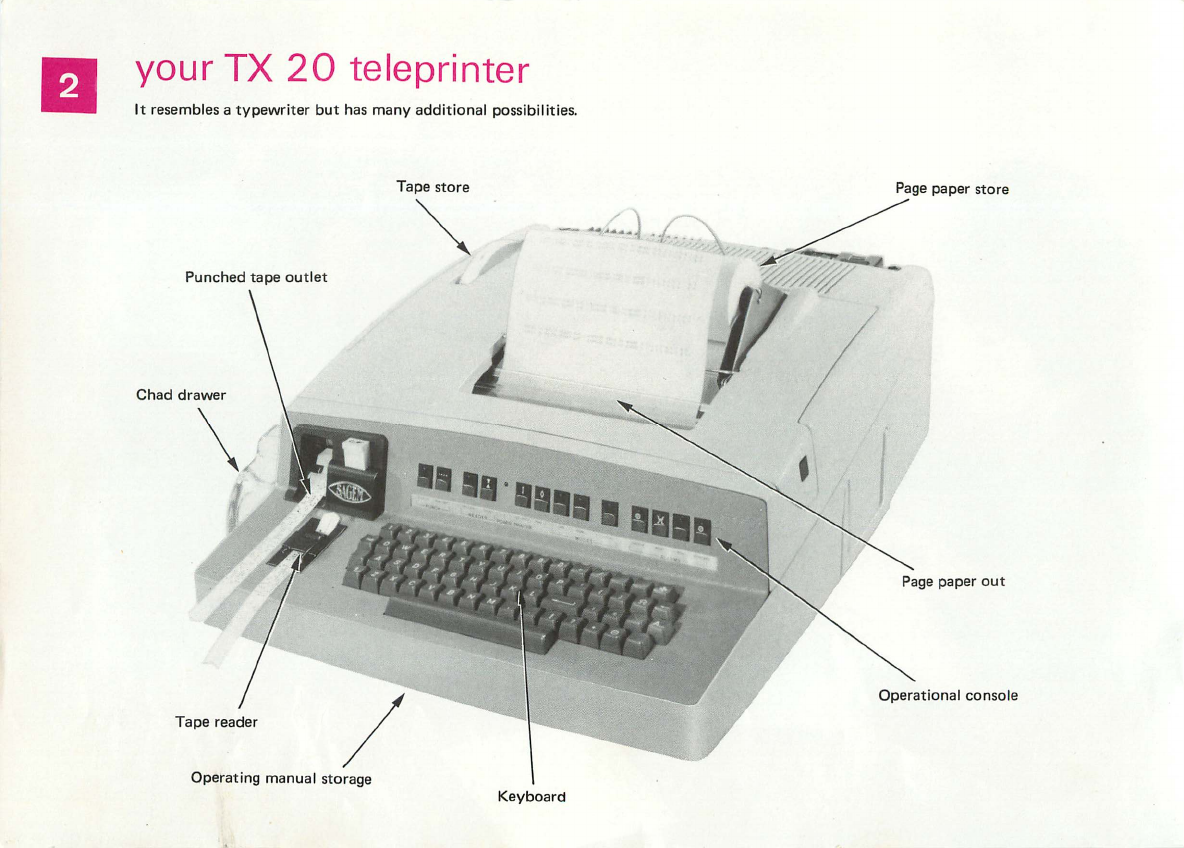
2 your TX 20 teleprinter
3 p r i n t i n g
4 starting your TX 20 teleprinter
5 keyboard
6 operational console
7 how to receive a message ?
7 how to send a message ?
8 the punched tape
9 how to prepare a message locally, on punched tape
for later transmission ?
10 how to correct a «typing errors while preparing a
message on punched tape ?
12 the tape reader
1 2 how to place the punched tape on the reader
13 how to «read» a punched tape ?
14 how to transmit a message using the tape reader
16 receipt of an incoming call during message prepara
tion
17 preparation of a message while transmitting another
message
17 controls for correspondent's machine (optional)
18 loading your teleprinter with page paper
20 how to change the paper width ?
21 how to adjust typing pressure ?
22 replacing a roll of tape on your teleprinter
24 replacing the ink ribbon on your teleprinter
26 particular devices
26 abbreviated numbering
26 automatic end of message
26 tabulation
27 possible choices
28 expendable material
29 your teleprinter is in derangement
\
I ..-.
CD
to
CD o
3
C7 c
CD -^
Cfl
CO
r+
•< H
CD
§X
CD ro
cr
co
IT
CJ r+
ICD
3
<CD
Q. "D
Q. —*
5'
CO d"
r+
"CJ
0
t/i CD
Ui —^
cr
r*
CD'

printing
Three printing patterns enable the following to be distinguished either on the original or on the copies :
— a message prepared locally,
ft LQCfcLLN PREPARED WESSfc&E IS PRIUTEfc IN CHfcRfcCTEPS
SLM4TIN6 TO THE LEFT
kECOEFfcHIJKLMNOPQ.RSTViVUX'VI 123^5^7 &9Q
a transmitted message,
A TRANSMITTED MESSAGE IS PRINTED IN CHARACTERS
SLANTING TO THE RIGHT
ABCDEFGHIJKLMNOPQRSTUVUXYZ 1234567890
an incoming message,
A RECEIVED MESSAGE IS PRINTED IN UPRIGHT CHARACTERS
ABCDEFGHIJKLMNOPQRSTUv'WXYZ 1234567890
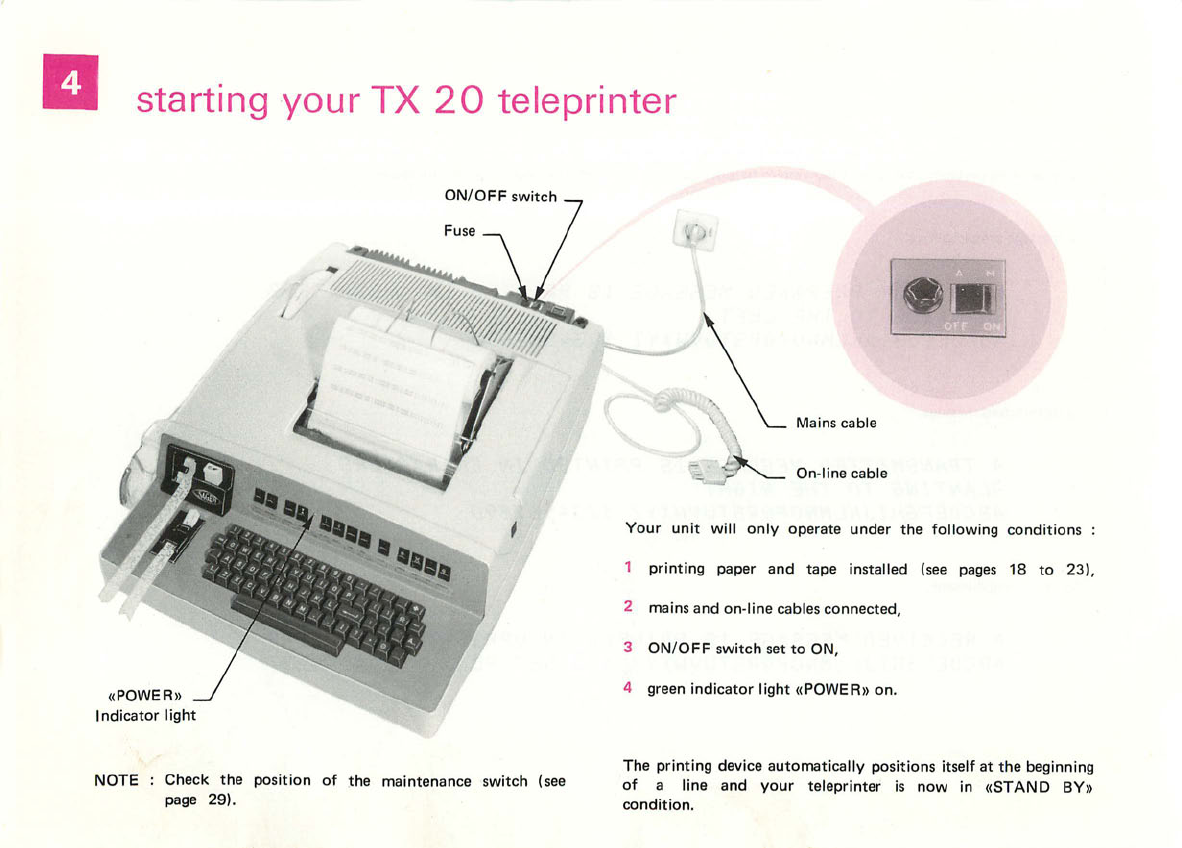
starting your TX 20 teleprinter
ON/OFF switch
Mains cable
line cable
((POWER))
Indicator light
Your unit will only operate under the following conditions :
1 printing paper and tape installed (see pages 18 to 23),
2 mains and on-line cables connected,
3 ON/OFF switch set to ON,
4 green indicator light «POWER» on.
NOTE : Check the position of the maintenance switch (see
page 29).
The printing device automatically positions itself at the beginning
o f a l i n e a n d y o u r t e l e p r i n t e r i s n o w i n « S TA N D B Y »
condition.

keyboard
Repetition
Do you want to repeat a character ? Keep the corresponding key depressed. The character is printed once, then, after one second, it is
repeated as long as the key is depressed.
0@
(D
0
IS
0
(*]
1*8
m
B
D
Particular keys
LETTERS shift
32nd combination of No 2 CCITT code
FIGURES shift
LINE FEED
CARRIAGE RETURN
CORRESPONDENT'S ANSWER-BACK
CODE REQUEST (NOTE 1)
TABULATION (See corresponding paragraph)
CALL BELL (NOTE 2)
NEW LINE (NOTE 3)
OPTION
Characters for national use
F G H
(in FIGURES position)
d ) i I D
F, G, H codes in FIGURES position are the characters
used in FRENCH network.
NOTE 1 : When your unit is connected to a correspondent, depressing this key automatically causes correspondent's answer-back code to be
transmitted.
NOTE 2 : When your unit is connected to a correspondent, depressing this key causes correspondent's audio-alarm to ring.
NOTE 3 : Depressing this key causes the printing device to return to the beginning of the next line.

operational console
Associated indicator lights indicate the operating conditions of your unit.
Answer-back code transmission
Change
LETTERS/FIGURES
Power on
Stepped progression
Tape release
Back space
for punched tape
Request or end of transmission
NOTE 1
Stop bell
NOTE 2
NOTE 3
NOTE 2
ON/OFF RUN-OUT
PUNCH
—I
/OFF STEP
-READER
5qq
L/C ICI LIGNE NUM
IMP. I MODES-
CASE ABB
SHIFT HERE IS LINE NUM.
R E S T O R E R E S E T A U T O U N B L O C K
SERVICE ALARM CLEAR KEYB.
Light on = ON
Light off = OFF
NOTE 1
Abbreviated numbering (see
corresponding paragraph)
This key can be used for
another optional function.
NOTE 2
Indicator light on= locking.
Clear by depressing key
(light goes out).
NOTE 3
Automatic end of message
(see corresponding para
graph).
This key can be used for
another optional function.
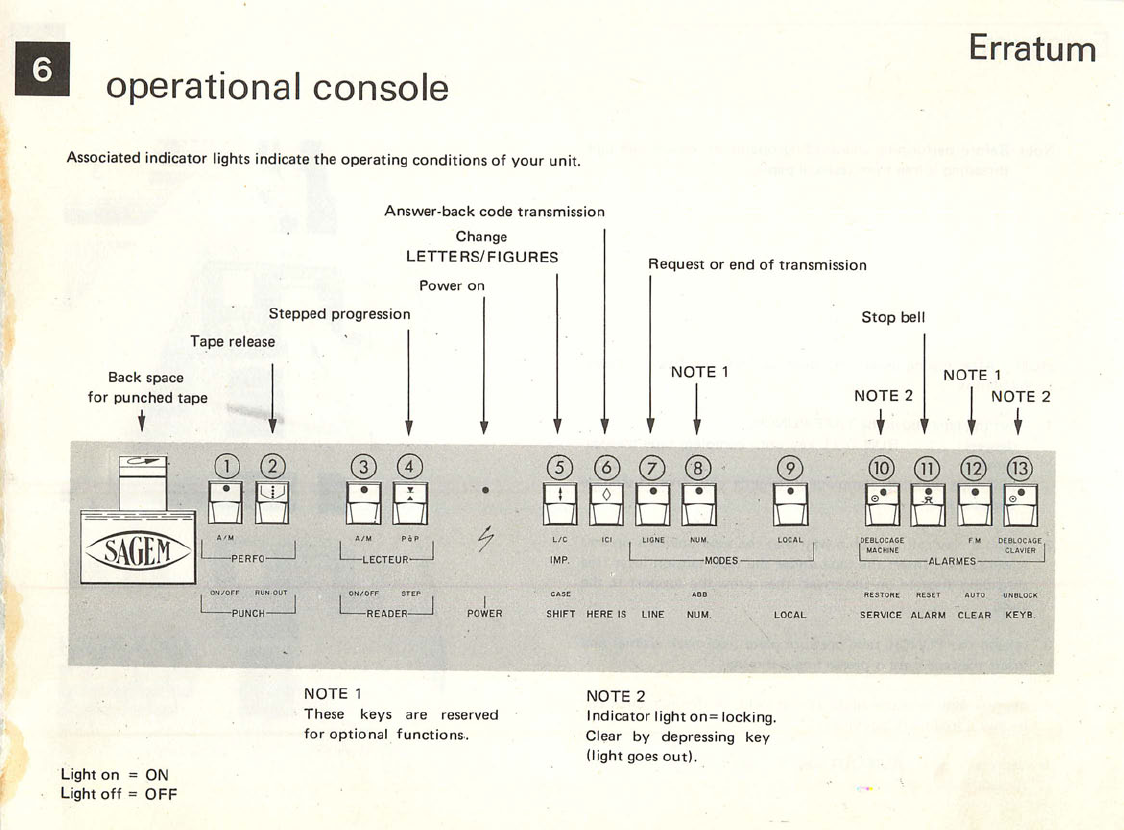
Erratum
operational console
Associated indicator lights indicate the operating conditions of your unit.
Answer-back code transmission
Change
LETTERS/FIGURES
Power on
Stepped progression
Tape release
Back space
for punched tape
♦
CL-~mXm*~
c§age^
© ©
02
PERFO
© ®
ON/OFF STEP
READER
t
Request or end of transmission
NOTE 1
© ® ® (D
tu
L I G N E N U M .
CASE ABB
SHIFT HERE IS LINE NUM.
Stop bell
NOTE 2
NOTE 1
NOTE 2
(D ® © ® ®
0E8LOCAGE FM DEBLOCAGE
MACHINE CLAVIER
' ALARMES —I
R E S T O R E R E S E T A U T O U N B L O C K
SERVICE ALARM CLEAR KEYB.
Light on = ON
Light off = OFF
NOTE 1
These keys are reserved
for optional functions.
NOTE 2
Indicator light on= locking.
Clear by depressing key
(light goes out).

how to receive
a message ?
how to send
a message ?
This is completely automatic. During the entire transmission the
LINE key indicator light is illuminated.
With unit on STAND BY depress LINE key. The associated indi
cator light begins to blink until CALL CONFIRMATION (at
which time light remains on). If the line is busy, the indicator goes
out.
With LINE light illuminated, compose CORRESPONDENT CALL
NUMBER on the KEYBOARD.
After establishing communications, you can send your MESSAGE
on the KEYBOARD.
When finished, depress the LINE key again. The associated indi
cator light blinks until reception of END OF MESSAGE CONFIR
MATION at which time the indicator light goes out. Your COM
MUNICATION is then DISCONNECTED.
If your correspondent's unit has a derangement during the com
munication, your teleprinter will write you «DER» and the
communication will be cut.
Other manuals for TX 20
1
Table of contents
Other Sagem Printer manuals


