E
F
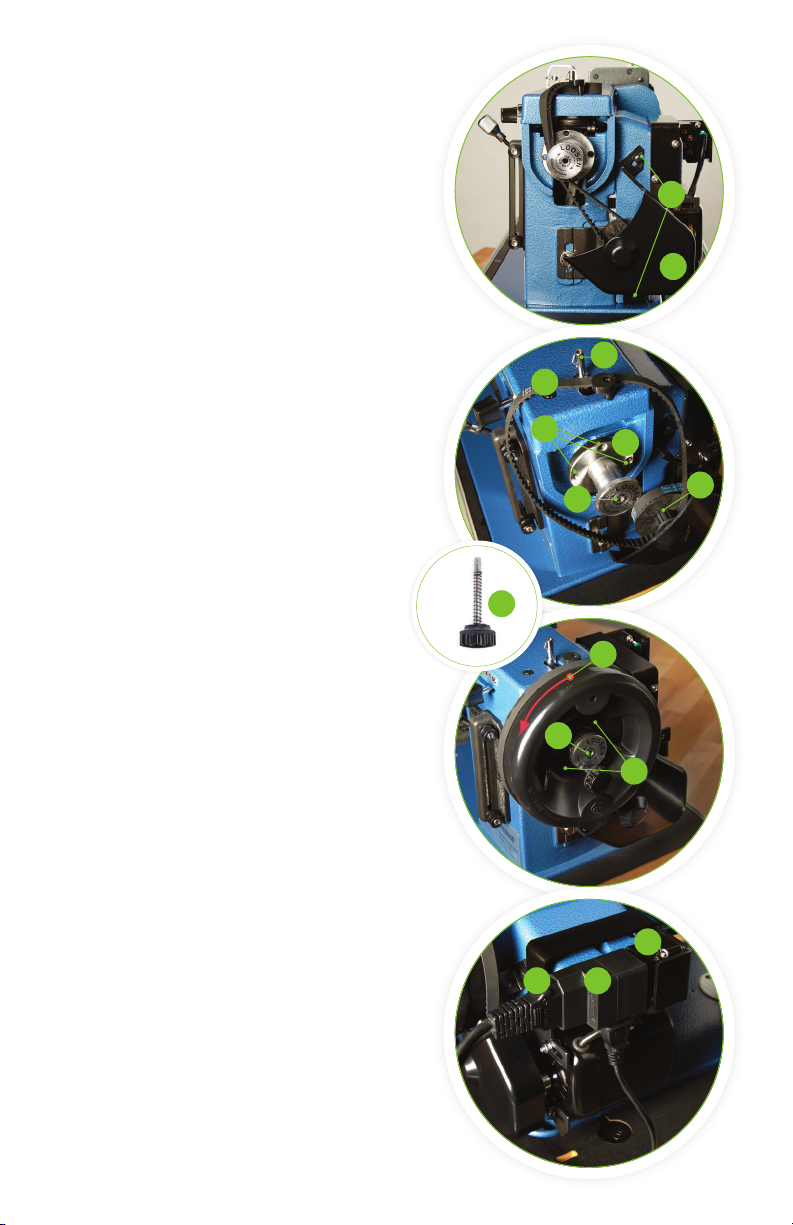
Install Balance Wheel & Belt
8. Remove the two screws (E) located above and
below the idler pulley. Position the belt cover
(F) over the idler pulley and belt. Snug the two
screws back in place to secure the belt cover.
9. Free the top of the Timing Belt by pushing the
Bobbin Winder Stopper (G) away from the
belt. Unscrew the reverse-threaded Posi-Pin®
Nut (H). Slide the Power Plus®or Monster®
II Balance Wheel onto the Posi-Pin Wheel
Bushing (I), making sure the Timing Belt is over
the top of the machine (J) and to the left of the
balance wheel.
10. Thread the reverse-threaded nut back onto the
bushing and tighten by hand.
NOTE: In order to properly rotate the balance
wheel, place your hand on the top of the
balance wheel and pull toward you (K).
11. Check to be sure the Timing Belt is still
around the small cogged pulley of the idler
pulley (L). Turn the balance wheel while
guiding the belt into place around the large
wheel (just like a bicycle chain).
12. Push the Posi-Pin (M) through one of the
holes in the balance wheel (N) (any will
work). While maintaining pressure on the
Posi-Pin rotate the balance wheel (K) until
the Posi-Pin locks into one of the balance
wheel bushing holes (O). Rotation of the
balance wheel will now cause the machine
to function.
13. To disengage the machine (for bobbin winding),
pull the Posi-Pin out of the balance wheel. The
balance wheel will now rotate without operating
the machine. Push the pin into the hole at the
center of the Posi-Pin nut to store (P).
Plug In Ultrafeed®
14. Plug the cord from the foot control (Q) into the
SAILRITE embossed end of the Light Adapter
(R) and the other end into the socket wired to
the motor (S). The plug can only be inserted
properly one way. Regular household current
should be used (115 volts for 110V power
systems or 220-240 volts for 220V power
systems, 50/60 Hz).
G
H
J
N
K
P
QR
S
I
L
O
M