Switching from
Straight to Zigzag Stitch
The stitch width adjustment lever controls
the stitch type as well as the width of your
zigzag stitch (15). When the lever is on “0” the
machine is in straight stitch. Moving the lever
to “1” produces a 1mm zigzag stitch and so
on through “5”.
DO NOT change the position of the stitch
width lever when the needle is in the fabric or
the needle may bend.
Straight Stitch
Needle Positioning
In straight stitch mode (stitch width
adjustment lever at “0”), the needle can be
moved left, right, or center (16). This is very
helpful when installing zippers where it is best
to have the needle as close to the zipper teeth
as possible. Gently push down on the lever
before moving it left, right or center. It may
also be helpful to move the balance wheel a
little while moving the lever.
DO NOT change the needle positioning when
the needle is in the fabric or the needle may
bend.
Sewing in Reverse
Position the needle fully up or fully down and
push the stitch length lever all the way down.
Hold the lever down until the reverse sewing
is completed. The lever is spring loaded and
will return to its forward position when you
release it. When the machine is operating at
1/4-speed or faster, reverse can be engaged
on the y.
DO NOT rotate the balance wheel in the
wrong direction. Always turn it towards you
(from the top) to avoid thread jams in the
lower mechanism.
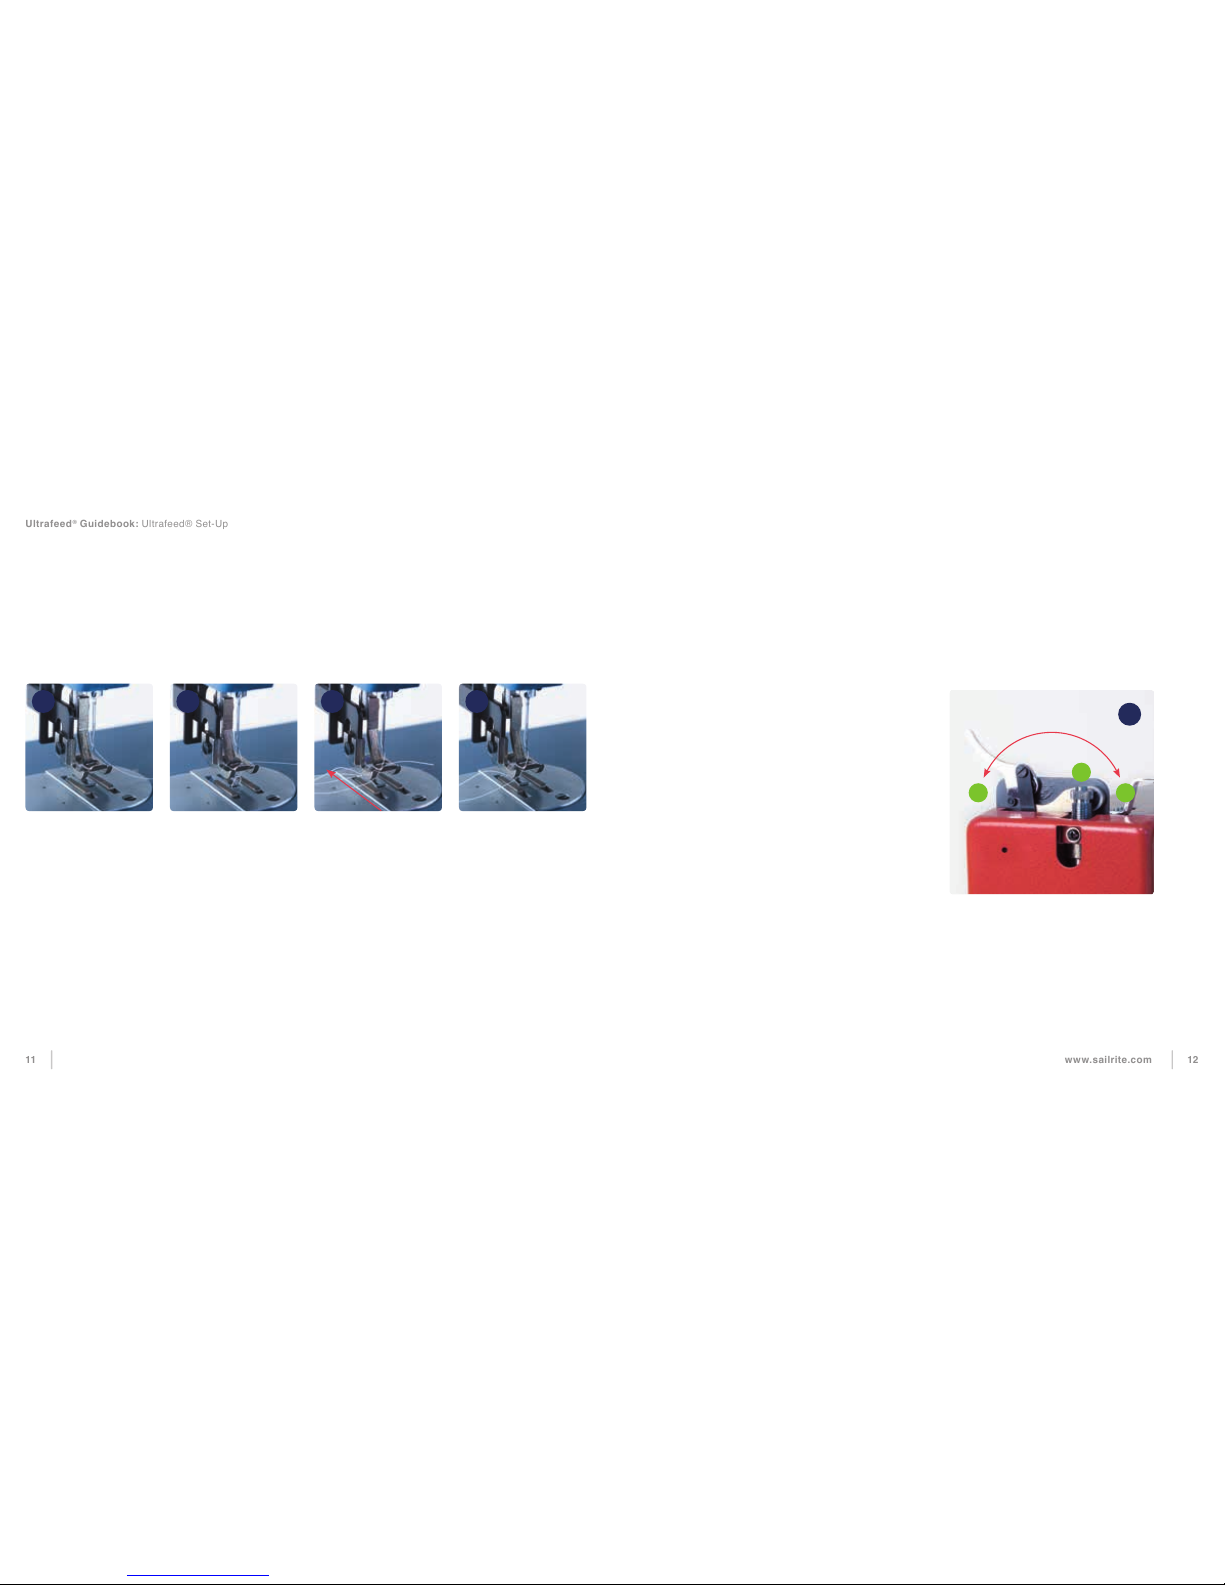
Turning Corners
First turn the balance wheel toward you until
the needle is at its lowest point. Then lift the
presser foot, turn the material to the new
direction (the needle acts as an axis), drop
the foot and start sewing in the new direction.
DO NOT attempt to change sewing directions
when the machine is at rest with the needle
positioned mid-stroke. This will cause a
skipped stitch or needle deection.
Rotating the fabric while the machine is at
rest with the presser foot down may bend the
needle.
Applies to LSZ-1 Model Only
Forward Feed
Reverse Feed
0 mm
Regulating Stitch Length
The EZ Set Stitch Length Plate (14) sets both
forward and reverse stitch length. To set the
stitch length, loosen the two thumb screws
(A), slide the posts up or down and tighten
the screws. The thumb screw stops (B)
restrict the movement of the Feed Regulator
Lever (C), which is spring loaded to always
rest against the upper stop.
B
C
A
15
16
+6 mm
Longest
Forward
+6 mm
Longest
Reverse