Table of Contents
Ultrafeed Safety���������������������� 1
Machine Damage Prevention�� 2
WorkerB®Speed Settings������� 3
Preparing to Sew�������������������� 4
Choosing Thread Size �����������������4
Needle Types ���������������������������5-6
Needle Installation��������������������7-8
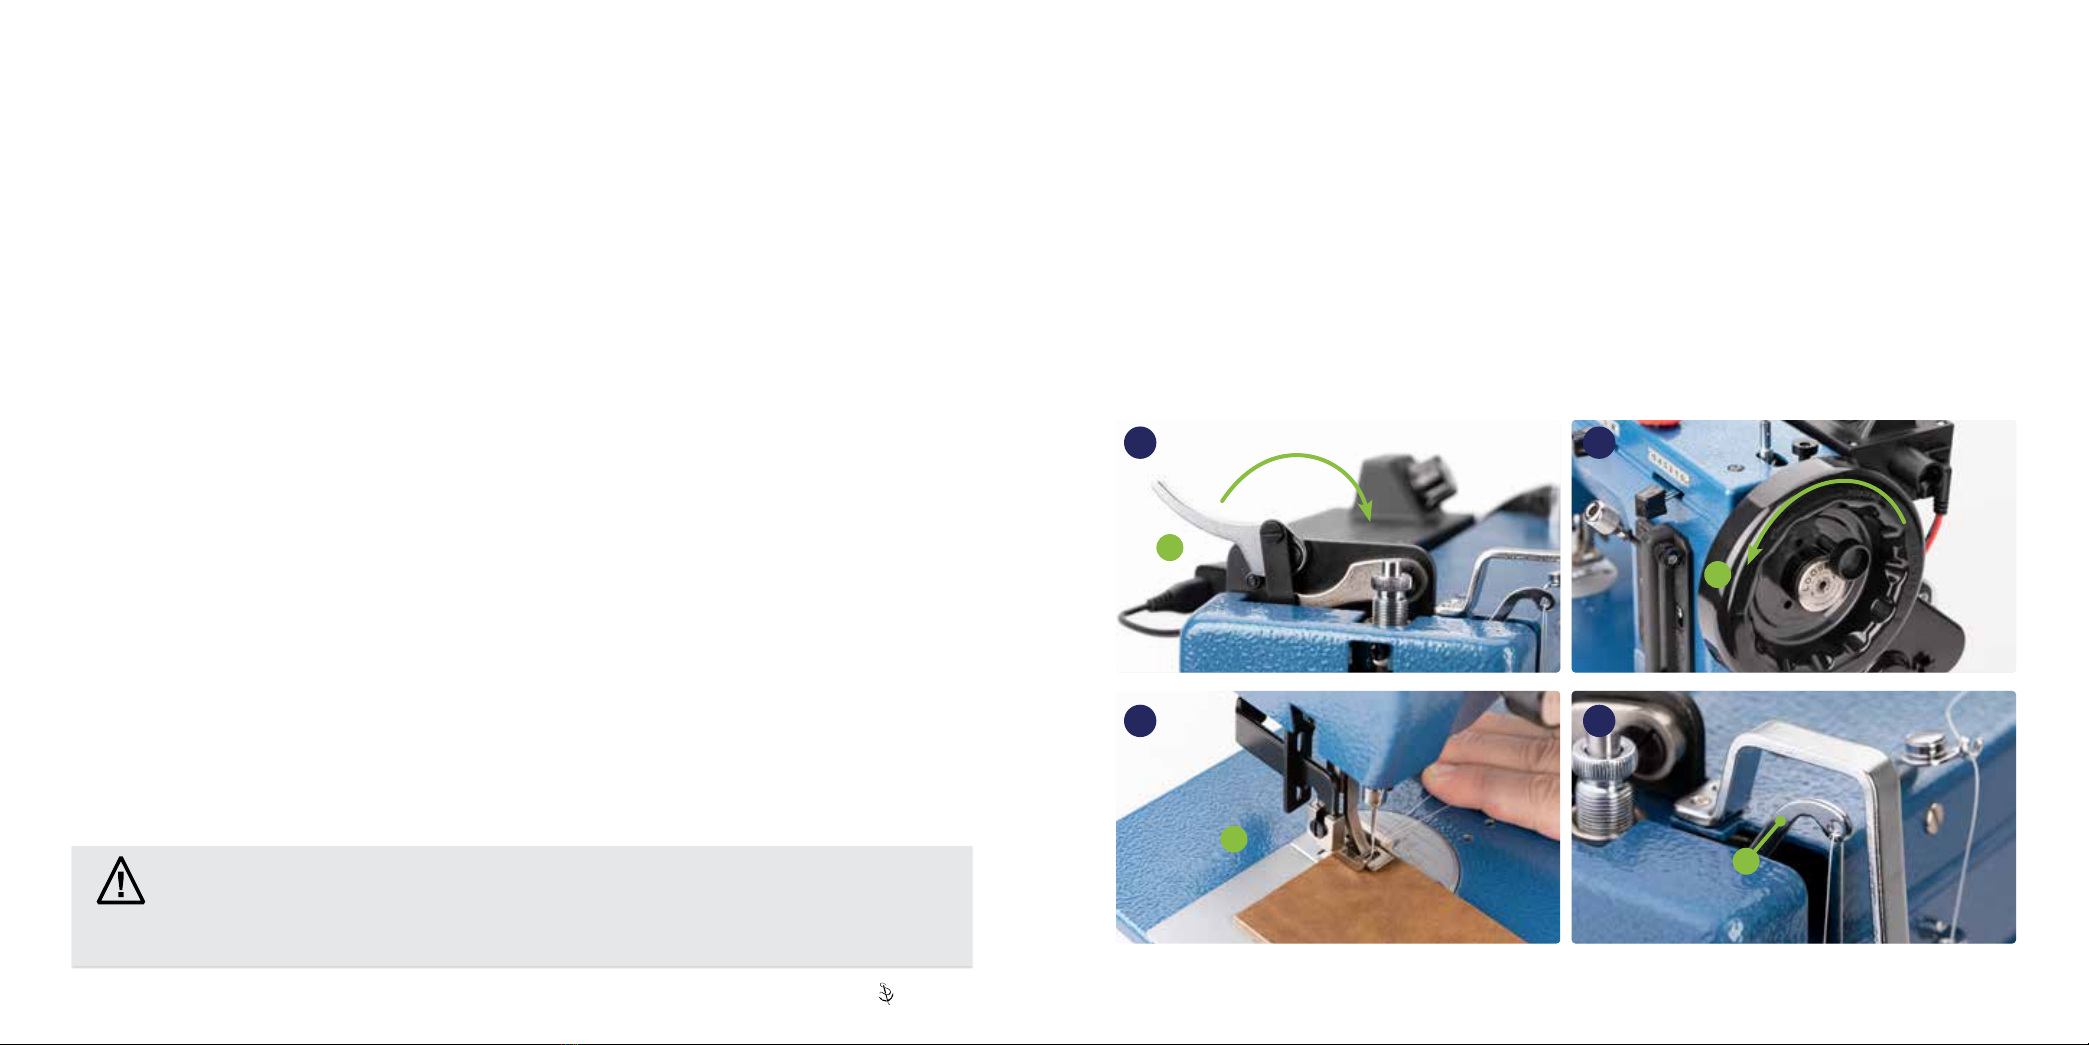
Presser Feet & Feed Dog
Installation������������������������������9-10
What Is the Posi-Pin®Safety
Shear? ����������������������������������� 11-12
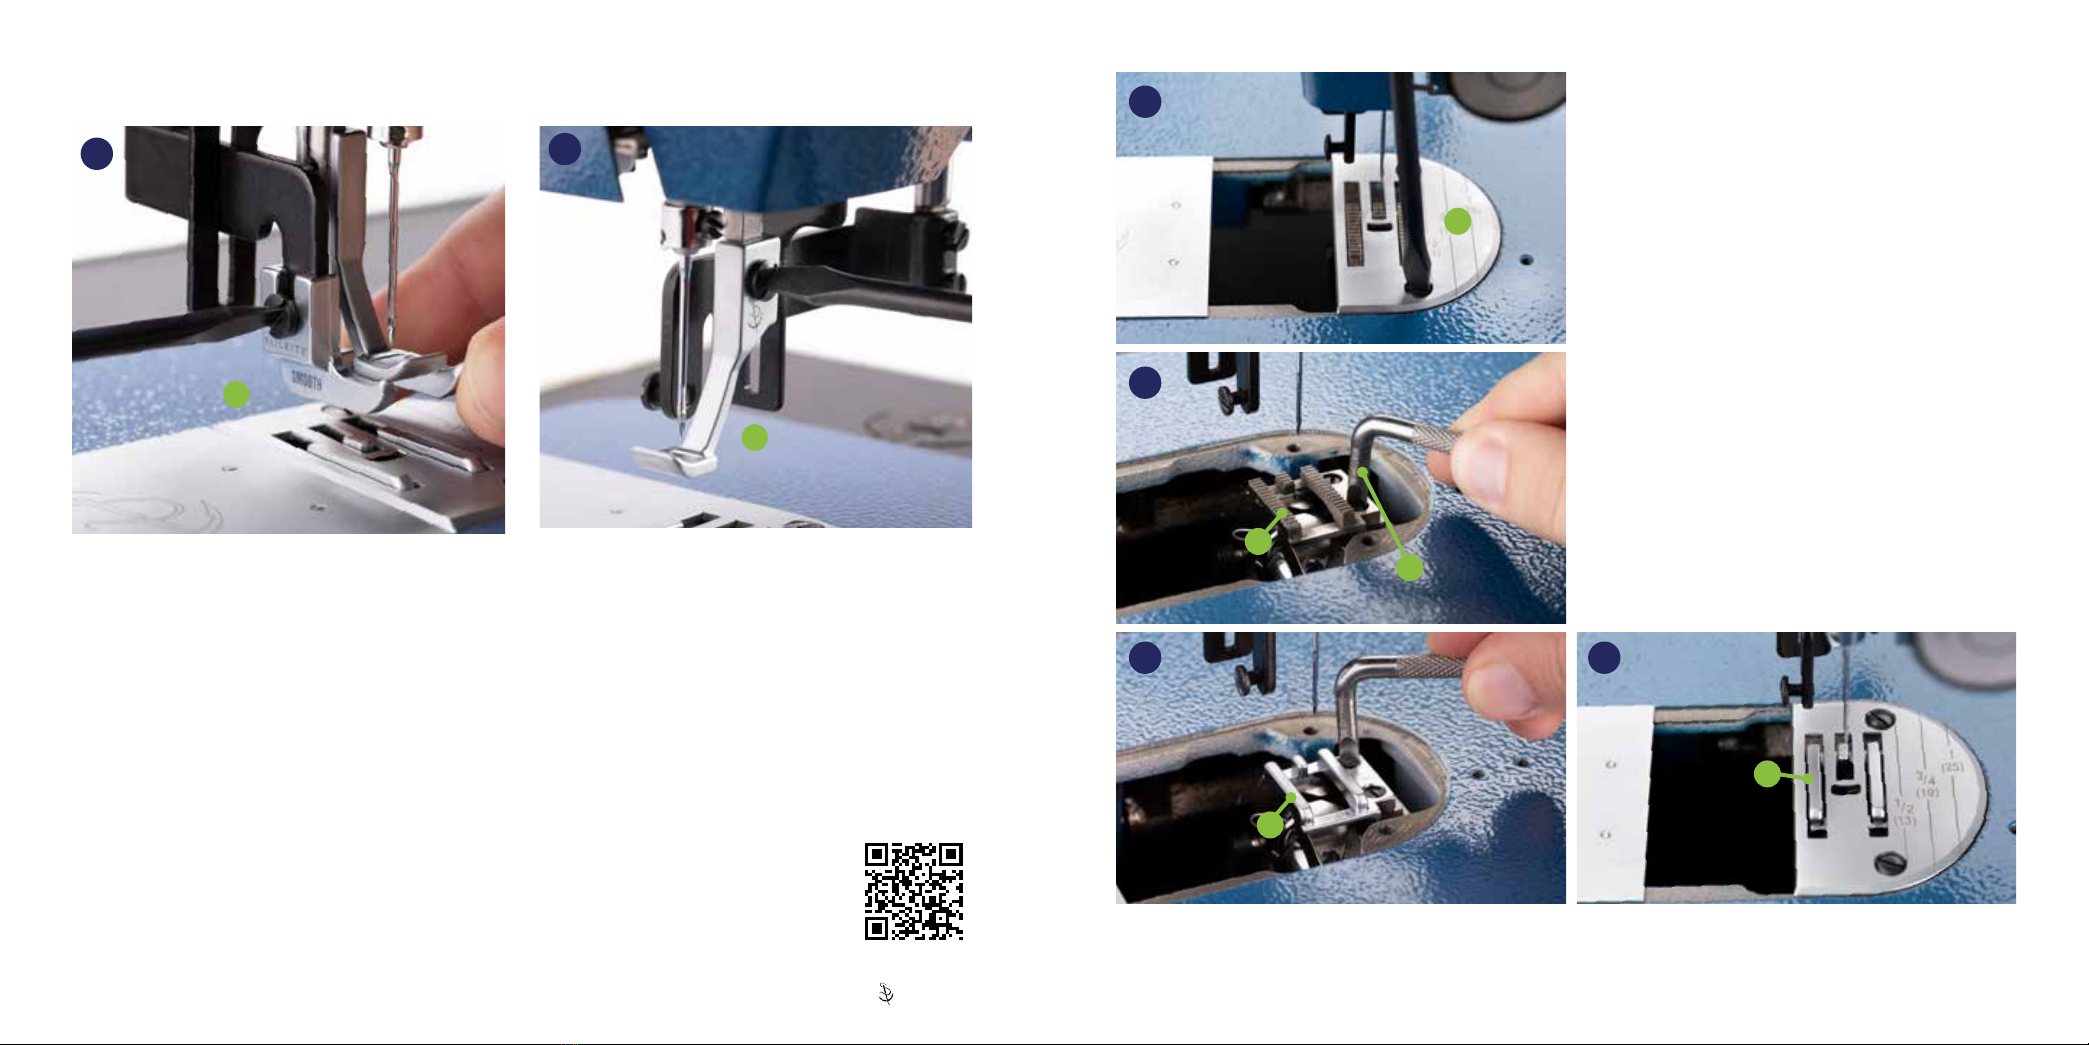
Winding Bobbins����������������������13-14
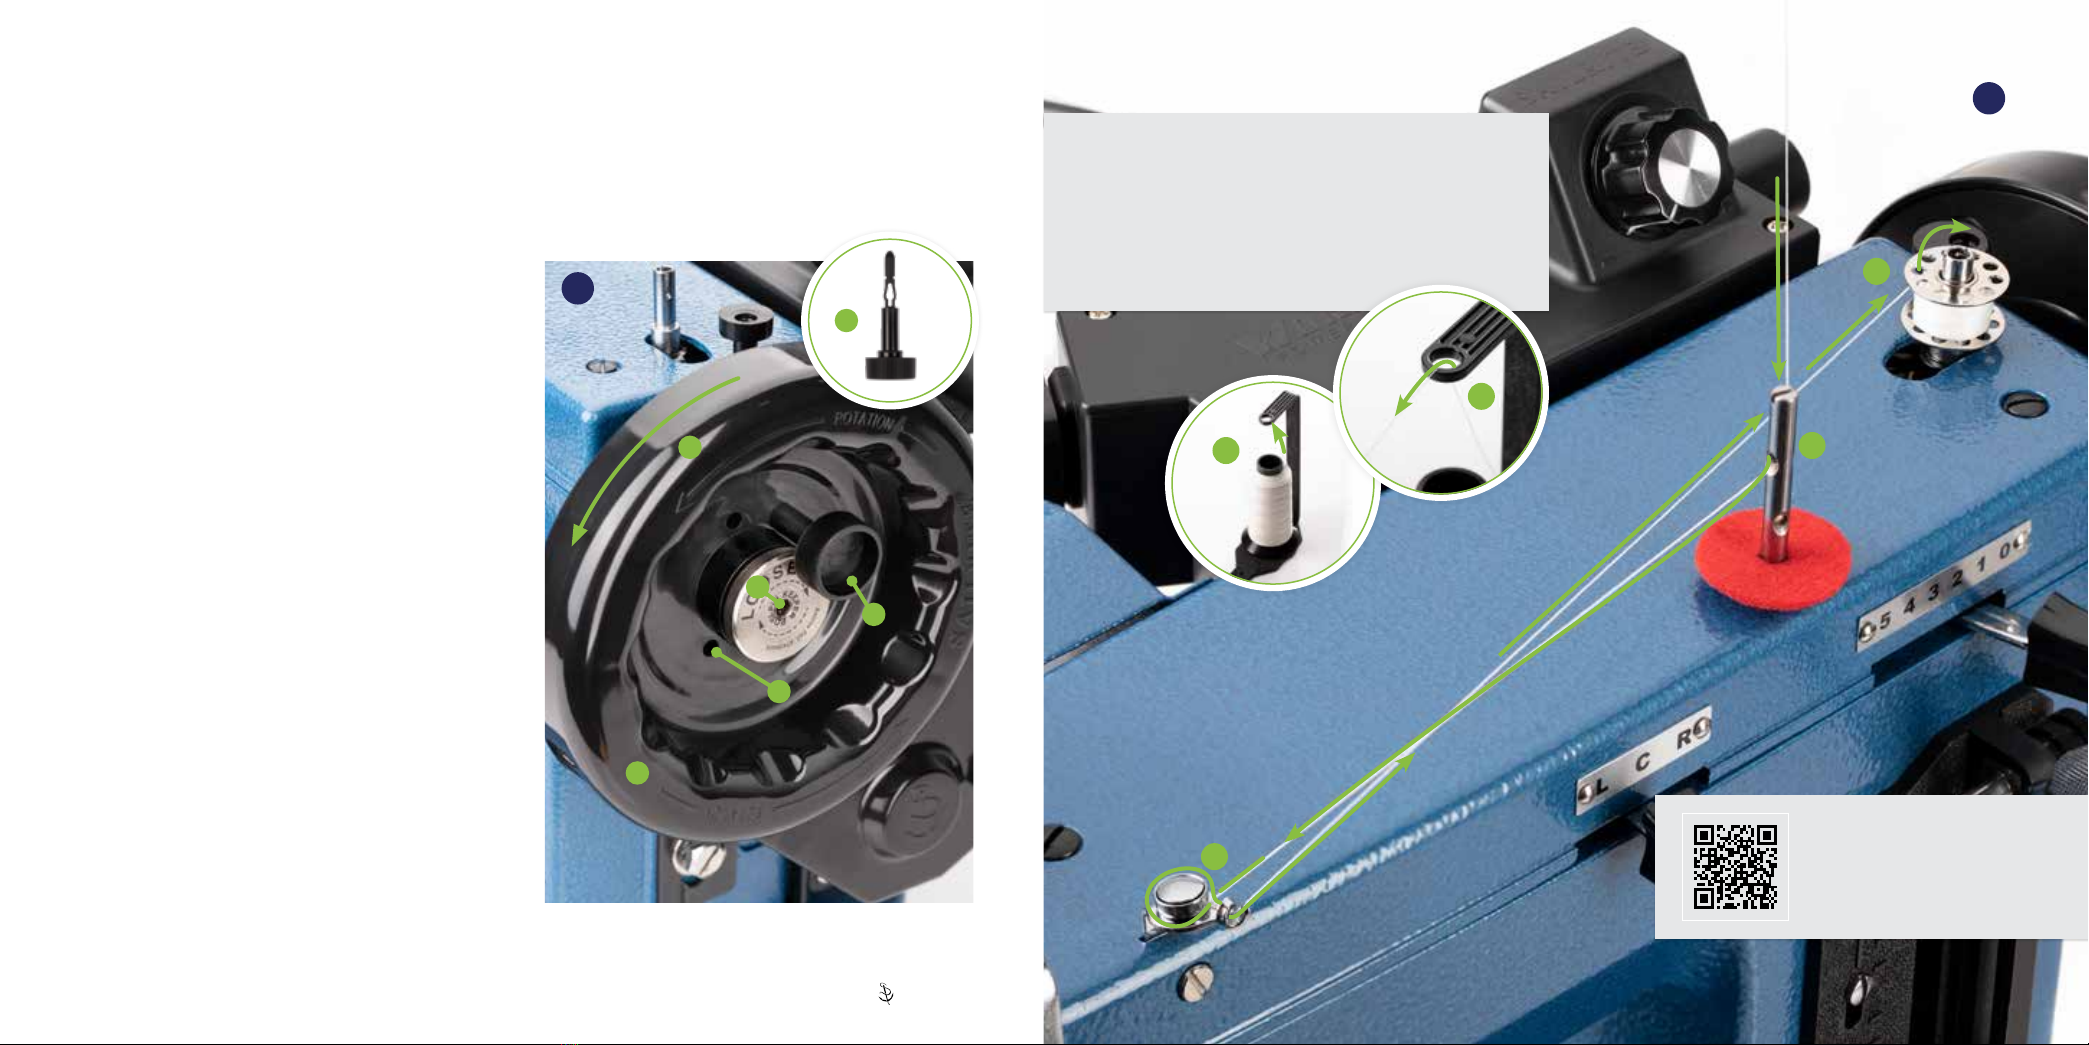
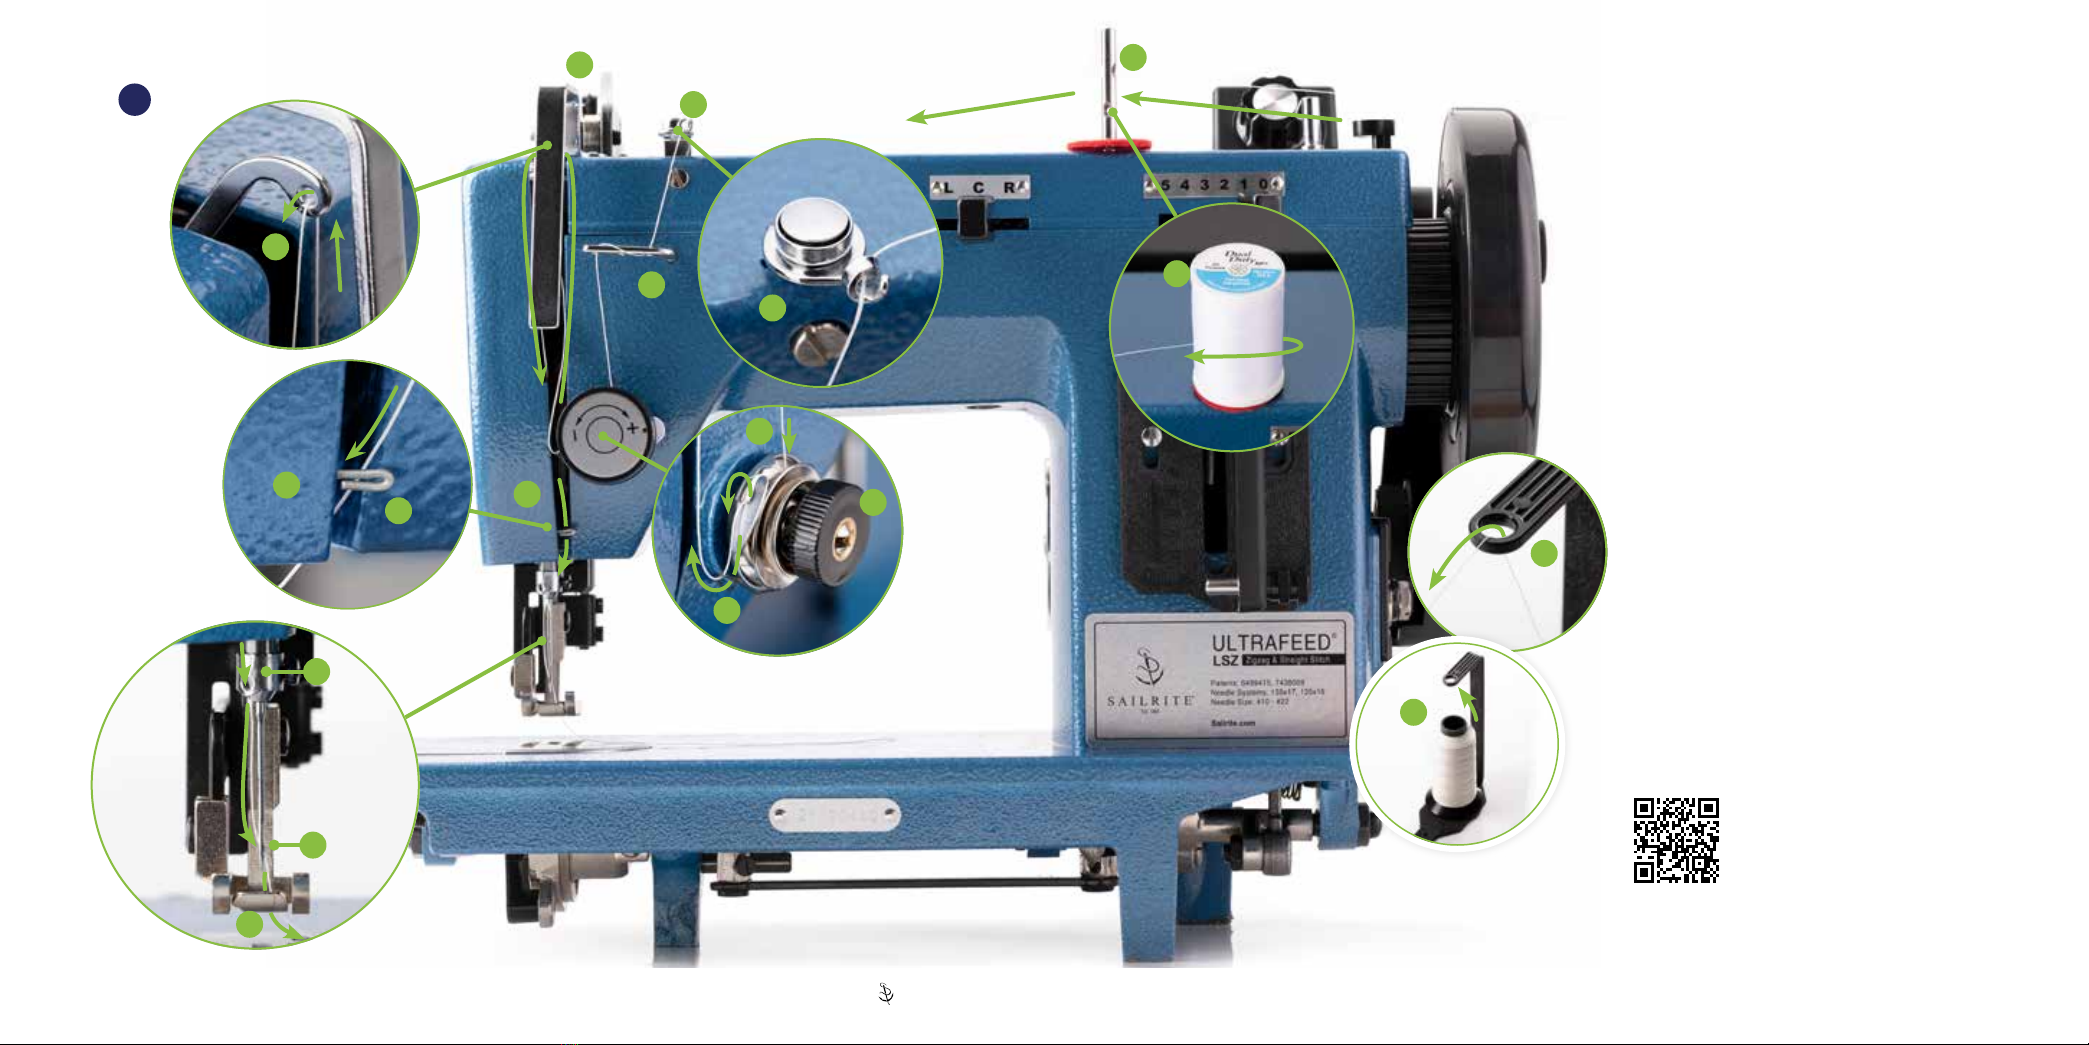
Threading the Machine������������� 15-16
Removing & Installing Bobbin Case��17
Installing Bobbin in Bobbin Case ���������������18
Picking Up Bobbin Thread ������������������������� 19
Using the Ultrafeed ��������������������������������20
Starting to Sew������������������������������������������20
Regulating Stitch Length ���������������������������21
Sewing in Reverse�������������������������������������21
Turning Corners�����������������������������������������22
Switching From Straight to Zigzag Stitch ��� 22
Straight Stitch Needle Positioning��������������22
Thread Tension Adjustment �������������������23
Advanced Thread Tension Adjustment �� 24
Adjusting Presser Foot Tension ������������ 25
Removing Material From Under the
Presser Foot�������������������������������������������26
Ultrafeed Maintenance ���������������������������27
Lubrication ������������������������������������������� 27-30
Troubleshooting the Ultrafeed ��������������� 31
Proper Needle Orientation & Installation���� 32
Replacing the Take-Up Spring ������������������� 33
Material Surface Is Being Damaged ���������� 34
If Posi-Pin®Safety Shear Breaks ��������������� 35
Removing the Hook to Clean the Shuttle
Race Guide Shaft & Free Thread Jams ����� 36
Skipped Stitches����������������������������������� 37-38
Thread Issues��������������������������������������� 39-42
Needle Issues�������������������������������������������� 43
Bobbin Winding Issues ������������������������������ 44
Ultrafeed Timing�������������������������������� 45-54
Schematics���������������������������������������� 55-66
Specifications ����������������������������������� 67-68
Warranty �������������������������������������������� 69-70
Your Sewing Journey
Starts Today!
Congratulations on your new Ultrafeed®Sewing
Machine. Inside this guidebook you'll nd detailed
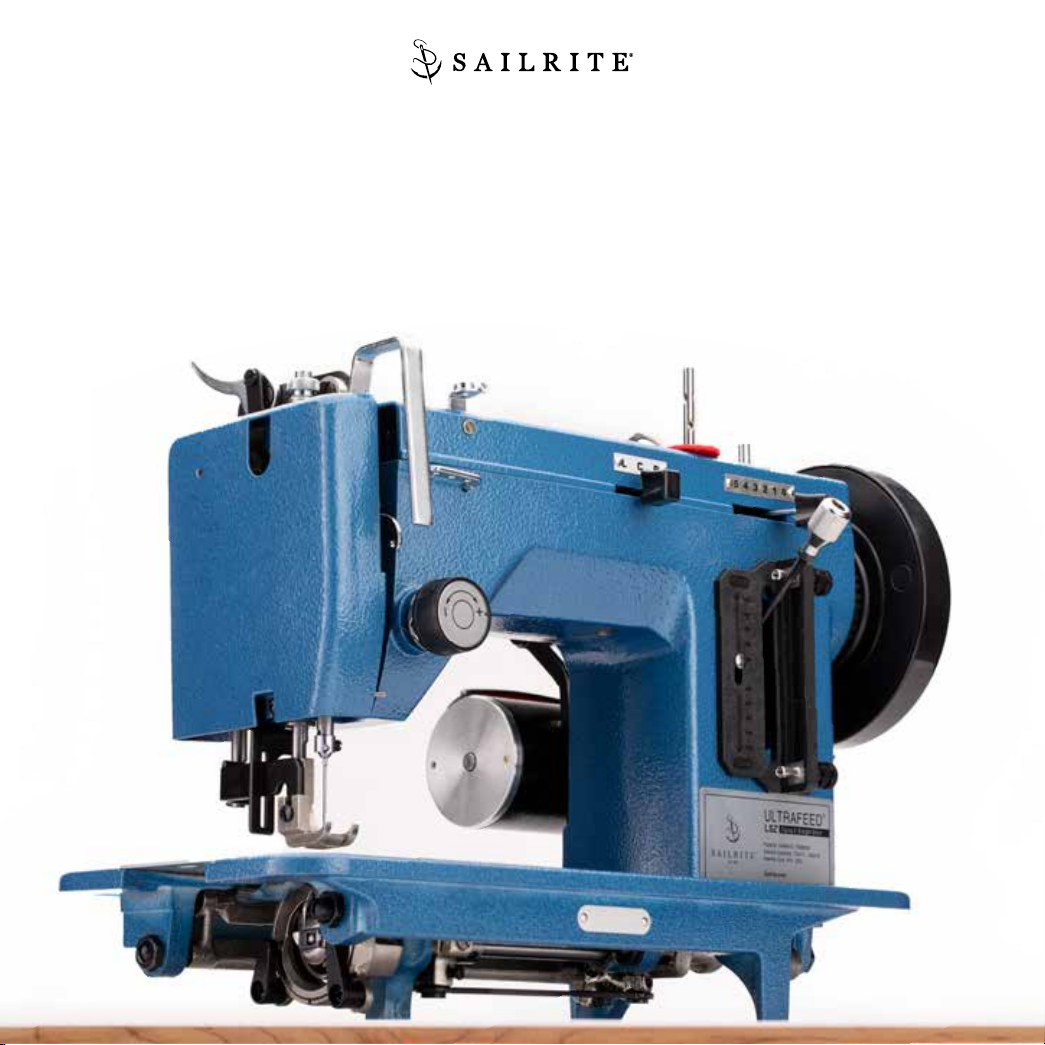
instructions, photos and videos on how to prepare
and use your machine, as well as troubleshooting and
maintenance advice�
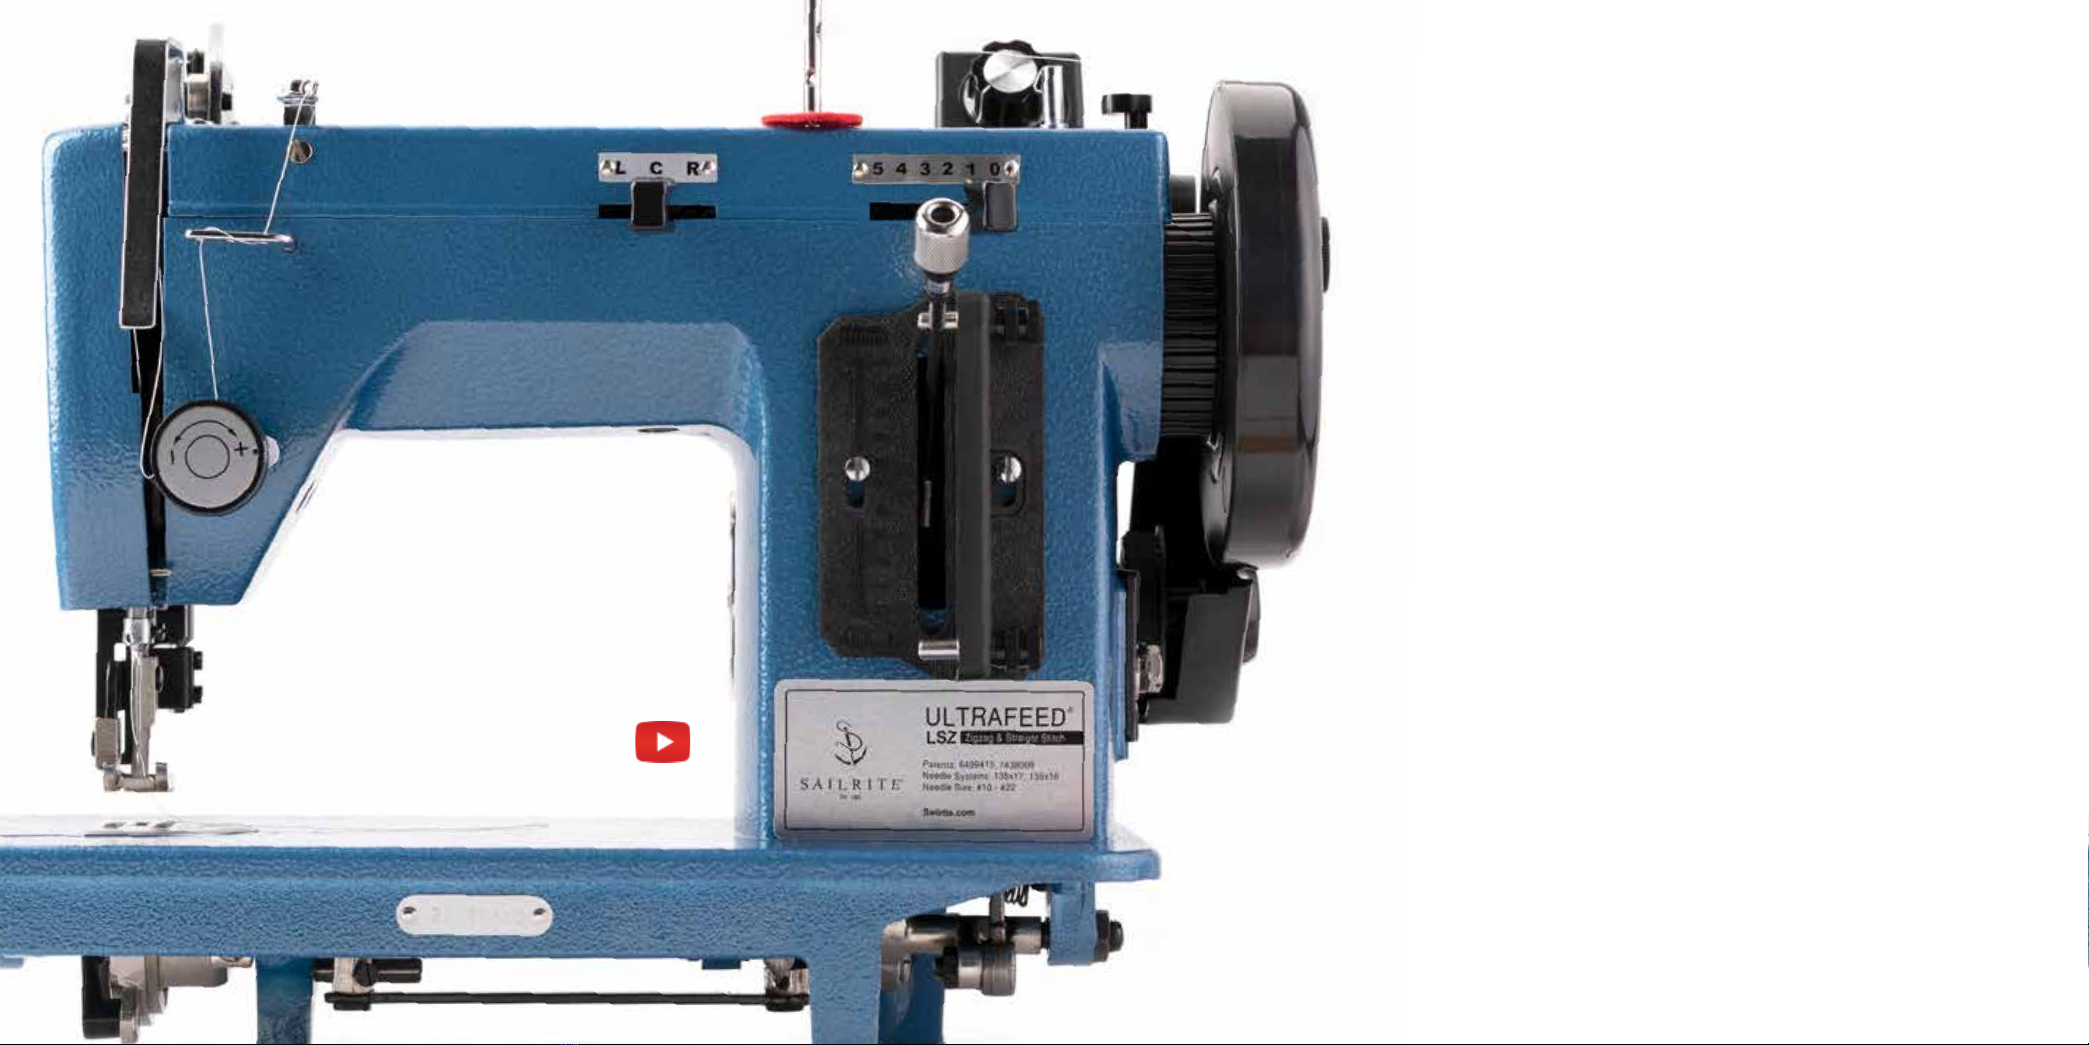
To watch all of the setup and maintenance videos in this
guidebook, please visit Sailrite�com/LSZ-Guidebook-Videos
for a complete video playlist�