Sailrite Craftool Pro Stitch Master Manual

Set-Up • Use • Maintenance • Troubleshooting • Schematics

Table of Contents
Stitch Master Legs & Table Top Components I
Stitch Master Sewing Machine Components III
Stitch Master Safety 1
Assembling the Stitch Master 4
Assembling the Legs 5
Assemble and Attach Treadle 7
Assemble and Attach Tabletop 9
Attach Idler Pulley 10
Tabletop Motor Attachment 11
Linkage Bar Installation 13
Install Oil Tray and Hinges 14
Install Sewing Machine and Belt Bracket 15
Attach Power Plus™ Flywheel 16
Installing Timing Belts 17
Insert Support Pin and
Thread Stand Post 20
Install Motor Cover and Belt Cover 21
Install Light and Wire 22
Install Spool Pin and Felt 23
Stitch Master Set-Up 24
Needles 26
Winding Bobbins 27
Threading the Machine 29
Removing & Installing the Bobbin Case 31
Installing Bobbin in Bobbin Case 32
Picking Up Bobbin Thread 33
Using the Stitch Master 34
Starting to Sew 34
Regulating Stitch Length 35
Sewing in Reverse 35
Turning Corners 35
Thread Tension Adjustment 36
Adjusting Presser Foot Tension 38
Removing Material from Under
the Presser Foot 39
Motor Speed Adjustment 40
Stitch Master Maintenance 41
Lubrication 41
Troubleshooting the Stitch Master 45
Material Surface is Being Damaged 46
Inconsistent Stitch Tension 47
Removing the Hook to Clean the Shuttle Race
Guide Shaft and Free Thread Jams 48
Skipped Stitches 49
Thread Issues 51
Needle Issues 55
Bobbin Winding Issues 56
Belt Issues 57
Stitch Master Timing 58
Hook/Driver Gap 61
Schematics 67
Specications 81
Warranty 84
Welcome to Your
Stitch Master®Sewing Machine!
You are now the proud owner of one of the toughest, most
versatile sewing machines around.
With the Stitch Master, you can sew up projects from leather to upholstery. This guidebook
will give you an in-depth look at your machine, its assembly and features, as well as teach
you proper use and maintenance and give helpful troubleshooting advice.

Table Top and Legs Hardware
Table Top and Legs
Stitch Master®Legs & Table Top Components
37 PCS/PZ
II
I

Accessories Box
(10)(6)
Servo Motor Box
Head Box
Stitch Master®Sewing Machine Components
77 PCS/PZ
IV
III

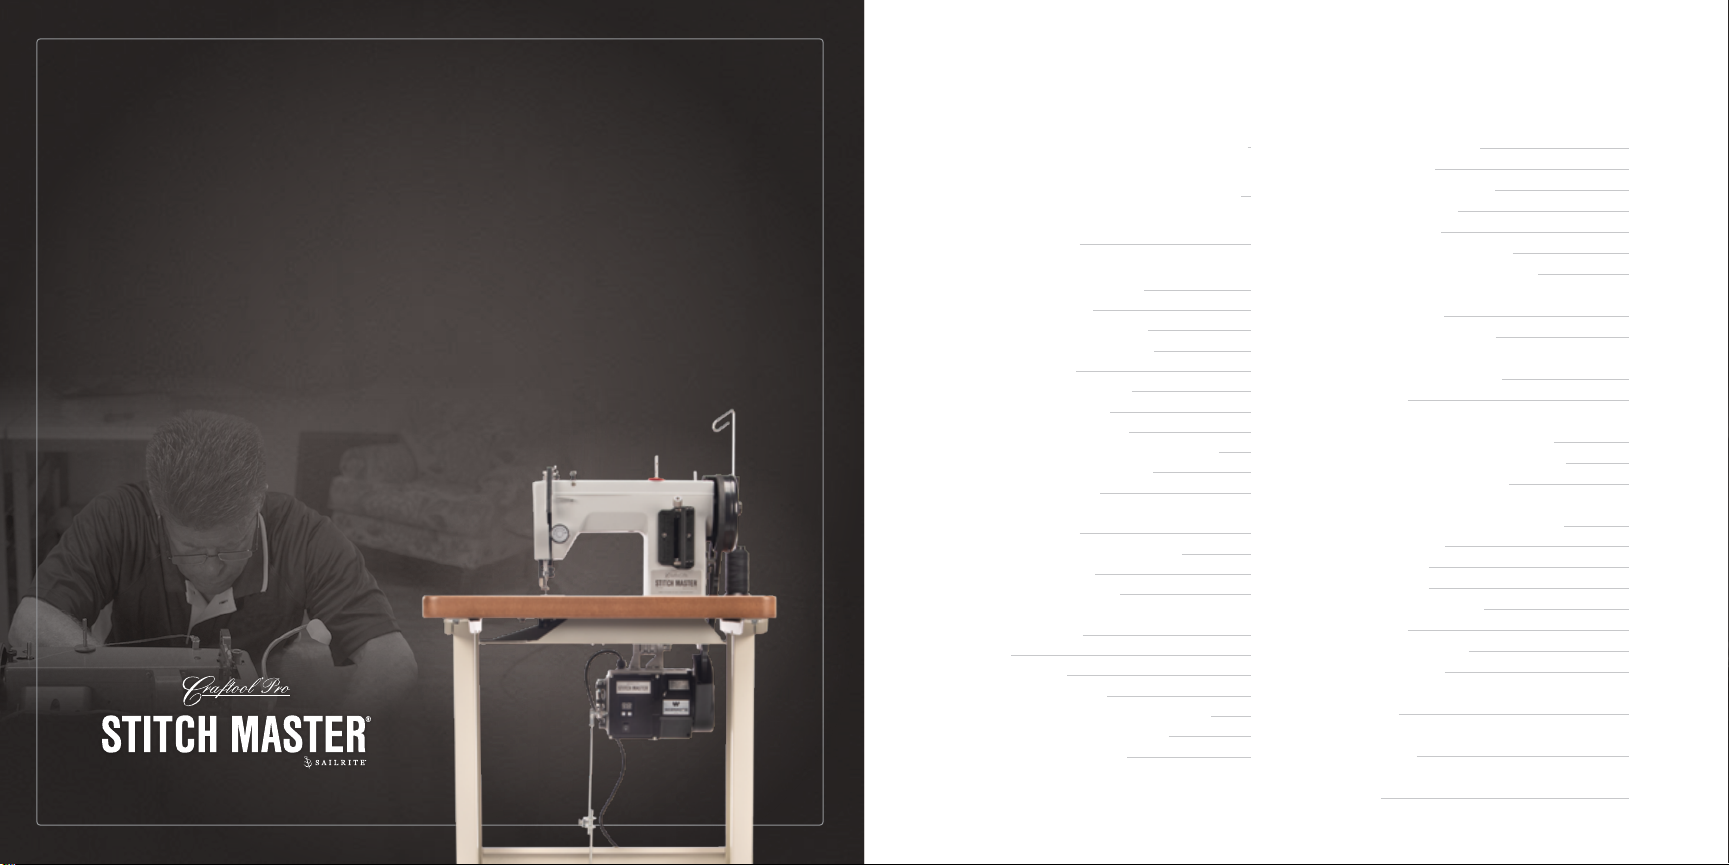
Stitch Master®Safety
Please observe the following when using your Stitch Master sewing machine:
1. Do not operate if you or the machine are
wet or may become wet.
2. Operate the machine on a rm, level surface
with adequate room for safe operation.
3. Observe caution when placing your hands,
other body parts, or clothing near any
moving parts including but not limited to
the walking foot, needle, Power Plus™
Flywheel, and belts.
4. Do not run the machine without its covers
in place.
5. Do not stop the movement of the Power
Plus Flywheel with your hands.
6. Always use the proper voltage required for
the motor and light.
7. Do not pull yourself toward the table
when using the machine as this is a tip
over hazard.
8. Wear protective eye wear when sewing.
9. Wear shoes when operating the foot
treadle.
10. Provide supervision when allowing
those unfamiliar with the Stitch Master
operations to use the machine.
11. Do not use the machine around ammable
materials.
12. Wire the light in a manner to keep it clear
of belts and other moving parts.
Workhorse™ Servo Motor Safety Precautions
The Workhorse Servo Motor is designed specically for sewing machines and
is not warranted for other uses. Please follow the guidelines below to prevent
injury or damage to the motor/sewing machine.
1. Confirm the shaft of the motor rotates
counterclockwise before operating the
sewing machine (See pg. 19 “Changing
Motor Rotation” if the shaft rotates
clockwise).
2. Do not operate the machine without the
belt covers installed.
3. Do not touch any moving parts when
operating the Workhorse Servo Motor.
4. Remove foot from the treadle when
turning the power ON.
5. Turn the motor power switch OFF
before replacing or threading the sewing
machine needle.
6. Turn the motor power switch OFF when
leaving the machine.
7. When performing maintenance on the
sewing machine, turn the motor power
switch to the OFF position and remove
the power cord from the wall.
8. To avoid injury or damage to the motor,
do not alter or tamper with the internal
components of the motor.
9. Do not cover the motor’s ventilation; it
can cause the motor to overheat.
2
1

Work Environment for Workhorse™ Servo Motor
1. Power Voltage: Do not use any Voltage
but the one specied on the motor.
2. Electromagnetic Pulse Interference: Keep
the motor away from high electromagnetic
machinery and electro pulse generators.
3. Temperature:
a. Do not operate in temperatures above
115°F (46°C) or under 40°F (4°C).
b. Avoid operating in direct sunlight.
c. Avoid operating near a heater.
d. Avoid operating in areas with low and
high humidity.
4. Atmosphere:
a. Avoid operating in dusty areas.
b. Avoid operating near combustible or
ammable items.
c. Avoid water coming into contact with
the motor/outlet.
5. Power Cord:
a. Avoid placing heavy objects, excessive
force or bends in the power cord.
b. Ensure the power cord cannot be
caught in the timing belt.
c. Check that the outlet voltage matches
the motor voltage before plugging in the
power cord.
• Mallet or Hammer
• 3/8 inch Socket Wrench
• 14 mm Socket Wrench
• Crescent Wrench
• #2 Phillips Screwdriver
• #1 Stubby Phillips Screwdriver
• Flat Screwdriver (included)
• Box End Wrench (included)
• Tape Measure
• A Triangle or Square
Basic tools required:
Assembling the Stitch Master
WARNING: This product can expose you to chemicals including Nickel (Metallic),
which is known to the State of California to cause cancer. For more information
go to www.P65Warnings.ca.gov.
WARNING: CHOKING HAZARD: Small parts. Not for children under 3 years. CONTAINS
FUNCTIONAL SHARP POINT. Adult supervision recommended.
Stitch Master®Guidebook: Safety
4
3

3. Flip the legs upside down and lay the
bottom brace (D) into the desired position
across the bottom of the legs. This will
determine the distance the treadle will
be from the operator once seated. We
recommend installing it 3-1/2 inches from
the front end of the legs (3). Find two
more bolts, lock washers and washers
(C) and rectangular nuts (E). Slide the
rectangular nut (E) into position inside the
leg cavity. The washer should bridge the
open channel cavity. While holding the
rectangular nut in the desired position,
slide the bottom brace into position and
thread in the corresponding bolt (4). Do
this for both sides.
4. Use a tape measure to confirm the
bottom brace is squarely positioned.
Tighten the bolts.
Assembling the Legs
1. Position legs (A) on their side, unnished
sides facing in, with the feet facing you.
Line up the back brace (B) with the
corresponding threaded holes (1).
2. To connect the back brace, nd parts (C)
and loosely thread them through each
of the four holes (2). Use a #2 Phillips
screwdriver to make these snug but do not
tighten completely.
Hardware is scaled 50%
1
2
C
C
E
3
4
Hardware is scaled 50%
A
D
B
Stitch Master®Guidebook: Assembling the Stitch Master
6
5

3. To attach the treadle to the bottom brace,
ip the treadle upside down with the treadle-
bracket facing the back leg brace. Line up
the holes on the sides of the treadle with the
pivots and slide the pivots into the treadle.
Center the treadle with the stand and tighten
the pivots (7). The treadle must be able to
pivot freely without left and right play.
Assemble and
Attach Treadle
1. Hold the treadle (A) so that the bolt holes
are facing toward you with the rubber pad
up. Next, place the treadle-bracket (B) over
the two right-most holes and thread the two
bolts (C) through each hole. Position the
bolts all the way to the left in the treadle-
bracket slots and tighten each bolt (C) with
a nut (D) on the back side (5).
2. Find the two pivots (E), bolts, lock washers
and washers (F) and nuts (G). With
the stand upside down, place one pivot
underneath the far right slot of the bottom
brace making sure the tab is facing up,
away from center and through the slot. Run
the bolt up through the hole in pivot (E)
from underneath the bottom brace, then
place the nut on top and loosely thread
together (6). Repeat this step with the other
pivot on the furthest opposite hole of the
bottom brace making sure the tab on the
pivot is facing up away from center.
5
6
7
Hardware is scaled 50%
Tabs
E
F
G
A
B
C
D
Stitch Master®Guidebook: Assembling the Stitch Master
8
7

Assemble and
Attach Tabletop
1. Place the tabletop (A) on the oor with the
top side down on a soft surface to avoid
scratching it. The belt slot of the tabletop
should be to your right. With the back of
the legs facing you, place them on top
of the tabletop and line up the back pilot
holes in the table with the leg mount holes.
Loosely thread a hex head lag screw (B),
lock washer (C), and large at washer (D)
into each back pilot hole rst. Then align
the front leg holes to their corresponding
tabletop pilot holes and thread in their
screws, lock washers, and at washers (8).
2. Use a 3/8 inch socket wrench to tightly
drive all four of the hex head lag screws
(B), lock washers (C) and large at
washers (D) into the tabletop.
3. The legs have adjustable feet. Rotate the
locking nut in a manner allowing each foot
to be threaded all the way in (9). Once
the table is upright this makes it easier to
adjust one or two feet to stabilize the table.
Once adjusted, use the nut to lock the
position permanently.
Attach Idler Pulley
1. Partially thread the two remaining hex head
lag screws (B), lock washers (C) with two
small washers (E) into the two pilot holes
next to the belt slot of the tabletop (10).
2. Slide the two parallel slots of the Idler Pulley
L-bracket (F) under the washers (E) so that
the wheel portion is facing the belt slot of
the tabletop. Tighten the lag screws (B) with
a 3/8 inch socket wrench. Position the lag
screws within the slots as shown (11).
3. Flip the table structure on its feet and
tighten all the bolts on the treadle with a #2
Phillips screwdriver and tighten the bolts on
the legs with a 14mm socket wrench, while
ensuring the upright legs are vertical.
8
9
10
11
Hardware is scaled 50%
C
A
F
2-1/2"
D
B
B
C
E
Hardware is scaled 50%
Stitch Master®Guidebook: Assembling the Stitch Master
10
9

4. Loosen the pivot screw (E) on the
Workhorse Servo Motor (14). When the
motor bracket (F) is placed at on the
ground, the side of the Workhorse Servo
(C) should be perfectly vertical with the
ground. Use a Triangle or Square to set the
angle and tighten the pivot screw (E) (15).
5. Slip the Workhorse Servo (C) and motor
bracket (F) onto the three carriage bolts
(A). Use a tape measure to measure 7-1/4
inches to the inside of the table leg from
the motor bracket (16). Once in the desired
position, drop one washer (G) onto each
carriage bolt (A), then a lock washer (H),
and nally thread on a nut (I).Tighten each
with crescent wrench or a 14mm deep
socket wrench (17).
6. Flip the table so that it is upright before
continuing to the next step.
Tabletop Motor Attachment
1. Use a mallet or hammer to pound the three
carriage bolts (A) into the three through-
holes in the tabletop (12).
2. Flip the table over again, legs up.
3. Within the motor box nd the plastic belt
cover and its mounting bracket. Secure
the belt bracket (B) to the end of the
Workhorse™ Servo Motor (C) using the
three small screws (D). Orient the bracket
as shown using the screw locations in the
slots as a reference (13).
15
16
17
1412
13
Hardware is scaled 50%
A
D
I
H
G
A
B
D
E
C
C
F
F
A
E
Stitch Master®Guidebook: Assembling the Stitch Master
12
11

Linkage Bar Installation
1. Loosen the center nut on the linkage bar
(A) so that it will slide apart (18). Slide into
furthest position so the linkage bar is at
its longest length and re-snug the nut. On
each end of linkage bar take off the rst nut
and lock washer.
2. Bolt the linkage bar (A) to the outer-most
holes of the motor operation lever on the
Workhorse™ Servo Motor and the treadle-
bracket of the treadle (19). By increasing
or decreasing the overlap of the linkage
bar, different treadle pedal angles can be
achieved depending on user preference.
Use a crescent wrench to set the angle (20).
3. If the linkage bar overlap is too agressive,
the pedal angle will be extreme preventing
the operation lever to make contact with its
resting stop. When this happens, the motor
will not run. Image (B) is correct with the
pedal not actuated.
Install Oil Tray and Hinges
1. Find the metal oil tray (C) and reference
the belt slot of the tabletop (21). Place the
oil tray (C) under the tabletop and line up
the mounting holes in the oil tray to the
pilot holes inside the rim of the tabletop
cutout. Next, thread in the four at head
tapping screws (D) to attach the oil tray
(Due to small size, extras are included in
the package). Use a #1 Stubby Phillips
screwdriver.
2. Place the two hinges (E) into the pre-made
hinge holes in the tabletop. Secure with
included wood screws (F) (22).
18
19
20
21
22
Hardware is scaled 50%
E
F
D
A
A
B
C
E
E
D
F
Stitch Master®Guidebook: Assembling the Stitch Master
14
13

Install Sewing Machine
and Belt Bracket
1. Remove the sewing machine from its
styrofoam shell and place the face of the
machine on a soft, at surface. Loosen the
hinge hole set screws (A) so that the holes
(B) are not obstructed.
2. Remove the long screw (C) from the head of
the sewing machine (23). Take the smaller
part of the belt cover assembly (D) and
secure with the screw (C) as shown (24).
3. Carefully lift the sewing machine and place
the hinge holes (B) over the hinge pins
of the hinges previously screwed to the
tabletop (25). Allow the sewing machine to
slide all the way back/down on the hinge
pins and rest the machine on the tabletop.
Tighten the set screws (A) (26). Pivot the
sewing machine upright.
23
24
25
26
27
28
C
D
F
A
B
A
G
H
E
E
Attach Power Plus™ Flywheel
1. Set the Posi-Pin®(E) aside and unscrew
the reverse-threaded Posi-Pin Nut (F) (27).
Slide the Power Plus Flywheel (G) onto the
Posi-Pin Wheel Bushing (H) and rethread
nut, spinning counter clockwise. Push the
Posi-Pin (E) into the center hole of the Nut
for safekeeping (28).
Stitch Master®Guidebook: Assembling the Stitch Master
16
15

Installing Timing Belts
1. Find the long and short timing belts (A&
B) and box end wrench in the accessory
box. Use the box end wrench to loosen
the shaft of the idler pulley (C) so that
the pulley shaft will be able to move up
and down (29). Take the shorter timing
belt (B) and place it over the big pulley
of idler pulley (30) and around the motor
pulley. Then push the shaft and pulley up,
tensioning the belt and tighten with the box
end wrench.
2. Place the larger timing belt (A) over, and to
the left of, the Power Plus™ Flywheel (D).
Feed the belt through the belt slot and onto
the small pulley of the idler pulley (31).
Turn the Flywheel while guiding the belt
into place around the Power Plus wheel
from the inside (just like a bicycle chain).
Rotate the Power Plus Flywheel to make
sure that both belts are aligned correctly.
The position of the Idler Pulley L-bracket
and the Workhorse™ Servo Motor can be
adjusted for perfect alignment.
3. Check the tension of both timing belts by
pressing at the middle of each belt. There
should be equal tension between the two
belts. If one is more loose, use the box
end wrench to loosen and tighten the idler
pulley accordingly (32).
4. To check the belts at speed plug in the
Workhorse Servo Motor and turn on the
motor by toggling the power switch. Press
the treadle to make sure the Power Plus
Flywheel is rotating from the top toward
you. Both timing belts (Aand B) should
track without side-to-side movement and
be well clear of the belt slot edges (33).
The needle will not move since the Posi-
Pin®is not yet in the engaged position.
If you nd you need to change the motor
rotation, the steps below will assist you.
30
32
31
33
29
C
B
A
D
AB
Stitch Master®Guidebook: Assembling the Stitch Master
18
17

Changing Motor Rotation
Do not run the Workhorse™ in a clockwise
direction as it will bind the sewing machine and
cause other problems. Make sure the motor is
always running in a counterclockwise direction.
If the motor shaft is spinning clockwise, follow
the instructions below to reverse the direction.
1. Press the “P” button 4 times until the LED
display reads “n3”.
2. Press the “S” button to select between “0”
and “1”.
3. Select “1” and the motor will run clockwise.
4. Select “0” and the motor will run
counterclockwise (this is the setting the
motor should be on).
5. Press the “P” button to save the selection
of “0”.
Insert Support Pin and
Thread Stand Post
1. Locate the support pin (A) and thread
stand posts (Band C) (34). The longest
thread stand post with looped end (C)
will drop into the back corner hole on the
tabletop. Gently tap the non-tapered end
of the short post (B) in the table top corner
hole just in front of the taller post. The
support pin (A) goes in the remaining hole,
and is used to rest the machine on when it
is tipped back (35).
34
35
A
C
B
Stitch Master®Guidebook: Assembling the Stitch Master
20
19

Install Motor Cover
and Belt Cover
1. Find the motor belt cover (A) and the
included small screw (B). Slide the motor
cover (A) over the belt bracket on the
Workhorse™ Servo Motor. Thread the
small screw (B) through the hole in the
motor belt cover and tighten with a #1
Stubby Phillips screwdriver to connect it to
the motor bracket (36).
2. The nal belt cover part (C) has a pointed
forked end that will slide between the
washer and the black bracket (37). The
keyway cut on the belt cover (C) will lock
onto the shaft of the key of its mating
component (38).
Install Light and Wire
1. To attach the LED light, place the magnetic
light in your desired location (39). If it is
a 110-volt sewing machine, the light will
plug into the back of the Workhorse Servo
Motor. If it is a 220-240 volt machine, the
light will plug into a wall outlet.
2. Use the included adhesive pieces and
wire ties (D) to secure the light cord in
your desired locations. Make sure to keep
the cord out of the way of any machine
moving parts.
36
37
38
39
Hardware is scaled 50%
B
A
B
C
C
D
Stitch Master®Guidebook: Assembling the Stitch Master
22
21

THREAD
SIZE
TEXTILE
SIZE
NEEDLE SIZE FABRIC WEIGHT
RECOMMENDED
LEATHER WEIGHT
RECOMMENDED
V-69 T-70 #18 3-8 oz. < 6 oz.
V-92 T-90 #20 8-14 oz. 4-10 oz.
Stitch Master Set-Up
Thread
Stitch Master sewing machines can handle most polyester, nylon, cotton or
monolament thread from general purpose to heavy-duty V-92 (T-90).
Install Spool Pin and Felt
1. Screw the spool pin (A) into the threaded
hole on top of the sewing machine. Slide
the red felt disc over the pin (40).
40
A
24
Stitch Master®Guidebook: Assembling the Stitch Master
23

Needles
Stitch Master sewing machines require system 135x16 leather needles sizes #18
or #20. A size #20 needle is used for most medium to heavy leather sewing.
Needle Installation
Stitch Master needles are round on top, unlike
home sewing machine needles. As a result,
proper installation must be exercised carefully.
Improperly installed needles are the main
reason users call for help. Please be sure
that the needle eye is not twisted.
The needles have two distinct sides (41 &
42). One side has a long channel or groove
(B) (locate this groove with your ngernail if
you cannot see it), and the other side has a
scarf (D) i.e., a carved out area, just above the
needle eye (C).
When installed, the side with the needle eye
and groove should be facing outward i.e. to the
left as you face the machine.
CAUTION: If the needle is inserted the
wrong way, the machine will skip stitches and
break thread.
To make sure your needle is inserted far
enough, you can look through the sighting hole
(43, E) near the bottom of the needle bar. The
top of the needle should be fully visible in the
sighting hole and pushed all the way to the top.
ANeedle bar thread guide hole
BNeedle groove
CNeedle eye
D3/16 inch (5mm) ~ height of scarf
ESighting Hole
DI Leather
Needle Type
Use of the wrong needle type can contribute to unattractive
or skipped stitches.
DI needles are ideal for working with leather
(system numbers 135X16 or DPX16).
A “diamond point needle”, should be used for
leather, nonwoven material or two or more layers
of hard leather. These allow for proper thread
entry and help it lay consistently. The cutting
point also keeps the back side of the material
free from a mound or budge at each penetration.
D
A
B
C
E
41 42 43
Stitch Master®Guidebook: Stitch Master Set-Up
26
25

Winding Bobbins
A partially wound V-92 (T-90) bobbin is
already loaded in the machine. Skip this
step if you wish to test sew with the pre-
loaded bobbin. The black thread in the
photos is used for visual purposes only
and is not included with the machine.
>Posi-Pin clutch
DISENGAGED
>Posi-Pin clutch
ENGAGED
Thread the Bobbin
on the machine:
1. Thread comes off top of cone to thread
stand arm (A).
2. Pass through thread post (B). Use
whichever hole provides the most direct
path to the bobbin tensioner (C).
3. Wrap around bobbin tensioner (C).
4. Run under and up through a hole in top
of bobbin (D). Place bobbin on post and
push to the right. Hold onto thread tail
briey and power machine with the clutch
disengaged to wind bobbin. Stop after
several rotations and cut the thread tail off
ush with the bobbin side.
5. Continue winding until the bobbin is full.
Then remove the bobbin from the winder
post by pushing the post to the left and
pulling the bobbin off. Cut the thread.
A
B
C
D
It's faster to wind while you sew!
Run thread to the bobbin winder from an
extra cone of thread. Simply place the second
cone beside the primary cone and lead the
thread up through the same guides. Follow
normal bobbin winding instructions but do not
disengage the clutch.
45
44
46
Disengage the Clutch i.e.
Posi-Pin®Clutch System:
To prepare your machine to wind bobbins,
rst disengage the Posi-Pin Clutch System, to
allow for bobbin winding without running the
machine (45).
Simply pull the pin out of the Power Plus™
Flywheel and place it in the center hole as
shown to store (46). It may already be in the
stored position if you are using the machine
for the rst time.
To continue sewing, re-engage the clutch:
1. Push the Posi-Pin gently into any of the three
Posi-Pin holes in the Power Plus Flywheel.
2. Rotate the Power Plus Flywheel while lightly
pushing on the Posi-Pin until you feel it
connect with any of the 4 bushing holes.
3. Push the pin all the way in and release.
Stitch Master®Guidebook: Stitch Master Set-Up
28
27

Threading the Machine
The black thread in the photos is used for
visual purposes only and is not included with
the machine.
1. Thread comes off top of cone to thread
stand arm hook (A).
2. Pass the thread through one hole in the
thread post (most direct route to bobbin
tensioner) (B).
3. Pass through pig tail of bobbin tensioner (C).
4. Loop through ear holes (D).
5. Thread through upper tension (shown
without cover knob) (E). Make sure lift
lever (F) is raised up to release tension
plates so thread can pass through. Be
sure to catch the hooked spring end with
the thread last.
6. Pass through take-up arm (right to left)
(G) and then under end cover.
7. Pass through the needle bar thread guide
hole (H) and then down through the
needle eye from left to right (I).
A
B
C
D
E
F
G
H
I
47
Stitch Master®Guidebook: Stitch Master Set-Up
30
29

Installing Bobbin
in Bobbin Case
1. Insert a threaded bobbin (A) into the
bobbin case (B) with thread coming off the
left side in a clockwise rotation.
2. Hold the tail of the thread while pushing
the bobbin into the bobbin case.
3. Pull the thread through the slit (C) in the
edge of the bobbin case.
4. Continue pulling the thread under the
tension plate (D).
5. Snap thread into position under tension plate
and pull out about a 6 inch tail of thread.
ABobbin
BBobbin Case
CSlit
DTension Plate
ESpring-loaded Lever
FFinger
GRetaining Ring
Removing & Installing
the Bobbin Case
The bobbin case (B) is located
on the underside of the machine
beneath the presser foot (48).
Removing — Lift the spring loaded lever (E)
and pull the bobbin case out. With the lever
held open the bobbin is captive in the bobbin
case. Release the lever and the bobbin will
fall out.
Installing — Pull and hold the spring-loaded
lever outward (to keep the bobbin from falling
out) and push the case onto the axle of the
gib hook. The nger of the bobbin case (F)
should point upward.
If the lever (E) is held up until the bobbin
case is completely installed, the lever, when
released, will lock onto the axle and there will
be no clicking sound. If the lever is released
before the bobbin case is pushed completely
in place, there is a clicking sound when the
case is pushed all the way on. The nger of
the bobbin case will drop into the notch in the
hook’s retaining ring (G).The bobbin thread
should loosely dangle.
A
B
C
D
E
F
The black thread in the photos is used for visual
purposes only and is not included with the machine.
49
B
F
E
G
48
Stitch Master®Guidebook: Stitch Master Set-Up
32
31
Table of contents
Other Sailrite Sewing Machine manuals

Sailrite
Sailrite Ultrafeed LSZ-1 User manual

Sailrite
Sailrite Leatherwork 3978-00 User manual

Sailrite
Sailrite Ultrafeed LS-1 Manual

Sailrite
Sailrite ULTRAFEED LS Manual

Sailrite
Sailrite Ultrafeed Plus User manual

Sailrite
Sailrite ULTRAFEED LSZ Manual

Sailrite
Sailrite Leatherwork Manual

Sailrite
Sailrite Fabricator User manual

Sailrite
Sailrite Fabricator User manual
Popular Sewing Machine manuals by other brands

Baby Lock
Baby Lock Tiara III BLTR16-3 Instruction and reference guide

EverSewn
EverSewn Sparrow X instruction manual

DURKOPP ADLER
DURKOPP ADLER 275 Series Additional instructions

Baby Lock
Baby Lock BLRG20ST Quick reference card

Reliable
Reliable MSK-8400B specification

Pfaff
Pfaff POWERLINE 2571 ME PLUS Service manual