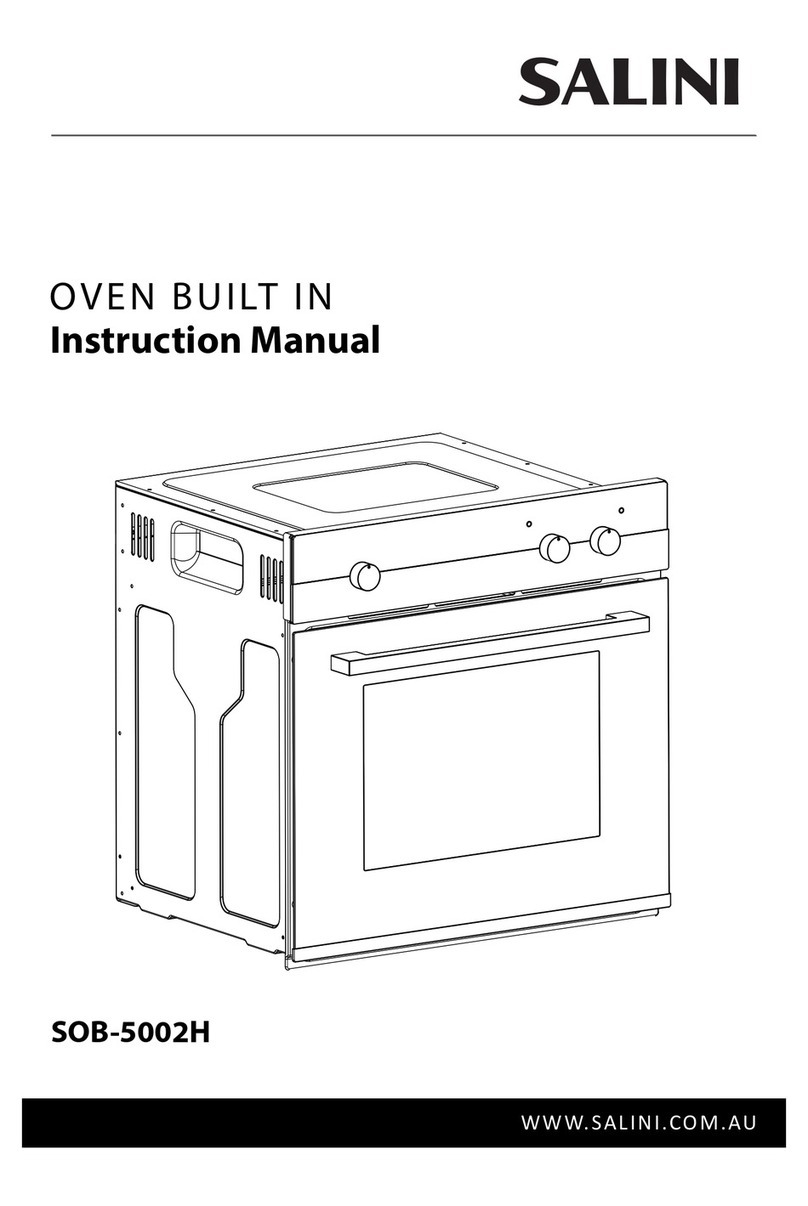
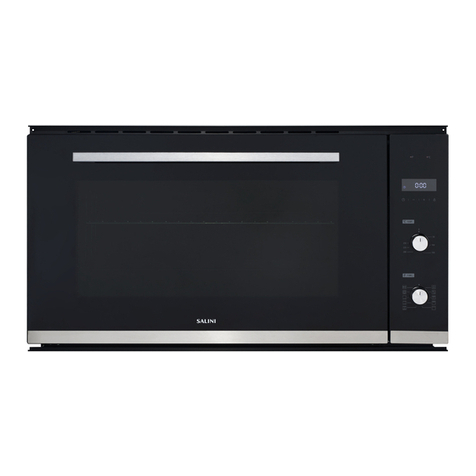
Salini SOB-1002H User manual

OVEN BUILT IN
Instruction Manual
SOB-1002H
WWW.SALINI.COM.AU

-1-
CONTENTS
Important safety information 2-5
Description of the appliance 6-8
Inserting accessories 7
Control panel 8
Using your appliance
9-14
Oven programmer/timer
9
Selecting an oven function
11
Setting the temperature
12
Setting and using the end cook/end time function
13-14
Cleaning and maintenance
15-18
Removing accessories and door 17
Lamp replacement 18
Avoiding damage from misuse 19
Installation
20-25
Electrical connections
21
Installing the oven into the kitchen cabinet
22
Ventilation requirements
25
Troubleshooting
26-27
Cooking Recommendations
28-30
Technical data 31
Declaration of conformity 32
IMPORTANT:
This User Instruction Manual contains important information, including safety & installation
points, which will enable you to get the most out of your appliance. Please keep it in a safe
place so that it is easily available for future reference; for you or any person not familiar
with the operation of the appliance.

-2-
IMPORTANT SAFETY INFORMATION
CAUTION!
Do not use or attempt to install this appliance until you have read this instruction
manual. This appliance is intended for household use only.
General Information
This appliance is designed for domestic household use and designed be built into a standard
kitchen cabinet or housing unit.
IMPORTANT: Your product warranty will be void if the installation is not in accordance with
the instructions. The installation must be carried out by a suitably qualified person, in
accordance with the with the manufacturer’s instructions, and must be connected in
accordance with all local electrical rules specification.
The use of this appliance for any other purpose or in any other environment will void warranty.
Your new appliance is guaranteed against electrical or mechanical defects, subject to certain
exclusions, the foregoing does not affect your statutory rights.
Repairs may only be carried out by Service Engineers or an authorised service agent.
Check the appliance for damage after unpacking it. Do not connect or install the appliance if it
has been damaged in transport as this will void the warranty.
Warning and safety instructions
WARNING:
The appliance and its accessible parts become hot during use. Care should be taken to
avoid touching heating elements.
This appliance complies with all current Australian and European safety legislation, and
designed to operate safely in normal use, however the appliance surfaces will become hot
during use and retain heat after operation.
This appliance is not intended for use by persons (including children) with reduced physical,
sensory or mental capabilities, or lack of experience and knowledge, unless they have been
given supervision or instruction concerning use of the appliance by a person responsible for
their safety.
During use the appliance becomes hot. Care should be taken to avoid touching heating
element inside the oven.
Always use heat resistant oven gloves when handling food, dishes, shelves, trays or ovenware
when the oven is still on or retaining heat from recent use.
Never touch the hot burners, inner sections of the oven, heating elements etc.

-3-
When the oven is on, or still retaining heat, use caution when opening the oven door, always
allow enough distance for hot air and steam to escape before to avoid injury when handling
food.
WARNING: Accessible parts may become hot during use. Young children should be kept
away.
Electrical Caution
WARNING! Cleaning operations must only be carried out when the oven is cool and
disconnected from the power supply.
Any work on electric equipment and systems may only be carried out by authorized qualified
persons.
Even if the oven is off, the cooling fan continues working for a while after turning off the oven.
In case of any damage, switch off the appliance and disconnect it from the power supply
If the supply cord is damaged, it must be replaced by the manufacturer, its service agent or
similarly qualified persons in order to avoid a hazard.
WARNING: Ensure that the appliance is switched off before replacing the lamp to avoid the
possibility of electric shock.
Child Safety
WARNING: Accessible parts may become hot during use.
We strongly recommend that babies and young children are prevented from being near to the
appliance and not allowed to touch the appliance at any time.
If it is necessary for younger family members to be in the kitchen, please ensure that they are
kept under close supervision at all times.
When the door is open, do not allow children to sit or lean onto it. It may overturn causing
harm and the door hinges may get damaged.
Cleaning and user maintenance shall not be carried out by children without supervision.
The packaging materials will be dangerous for children. Keep the packaging materials away
from children. Please dispose of all parts of the packaging according to environmental
obligation.

-4-
Cleaning
WARNING! The appliance must be disconnected from the power supply before cleaning
Cleaning of the oven should be carried out on a regular basis.
Great care should be taken whilst using this appliance and when following the cleaning
procedure (See Cleaning and Maintenance section)
Do not use harsh abrasive cleaners or sharp metal scrapers to clean the oven door glass since
they can scratch the surface, which may result in shattering of the glass.
A steam cleaner is not be used on any part of the oven.
General Safety of Use
DO NOT use the appliance for any other purpose than its intended use.
DO NOT place heavy objects on the oven door or lean on the oven door when it is open, as this
can cause damage to the oven door hinges.
DO NOT leave heated oil or fat unattended, as this is a fire risk.
DO NOT place pans, baking trays, dishes or aluminium foil directly onto the bottom of the oven.
The heat accumulation might damage the bottom of the oven.
DO NOT allow electrical fittings or cables to come into contact with areas of the appliance that
get hot.
DO NOT pour water into the hot cooking compartment.
DO NOT use the product with the front door glass removed or if glass is cracked.
DO NOT place greaseproof paper loosely over accessories during preheating. Always weight
down the greaseproof paper with a dish or a baking tin. Only cover the surface required with
greaseproof paper. Greaseproof paper must not protrude out and make contact with element.
A draught is created when the appliance door is opened. Greaseproof paper may come into
contact with the heating element as it may catch fire.
The drip tray handle should only be used to reposition the drip tray and NOT for removing it
from the oven cavity. When removing the drip tray, you should ALWAYS use an oven glove.
Only use the temperature probe recommended for this oven.

-5-
Installation
The installation must be carried out by a suitably qualified person, in
accordance with the with the manufacturer’s instructions, and in accordance
with all local electrical and building rules and specifications.
The appliance is intended for installation into kitchen cabinet or enclosure, it is important to
follow instructions to ensure correct installation. Improper installation will void the product
warranty, and invalidate any claims.
We decline any responsibility for injury or damage, to person or property, as a result of
improper use or installation of this appliance.
Heat, steam and moisture will be created during use of the appliance, take care to avoid injury
and ensure that the room is adequately ventilated. If the appliance is going to be used for
prolonged periods of time, then additional ventilation may be required.
Please consult with your qualified installer if you are in any doubt about the amount of
ventilation that you will require.
Carry the appliance with at least two persons, appliance is heavy and requires two persons lift
DO NOT attempt to lift or move cooking appliances by using the oven door or handle, as this
may cause damage to the appliance or result in injury to the person lifting the appliance.
DO NOT install the appliance next to curtains or soft furnishings.
IMPORTANT: The adjacent furniture or housing and all materials used in the installation must
be able to withstand a minimum temperature of 85°C above the ambient temperature of the
room it is located in, whilst in use.

-6-
DESCRIPTION OF THE APPLIANCE
Oven Overview
1. Control panel 6. Fan motor
2. Wire shelf 7. Lamp
3. Tray 8. Grill heating element
4. Door 9. Shelf positions
5. Handle
Accessories
The accessories supplied with your appliance are suitable for making various meals. Ensure that
you always insert the accessories into the cooking compartment in the correct way.
There is also a selection of optional accessories, with which you can improve on some of your
favorite dishes, or simply to make working with your oven more convenient.
1
2
3
4
5
6
7 8 9

-7-
Inserting accessories
You can insert the accessories into the cooking compartment at 5 different levels. Always insert
them as far as they will go so that the accessories do not touch the door panel.
The accessories can be pulled out approximately halfway until they lock in place. This allows dishes
to be removed easily.
Note: The accessories may deform when they become hot. Once they cool down again, they
regain their original shape. This does not affect their operation.
Oven pan
For moist cakes, pastries, frozen meals and large roasts. It can also be used to catch dripping fat
when you are grilling directly on the wire rack.
Wire rack
Used for roasting and for placing the food to be baked, roasted or cooked in casserole dishes.

-8-
Control panel
Here, you will see an overview of the control panel. Depending on the appliance model, individual
details may differ. 14
3 2 5
1. Power Indicator Light
2. Function Selector
3. Timer
4. Oven Operating Light
5. Temperature Control
6. Heating Indicator Light
Cooling fan
A tangential cooling fan is fitted inside this appliance to keep the internal temperature of the oven
stable and the external surface temperature lower. After the oven has been turned off the cooling
fan will run on for a period of time until the oven is sufficiently cooled.

-9-
USING YOUR APPLIANCE
This multi-function oven combines the advantages of traditional convection ovens with those of
the more modern fan assisted models in a single appliance.
It is an extremely versatile appliance that allows you to choose easily between different cooking
modes. (Take the time to read this section and familiarize yourself with its ability and functions to
help you get the best out of using your appliance.)
Before using the oven for the first time
We strongly recommend running the oven to air it out before you use it the first time.
To air it out, we recommend that it is set at the highest setting and leave the oven on for about half
an hour with nothing in it, with the oven door shut. Then open the over door and let the room air
in. The odour that is often detected during this initial use is due to the evaporation of substances
used to protect the oven during storage and until is installed.
Before you use the accessories for the first time, clean them thoroughly with hot soapy water and
a soft dish cloth.
Setting and using the oven programmer/timer
Selecting manual operation mode
After your appliance is connected to your mains supply for the first time, the numbers on the timer
display will flash. Before you can select a cooking function or set a temperature, you must set the
appliance into “manual operation” mode.
•To select manual operation mode, press the “manual operation” button (5) on the control
panel.
Setting the time of day
After setting your oven for manual operation, you should also set the time of day:
•After pressing the “manual operation” button (5), use the “minus” button (6) and “plus”
button (7) to adjust the time that appears in the display. After getting the display to the
correct time, release the “minus” and “plus” buttons. After a few seconds the time will fix in
the display and you will be able to use your oven.

-10-
The oven timer
1. Oven programmer/timer
2. Timer “minute minder” button
3. Timer “duration” button
4. Timer “end cook” button
5. Timer “manual operation” button
6. Timer “minus” button
7. Timer “plus” button
Oven programmer/timer display
8. “Auto” function symbol
9. “Minute minder” symbol
10. “Manual operation” symbol.

-11-
Selecting a cooking function and temperature
Selecting an oven function
The oven function selector knob should be used to select the particular mode of
cooking that you require. The appliance will utilize different elements within the
oven cavity, depending on the oven function that you select. When a function is
selected, the power indicator light will come on.
Defrost:
The fan runs without heat to reduce defrosting time on frozen foods. The time required to
defrost the food depends on the room temperature.
Conventional Oven (top and lower element):
This method of cooking provides traditional cooking, with heat from the top and lower
elements. This function is suitable for roasting and baking on one shelf only.
Fan Forced:
This method of cooking uses the circular element and the heat is distributed by the fan.
This results in a faster more economical cooking process. The fan oven allows food to be
cooked simultaneously on different shelves.
Half Grill:
This method of cooking utilises the inner part only of the top element, which directs heat
downwards onto the food. This function is suitable for grilling small portions of bacon, toast
and meat etc.
Full Grill:
This cooking method is for normal grilling using inner and outer parts of top element. It’s
ideal for medium to large portions of sausages, bacon, fish etc.
Fan Grill:
The fan circulates heat from the oven grill around the food, simultaneous quick browning
and sealing the juices in economical rotisserie or spit effect.
Fan and Bottom Element:
This method of cooking utilises the bottom element in conjunction with the fan, which
helps to circulate the heat. This function is suitable for sterilizing and reserving jars.

-12-
Selecting an oven temperature
The oven thermostat control knob sets the required temperature of the oven.
It is possible to regulate the temperature within a range of 50 - 250°C.
Turn the control knob clockwise.
Setting the minute minder function
You are able to set the minute minder at any time, regardless of whether an oven function has
been selected. You can set a period of time using the minute minder function and an alarm will
sound when that period of time has elapsed.
•Press the “minute minder” button (2), the display will show a value of 00:00. Set the period of
time that you wish the minute minder to countdown for, by using the “minus” (6) and “plus” (7)
buttons.
•Once the display has got to your desired countdown time, let go of the “minus” and “plus”
buttons. The minute minder symbol (9) will appear on the timer display.
•Once a countdown time has been set, it is possible to shorten or lengthen the time by using the
“minus” or “plus” buttons.
•An alarm will sound when the countdown time has elapsed. The alarm can be silenced by
pressing the “minute minder” button.
•IMPORTANT: The oven will continue to heat once the alarm has been silenced. If you have
finished cooking, then you should turn the oven function selector and thermostat control knob
to 0.
•NOTE: Only the minute minder can be used with the defrost oven function. Any of the other
timer settings will not work with the defrost oven function.
Setting the duration function
This function will allow you to set a countdown time similar to the minute minder function.
However the oven will no longer continue to heat, once the countdown period has elapsed.
•Use the thermostat control knob (Temperature selector) to set the temperature that you
require. The manual operation symbol (10) will appear on the display.
•Use the oven function selector knob to select the mode of cooking that you require.
•It is then possible to set the duration of the cooking time that you require.

-13-
•Press the “duration” button (3)and the display will show a value of 00:00. Set the period
of time that you wish the duration function to countdown for, by using the “minus” (6) and
“plus” (7)buttons.
•Once the display has got to your desired countdown time, let go of the “minus” and “plus”
buttons. The countdown will start immediately and the word AUTO will appear on the timer
display.
•Once a countdown time has been set, it is possible to shorten or lengthen the time by using
the “minus” or “plus” buttons.
•An alarm will sound when the countdown time has elapsed and the oven will switch off. The
word AUTO will flash and the heating symbol will disappear. The alarm can be silenced by
pressing the “duration” button.
•You will need to return the oven to manual operation mode, once the duration function has
been used. To do this you should press the “manual operation” button, the word AUTO will
disappear from the display and the manual operation symbol will appear instead.
•IMPORTANT: If you do not turn the thermostat control knob (Temperature selector)and
oven function selector knob to 0, then the appliance will continue to operate as soon as you
press the “manual operation” button.
Setting the end cook function
This function is similar to the duration function, however instead of selecting a period of time that
you wish the oven to switch off after. You select the time of day that you wish the oven to switch
off at.
•Use the thermostat control knob (Temperature selector) to set the temperature that you
require. The manual operation symbol (10) will appear on the display.
•Use the oven function selector knob to select the mode of cooking that you require.
•Press the “end cook” button (4) and the display will show a value of 00:00. Set the time of
day that you wish the oven to stop cooking at by using the “minus” and “plus” buttons. The
timer will calculate how long the cooking time will be, based on the time of day that you
have selected and show it on the display.
•Once the display has got to the time of day that you want the oven to stop cooking at, let
go of the “minus” and “plus” buttons. The countdown will start immediately and the word
AUTO symbol will appear on the timer display.
•When the time is set, it can be modified by pressing the “minus” and “plus” buttons.
•When the time of day reaches the end of cooking time that you set, the oven will switch off
and an alarm will sound. The word AUTO will flash and the heating symbol will disappear.
The alarm can be silenced by pressing the “end cook” button.

-14-
•You will need to return the oven to manual operation mode, once the end cook function has
been used. To do this you should press the “manual operation” button, the word AUTO will
disappear from the display and the manual operation symbol will appear instead.
•IMPORTANT: If you do not turn the thermostat control knob and oven function selector
knob to 0, then the appliance will continue to operate as soon as you press the “manual
operation” button.
Setting the start and end time function
This function will allow you to set a time in the future that the oven switches on at and a time that
the oven will switch off at.
•Use the thermostat control knob (Temperature selector) to set the temperature that you
require. The manual operation symbol (10) will appear on the display.
•Use the oven function selector knob to select the mode of cooking that you require.
•Press the “duration” button (3)and the display will show a value of 00:00. Set the period
of time that you wish to cook for, by using the “minus” (6) and “plus” (7) buttons. The word
AUTO will appear on the timer display.
•Immediately press the “end cook” button (4) and the timer display will show the value
00:00. Set the time of day that you want the oven to switch off at, using the “minus” and
“plus” buttons.
•The oven will calculate what time it needs to switch on at, so that your food will cook for the
length of time that you selected. It will automatically switch itself on, once it reaches the
time of day that you set previously.
•When the time of day reaches the end of the cooking time that you set, the oven will switch
off and an alarm will sound. The word AUTO will flash and the heating symbol will disappear.
The alarm can be silenced by pressing the “end cook” or “duration” button.
•You will need to return the oven to manual operation mode, once the start and end time
function has been used. To do this you should press the “manual operation” button, the
word AUTO will disappear from the display and the manual operation symbol will appear
instead.
•IMPORTANT: If you do not turn the thermostat control knob and oven function selector
knob to 0, then the appliance will continue to operate as soon as you press the “manual
operation” button.

-15-
CLEANING AND MAINTENANCE
CAUTION! Cleaning operations must only be carried out when the oven is cool
and disconnected from the power supply.
•The oven should be cleaned after every use. When cleaning the oven the lighting should be
switched on to enable you to see the surfaces better.
•The oven cavity should only be cleaned with warm soapy water, using either a sponge or soft
cloth. No abrasive cleaners should be used.
•After cleaning the oven cavity wipe it dry.
•Outer parts of the oven should only be cleaned with warm soapy water, using either a sponge
or soft cloth. No abrasive cleaners should be used.
•If you use any form of oven cleaner on your appliance, then you must check with the
manufacturer of the cleaner that it is suitable for use on your appliance.
•DO NOT clean the oven surfaces by steam cleaning.
•Any damage that is caused to the appliance by a cleaning product is not included under the
product warranty, even if the appliance is within the warranty period.
Advice to help reduce cleaning required
•Any stains that may appear on the bottom of the oven will have originated from food splashes
or spilt food, these splashes occur during the cooking process. These could possibly be a
result of the food being cooked at an excessively high temperature or being placed in
cookware that is too small.
•You should select a cooking temperature and function that is appropriate for the food that you
are cooking.
•You should also ensure that the food is placed in an adequately sized dish and that you use
the drip tray where appropriate.
CAUTION! Do not use cleaning products containing abrasive materials for the
cleaning and maintenance of the oven including the glass front panel.

-16-
Regular inspections
Besides keeping the appliance clean, you should:
•Carry out periodic inspections of the control elements and cooking units of the cooker. After
the warranty period has expired you should have a technical inspection of the cooker carried
out at a service centre at least once every two years.
•Fix any operational faults.
•Carry out periodical maintenance of the cooking units of the cooker.
•If the sealing strip is not sealing adequately, it must be replaced with the same sealing strip.
Do not use any other sealing strip instead as doing so may effect function performance.
CAUTION! All repairs and regulatory activities should be carried out by the
appropriate service centre or by an appropriately authorized person.

-17-
Removing accessories
You need to take out the accessories before you start cleaning the oven.
1) Remove the side shelves in the following way. Grab the bottom line of one side shelf, pull
sideward, then pull upward, then lift the side shelf horizontally, and then pull out the side shelf.
2) Clean the cavity, and then put the side shelves back.
3) Don’t use any harsh abrasive cleaners or sharp metal scrapers for cleaning the oven door. They
could scratch the surface and destroy the glass. (Refer to the cleaning and maintenance
section)
Detaching and attaching the oven door
For cleaning purposes and to remove the door panels, you can detach the oven door.
Each hinge has a locking rod. When the locking rod is closed, the door is installed well and you
can’t move the door.
CAUTION: Before the hinge is totally locked, the locking rod may close suddenly. Ensure the
locking rod is open when you are removing the door.
Detaching the door
1) Completely open the door.
2) Push the locking rod upward.
3) Close the door. Hold the door at the two sides.
Close the door more closely. Pull the door upwards,
then downwards, and then pull out the door.

-18-
Installing the door
1) Hold the door and insert the hinges into the holes。
2) Ensure the hinge is connected correctly then close the door.
3) Open the door and press the locking rod downward.
4) Close the door.
Caution: Don’t touch the hinges with your hands. It could cause injury.
How to remove the glass of the door
Disassembly
1) Detach the door as per previous instructions.
2) Place the door handle side down on a cloth to prevent scratches.
3) With one hand underneath, push the glass upwards. At the same time use your other hand to
pull the glass up from the door. After the glass is pulled out, horizontally remove the glass
completely.
WARNING: Handle glass with care.
CAUTION: Don’t use scraper or corrosive liquid to clean the door.
Assembly
1) Insert the inner glass into the punch slot.
2) Press the inner glass.
3) Ensure the inner glass is fixed well before you
put the door back to the oven.
Lamp Replacement
(If the bulb in the oven light fails, it must be replaced.)
WARNING! To avoid the possibility of an electric shock ensure that the appliance is
switched off before replacing the bulb.
1) Disconnect all power from the appliance.
2) Place a tea towel in the oven when it is cold to prevent damage.
3) Unscrew the glass cover by turning it anti-clockwise.
4) Replace the bulb with one of the same type.
5) Screw the glass cover back in.
6) Remove the tea towel and reconnect the power.

-19-
AVOIDING DAMAGE FROM MISUSE
Only allow the cookingcompartment to cool when it is closed. Even if the appliance door is only
open a little, front panels of adjacent units could be damaged over time.
If the door seal is very dirty, the appliance door will no longer close properly when the
appliance is in use. The fronts of adjacent units could be damaged. Always keep the door seal
clean.
Do not sit on the appliance door, or place or hang anything on it. Do not place any cookware
or accessories on the appliance door.
Do not place accessories on the cooking compartment floor. Do not cover the cooking
compartment floor with any sort of foil or greaseproof paper. Do not place ovenware on the
cooking compartment floor if a temperature of over 50℃has been set. This will cause heat to
accumulate. The baking and roasting times will no longer be correct and the enamel will be
damaged.
Do not pour water into the cooking compartment when it is hot. This will cause steam. The
temperature change can cause damage to the enamel.
Do not store moist food in the cooking compartment when it is closed for prolonged periods
this will damage the enamel.
When baking particularly juicy fruit pies, do not pack the baking tray too generously. Fruit
juice dripping from the baking tray leaves stains that cannot be removed. If possible, use the
deeper universal pan.
Accessories can scratch the door panel when closing the appliance door. Always insert the
accessories into the cooking compartment as far as they will go.
Do not carry or hold the appliance by the door handle. The door handle cannot support the
weight of the appliance and could break.
Table of contents
Other Salini Oven manuals
Popular Oven manuals by other brands

Black & Decker
Black & Decker Infrawave FC151B Use and care book

myappliances
myappliances AMFM60SS user manual

Wood Stone
Wood Stone DESIGNER SERIES 6348 WS-DS1-4048 Installation and operation manual

Bosch
Bosch HRG776M 1A Series User manual and installation instructions

Pelgrim
Pelgrim OVP826MAT Instructions for use

Bosch
Bosch MHS133B 0B Series instruction manual