7
• Heat, steam and moisture will be created during use of the appliance, take care to avoid injury
and ensure that the room is adequately ventilated. If the appliance is going to be used for pro-
longed periods of time, then additional ventilation may be required.
• To work properly, the oven needs a sucient amount of fresh air to ow. Make sure the ow of air
is not jeopardised (eg. by tting slats for thermal insulation in the cabinet where the appliance is
built in). In this case, the necessary cold air must not get excessively heated by other sources of
heat (eg. solid fuel stoves).
• Please consult with your qualied installer if you are in any doubt about the amount of ventilation
that you will require.
• DO NOT install the appliance next to curtains or soft furnishings.
• Carry the appliance with at least two persons, appliance is heavy and requires two persons lift.
• DO NOT attempt to lift or move cooking appliances by using the oven door or handle, as this may
cause damage to the appliance or result in injury to the person lifting the appliance.
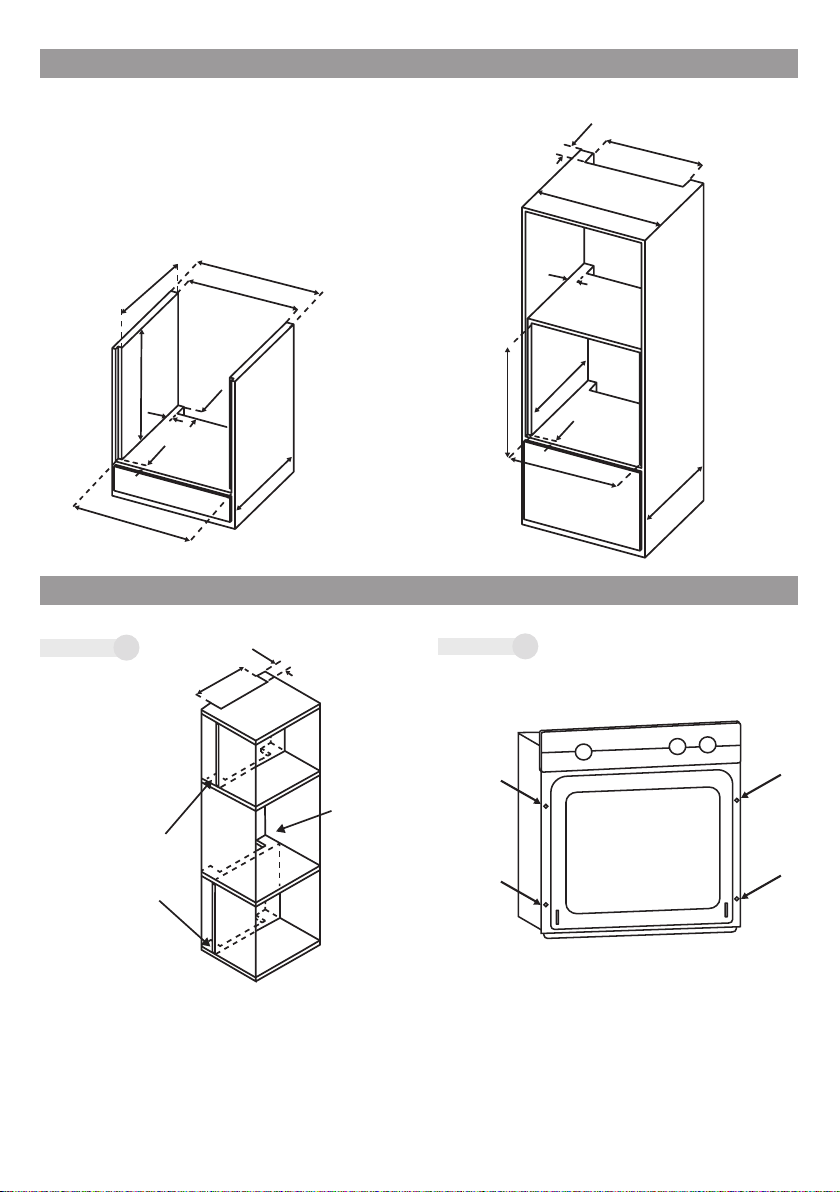
• IMPORTANT: The adjacent furniture or housing and all materials used in the installation must be
able to withstand a minimum temperature of 85°C above the ambient temperature of the room it
is located in, whilst in use.
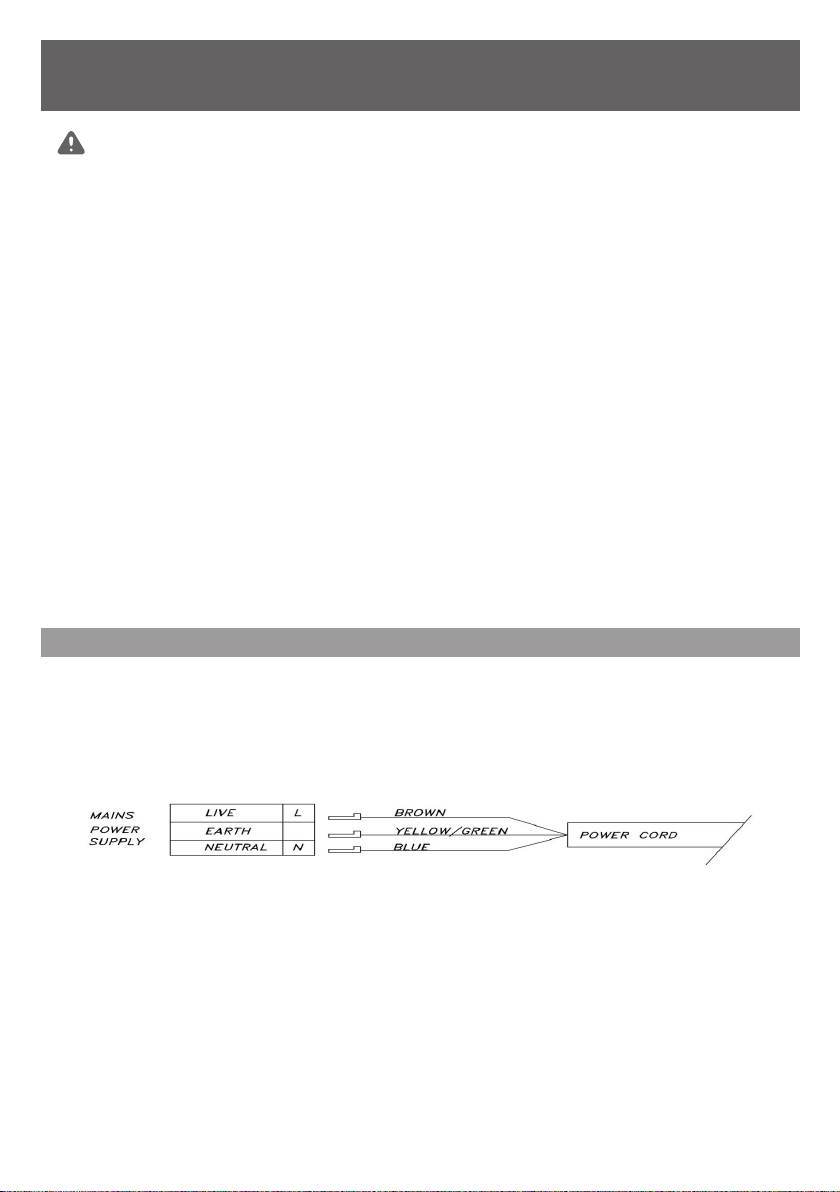
• Before obtaining access to terminals, all supply circuits must be disconnected.
• Failure to install the screws or xing device in accordance with these instructions may result in
electrical hazards.
• The appliance installation must be earthed.
• Use only suitable isolation devices: circuit breakers, fuses (plug fuses must be removed from the
fuse holder), earth leakage circuit breakers and relays.
• The electrical system must be equipped with an isolation device which lets you disconnect the
appliance from the power socket at all poles. The isolation device must have a contact opening
width of no less than 3 mm.
• Appliance shall only be used with rated voltage and frequency, ensure that the appliance data
plate matches the electrical system it will be installed in.
• This appliance must be installed in accordance with the installation instructions and in
accordance with local regulations.
• WARNING: Always switch o the electricity supply at the mains during installation and during
maintenance such as before replacing the light globe to avoid the possibility of electric shock.
• Always use an electric socket with a properly installed protective contact.
• Do not use multiple sockets or cable extensions.
• Insert the power plug into the socket only at the end of installation. Check that the power plug
remains accessible after installation.
• If the power plug is loose, do not connect it to the socket.
• If the power cord is damaged it must be replaced by the manufacturer or a qualied service
engineer.
• We recommend the use of only genuine parts for repairs.
• We decline any responsibility for injury or damage, to person or property, as a result of improper
use or installation of this appliance.