Salton SAF12 Installation guide

1
INSTRUCTIONS AND WARRANTY
MODEL NO. SAF12
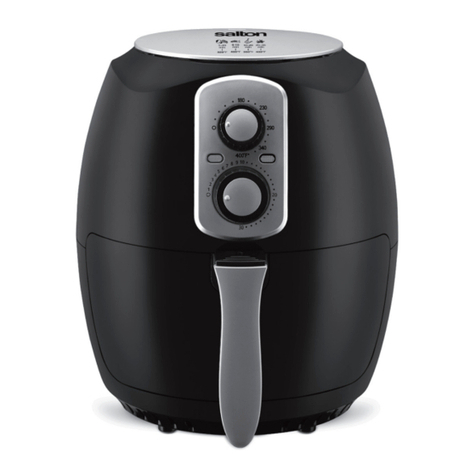
SALTON DIGITAL AIR FRYER

2
Congratulations on purchasing your Salton Digital Air Fryer. Each unit is manufactured to ensure
safety and reliability. Before using this appliance for the first time, please read the instruction
manual carefully and keep it for future reference.
FEATURES OF THE SALTON DIGITAL AIR FRYER
•1300W
•4.2L Inner pot capacity with 3.5L removeable basket
•Adjustable temperature control, ranges from 80-200 degrees
•Power and heating light indicators
•60 minute timer with auto shut off for precise cooking
•Unique pause function
•Healthy, fat free frying
•Quick and convenient
•With overheat protection
•Non-slip feet
•For domestic use only
•1 year warranty
IMPORTANT SAFEGUARDS
When using any electrical appliance, basic safety precautions should always be followed including
the following:
1. Please read the instructions carefully before using any appliance.
2. Always ensure that the voltage on the rating label corresponds to the mains voltage in
your home.
3. Incorrect operation and improper use can damage the appliance and cause injury to the user.
4. The appliance is intended for household use only. Commercial use invalidates the warranty
and the supplier cannot be held responsible for injury or damage caused when using the
appliance for any other purpose than that intended.
5. This appliance is not intended for use by persons (including children) with reduced physical,
sensory or mental capabilities, or lack of experience and knowledge, unless they have been
given supervision or instruction concerning use of the appliance by a person responsible for
their safety.
6. Children should be supervised to ensure that they do not play with the appliance.

3
7. Check the power cord and plug regularly for any damage. If the cord or the plug is damaged,
the manufacturer or a qualified person must replace it in order to avoid an electrical hazard.
8. Do not allow this appliance to touch curtains, wall coverings, clothing, dishtowels or other
flammable materials during use. Allow a minimum of 200mm distance between the appliance
and surrounding objects. Caution is required on surfaces where heat may cause damage - an
insulated heat pad is recommended. Never place the appliance on a plastic, fabric or
carpeted surface while cooking.
9. The appliance is not intended to be operated by means of an external timer or separate
remote control system.
10. Do not touch hot surfaces –use the handles and dials as well as appropriate cooking utensils.
11. Let the unit cool down completely before you clean or store it.
12. Extreme caution must be used when moving the unit. It is recommended that you do not
move it when it is switched on or before it has cooled down.
13. Do not use the appliance if it has been dropped or damaged in any way. In case of damage,
take the unit in for examination and/or repair by an authorised service agent.
14. Do not use harsh abrasives, caustic cleaners or oven cleaners when cleaning this appliance.
15. To reduce the risk of electric shock, do not immerse or expose the body, plug or the power
cord to water or any other liquid.
16. Remove the plug from the socket by gripping the plug. Do not pull on the cord to disconnect
the appliance from the mains. Always unplug the unit when not in use and before cleaning or
when adding or removing parts.
17. A short detachable cord is provided to reduce the hazards resulting from becoming entangled
in or tripping over a longer cord.
18. Do not let the cord hang over the edge of a table or counter. Ensure that the cord is not in a
position where it can be pulled on inadvertently.
19. Do not allow the cord to touch hot surfaces and do not place on or near a hot gas or electric
burner or in a heated oven.
20. Do not use the appliance on a gas or electric cooking top or over or near an open flame.
21. Use of an extension cord with the appliance is not recommended. However, if it is necessary
to use an extension lead, ensure that the lead is suited to the power consumption of the
appliance to avoid overheating of the extension cord, appliance or plug point. Do not place
the extension cord in a position where it can be pulled on by children or animals or
tripped over.
22. This appliance is not suitable for outdoor use. Do not use this appliance for anything other
than its intended use.
23. Do not carry the appliance by the power cord.
24. Do not leave the appliance unattended during use. Always unplug the unit when not in use or
before cleaning.

4
25. Ensure that the unit is turned off after each use.
26. The manufacturer does not accept responsibility for any damage or injury caused by
improper or incorrect use, or for repairs carried out by unauthorised personnel.
27. In case of technical problems, switch off the machine and do not attempt to repair it yourself.
Return the appliance to an authorised service facility for examination, adjustment, or repair.
Always insist on the use of original spare parts. Failure to comply with the above-mentioned
pre-cautions and instructions, could affect the safe operation of this machine.
28. Do not use accessories or attachments other than those we supply.
29. Do not use anything metal or sharp, you will damage the non-stick surfaces.
30. Keep clear of the vent at the rear of the appliance –hot air will immerse from it.
31. Do not wet or wash outer housing.
32. Do not let water or other liquid flow into outer housing of air fryer.
33. Never pour oil directly into the air fryer.
34. Never cover the air outlets.
35. If there are damages to the plug, power wire or the air fryer, stop using the
appliance immediately.
36. Always allow 10cm of free space for the back side, left/right sides, and the upper side of the
air fryer. Do not place other items directly on top of the air fryer.
37. Do not leave the air fryer unattended while in use.
38. Before cleaning the air fryer, it must be given 30 minutes for cooling down.

5
PARTS DIAGRAM
1. Control panel and display
2. Basket
3. Pot
4. Pot handle
5. Air outlet
6. Power cord
7. Pot
8. Basket
9. Sliding protective button cover
10.Basket ejection button
Control panel and display
1. On/off button
2. Adjustment button (“+”)
3. Adjustment button (“-”)
4. Temperature and timer control
5. Menu selection
6. Menu (listed below)
7. Temperature and timer display
Menu:
a). preheating
b). cake
c). drumsticks
d). fish
e). steak
f). chips
g). vegetables
h). shrimp

6
DEFAULT MENU SETTINGS
(You may adjust according to your preferred taste.)
Category
Pre-
heating
Cake
Drum
sticks
Fish
Steak
Chips
Vegetables
Shrimp
Working
Temp (C)
120
160
200
200
180
200
160
160
Working
Time (min)
6
20
25
20
15
20
15
20
BEFORE FIRST USE
•Before using the unit for the first time, remove any packaging material and carefully clean it
using warm, soapy water - rinse and dry.
•Never use an abrasive scourer to clean the frying pot or basket.
•To remove the frying pot from the body, place one hand on top of the air fryer, grip the
handle with the other hand and pull the frying pot out of the body.
•Rest the frying basket on an insulated heat-resistant pad/surface.
•This appliance heats food in all directions and most of the ingredients do not need any oil.
•Use the unit empty for approximately 10 minutes to burn off production residues. Make sure
there is good ventilation.
•The unit may emit some smoke and a characteristic smell when you switch it on for the first
time. This is normal and will stop soon.
OPERATING INSTRUCTIONS
1. Place the appliance on a dry, stable and heat-resistant surface.
2. Pull out the pot with basket from the appliance by the pot handle. Set the pot
with basket on the flat counter-top and open the sliding protective button cover
by pushing forward it and lift up the basket by pressing the release button on
the handle.
3. Place ingredients into the basket. (Do not exceed the MAX level indicated inside the basket.)
Slide the basket into the appliance. Make sure the unit is closed completely. Otherwise, the
appliance will not work. Caution: Do not touch the basket during use or after use in short
time as it gets very hot. Only hold the basket by the handle.
4. Connect the power plug to a suitable outlet. The unit is now in standby mode.

7
5. Press the temperature and timer control button to first enter temperature setting; press the
adjustment button to set your desired temperature (80℃- 200℃). Press the temperature
and timer control button again to start timer setting; press adjustment button to set the
desired time (1 - 60 minutes). You can also hold down the adjustment button for rapid
adjustment. The desired setting is reached when the value stops flashing.
6. You can also press the menu selection button to directly choose the cooking functions in the
menu. The selected icon in the menu will flash. If you wish to adjust the time and
temperature a little, please make adjustment as in step 5. When the last menu icon is
selected, press the menu selection button once more, the menu setting mode will be exited.
7. Press the on/off button again; the machine will start working. The digital display shows the
set temperature and time. You can press the on/off button again to make a pause, or directly
press the temperature and timer control button to adjust if needed. If there is no operation
for several minutes in the pause state, the machine will automatically enter standby
without beeping.
8. When the whole cooking process is finished, the unit will stop working automatically and
enter standby after a count-down on the digital display. The unit will beep to remind you that
it has completed the cooking cycle. You can also manually put the machine into standby by
holding the on/off button for 3 seconds.
9. Pull out the pot from the appliance by the pot handle. Check if the ingredients are ready. If
not, simply slide the basket back into the appliance. Set the temperature and the timer to the
desired settings for a few more minutes. Press the start/pause button to run the machine
again. NOTE: You can also pull out the pot to check and shake the ingredients during cooking
process. When you slide the basket back into the unit, the machine will continue to work with
the selected setting.
10. To remove ingredients (e.g., beef, chicken, meat, any ingredients with original oil and will
have excess oil from ingredients collected on the bottom of the basket), please use tongs to
pick ingredients up one by one. To remove ingredients (e.g. chips, vegetables, or ingredients
with no excess oil from the ingredients), pull out the basket, and pour ingredients to
tableware.
11. After the cooking is done, the appliance is instantly ready for preparing another batch of
ingredients if needed.
FRYING TIPS
1. The optimal amount for crispy fries is 400 grams.
2. Add 3 more minutes to the preparation time when the appliance is cold, or you can also let
the appliance preheat approx. 4 –6 minutes without any ingredients inside.
3. Some ingredients require shaking halfway through the cooking time. To shake or turn over
the ingredients, pull the basket out of the appliance by the handle and shake it or turn over
the ingredients by fork (or tongs). Then slide the basket back into the appliance.
4. You can also use the air fryer to reheat ingredients. To reheat ingredients, set the
temperature to 150°C for up to 10 minutes.
8
5. Products with coatings of dry breadcrumbs will get crispier by spraying them with a little
vegetable oil.
6. Place a baking tin or an oven dish in the appliance if you want to bake a cake or quiche or
other fragile ingredients.
Food
Min-max
Amount
(g)
Time
(min)
Temp (°C)
Shake
Notes
Thin frozen fries
300-700
12-16
200
shake
Thick frozen fries
300-700
12-20
200
shake
Home-made fries (8x8mm)
300-750
18-25
180
shake
Add 1/2 tbsp of oil
Home-made thick fries
300-800
18-22
180
shake
Add 1/2 tbsp of oil
Home-made potato chips
300-750
12-18
180
shake
Add 1/2 tbsp of oil
Hashbrowns
250
15-18
180
Baked potatoes
500
18-22
180
Pork chops
100-500
10-14
180
shake
Sausage rolls
100-500
12-15
200
shake
Add 1/2 tbsp of oil
Chicken breast
100-500
10-15
180
Spring rolls
100-400
8-12
200
shake
Add 1/2 tbsp of oil
Frozen chicken nuggets
100-500
8-14
200
shake
Add 1/2 tbsp of oil
Frozen cheese snacks
100-400
8-10
180
Add 1/2 tbsp of oil
Stuffed vegetables
100-400
10
180
Cakes
100-400
8-12
200
shake
Add 1/2 tbsp of oil
CAUTION:
1. Do not immerse the housing in water or rinse it under the tap.
2. Avoid any liquid entering the appliance to prevent short circuiting.
3. Keep all ingredients in the basket to prevent contact with the heating elements.
4. Do not cover the air inlet and the outlet when the appliance is working. Leave at least 10cm
free space around and above the appliance.
5. Never fill the basket with oil only.
6. Do not touch the inside of the appliance when it is in use.
7. Be careful of the hot steam and air when you remove the basket from the appliance.
8. During operation, hot steam is released through the air outlet. Keep your hands and face at a
safe distance from the steam and the air outlet.
9. Immediately turn off and unplug the appliance if you see any dark smoke coming out of the
appliance. The food is overcooked or the appliance is malfunctioning.

9
CLEANING AND MAINTENANCE
•Before handling or cleaning the appliance, let it cool down for approximately 30 minutes.
•Clean the inside and outside of the appliance regularly using a damp cloth and dry with a soft,
clean cloth.
•Never use abrasive cleaners or sponges.
•Remove the pot and basket to let the appliance cool down quicker. Clean the pot and basket
in hot water with washing liquid and a non-abrasive sponge. Dry well before use.
•Clean the heating element inside of the housing (You can see it after pulling out the basket)
with a cleaning brush to remove any food residue.
TROUBLE SHOOTING
Problem
Possible cause
Solution
The appliance
does not work.
The appliance is not
plugged in.
Put the mains plug in an earthed wall socket.
You have not pressed the
button to turn on the
machine.
Press the on/off button to turn on the appliance.
The ingredients
are not fried
completely.
The amount of the food in
the basket is too high.
Put smaller batches of ingredients in the basket.
Smaller batches are fried more evenly.
The temperature is too
low, or the time is too
short.
Increase the temperature or cook time.
The ingredients
are fried
unevenly.
Different types of food may
need to be shaken halfway
during cooking.
Shake food halfway during the cooking time.
Fried snacks are
not crispy
You used a type of snacks
which shall be cooked in a
traditional deep fryer.
Use oven snacks or lightly brush some oil onto the snacks
for a crispier result.
White smoke
comes out from
the appliance.
You are preparing greasy
ingredients.
When you fry greasy ingredients, oil will leak into the
basket. The oil produces white smoke, and the basket may
heat up. This does not affect the cooking result or damage
the appliance.
The basket still contains
residue and/ or grease
from previous use.
Clean the basket properly after each use.
Fresh fries are
fried unevenly.
You haven’t used the right
type of potatoes.
Use fresh potatoes.
You haven’t rinsed the
potato sticks properly
before frying.
Rinse the potato sticks properly to remove starch from the
outside of the sticks.
Fresh fries are
not crispy.
The crispness of the fries
depends on the amount of
oil and water in the fries.
Make sure the potato sticks have been dried properly
before adding the oil.
Cut the potato sticks smaller for a crispier result
Add slightly more oil for a crispier result.

10
STORING THE APPLIANCE
•Unplug the unit from the wall outlet and clean all the parts as instructed at the “cleaning and
maintenance” section. Ensure that all parts are dry before storing.
•Store the appliance in its box or in a clean, dry place.
•Never store the appliance when dirty.
•Never wrap the power cord around the appliance.
SERVICING THE APPLIANCE
There are no user serviceable parts in this appliance. If the unit is not operating correctly, please
check the following:
•You have followed the instructions correctly.
•That the unit has been wired correctly and that the electrical socket is switched on.
•That the mains power supply is ON.
•That the plug is firmly in the mains socket.
If the appliance still does not work after checking the above:
- Consult the retailer for possible repair or replacement. If the retailer fails to resolve the problem
and you need to return the appliance, make sure that:
•The unit is packed carefully back into its original packaging.
•Proof of purchase is attached.
•A reason is provided for why it is being returned.
If the supply cord is damaged, it must be replaced by the manufacturer or an authorised service
agent, in order to avoid any hazard. If service becomes necessary within the warranty period, the
appliance should be returned to an approved Home of Living Brands (Pty) Limited service centre.
Servicing outside the warranty period is still available, but will, however, be chargeable.

11
CHANGING THE PLUG
Should the need arise to change the fitted plug, follow the instructions below.
This unit is designed to operate on the stated current only. Connecting to other power sources may
damage the appliance.

12
PLEASE AFFIX YOUR PROOF OF PURCHASE/RECEIPT HERE
IN THE EVENT OF A CLAIM UNDER WARRANTY THIS RECEIPT MUST BE
PRODUCED.
W A R R A N T Y
1. Home Of Living Brands (Pty) Limited warrants to the original purchaser of this
product (“the customer”) that this product will be free of defects in quality and
workmanship which under normal personal, family or household use and purpose
may manifest within a period of 1 (one) year from the date of purchase (“warranty
period”).
2. Where the customer has purchased a product and it breaks, is defective or does
not work properly for the intended purpose, the customer must notify the supplier
from whom the customer bought the product (“the supplier”) thereof within the
warranty period. Any claim in terms of this warranty must be supported by a proof
of purchase. If proof of purchase is not available, then repair, and/or service
charges may be payable by the customer to the supplier.
3. The faulty product must be taken to the supplier's service centre to exercise the
warranty.
4. The supplier will refund, repair, or exchange the product in terms of this warranty
subject to legislative requirements. This warranty shall be valid only where the
customer has not brokenthe product himself or used the product for something that
it is not supposed to be used for. The warranty does not include and will not be
construed to cover products damaged as a result of disaster, misuse, tamper,
abuse or any unauthorized modification or repair of the product.
5. This warranty will extend only to the product provided at the date of the purchase
and not to any expendables attached or installed by the customer.
6. If the customer requests that the supplier repairs the product and the product
breaks or fails to work properly within 3 (three) months of the repair and not as a
result of misuse, tampering or modification by or on behalf of the customer, then
the supplier may replace the product or pay a refund to the customer.
7. The customer may be responsible for certain costs where products returned are
not in the original packaging, or if the packaging is damaged. This will be deducted
from any refund paid to the customer.
HOME OF LIVING BRANDS (PTY) LTD (JOHANNESBURG)
NATIONAL CONTACT: TEL NO. (087) 245-0029
www.homeoflivingbrands.co.za
www.salton.co.za
www.facebook.com/SaltonAppliances
Table of contents
Other Salton Fryer manuals

Salton
Salton DF1240BK User manual

Salton
Salton AF2085 User manual

Salton
Salton DF1539 User manual

Salton
Salton DF-1114 User manual

Salton
Salton SDF25 Installation guide

Salton
Salton AF2090 User manual

Salton
Salton SDF35 Installation guide

Salton
Salton SFP60 User manual

Salton
Salton AF1870 User manual

Salton
Salton DF1233 User manual