Sammic CK-24V User manual

INSTRUCCIONES
USERS MANUAL
GEBRAUCHSANWEISUNG
MODE D’EMPLOI
INSTRUZIONI PER L’USO
MANUAL DE INSTRUÇÕES
INSTRUKCJA OBSŁUGI
Cortadora de hortalizas - cutter
Vegetable preparation machine - cutter
Gemüseschneider-Kutter
Coupe-légumes-cutter
Tagliatrice di orgaggi-cutter
Cortadora de hortaliças-cutter
Krajarka do warzyw
ES
EN
DE
FR
IT
PT
PL
CK-24V
CA-2V
KE-4V

- 2 -
1
2
3
4
5 6
7
8
9
10
FIG 1
FIG 2
11
12 13
14
15

- 3 -
FIG 3
FIG 5
FIG 7
FIG 4
FIG 6

- 4 -
ES
FIG 1
1 - Texto informativo
2 - Representación tiempo. Solo modo cutter.
3 - Representación FORCE CONTROL.
5 - Detección cabezal cutter y giro eje. Solo modo cutter.
6 - Tiempo. Solo modo cutter.
7 - Detección cabezal cortadora y giro eje. Solo modo cortadora.
8 - Nivel de velocidad y RPM asociado.
9 - Pausa.
10 - Indicador avisos y errores.
Función Ajuste inicial
Cutter Cortadora
11 Subir Versión software
12 Bajar Versión hardware
11+12 Visualización parámetros en tiem-
po real.
13 Temporizador FORCE
CONTROL
Visualización iconos pan-
talla
14 Motor ON / Motor OFF Visualización contadores
15 PULSE / STOP Selección parámetros
13+15 Demo Force
control
Operacion Cantidad maxima
Cutter
Velocidad Cuchilla
recomendada
Notas
Carne cruda en general 1-1.5 Kg I o 3-6 Lisa
Carne cocinada o Jamón York 2-2.5 Kg I o 3-7 Lisa Recomendación: Pulse
Patés 1-1.5 Kg I o 3-6 Lisa o Microdentada
Pescados 1.5-2 Kg I o 3-7 Lisa
Masas y pastas 1-1.5 Kg I o 3-5 Lisa o Microdentada
Pan rallado 0.5-1 Kg I o 5-10 Microdentada
Purés, salsas, sopas 1 litro I o 7-10 Microdentada
Mayonesa 3 litros I o 7-10 Todos
Azúcar glass 1-1.5 Kg I o 8-10 Lisa
Picar cebolla, ajo, perejil 1 Kg I o 1-4 Lisa o Microdentada Recomendación: Pulse
FIG 2 - Descripción técnica
A - Disco.
B - Pisador.
C - Pasador desmontable.
D - Mazo.
E - Tapa.
F - Tapa inferior.
G - Rejilla.
H - Rampa.
I - Expulsor.
J - Teclado.
K - Bloque motor.
M - Tapa olla.
N - Cuchilla.
O - Olla.

- 5 -
ES
Instrucciones originales
Este manual describe la instalación, funcionamiento y mantenimiento de la
CK-24V, CA-2V y KE-4V.
Cada máquina lleva los siguientes indicadores:
- Nombre y dirección del fabricante: SAMMIC S.L - Basarte 1 Azkoitia.
Gipuzkoa (SPAIN).
- Modelo de máquina y número de serie.
- Marcas de homologación.
- En la hoja de garantía y en la declaración de conformidad se indican tam-
bién el número de serie y toda la información sobre la normativa vigente bajo
la cual ha sido fabricado este aparato.
NOTA: Los modelos de 120V han sido homologados bajo la norma de
seguridad UL-763 y norma de higiene y materiales ANSI NSF-8.
OBSERVACIONES IMPORTANTES
- Para reducir la posibilidad de accidentes (cortocir-
cuitos, heridas o incendios, etc.), obtener las mejores
prestaciones y una buena conservación de la máquina,
lea y siga atentamente estas instrucciones. Conserve
las instrucciones y haga que todos los usuarios de la
maquina las lean antes de su utilización. Conserve tam-
bién la hoja de garantía, la declaración de conformidad.
- Los discos (A), rejillas (G), y el conjunto cuchillas (N)
están provistos de cuchillas muy aladas, por tanto,
manipúlelas cuidadosamente tanto durante el desem-
balaje, como durante el uso y limpieza de las mismas
y de la máquina. Utilice guantes resistentes al corte.
- Esta máquina es de uso vigilado. No deje nunca la
máquina en marcha sin que alguien esté a su cargo.
- Antes de utilizar la máquina por primera vez, limpie
la zona de contacto con alimentos con agua jabonosa
(templada), aclare y déjela secar.
- Al término de cada operación y antes de cualquier
intervención para cambio de herramientas o cabeza-
les, limpieza, revisión o reparación de la máquina, es
obligatorio desconectar la máquina de la red.
- Este aparato no está destinado para ser usado por
personas (incluidos niños) cuyas capacidades físicas,
sensoriales o mentales estén reducidas, o carezcan
de experiencia o conocimiento, salvo si han tenido
supervisión o instrucciones relativas al uso del apara-
to por una persona responsable de su seguridad. Los
niños tienen que ser supervisados para asegurar que
no juegan con la máquina.
- Los modelos citados en el manual han sido diseñados
para el uso en hostelería, restauración catering y comer-
cial, pero nunca para una fabricación industrial continuada.
- El fabricante no se responsabilizará en aquellos
casos en el que el uso haya sido incorrecto o distinta al
citado anteriormente, tales como el uso sanitario, uso
químico, uso en atmósferas explosivas…
EMPLAZAMIENTO
Coloque la máquina sobre una supercie estable que no actúe como caja de
resonancia, a una altura que sea cómoda y no produzca fatiga. Coloque el
recipiente de recuperación por debajo de la boca de salida de los alimentos.
La máquina no está sujeta y es fácilmente desplazable.
CONEXIÓN ELÉCTRICA
¡ATENCIÓN! ES OBLIGATORIA LA CONEXIÓN A TIERRA. PELIGRO DE
ELECTROCUCIÓN.
Compruebe que las características eléctricas del equipo coinciden con el
de la red.
El equipo se suministra para tensión de 230V 50-60 Hz monofásica o 120V
50-60 Hz monofásica.
Prepare una toma de corriente mural, con interruptor general de secciona-
miento, y protección diferencial y magneto-térmica de 2P (de 13A a 20A)
con su clavija correspondiente. Coloque un interruptor general o la clavija de
forma visible y accesible para la desconexión de la máquina.
El variador está provisto de un ltro que conduce las perturbaciones exis-
tentes a tierra. Por este motivo puede ocurrir que el diferencial de la insta-
lación actúe de forma intempestiva. Se recomienda utilizar un diferencial
propio para la máquina o uno del tipo “súper inmunizado”.
UTILIZACIÓN
- No deje que la comodidad o la familiaridad con el producto (a base de
utilizarlo repetidamente) sustituya la estricta observancia de las normas de
seguridad, manténgase alerta, ponga atención a lo que hace y use el sentido
común al operar el equipo.
- No utilice el equipo mientras esté cansado o bajo la inuencia de las dro-
gas, alcohol o medicamentos. Si utiliza la herramienta de forma no segura o
incorrecta, puede sufrir daños corporales o materiales.
- NUNCA abra la tapa antes de que el motor se haya parado por completo.
- NUNCA suprima los sistemas de bloqueo y de seguridad.
- NUNCA introduzca la mano en la boca de salida o en las tolvas de intro-
ducción de alimentos.
- Sólo introduzca alimentos (nunca objetos) en las tolvas.
- NUNCA use objetos externos para guiar los ingredientes en las tolvas de
entrada o de bocas de salida.
- No se debe sobrecargar la máquina.
- No ejerza excesiva presión con los pisadores, puede deteriorar el producto
y forzar el motor en exceso.
- Se recomienda hacer periodos de marcha de 30 minutos con descansos
de 20 minutos.
LIMPIEZA
- Es necesario limpiar la máquina al término de cada día o cada vez que se
cambie de producto o de accesorio.
- Todos los elementos que están en contacto con los alimentos se deben
limpiar inmediatamente después de su utilización, con agua caliente y
un detergente admitido en alimentación. Después, aclare con abundante
agua caliente y desinfecte con un paño suave impregnado en alcohol
etílico (90 º).
- NO SE DEBEN utilizar detergentes abrasivos (aguafuerte, lejía concentra-
da etc…) ni estropajos o rasquetas que contengan acero común. Pueden
causar la oxidación de la máquina.
- En caso de que los elementos desmontables de la CK y CA sean intro-

- 6 -
ES
ducidos en un lavavajillas para su limpieza, utilice detergentes que no dete-
rioren los mismos.
- NO SE DEBE limpiar el exterior de la máquina con un chorro directo de agua.
Emplee para su limpieza un paño húmedo y cualquier detergente habitual.
MANTENIMIENTO
- Verique antes de cada uso el funcionamiento de las seguridades de la
máquina. En caso de detectar alguna anomalía llame al servicio técnico
reconocido por SAMMIC.
- Verique semanalmente el estado del retén del eje de arrastre para preser-
var la estanqueidad de esta zona. Cada vez que se suelte el eje de arrastre
para el mantenimiento se recomienda colocar un retén nuevo.
- Si el cable de alimentación se deteriora es preciso instalar uno nuevo antes
de volver a utilizar la máquina. Dicho recambio sólo podrá ser realizado por
un servicio técnico reconocido por SAMMIC.
- Si el bloque motor (K) o cualquier otra pieza se deteriora, es preciso susti-
tuir las piezas afectadas antes de volver a utilizar la máquina. Dicho cambio
sólo podrá ser realizado por un servicio técnico reconocido por SAMMIC.
- El nivel de ruido de la máquina (según EN ISO 11201:1995), en marcha y
colocada a 1,6m de altura y a 1 m de distancia, es inferior a 70dB(A). Ruido
de fondo:32dB(A).
FUNCIONES DEL CONTROL ELECTRÓNICO Y SU
FUNCIONAMIENTO
MARCHA/PARADA (14):
Pone en marcha el motor si todas las seguridades lo permiten. Una segunda
pulsación para el motor.
PULSE (15):
El motor se pone en marcha mientras está pulsada esta tecla y se para al
soltarlo.
En modo Cutter.
- En caso de que la máquina esté en funcionamiento continuo, al pulsar
PULSE (15) se para y el temporizador se desactiva.
- Si está dentro de un programa, en caso de pulsar PULSE (15) la máquina
se para y el tiempo vuelve al punto inicial.
SUBIR (11)
Cada pulsación incrementa el valor seleccionado en el visor.
BAJAR (12)
Cada pulsación disminuye el valor seleccionado en el visor.
TEMPORIZADOR (13)
Modo cutter:
Pulse para activar la función de cuenta atrás. Use los botones SUBIR (11) o
BAJAR (12) para modicar el tiempo. Tras seleccionar el tiempo, una segun-
da pulsación conrma el valor.
Modo cortadora:
Manteniendo pulsado tres segundos accederá a la función FORCE
CONTROL.
FUNCIONAMIENTO
Al conectar la máquina el “Visor” (1) visualiza dos rayas centrales (espera).
Si monta el accesorio “Cortadora de Hortalizas” el visor visualiza el icono
Nº7 (representado un disco de corte) y si monta el accesorio “Cutter” el visor
visualiza el icono Nº5 (representado el rotor). indica que la placa de control
ha identicado cada accesorio. También se visualiza la velocidad en nivel y
RPM asociado.
Se pueden seleccionar 10 velocidades distintas (1 a 10) y los programas P1,
P2 y P3 en el modo de funcionamiento “Cutter” y 5 velocidades distintas (1 a
5) en el modo de funcionamiento “Cortadora de Hortalizas”.
- Control de Tiempo: Solo es posible en modo de funcionamiento “Cutter”.
Es posible programar el tiempo para la cuenta atrás y la parada automática
del equipo.
- Si se pulsa marcha y alguna de las seguridades no está en posición, en la
pantalla aparecerá el texto indicativo asociado.
PUESTA EN MARCHA FUNCIONAMIENTO GENERAL
Modo de funcionamiento “Cortadora de Hortalizas” (CK-24V, CA-2V)
Es posible colocar el accesorio “Cortadora Hortalizas” (F) en dos direcciones
diferentes (FIG 3) de modo que la salida para los productos quede en un
sentido o en otro.
Con la máquina desconectada de red:
- Coloque el accesorio “Cortadora Hortalizas” sobre el bloque motor y gírelo
en sentido antihorario según se indica en los dibujos.(Fig.4)
- Es necesario colocar la tapa (E) según se indica en los dibujos girándolo
en sentido antihorario.(Fig. 5)
- Coloque el pisador (B) según se indica en los dibujos jándolos con el
pasador (C). (Fig.6)
Colocación de discos (A) y rejillas (G)
- Retire el conjunto tapa (E) - pisador (B) girándolo en sentido horario (g.5).
- Coloque el expulsor (I) en su alojamiento del eje de arrastre o la rampa de
evacuación(H).
- La rejilla (G) se inserta en la cavidad de la tapa (F) cuando el proceso lo
requiera.
- Colocar un disco (A) en el eje de arrastre. Los discos que trabajan con
rejillas necesitan ser jados.
- Vuelva a colocar conjunto tapa (E) – pisador (B) girándolo en sentido antiho-
rario (g. 5).
Conecte la máquina, y el visor mostrará el icono Nº7 (representado un
disco de corte) y la velocidad en nivel y RPM asociado. Es posible modi-
car la velocidad con el motor en marcha o parado.
Con la tapa (E) cerrada y el pisador (B) abajo, si pulsa “Marcha” (7) el motor
arranca. El icono Nº7 empieza a girar indicando el movimiento del motor.
Con el motor parado, la tapa articulada (E)cerrada y el pisador (B) arriba, si
pulsa “Marcha”(7), aparece el icono “Pause” y el texto indicativo de que es
necesario bajar el pisador. Al bajar el pisador (B), el motor arranca.
Con el motor en marcha si sube el pisador (B), el motor se para. Al bajar
el pisador (B) el motor vuelve a arrancar automáticamente. Con el motor
en marcha, si abre la tapa articulada (E), el motor se para. Al cerrar la tapa
articulada (E) vuelve a arrancar.
Si en 15s no ha bajado el pisador (B) o cerrado la tapa, es necesario volver
a pulsar el pulsador de “Marcha” (7) para poder arrancar la máquina.
Si deja la máquina en marcha con el pisador (B) abajo, a los 30 minutos la
máquina se para automáticamente.

- 7 -
ES
Si pulsa marcha y alguna de las seguridades no está en posición, en la
pantalla aparecerá el texto indicativo asociado.
El botón PULSE (15) también funciona en modo cortadora, mientras se
mantenga pulsado el motor se pone en marcha y al soltarlo se para
Función FORCE CONTROL:
- Cuando el motor está en marcha, mediante el aro 3 de la pantalla se
representa el nivel de fuerza que está haciendo el motor. Cuando el nivel
se acerca a las posiciones rojas, indica que el motor va forzado. Este nivel
varía según las características del producto que se está procesando y la
fuerza con la que se pisa el pisador.
- Es posible programar una señal acústica y visual para que sepa que ha
llegado a un nivel de fuerza determinado. Esto es útil para hacer siempre
la misma fuerza y conseguir una calidad de corte homogénea.
- Al bajar el pisador haga, fuerza hasta oír la señal acústica o ver la barra
que indica que ha alcanzado el nivel de fuerza deseado. No supere este
nivel de fuerza para tener el mismo corte durante todo el proceso.
- Para acceder a la función FORCE CONTROL, mantener pulsado durante
3s la tecla TIEMPO (13). Con las teclas SUBIR (11) y BAJAR (12) seleccio-
ne el nivel deseado y vuelva a pulsar el TIEMPO (13) para salir.
Funcionamiento con la tolva normal (P) y pisador (B). CK-24V y CA-2V.
- Es necesario que el mazo (D) esté alojado y bloqueado en su oricio. Esto
se hace girándolo en el sentido antihorario.
- Ponga en marcha la cortadora.
- Levante el pisador (B). El motor se para.
- Introduzca los productos en la tolva normal (P).
- Al empezar a bajar el pisador (B) el motor arranca y empieza el proceso
de corte. Empuje el producto bajando suavemente el pisador (B). Repita la
operación una y otra vez.
- Pulse “Parada” (14) al terminar la producción.
Funcionamiento con tolva cilíndrica (P). CK- 24V, CA-2V.
Esta tolva de Ø47mm se utiliza para el corte de productos cilíndricos y
alargados, como las zanahorias, endivias, pepinos, etc.
- Ponga en marcha la cortadora.
- Desbloquee el mazo (D) girándolo en el sentido horario.
- Introduzca los productos por el orico y empújelos suavemente con el
“Mazo”(D). Repita la operación una y otra vez.
- Pulse “Parada” (14) al terminar la producción.
IMPORTANTE: Cuando no se utiliza la tolva cilíndrica, deje el mazo
(D) dentro de la tolva.
Modo de funcionamiento “Cutter”. (CK-24V y KE-4V):
Con la máquina desconectada de red:
Coloque el accesorio “Cutter” sobre el bloque motor y gírelo en sentido
antihorario según el dibujo. Para que la máquina funcione, el asa tiene que
colocarse justo encima del teclado. (Fig. 7)
Coloque el “Conjunto de cuchillas” (N) y cierre la tapa (M) girándola en
sentido antihorario hasta que quede encajada y bloqueada. La tapa (M)
va provista de un oricio para la incorporación de producto mientras la
máquina está funcionando.
Al conectar la máquina, la pantalla visualiza el icono Nº5 (representado el
rotor) junto con el nivel de velocidad y la RPM asociada. Es posible modi-
car la velocidad del motor en marcha o parado.
Al pulsar la tecla de MARCHA (14), y se para al volver a pulsar la misma tecla
o la tecla PULSE (15). También arranca y está en marcha mientras se manten-
ga pulsada la tecla de PULSE (15). Con el motor en marcha el icono Nº5 gira.
Cada vez que pulse el botón MARCHA (14) aparece un contador que cuenta
el tiempo que dura dicha elaboración. Este tiempo se resetea pulsando el
botón PULSE (15) o si la máquina está parada un minuto en modo pause (9).
Si al colocar el caldero pulsa la tecla TIEMPO RELOJ (13), puede progra-
mar el tiempo de cuenta atrás. Acepte pulsando de nuevo la misma tecla
o poniendo en marcha el motor, empezando así la cuenta atrás. El tempo-
rizador tiene el aro indicativo asociado para tener una referencia visual de
cuánto falta para el n del proceso. Cuando el tiempo llega a cero, el motor
se para y escucha un pitido indicativo.
Programas dedicados
Estando el motor parado, pulse el botón BAJAR (12) hasta llegar a los
programas dedicados P1 (textura densa), P2 (textura ligera) y P3 (pulsos).
P1 y P2 son programas automáticos utilizados para obtener un triturado
no y uniforme. Puede modicar el tiempo prejado pulsando el botón
TIEMPO (13) (estando el motor parado). P3 es un programa de pulsos,
con el botón TIEMPO (13) cambie la cantidad de pulsos a realizar. Pulse el
botón MARCHA (14) para ponerlo en funcionamiento.
P1 (textura densa) para productos tipo plátano.
P2 (textura ligera) para productos tipo tomate.
Visualización potencia del motor
Cuando el motor está en marcha, mediante el aro 3 de la pantalla se
representa el nivel de fuerza que está haciendo el motor. Cuando el nivel
se acerca a las posiciones rojas, indica que el motor va forzado. Este nivel
varía según las características del producto que se está procesando.
LIMPIEZA
Limpieza de accesorio “Cortadora Hortalizas” CK-24V y CA-2V:
- Desbloquee la tapa (E) girándolo en sentido horario según indicado en
el dibujo y retírela.
- Retire el disco (A) girándolo en sentido horario y tirando de él hacia
arriba cuidadosamente. Retire la rejilla (G) y el expulsor (I) o la rampa de
evacuación (H).
- Es posible desmontar el pisador (B) y la tapa articulada (F) para facilitar
su limpieza.
ATENCION: Para poder retirar los productos encajados en las rejillas
(G), basta con golpearlas con una patata alargada o una zanahoria
entera en el sentido de corte. De esta forma no se daña la rejilla (G).
Tenga precaución con el lo de la rejilla (G). Nunca utilice objetos
duros para golpear la rejilla (G).
Limpieza de accesorio “Cutter” (CK-24V y KE-4V):
- Si la suciedad está seca, adherida a la olla y a las cuchillas, ponga agua
caliente y detergente en la olla y haga funcionar a la máquina para que los
residuos se ablanden.
- Para evitar salpicaduras, una vez procesado el producto y quite la olla (O)
con la cuchilla dentro(N).

- 8 -
ES
Limpieza del bloque motor CK:
El exterior de la máquina NO SE DEBE limpiar con un chorro directo de
agua. Emplee para su limpieza un paño húmedo y cualquier detergente
habitual. NO SE DEBEN utilizar detergentes abrasivos (agua fuerte, lejía
concentrada etc…) ni estropajos o rasquetas que contengan acero común,
pueden causar el deterioro y la oxidación de la máquina.
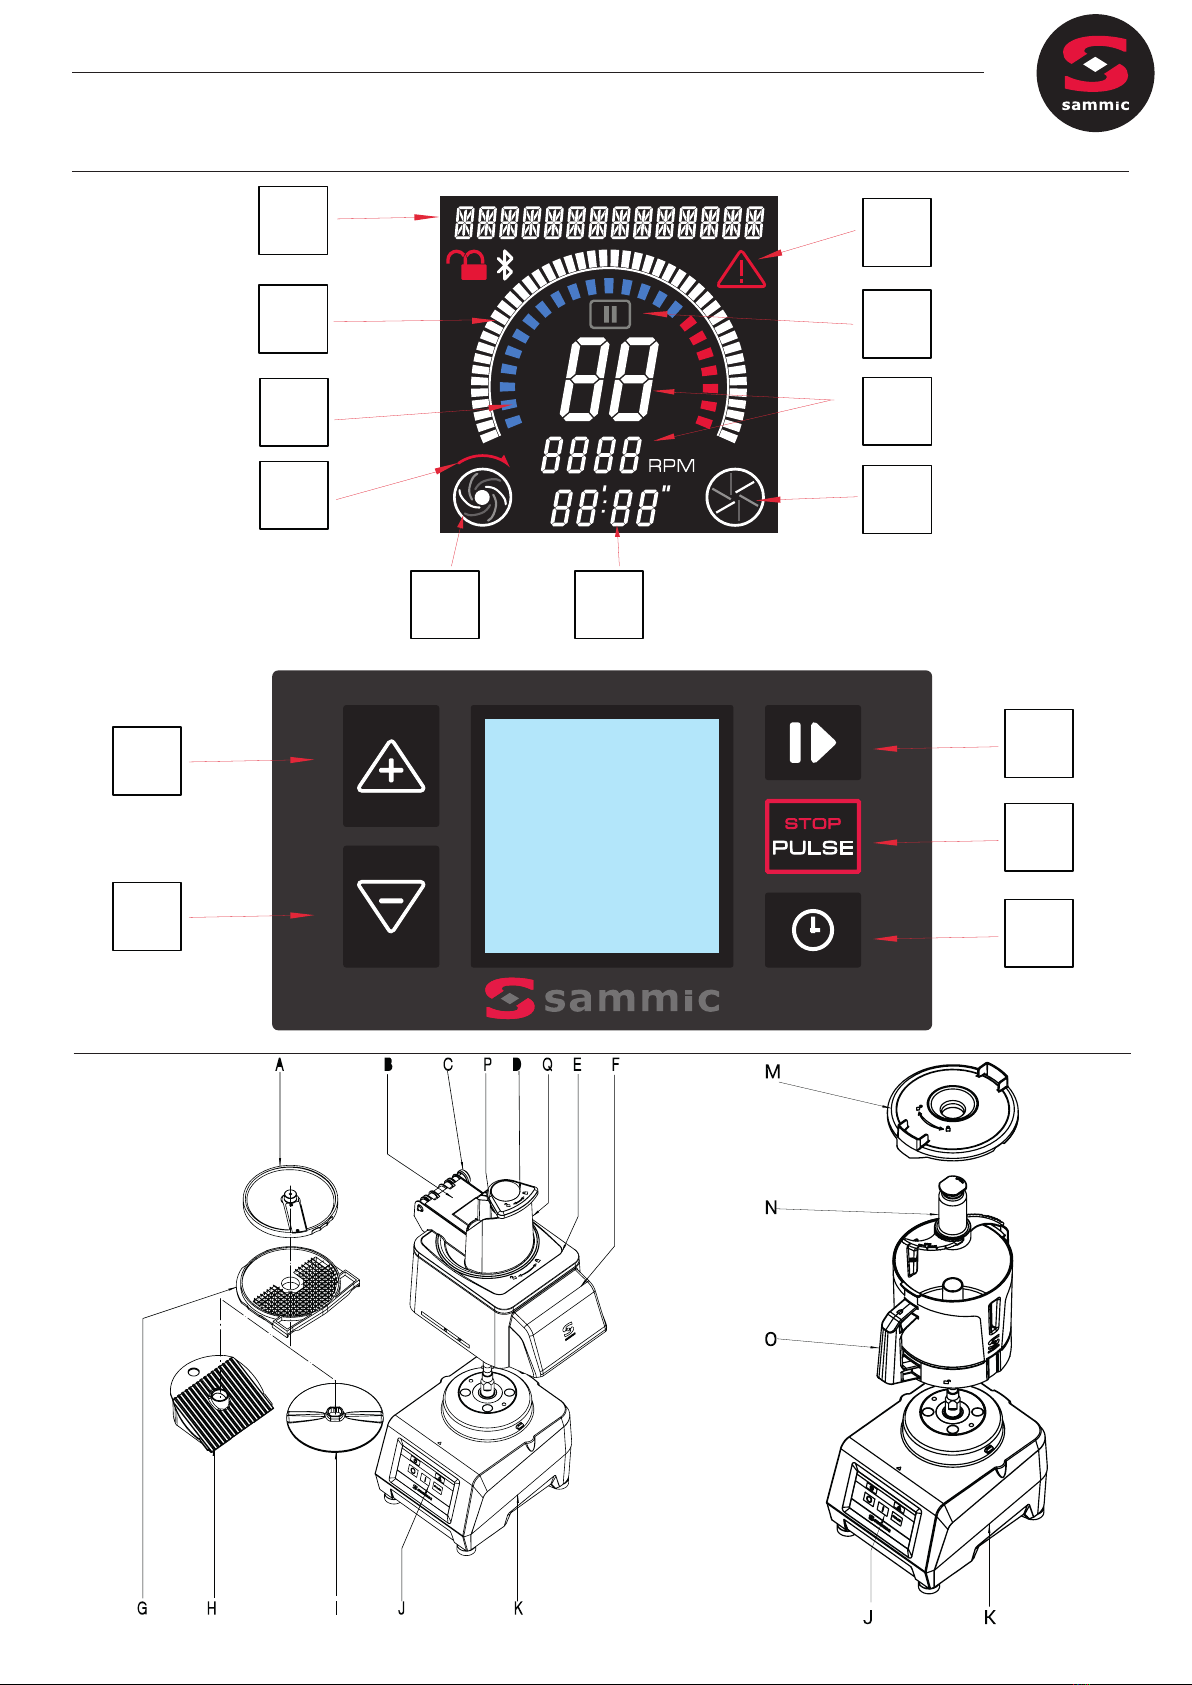
Accesorio “Cortadora Hortalizas”: Funcionamiento de discos (A) y
rejillas (G).
- Discos (A):
- Discos (A) FCS-1 y FCS-2 para cortar patatas “chips” o rodajas nas de
1 y 2mm.
- Discos (A) de FCS-3 a FCS-12 para obtener rodajas de 3 a 12mm de
patatas, zanahorias, remolachas, coles, pepinos, calabacines, cebollas,
rábanos, etc.
- Discos (A) ralladores tipo SHS, desde 2 a 7mm, para deshilar verduras y
rallar queso, pan, nueces, almendras, etc.
Para cortar patatas del tipo “paja” y “cerilla”, tiras de zanahorias, apio, remo-
lacha, etc., discos (A) FCES
- Discos (A) SHSF y SHSG para rallar el pan, queso, chocolate, etc.
- Discos (A) y rejillas (G). Combinaciones posibles:
- Los discos(A) FCS-8, FCS-10 y FCS-12 combinadas con las rejillas(G),
FFS- 8 y FFS-10 se obtienen patatas del tipo “fritas”.
- Los discos (A) FCS-8, FCS-10 y FCS-12 combinados con las rejillas (G)
FMS-8, FMS- 10 y FMS-12, obtienen dados y/o cubos de 8 a 12 mm de
patatas para tortillas, de hortalizas y frutas para macedonia, ensalada rusa,
etc.
Expulsor (I) y rampa (H)
- Expulsor: para extraer el producto cortado a gran velocidad y mantener así
una producción grande.
- Rampa: el producto va cayendo por gravedad poco a poco. Para dañando
menos el producto cortado.
Accesorio “Cutter”
Mediante el accesorio “Cutter” se puede:
PICAR: perejil, ajo, cebolla, queso, jamón cocido, carne cocinada, etc.
SALSAS: tomate, mayonesa, tártara, alioli, verde, gazpacho, etc.
PURES: legumbres, verduras, compotas, etc.
PASTAS: gambas, mejillones, ostras, carne, embutidos, etc.
SOPAS / CREMAS: marisco, ajo, verduras, legumbres, carne, etc.
MANTEQUILLAS DE SABORES: ajo, perejil, nas hierbas, anchoas, etc.
En repostería:
PICAR: almendras, avellanas, chocolate, pasas, frutas para macedonia, etc.
PREPARAR: azúcar glas, pasta de almendras, batir nata; crema de
chocolate, vainilla, café, fresas y frutas en general, etc.
AFILADO DE CUCHILLAS
ATENCION: Los discos (A), rejillas (G) y el conjunto cuchillas (N) están
provistos de cuchillas muy aladas, por tanto, hay que manipúlelas
cuidadosamente.
Las cuchillas de los discos (A) y del Conjunto Cuchillas (N) se desmontan
fácilmente para poder alarse. Para su alado emplee siempre piedras blan-
das conservando el ángulo de corte de la cuchilla.
ELIMINACIÓN
EMBALAJE
Para eliminar el embalaje, siga las normas de protección medioambiental
vigentes en su país.
MÁQUINA
Esta máquina está sujeta a las disposiciones de la Directiva Europea
2012/19/UE sobre residuos de aparatos eléctricos y electrónicos RAEE /
WEEE (Waste of Electrical and Electronic Equipment). La máquina está
marcada con el símbolo WEEE:
· No elimine esta máquina con la basura doméstica normal.
· Deseche la máquina en un centro de residuos autorizado o a través de las
organizaciones municipales de desecho de residuos. Observe las normas
vigentes.
Obtendrá información sobre la eliminación y la situación del centro de reci-
claje más cercano, por ejemplo, en el servicio de limpieza de su municipio.
INCIDENCIAS DE FUNCIONAMIENTO
Estando la máquina preparada para su funcionamiento, al pulsar “Marcha”
(1) la máquina no arranca y en el display aparece el mensaje indicativo de la
acción a realizar. Puede que el sensor asociado no se detecte.
- No se enciende la pantalla: el cable plano que une la placa de potencia y
la de control se ha soltado o dañado o la placa electrónica de control está
estropeada.
- La máquina estaba en marcha y se ha parado sin pulsar ninguna tecla.
Estando la máquina en marcha sin actuar sobre ningún dispositivo, se para
automáticamente a los 30 minutos.
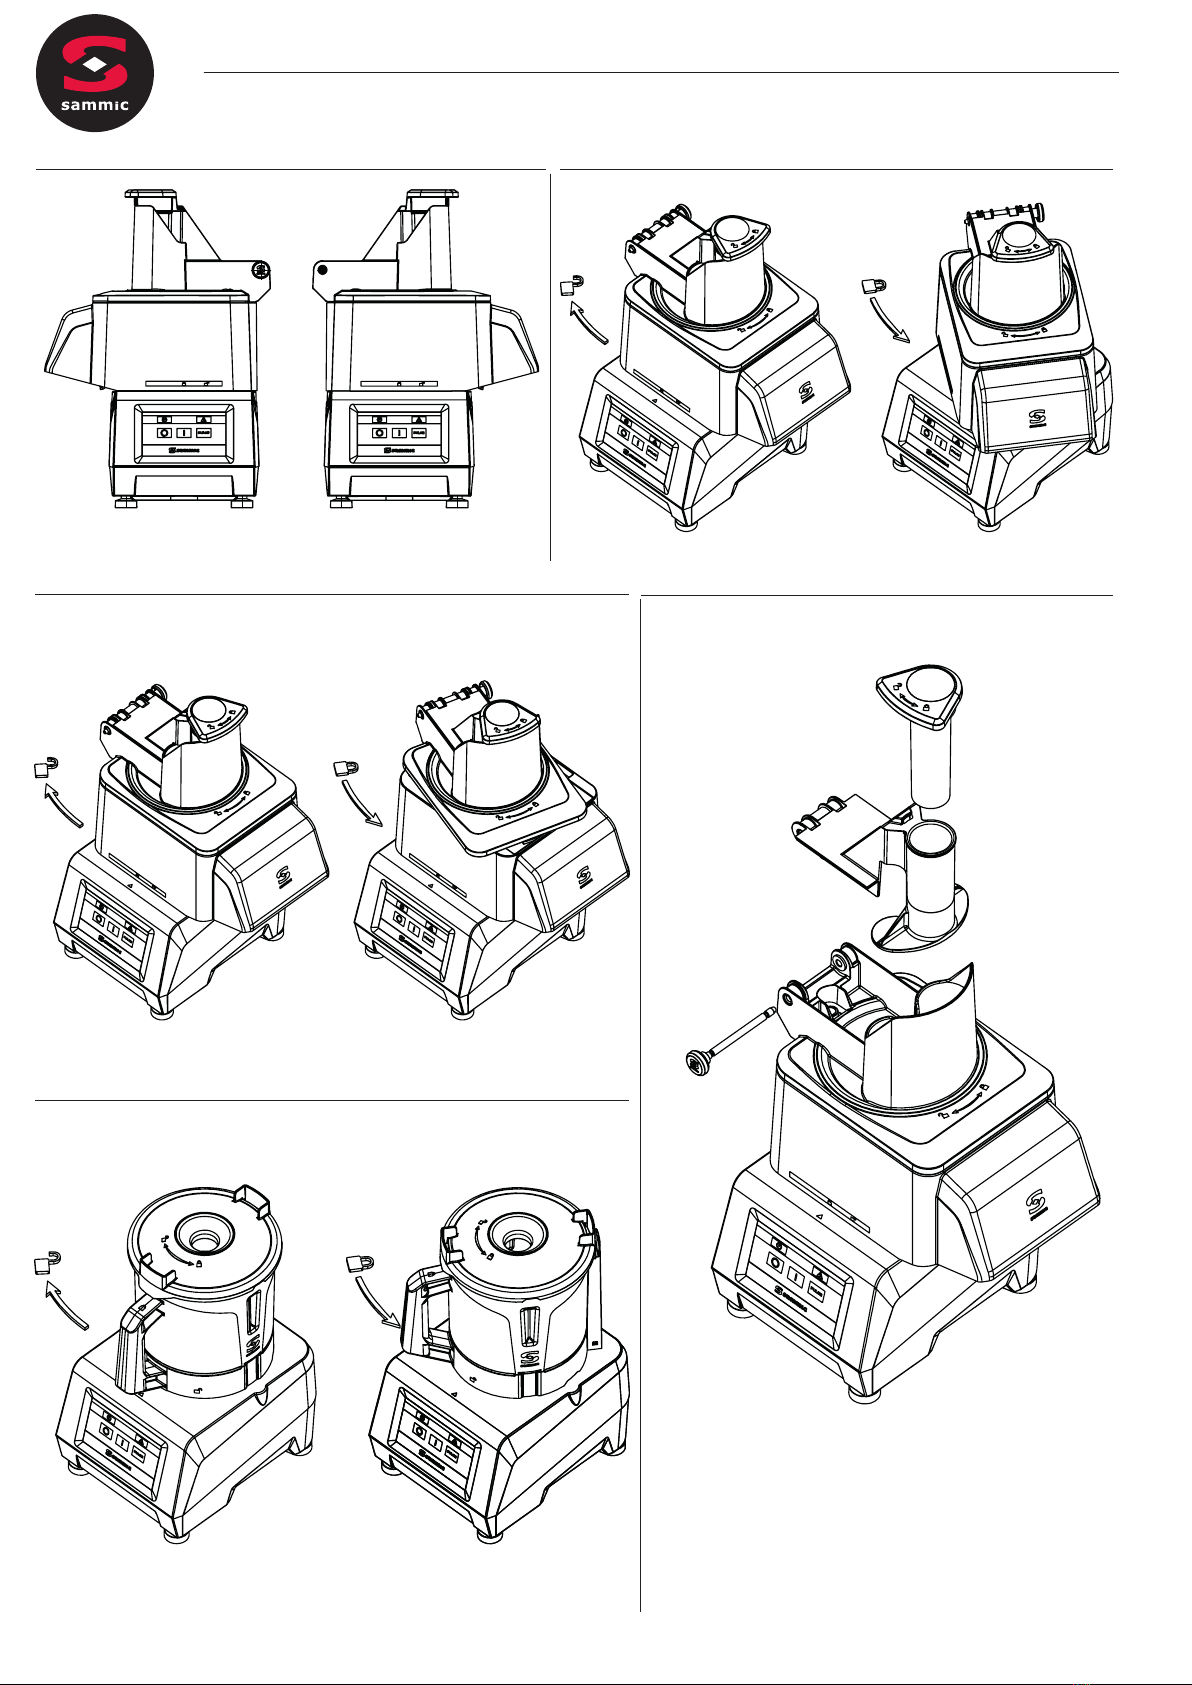
En modo Cortadora de Hortalizas al bajar el pisador (B) el motor no arranca:
- Si se deja el pisador (B) abierto más de 15s es necesario volver a pulsar
“Marcha” (7) para rearmar la cortadora.
- Puede que la tolva esté demasiado llena y el pisador (B) no actúe sobre
el micro. Vacíe parte de la tolva he inténtelo de nuevo.
- Si el ruido de CK la maquina es excesivo, el disco (A) o el Conjunto
Cuchillas (N) roza en alguna parte. Es probable que los rodamientos del eje
principal hayan deteriorado.
- Si la maquina vibra en exceso vericar el estado del disco (A) o la cuchilla (N).
Puede que algún trozo de alimento esté adherido, desequilibrado los mismos.
- Verique que todos los componentes estén en posición.
- Si tras vericar el punto anterior el error persiste, hay algún problema
en alguna de las seguridades. Llame a un servicio técnico autorizado por
Sammic,S.L.
- Para vericar que el teclado funciona correctamente con algún accesorio
montado, pulse las teclas y verique que la placa emita un pitido y el display
reaccione. Si no es así cambie el teclado.
El equipo cuenta con protecciones propias que actúan para protegerse y
no dañar partes importantes del mismo. Estas protecciones se representan
con el triángulo rojo (1) y el aro (2) encendidos junto con el texto indicativo.
Que aparezcan esas protecciones no indica que el equipo esté dañado, sino
que ha detectado un estado que ha sido programado para que se proteja.
Para resetear la protección pulsé de nuevo marcha (14). Si el aviso persiste
y no permite funcionar correctamente al equipo, contacte con el servicio
autorizado por SAMMIC. Los avisos que se dan son registrados para poder
ser consultados.

- 9 -
ES
Además de la función FORCE CONTROL que le permite controlar el
estado del motor, es posible visualizar algunos parámetros de la máquina
mientras está funcionando. Si mantiene pulsadas a la vez las teclas de
subir y bajar, en la parte superior de la pantalla aparecen 4 números que,
de izquierda a derecha, nos indican: Intensidad del motor, potencia del
motor, temperatura del módulo de IGBTs y la temperatura en el interior de
la máquina.
Intensidad motor: décimas de amperio.
Potencia motor: W
Temperatura IGBT: ºC
Temperatura interior: ºC
Si alguna de las alarmas persiste o se sobrepasan los valores indicados en
el manual, verique y valore si el trabajo que está realizando es proporcinado
e intente adecuarlo en fuerza y periodo de reposo para tener los parámetros
dentro de márgenes y no hacer saltar las protecciones. Si estima que es
una anomalía de la máquina, contactar con el servicio técnico autorizado
por Sammic.
AJUSTES INICIALES
Puede cambiar los siguientes parámetros en la máquina:
1- Idioma
2- Mantener velocidad cutter: si esta activo, la velocidad inicial del cutter será
aquel que utilizó la última vez.
3- Mantener FORCE CONTROL: FORCE CONTROL esta siempre activo.
4- Mantener tiempo de programa: el cambio de tiempo de un programa es
permanente.
5- Programas (ver apartado “programas”).
6- Parámetros de fábrica: resetea la máquina para volver a los parámetros
de fábrica.
Para modicar estos parámetros:
- Conecte la máquina y, en los primeros tres segundos, mantener pulsado
el botón PULSE (15).
- Utilice las teclas de SUBIR (11) o BAJAR (12) para moverse entre diferentes
parámetros y elija aquel que quiere cambiar con el botón MARCHA (14). Si
se equivoca, pulse una vez el botón PULSE (15) para volver al nivel anterior.
- En el siguiente nivel, utilice las teclas de SUBIR (11) o BAJAR (12) para
moverse entre diferentes valores y conrme con el botón MARCHA (14). Al
aceptar el cambio, vuelve al nivel anterior. Si se equivoca, pulse una vez el
botón PULSE (15) para volver al nivel anterior.
Para salir de los parámetros pulse el botón PULSE (15).
CAMBIO DE IDIOMA
- Conecte la máquina y mantenga pulsado el botón PULSE (15) durante los
primeros 3 segundos.
- Seleccione IDIOMA con el botón MARCHA (14).
- Escoja el idioma mediante las teclas de subir (11) o bajar (12) y seleccióne-
lo con el botón MARCHA (14).
- Pulse el botón PULSE (15) dos veces para hacer el cambio.
CONTADORES DE LA MÁQUINA
Conecte la máquina y mantenga pulsado el botón MARCHA (14) en los pri-
meros 3 segundos: accederá a los contadores que van registrando el nivel
de uso de la máquina. Pulsando subir (11) y bajar (12) irá viendo:
0 HPOW: horas conectado a alimentación.
1 HCUT: horas motor en marcha modo cutter.
2 HCOR: horas motor en marcha modo cortadora hortalizas.
3 NARR: número de arranques del motor.
4 NMTERM: número de maniobras térmicos del motor.
5 NMCIER: número de maniobras de cierre de bayoneta.
6 NMTAPA: número de maniobras de la tapa cortadora de hortalizas.
7 NMPCA: número de maniobras del pisador de la cortadora de hortalizas
y la tapa del cutter.
Para resetear los contadores mantenga pulsado el pulsador de marcha/
parada durante 3 segundos.
TEMPORIZADOR (13): enciende todos los iconos de la pantalla.
BAJAR (12): aparece la versión de la placa.
SUBIR (11): aparece la versión del programa.
PROGRAMAS
CREAR UN PROGRAMA NUEVO
- Desenchufe la máquina y espere 20 segundos antes de volver a enchufar.
- Enchufe la máquina y, antes de que pasen 3 segundos, mantener pul-
sado el botón PULSE (15) con lo cual accede al menú de los parámetros.
- Utilice las teclas de SUBIR (11) hasta llegar al parámetro PROGRAMAS y
pulse el botón MARCHA (14) para acceder a la creación o modicación de
un programa.
- Los programas se denominan C1, C2, C3… llegando a poder congurar
hasta 9 programas (C9). Utilice las teclas de SUBIR (11) o BAJAR (12) para
localizar el programa que desea crear o modicar (C1, C2, C3…).
- Una vez localizado el programa pulse el botón MARCHA (14) para empe-
zar a modicarlo.
- Una vez accedido a la conguración del programa:
- La pantalla muestra en la parte superior izquierda el nombre del progra-
ma (C1, C2, C3…) y la fase (1,2,3..) que está congurando.
- Para congurar una fase pulse el botón MARCHA (14).
• Encuentre la función que desee programar (velocidad, pulse, …) con los
botones SUBIR (11) Y BAJAR (12). Acceda a la función escogida con el
botón de MARCHA (14). La máquina dispone de las siguientes funciones:
• VELOCIDAD. Seleccione una velocidad y el tiempo en la que estará
en marcha:
• Con los botones de SUBIR (11) Y BAJAR (12) seleccione la velo-
cidad de trabajo (estará parpadeando) y pulse el botón MARCHA
(14) para jarlo.
• Determine el tiempo que trabajará a esa velocidad (estará par-
padeando). Utilice los botones de SUBIR (11) y BAJAR (12) para
modicar el tiempo y el botón de MARCHA (14) para jarlo.
• Ha terminado la conguración de la función. Pulse MARCHA (14)
para empezar a denir la siguiente fase (1,2,3…).
• PULSE. Seleccione la cantidad de pulsos (ciclos de 1 segundo en
marcha) a realizar.
• El número de pulsos aparecerá parpadeando. Use los botones de
SUBIR (11) y BAJAR (12) para determinar los pulsos a realizar y el
botón MARCHA (14) para jarlo.
• Ha terminado la conguración de la función. Pulse MARCHA (14)
para empezar a denir la siguiente fase (1,2,3…).
• REPOSO. La máquina estará parada el tiempo que le indique.
• En la pantalla aparecerá un tiempo parpadeando. Use los botones
de SUBIR (11) y BAJAR (12) para determinar el tiempo de parada
y el botón MARCHA (14) para jarlo.

- 10 -
ES
• Ha terminado la función. Pulse MARCHA (14) para empezar a
denir la siguiente fase (1,2,3…)
• PAUSA. La máquina estará parada hasta que el usuario pulse el
botón MARCHA (14).
• Ha terminado la función. Pulsa MARCHA (14) para empezar a
denir la siguiente fase (1,2,3…).
• FIN. Cierra el programa.
• Para nalizar el programa:
• Congure la ultima fase del programa y escoja la función FIN.
• Si desea salir de la conguración de los parámetros de máquina,
pulse el botón PULSE (15) dos veces hasta que aparezca el símbolo
SAMMIC.
• Para acceder al nuevo programa:
• Se puede acceder al nuevo programa con las echas 12 (BAJAR).
Estará congurado con el nombre que ha escogido (C1, C2, C3…).
Para ejecutar el programa debe de pulsar el botón MARCHA (14).
BORRAR UN PROGRAMA (C1, C2, C3,…)
- Desenchufe la máquina y espere 20 segundos antes de volver a enchufar.
- Enchufe la máquina ,y antes de que pasen 3 segundos, mantenga pul-
sado el botón PULSE (15) con lo cual accede al menú de los parámetros.
- Use las teclas de SUBIR (11) hasta llegar al parámetro PROGRAMAS
y pulse el botón MARCHA (14) para acceder a la creación o modicación
de un programa.
- Utilice las teclas de SUBIR (11) o BAJAR (12) para localizar el programa
que desea borrar (C1, C2, C3…).
- Una vez localizado el programa pulse el botón MARCHA (14).
- Una vez accedido a la conguración del programa:
• La pantalla nos muestra, en la parte superior izquierda, el nombre del
programa (C1, C2, C3…) y la fase (1,2,3..) que está congurando.
• Entre a la conguración de la fase 1 con el botón MARCHA (14).
• Encuentre la función la función Fin con los botones SUBIR (11) o
BAJAR (12) y pulse MARCHA (14). Ha borrado el programa correcta-
mente.
- Si desea salir de la conguración de los parámetros de máquina, pulse
el botón PULSE (15) dos veces hasta que aparezca el símbolo SAMMIC.

- 11 -
ES
CK-24V
CARACTERÍSTICAS CK-24V
Producción / hora 50-350 kg. - 110-772 lbs.
Alimentación eléctrica 230V / 50-60 Hz / 1~ | 120V / 50-60 Hz / 1~
Potencia eléctrica 1100 W - 1.5 HP | 1400 W - 2 HP
Velocidad Variable (rPm) 300 - 1000
Dimensiones externas
-Ancho 378 mm. / 14 29/32”
-Fondo 309 mm. / 12 11/64”
-Alto 533 mm. / 20 31/32”
Peso neto 13 kg. / 28.66 lbs.

- 12 -
ES
CA-2V
CARACTERÍSTICAS CA-2V
Producción / hora 50-350 kg. / 110-772 lbs.
Alimentación eléctrica 230V / 50-60 Hz / 1~ | 120V / 50-60 Hz / 1~
Potencia eléctrica 1100 W - 1.5 HP | 1400 W - 2 HP
Velocidad Variable (rPm) 300 - 1000
Dimensiones externas
-Ancho 378 mm. / 14 29/32”
-Fondo 309 mm. / 12 11/64”
-Alto 533 mm. / 20 31/32”
Peso neto 13 kg. / 28.66 lbs.

- 13 -
ES
KE-4V
CARACTERÍSTICAS KE-4V
Alimentación eléctrica 230V / 50-60 Hz / 1~ | 120V / 50-60 Hz / 1~
Potencia eléctrica 1100 W - 1.5 HP | 1400 W - 2 HP
Velocidad Variable (rPm) 300 - 3000
Capacidad cuba 4,4 l. / 4,65 qt.
Dimensiones cuba mm ø 193 x161 h
Dimensiones externas
-Ancho 252 mm. / 9 59/64”
-Fondo 309 mm. / 12 11/64”
-Alto 434 mm. / 17 5/64”
Peso neto 11,9 kg. / 26.2 lbs.

- 14 -
EN
FIG 1
1 - Informative text.
2 - Time display. Cutter mode only.
3 - FORCE CONTROL display.
5 - Detection of cutter head and shaft rotation. Cutter mode only.
6 - Time display. Cutter mode only.
7- Detection of cutter head and shaft rotation. Cutter mode only. 8 -
Speed level and associated RPM.
9 - Pause.
10 - Alert and error indicator.
Function Initial settings
Cutter Cutter
11 Up Software version
12 Down Hardware version
11+12 Real-time parameter display.
13 Timer FORCE
CONTROL Icons display screen
14 Motor ON / Motor OFF Counter display
15 PRESS / STOP Selection of parameters
13+15 Demo Force
control
Operation Maximum amount
Cutter
Speed Blade
recommended
Notes
Raw meat in general 1-1.5 kg I or 3- 6 Smooth
Cooked meat or boiled ham 2-2.5 kg I or 3- 7 Smooth Recommendation:
Press
Pâtés 1-1.5 kg I or 3- 6 Smooth or micro-
toothed
Fish 1.5-2 kg I or 3- 7 Smooth
Dough and pasta 1-1.5 kg I or 3- 5 Smooth or micro-
toothed
Breadcrumbs 0.5-1 kg I or 5- 10 Micro-toothed
Purées, sauces, soups 1 litre I or 7- 10 Micro-toothed
Mayonnaise 3 litres I or 7- 10 All
Icing sugar 1-1.5 kg I or 8- 10 Smooth
Chop onion, garlic, parsley 1 kg I or 1- 4 Smooth or micro-
toothed
Recommendation:
Press
FIG 2 - Technical description
A - Disk
B - Plunger
C - Removable pin
D - Mallet
E - Lid
F - Lower lid
G – Screen
H - Ramp
I - Ejector
J - Keyboard
K - Motor block
M - Pressure pot lid
N - Blade
O - Pressure pot

- 15 -
EN
Translation of the original instructions
This manual describes the installation, operation, and maintenance of
machines CK -24V, CA -2V and KE -4V.
Each machine is identied as follows:
- Name and address of the manufacturer: SAMMIC S.L - Basarte 1 Azkoitia.
Gipuzkoa (SPAIN).
- Machine model and serial number.
- Approval marks.
- The serial number and all the information regarding the current legislation
under which this appliance was manufactured is indicated on the guarantee
card and in the declaration of conformity.
NOTE: The 120V models have been approved under the safety standard
UL-763 and hygiene and materials standard ANSI NSF-8.
IMPORTANT OBSERVATIONS
- To reduce the possibility of accidents (short-circuits,
injuries, or res, etc.), to obtain the best performance,
and to keep the machine in good condition, read and
follow these instructions carefully. Keep the instruc-
tions and ensure that all users of the machine read
them before use. Also keep the guarantee card and
the declaration of conformity.
- The disks (A), screens (G), and blade assembly (N)
are tted with very sharp blades, for which reason it
is important to handle them with great care during the
unpacking, use, and cleaning of these parts and of the
machine. Use cut-resistant gloves.
- This machine is for supervised use. Never leave the
machine running without supervision.
- Clean the food contact area with lukewarm soapy
water, rinse, and allow to dry before using the machine
for the rst time.
- The machine must be disconnected from the mains
at the end of each operation and before any interven-
tion to change tools or heads, cleaning, review, or
repair.
- This machine is not designed for use by people
(including children) with reduced physical, sensory, or
mental capabilities or who lack the necessary experi-
ence or knowledge unless they have received super-
vision or instructions regarding the machine’s use from
a person responsible for their safety. Children must be
supervised to ensure they do not play with the machine.
- The models mentioned in the manual were designed
for use in hotels, restaurants, catering, and retail
establishments, but never for continuous industrial
production.
- The manufacturer declines responsibility in all cases
of improper use or different from those mentioned
above, such as for sanitary use, chemical use, or use
in explosive atmospheres, etc.
PLACEMENT
Place the machine at a comfortable height on a stable surface that does
not act as a sounding board, and where it does not cause fatigue.. Place
the recovery recipient under the food outlet. The machine is not secured
and can be moved easily.
ELECTRICAL CONNECTION
WARNING! THE EARTH CONNECTION IS OBLIGATORY. DANGER OF
ELECTROCUTION.
Ensure that the machine’s electrical specications match the mains power
supply.
The unit is provided for a 230 V 50-60 Hz single-phase or a 120 V 50-60 Hz
single-phase power supply.
Prepare a wall-mounted socket with a general cut-out switch, differential
and magneto-thermal 2-pole protection (13 to 20 A) with its associated plug.
Place a general switch or the plug in a visibly accessible place to disconnect
the machine.
The variable speed drive is tted with a lter that leads existing disturbances
to earth. For this reason, the differential protection of the installation may act
unexpectedly. It is advisable to use a suitable differential device or a super
immunised type for this machine.
INSTRUCTIONS FOR USE
- Comfort or familiarity with the product (based on its repeated use) should
not replace strict compliance with the safety regulations. Be alert, pay
attention to what you are doing and use common sense when operating the
appliance.
- Do not use the equipment when you are tired or under the inuence of
drugs, alcohol, or medications. You may suffer personal injury or material
damage if you use the tool in an unsafe or incorrect manner.
- NEVER open the lid before the motor has completely stopped.
- NEVER attempt to eliminate the blocking or safety systems.
- NEVER insert your hand in the food outlet or the food inlet hoppers.
- Only insert foodstuffs (never objects) into the hoppers.
- NEVER use external objects to guide the ingredients in the feeding hoppers
or outlets.
- The machine must not be overloaded.
- Refrain from exerting excessive pressure with the plungers as this may
damage the product and overload the motor.
- 30-minute working periods with 20-minute breaks are recommended.
CLEANING
- It is necessary to clean the machine at the end of each day or each time
you change the product or accessory.
- All components in contact with the food must be cleaned immediately after
use with hot water and a food-safe detergent. Then rinse with abundant hot
water and disinfect using an ethyl alcohol-soaked cloth (90º).
- DO NOT use abrasive detergents (etching acid, concentrated bleach, etc.)
or scouring pads or scrapers that contain ordinary steel.. They may cause
the machine to rust.
- If the removable parts of the CK and CA are put in a dishwasher for clean-
ing, use detergents that do not damage them.
- DO NOT clean the outside of the machine with a direct stream of water. Use
a damp cloth and any common detergent for cleaning.

- 16 -
EN
MAINTENANCE
- Verify before each use that the machine’s safety devices are working prop-
erly. Call the SAMMIC authorised technical service if you detect any anomaly.
- Check the condition of the drive shaft seal on a weekly basis to ensure
that this area remains water-tight. Installation of a new seal is recommended
every time the drive shaft is loosened for maintenance.
- If the power cable is damaged, a new one must be installed before the
machine is used again. Only a SAMMIC authorised technical service may
perform this replacement.
- If the engine block (K) or any other part is damaged, the affected parts must
be replaced before the machine is used again. Only a SAMMIC authorised
technical service may perform this change.
- The noise level in operation (according to EN ISO 11201:1995) is less than
70 dB(A) with the machine placed at a height of 1.6 m and a distance of 1 m.
Background noise: 32 dB(A).
FUNCTIONS AND OPERATION OF THE ELECTRONIC
CONTROL
ON/OFF (14):
Starts the motor if all the safety devices permits it. Pressing a second time
stops the motor.
PRESS (15):
The motor starts and runs as long as this key is held down and stops when
it is released.
In Cutter mode.
- If the machine is in continuous operation, pushing PRESS (15) stops it and
deactivates the timer.
- If a programme is running and you push PRESS (15), the machine stops
and the timer returns to the initial point.
UP (11)
Each time the key is pressed the setting on the display increases.
DOWN (12)
Each time the key is pressed the setting on the display decreases.
TIMER (13)
Cutter mode:
Press to activate the countdown function. Use the UP (11) or DOWN (12)
buttons to adjust the time. After selecting the time, a second press conrms
the selection.
Veg. slicer mode:
Press and hold for three seconds to access the FORCE CONTROL function.
OPERATION
When the machine is switched on, the “Viewer” (1) displays two central
lines (wait). Icon number 7 (representing a cutting disk) is displayed on the
Viewer if the “Vegetable Cutter” accessory is mounted and Icon number 5
(representing a rotor) is displayed if the “Cutter” is mounted, Indicating that
the control plate has Identied each accessory. The speed level and the
associated RPM are also displayed.
Ten different speeds (1 to 10) and programmes P1, P2 and P3 can be
selected in “Cutter” mode and ve different speeds (1 to 5) can be selected
in “Vegetable Cutter” mode.
- Time control: Only available in “Cutter” mode. The countdown time and
automatic shut-down can also be programmed.
- If the Start button is pushed when any of the safety devices is out of posi-
tion, an associated indicative text will appear on the screen.
START-UP AND GENERAL OPERATION
“Vegetable Cutter” operating mode (CK-24V, CA-2V)
The “Vegetable Cutter” accessory (F) can be positioned in two different
directions (FIG 3) so that the outlet for the products faces one direction or
the other.
With the machine disconnected from the mains:
- Place the “Vegetable Cutter” accessory on the motor block and turn it anti-
clockwise as shown in the drawings (Fig.4).
- The lid (E) must be tted as shown in the drawings by turning it anticlock-
wise (Fig. 5)
- Place the plunger (B) as shown in the drawings and fasten it in position
with the pin (C). (Fig.6)
Installation of disks (A) and screens (G)
- Remove the lid (E) - plunger (B) assembly by turning it clockwise (Fig.5).
- Place the ejector (I) in its housing on the drive shaft or discharge ramp
(H).
- The screen (G) is inserted into the lid cavity (F) when required by the
process.
- Fit a disk (A) on the drive shaft. Disks that work with screens need to be
fastened in position.
- Reinsert the lid (E) - plunger (B) assembly by turning it anticlockwise
(Fig. 5).
Start the machine and the screen will display the Icon number 7 (represent-
ed by a cutting disk), the speed level ,and its associated RPM. The speed
can be adjusted with the motor running or stopped.
Pressing “Start” (7) with the lid (E) closed and the plunger (B) down will
start the motor. The Icon No. 7 will begin to rotate, indicating that the motor
is in movement.
The “Pause” icon will be displayed if “Start” (7) is pressed with the motor
stopped, the hinged lid (E) closed, and the plunger (B) up, indicating that
the plunger must be lowered. The motor will start when the plunger (B) is
lowered.
The running motor will stop if the plunger (B) is raised. When the plunger
(B) is lowered, the motor restarts automatically. The running motor will stop
if the hinged lid (E) is opened. When the hinged lid (E) is closed, it starts
up again.
If the plunger (B) is not lowered or the lid is not closed for more than 15
seconds, the “Start” button (7) must pressed again to start the motor .
If the machine Is left running with the plunger (B) in the lowered position,
the machine will stop automatically after 30 minutes.
If the Start (7) button is pushed when any of the safety devices is out of
position, an associated indicative text will appear on the screen.
The PRESS button (15) also works in cutter mode: the motor starts while it
is held down and stops when it is released.

- 17 -
EN
FORCE CONTROL function:
- With the motor running, ring 3 on the screen indicates the load under
which the motor is working. When the indicator approaches the red zone,
it means that the motor is nearing overload. This level varies depending
on the features of the product being processed and the force exerted by
the plunger.
- An acoustic and visual signal can be congured to warn that a certain
level of force has been reached. This is useful to ensure that constant force
is applied to obtain uniform cutting.
- Lower the plunger and increase the load until the acoustic signal sounds
or the bar can be seen, indicating that the desired level of force has been
reached. Maintain this force level to obtain uniform cutting throughout the
process.
- To access the FORCE CONTROL function, press and hold the TIME but-
ton (13) for 3 seconds. Use the UP (11) and DOWN (12) keys to select the
desired level, then press TIME (13) again to exit.
Operation with the normal intake hopper (P) and plunger (B). CK-24V
and CA-2V.
- The mallet (D) must be housed and locked in its hole. Rotate it anti-clock-
wise to do so.
- Start the cutter.
- Raise the plunger (B). The motor stops.
- Introduce the products into the normal hopper (P).
- The motor starts and the cutting process begins when the plunger starts to
lower (B). Push the product by gently lowering the plunger (B). Repeat the
process as many times as required.
- Press “Stop” (14) to terminate the production.
Operation with cylindrical hopper (P). CK- 24V, CA-2V.
This 47 mm Ø hopper is used to cut long, cylinder-shaped vegetables such
as carrots, endives, cucumber, etc.
- Start the cutter.
- Release the mallet (D) by rotating it clockwise.
- Insert the products through the hole and push them gently with the “Mallet”
(D). Repeat the process as many times as required.
- Press “Stop” (14) to terminate the production.
IMPORTANT Leave the mallet (D) inside the cylindrical hopper when the
latter is not in use.
“Cutter” operating mode. (CK-24V and KE-4V):
With the machine disconnected from the mains:
- Place the “Cutter” accessory on the motor block and turn it anticlockwise as
shown in the drawing. The handle must be located just above the keypad for
the machine to operate. (Fig. 7)
Place the “Blade assembly” (N) and close the lid (M) by turning it anticlock-
wise until it is engaged and locked. The lid (M) has a hole for inserting the
product while the machine is running..
When the machine is switched on, the screen will display the Icon No. 5 (rep-
resented by the rotor) together with the speed level and the associated RPM.
The speed can be adjusted with the motor running or stopped.
It can be started by pressing the START key (14) and stopped by pressing
the same key again or the PRESS key (15). It also starts and continues to
operate while the PRESS button (15) is held down. With the motor running,
icon No. 5 rotates.
Each time the START button (14) is pressed, a counter appears that counts
the time taken for each process. The time is reset by pressing the PRESS
button (15) or if the machine is stopped for one minute in pause mode (9).
The countdown time can be programmed by pressing the CLOCK TIME
(13) key when tting the pot. By pressing the same key again or starting the
motor, the countdown will then start. The timer has an associated indicator
circle that provides a visual reference of the time remaining until the end of
the process. When the time reaches zero , the motor stops and a “beep” is
emitted.
Dedicated programmes
With the motor stopped, press the DOWN button (12) until you reach the
dedicated programmes P1 (dense texture), P2 (light texture), and P3 (puls-
es). P1 and P2 are automatic programmes used to obtain a ne and consist-
ent grind. The pre-set time can changed by pressing the TIME button (13)
(when the engine is stopped). P3 is a pulse program:; change the number
of pulses to be realized with the TIME button (13). Press the START button
(14) to start it up.
P1 (dense texture) for banana-type products.
P2 (light texture) for tomato-type products.
Motor power display
When the motor is running, ring 3 on the screen indicates the load under
which it is working. When the indicator approaches the red zone, it means
that the motor is nearing overload. This level varies depending on the fea-
tures of the product being processed.
CLEANING
Cleaning the “Vegetable Cutter” accessory CK-24V and CA-2V:
- Unlock the lid (E) by turning it clockwise as shown in the drawing and
remove it.
- Remove the disk (A) by turning it clockwise and carefully pulling it upwards.
Remove the screen (G) and the ejector (I) or the discharge ramp (H).
- The plunger (B) and the hinged lid (F) can be removed for cleaning.
WARNING: To remove any product embedded in the screens (G), sim-
ply tap them with an elongated potato or a whole carrot in the cutting
direction. This prevents damage to the screen (G). Be careful with the
edge of the screen (G). Never use hard objects to hit the screen (G).
Cleaning the “Cutter” accessory CK-24V and KE-4V:
- If the deposits are dry and adhere to the pot and the blades, put hot water
and detergent into the pot and switch the machine on to soften the residue.
- To avoid splashes, remove the pot (O) with the blade (N) inside once the
product has been processed.
Cleaning the CK motor block:
The outside of the machine must NEVER be cleaned with a direct jet of
water. Use a damp cloth and any common detergent for cleaning. DO NOT
use abrasive detergents (etching acid, concentrated bleach, etc.) or scouring
pads or scrapers that contain ordinary steel as they may cause damage and
rust to the machine.

- 18 -
EN
“Vegetable Cutter” attachment: Operation of disks (A) and screens (G).
- Disks (A):
- Disks (A) FCS-1 and FCS-2 to cut potato chips or thin slices of 1 and
2-mm .
- Disks (A) from FCS-3 to FCS-12 to obtain 3 to 12-mm slices of potatoes,
carrots, beets, cabbage, cucumbers, zucchinis, onions, radishes, etc.
- SHS-type grater disks (A), from 2-7 mm to shred vegetables and grate
cheese, bread, nuts, almonds, etc.
Use disks (A) FCES to cut potato “matchsticks”, and strips of carrots, celery,
beetroot, etc.
- Disks (A) SHSF and SHSG to grate bread, cheese, chocolate, etc.
- Disks (A) and screens (G). Possible combinations:
- Disks (A) FCS-8, FCS-10, and FCS-12 combined with screens (G) FFS- 8
and FFS-10 to obtain chip-style potatoes.
- Disks (A) FCS-8, FCS-10, and FCS-12 combined with screens (G) FMS-8,
FMS- 10, and FMS-12 to obtain ngers and/or cubes of potatoes of 8 to 12
mm for omelettes, of vegetables and fruit for fruit salads, Russian salads, etc.
Ejector (I) and ramp (H)
- Ejector: to extract the cut product rapidly and maintain a large production.
- Ramp: the product falls out gradually due to gravity. To avoid damage to
the cut product.
“Cutter” attachment
Using the “Cutter” accessory you can:
CHOP: parsley, garlic, onion, cheese, cooked ham, cooked meat, etc.
SAUCES: tomato, mayonnaise, tartar, garlic mayonnaise, green sauce,
gazpacho, etc.
PURES: legumes, vegetables, compotes, etc.
PASTA: prawns, mussels, oysters, meat, sausages, etc.
SOUPS / CREAMS: seafood, garlic, vegetables, legumes, meat, etc..
FLAVOURED BUTTERS: garlic, parsley, ne herbs, anchovies, etc. in pas-
tries:
CHOP: almonds, hazelnuts, chocolate, raisins, fruit for fruit salad, etc.
PREPARE: powdered sugar, almond paste, whipped cream; creamed
chocolate, vanilla, coffee, strawberries, and fruit in general, etc.
SHARPENING THE BLADES
ATTENTION: Disks (A), screens (G) and the blade assembly (N) have
very sharp blades and must be handled with extreme care.
The disc blades (A) and blade assembly (N) can be removed easily for
sharpening. Always use soft stones to sharpen them, maintaining the blades’
cutting angle.
DISPOSAL
PACKAGING
Follow current environmental protection standards in your country to dis-
pose of the packaging.
MACHINE
This machine is subject to the provisions of European Directive 2012/19/
EU on waste electrical and electronic equipment (WEEE). The machine is
marked with the WEEE symbol:
· Do not dispose of this machine with the normal household waste.
· Dispose of the machine at an authorised waste management centre or
through municipal waste disposal entities. Comply with the applicable reg-
ulations.
You can obtain information about waste disposal and the location of your
nearest recycling centre, for example, from your municipal cleaning service.
OPERATING INCIDENTS
The machine fails to start on pressing “Start” (7) , when it is ready for oper-
ation and the message indicating the action to be performed appears on the
display. The associated sensor may not be working.
- The screen fails to turn on: The at cable that connects the power and
control boards is loose or damaged or the electronic control panel is faulty.
- The machine was running and stopped without any key being pressed.
With the machine running, and without any action on any device, it will stop
automatically after 30 minutes.
In Vegetable Cutting mode the motor will not start when the plunger (B) is
lowered.
- If the plunger (B) is left open for more than 15 seconds, it is necessary to
press “Start” (7) again to reset the cutter .
- The hopper may be too full and the plunger (B) may not activate the
microswitch. Reduce the amount of product in the hopper and try again.
- If the CK noise from the machine is excessive, disk (A) or the blade
assembly (N) is rubbing somewhere. The main shaft bearings have probably
deteriorated.
- If the machine vibrates excessively, check the condition of disk (A) or the
blade (N). A piece of food may be stuck, unbalancing them.
- Check that all of the components are in position.
- If the problem persists after revising the previous point, there is a problem
with one of the safety devices. Call a SAMMIC authorised technical service.
- To verify that the keypad is working properly, press the keys with an acces-
sory tted and verify that the plate emits a beep and the display is activated.
If this doesn’t work, change the keyboard.
The unit has its own protection devices that are activated to protect itself and
prevent damage to important components. These protections are represent-
ed by a red triangle (1) and a circle (2) lit simultaneously with the indicative
text. Display of these indicators does not mean that the equipment has been
damaged but that it has detected a status that triggers the programmed
protection. Press Start (14) again to reset the protection system. Contact
the authorised SAMMIC technical service if the alert persists and does not
permit normal operation of the machine. These alerts are recorded in a log
that can be consulted.
In addition to the FORCE CONTROL function that enables users to monitor
the status of the motor, it is possible to display some of the machine’s param-
eters while it is running. If you press and hold the UP and DOWN keys at the
same time, 4 numbers appear at the top of the display, which, from left to
right, indicate: motor current, motor power, IGBT module temperature, and
the temperature inside the machine.
Motor current: tenths of an ampere.
Motor power: W
IGBT temperature: ºC
Internal temperature: ºC
If any of the alerts persists or exceeds the values indicated in the manual,
check and assess if the work being done is proportional and try to adjust the
load and rest period to keep the parameters within the proper ranges to avoid

- 19 -
EN
tripping the protections. If you consider there is an anomaly in the machine,
contact Sammic’s authorised technical service.
INITIAL SETTINGS
The following parameters can be changed on the machine:
1- Language
2- Maintain cutter speed: If enabled, the initial cutter speed will be the one
used last time.
3- Maintain FORCE CONTROL: FORCE CONTROL is always active.
4- Maintain programme time: the change of time of a programme is perma-
nent.
5- Programmes (see section “Programmes”).
6- Factory settings: reset the machine to return it to its factory settings.
To change these settings:
- Switch on the machine and keep the PRESS button (15) pressed during
the rst three seconds.
- Use the UP (11) or DOWN (12) buttons to move from one setting to another
and choose the one you want to change with the START button (14). If you
make a mistake, push the PRESS button (15) once to return to the previous
level.
- On the next level, use the UP (11) or DOWN (12) buttons to move from one
value to another and conrm with the START button (14). By accepting the
change, the machine returns to the previous level. If you make a mistake,
push the PRESS button (15) once to return to the previous level.
To exit the settings, push the PRESS button (15)..
CHANGE OF LANGUAGE
- Switch on the machine and keep the PRESS button (15) pressed during
the rst three seconds.
- Select LANGUAGE with the START button (14).
- Select the language using the UP (11) or DOWN (12) keys and select it with
the START button (14).
- Press the PRESS button (15) twice to make the change.
MACHINE COUNTERS
Switch on the machine and keep the START button (14) pressed during
the rst three seconds: this will access the counters that record the level of
machine usage. Pressing UP (11) and DOWN (12) displays the following::
0 HPOW: Hours connected to the power supply.
1 HCUT: Hours with the motor running in Cutter mode.
2 HCOR: Hours with the motor running in Vegetable Cutting mode.
3 NARR: Number of motor starts.
4 NMTERM: Number of thermal manoeuvres of the motor
5 NMCIER: Number of bayonet closing manoeuvres.
6 NMTAPA: Number of manoeuvres of the vegetable cutting lid.
7 NMPCA: Number of manoeuvres of the vegetable cutter plunger and the
cutter lid.
Press and hold the Start/Stop button for 3 seconds to reset the counters.
TIMER (13): Turns on all the icons on the screen.
BAJAR (12) The panel version is shown.
SUBIR (11) The program version is shown.
PROGRAMMES
CREATE A NEW PROGRAM
- Unplug the machine and wait 20 seconds before reconnecting.
- Plug in the machine and, within 3 seconds, press and hold the PRESS
button (15), which accesses the parameters menu.
- Use the UP keys (11) until you reach the PROGRAMMES parameter and
press the START button (14) to access the creation or modication of a
program.
- The programmes are called C1, C2, C3… and up to 9 programs can be
congured (C9). Use the UP (11) or DOWN (12) keys to locate the program
you want to create or modify (C1, C2, C3...).
- Once the program is located, press the START button (14) to start mod-
ifying it.
- Once you have accessed the program conguration:
- The screen shows in the upper left the name of the program (C1, C2,
C3...) and the phase (1.2,3..) you are conguring.
- To congure a phase press the START button (14).
• Find the function you want to programme (speed, pulse, …) with the
UP (11) and DOWN (12) buttons. Access the selected function with the
START button (14). The machine has the following functions:
• SPEED. Select a speed and the time it will be running:
• Use the UP (11) and DOWN (12) buttons to select the working
speed (it will be ashing) and press the START button (14) to set it.
• Determine how long you will work at that speed (it will be ashing).
Use the UP (11) and DOWN (12) buttons to change the time and
the START button (14) to set it.
• The conguration of the function has concluded. Press START (14)
to start dening the next phase (1.2,3...).
• PRESS. Select the number of pulses (one second cycles while run-
ning) to be performed.
• The number of pulses will appear ashing. Use the UP (11) and
DOWN (12) buttons to determine the pulses to be realized and the
START button (14) to set it.
• The conguration of the function has concluded. Press START (14)
to start dening the next phase (1.2,3...).
• REST. The machine will be stopped for the time you indicate.
• A ashing time will appear on the display. Use the UP (11) and
DOWN (12) buttons to determine the stop time and the START
button (14) to set it.
• The function is nished. Press START (14) to start dening the next
phase (1.2,3...)
• PAUSE The machine will be stopped until the user presses the
START button (14).
• The function is nished. Press START (14) to start dening the
next phase (1.2,3...).
• END Closes the program.
• To end the program:
• Congure the last phase of the program and choose the END func-
tion.
• If you want to exit the machine parameter conguration, push the
PRESS (15) twice until the SAMMIC symbol appears.
• To access the new program:
• The new program can be accessed with the (DOWN) arrows 12. It
will be congured with the chosen name (C1, C2, C3...). To run the
program, press the START button (14).

- 20 -
EN
DELETE A PROGRAM (C1, C2, C3,…)
- Unplug the machine and wait 20 seconds before reconnecting.
- Plug in the machine , and within 3 seconds, press and hold the PRESS
button (15), which accesses the parameters menu.
- Use the UP keys (11) until the PROGRAMMES parameter is reached,
then press the START button (14) to access the creation or modication
of a programme.
- Use the UP (11) or DOWN (12) keys to locate the programme you want
to delete (C1, C2, C3...).
- Once the programme is located, press the START button (14).
- Once you have accessed the programme conguration:
• The screen shows us, in the upper left, the name of the program (C1,
C2, C3…) and the phase (1.2,3..) that you are conguring.
• Enter the stage 1 conguration with the START button (14).
• Find the End function using the UP (11) or DOWN (12) buttons and
press START (14). You have successfully deleted the program.
- If you want to exit the machine parameter conguration, push the PRESS
button (15) twice until the SAMMIC symbol appears.
This manual suits for next models
2
Table of contents
Languages:
Other Sammic Food Processor manuals