3
Article 212700 Princess Food Processor and Blender
verwijdert u de deksel en het mes. U kunt
ingrediënten vervolgens afschrapen met
een spatel.
• Snijd de ingrediënten in kleine stukken
voordat u deze in de werkkom doet.
• Het apparaat hakt erg snel. Zorg ervoor
dat het apparaat niet te lang hakt. U kunt
beter meerdere malen kort hakken door
de stand P (Puls) te gebruiken.
• Gebruik de intervalfunctie (houd de knop
II/ICE langer dan 3 seconden ingedrukt)
wanneer u vast voedsel wilt verwerken.
• Hak in de werkkom geen harde
ingrediënten, zoals koffiebonen,
muskaatnoten en ijsklontjes.
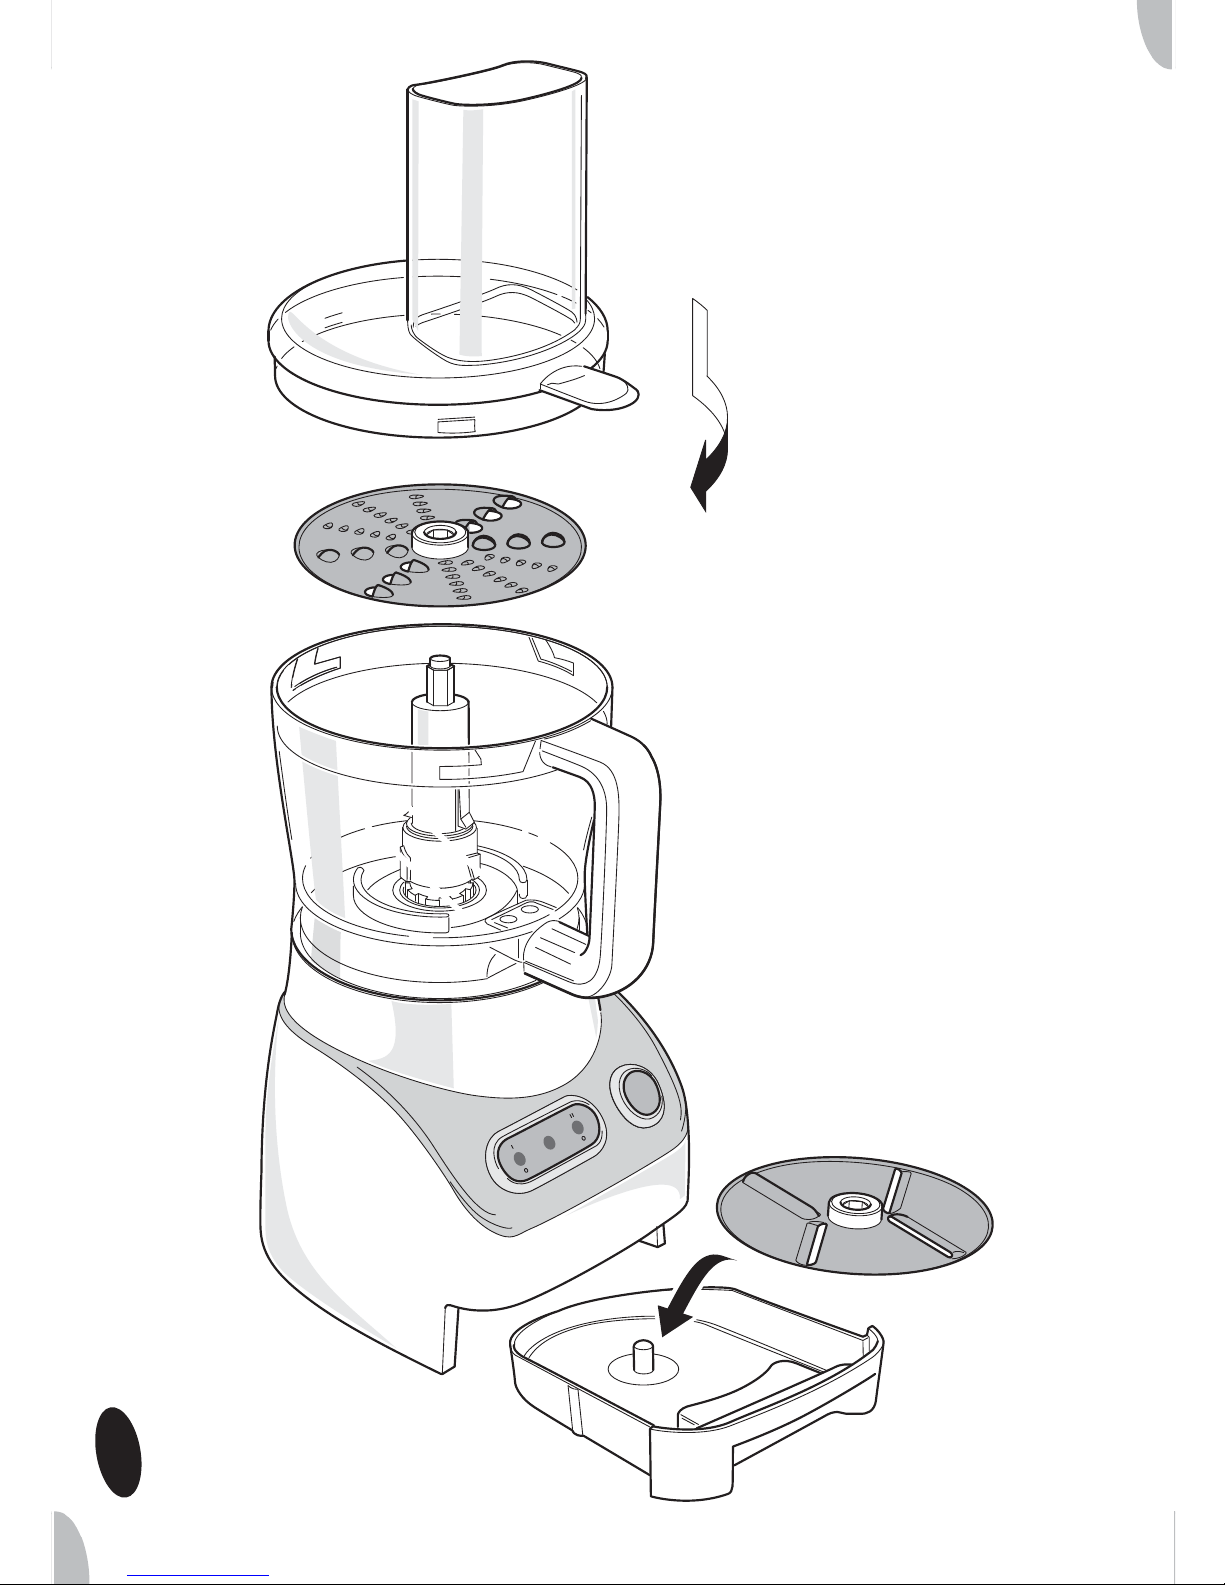
Raspen, schaven of plakjes snijden
1 Plaats het apparaat op een vlak, stabiel
oppervlak zodat het niet kan omvallen.
Zie figuur 4.
2 Plaats de werkkom op de aandrijfeenheid.
Draai de werkkom met de klok mee
vast totdat deze niet meer verder kan.
3 Plaats de opzetas (zonder het mes)
over de aandrijfas in de werkkom.
4 Plaats de plakkensnijder of de rasper/
schaver op de opzetas en zorg ervoor
dat de zijde die wordt gebruikt omhoog
gericht is.
Wees voorzichtig bij het plaatsen en
verwijderen van de hulpstukken. De
rasper/schaver is scherp.
5 Plaats de deksel op de werkkom en
draai de deksel met de klok mee totdat
deze niet meer verder kan. Het
uitstekende lipje van de deksel moet
over de handgreep van de werkkom zijn
geschoven.
6 Trek het netsnoer uit de opbergruimte
aan de achterzijde van de
aandrijfeenheid.
7 Steek de stekker in het stopcontact.
Wanneer alle indicatielampjes
knipperen, zijn de werkkom en/of de
deksel niet correct geplaatst. Om
veiligheidsredenen is het in dit geval
niet mogelijk om het apparaat in te
schakelen. Controleer de plaatsing van
de kom en de deksel.
Wanneer de werkkom en deksel correct
geplaatst zijn, knippert alleen het stand-
by-indicatielampje. Alleen dan kan het
apparaat worden gebruikt.
8 Druk op de knop I voor continue lage
snelheid. Het stand-by-indicatielampje
gaat uit en het blauwe indicatielampje in
knop I gaat branden.
9 Voeg tijdens gebruik desgewenst
ingrediënten toe via de vulopening in de
deksel. Gebruik de stopper om de vaste
ingrediënten door de vulopening naar
beneden te drukken. Druk niet te hard.
• De maximale werktijd in de continue
hoge of lage snelheid is 2 minuten.
Vervolgens wordt de aandrijfeenheid
automatisch gedurende 2 minuten
uitgeschakeld. 15 Seconden voordat
het apparaat wordt uitgeschakeld,
begint het stand-by-indicatielampje te
knipperen. Het blauwe indicatielampje
blijft branden.
• Steek, om verwondingen of schade
aan het apparaat te voorkomen, nooit
een hand of ander voorwerp in de
werkkom terwijl deze in gebruik is.
• Gebruik altijd de stopper om
ingrediënten in de kom te drukken.
Druk de ingrediënten dus nooit aan
met uw vingers, een vork of ander
voorwerp.
10 Schakel het apparaat na gebruik uit
(druk op de knop I waarvan het
indicatielampje brandt).
11 Draai de werkkom los en verwijder deze
van de aandrijfeenheid. Neem de
hulpstukken uit de kom voordat u deze
leegmaakt.
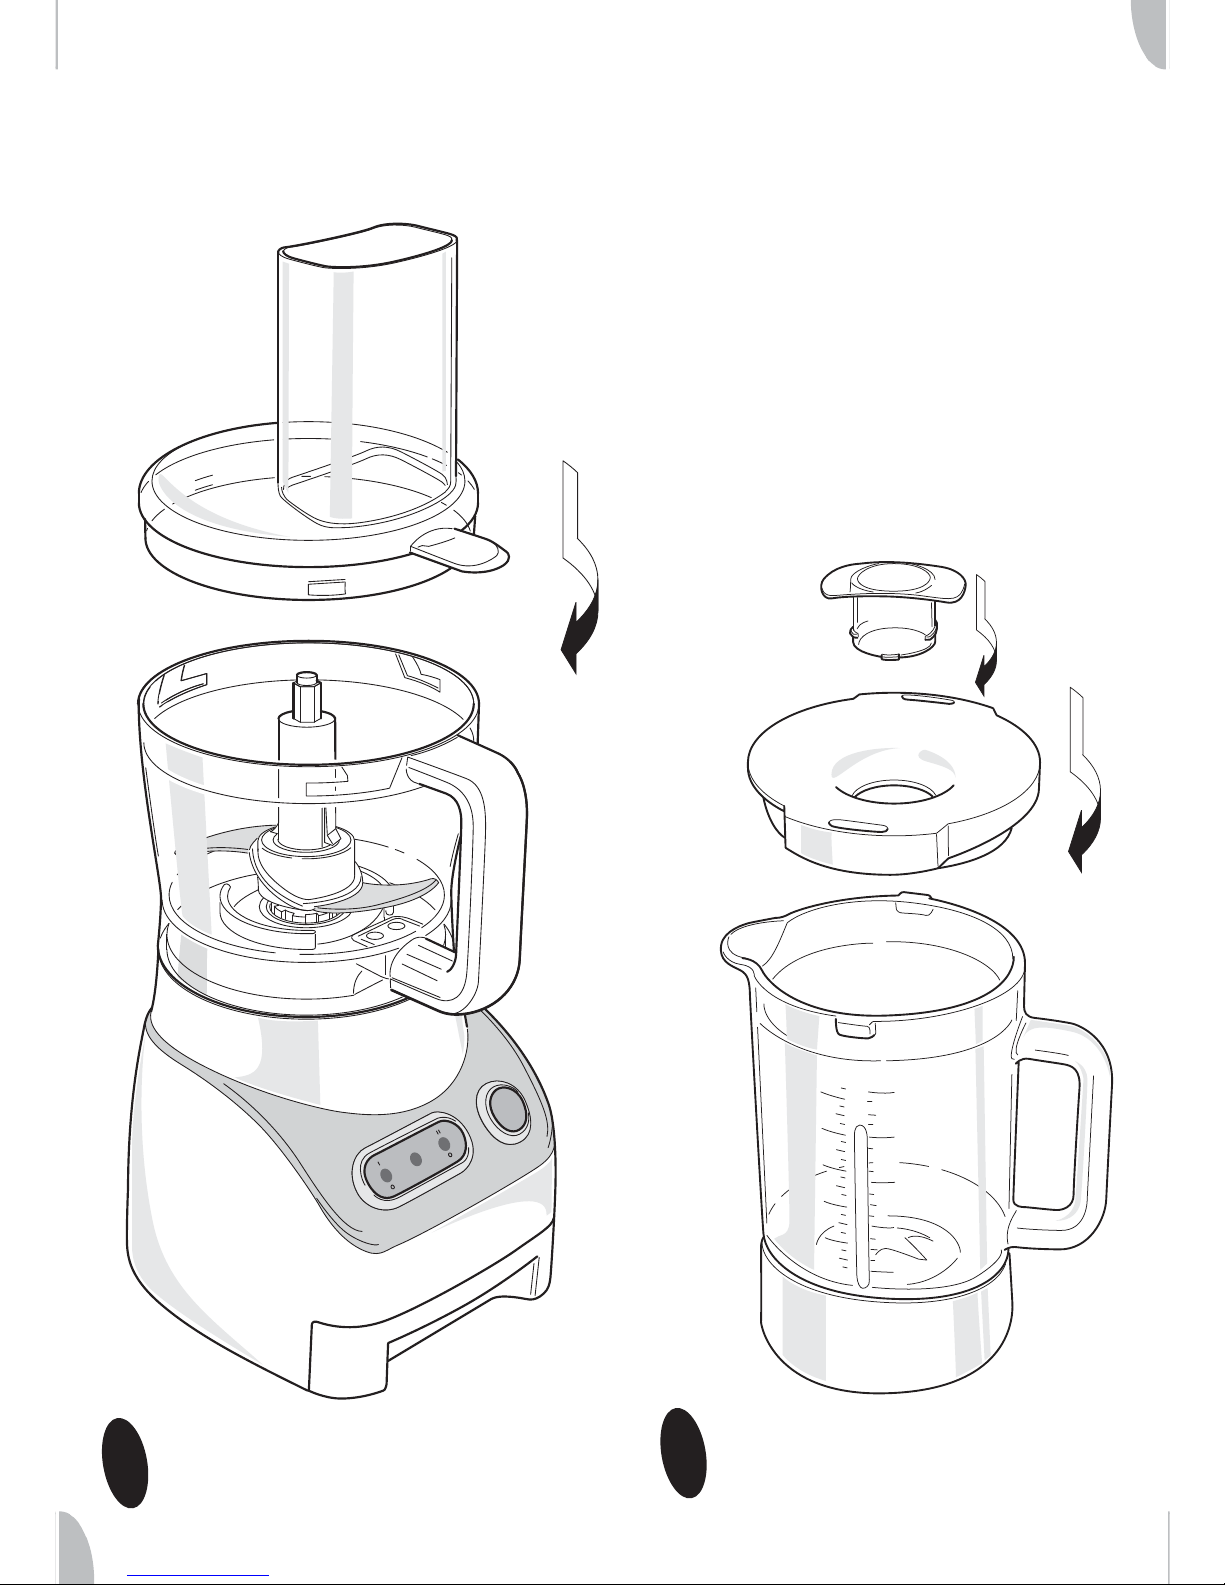
Blenden
1 Plaats het apparaat op een vlak, stabiel
oppervlak zodat het niet kan omvallen.