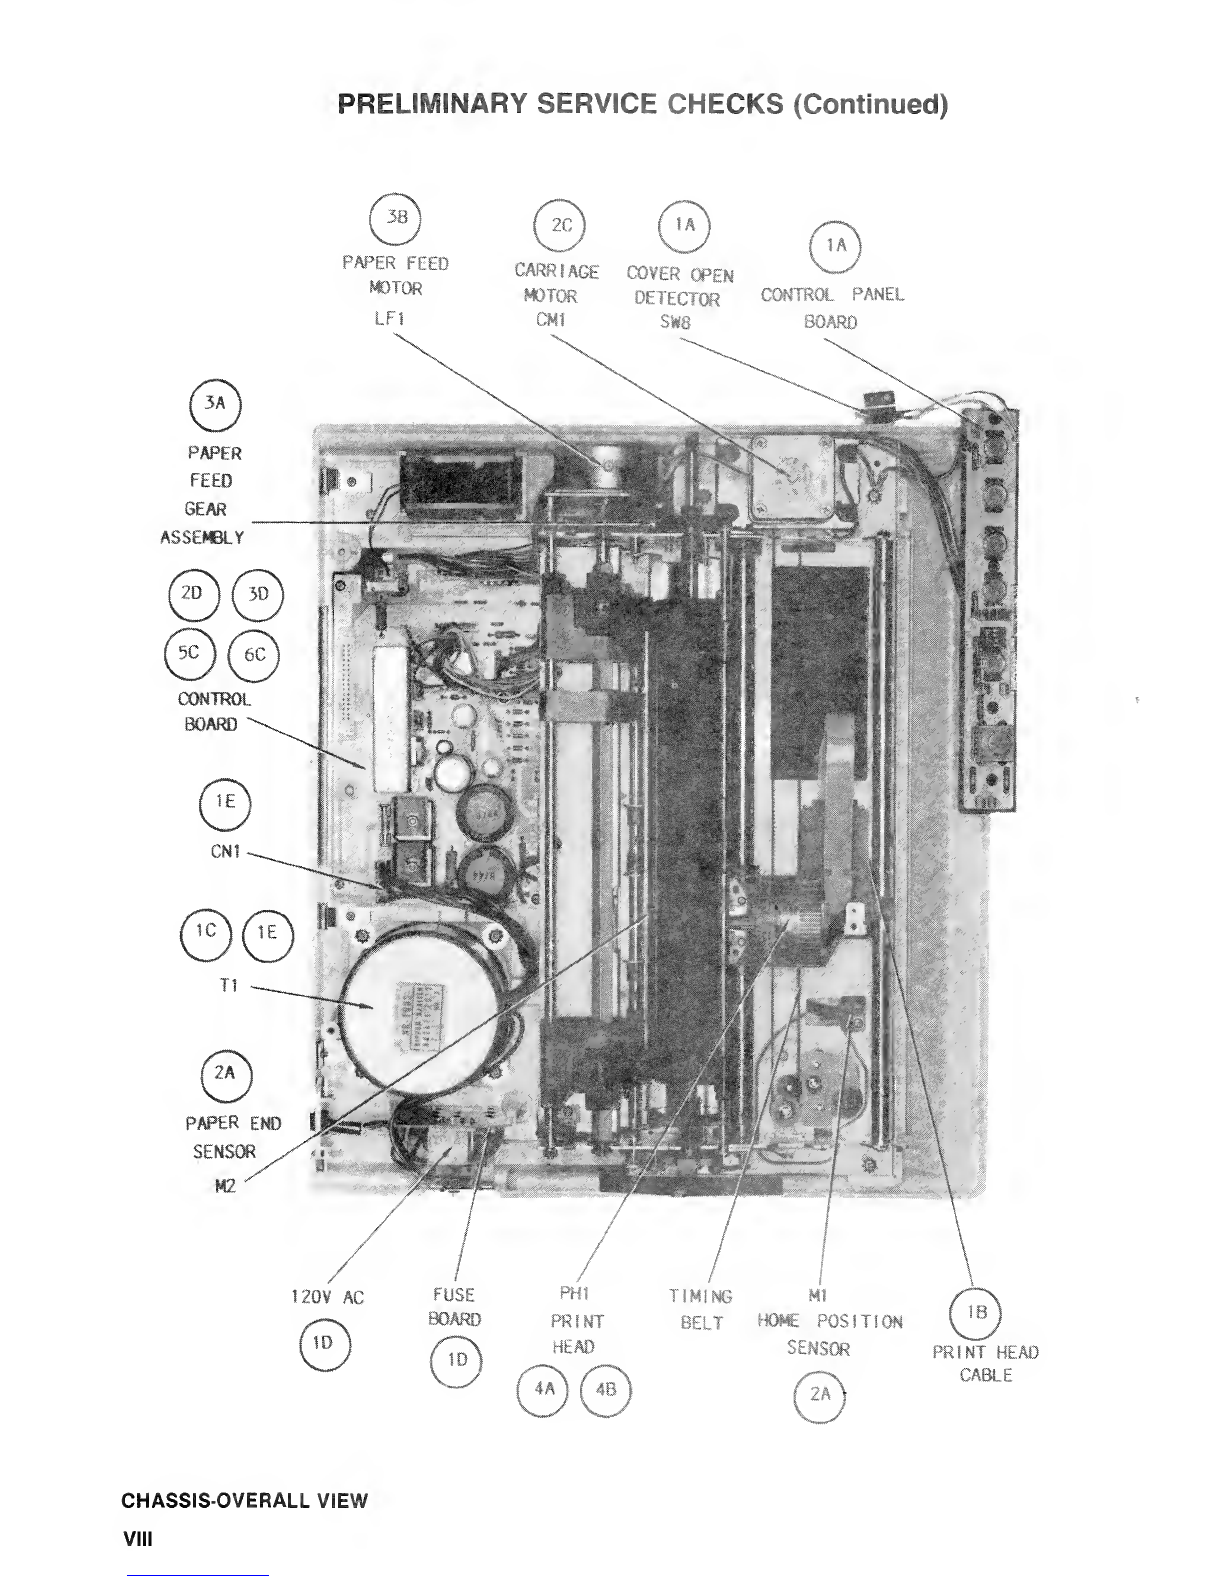
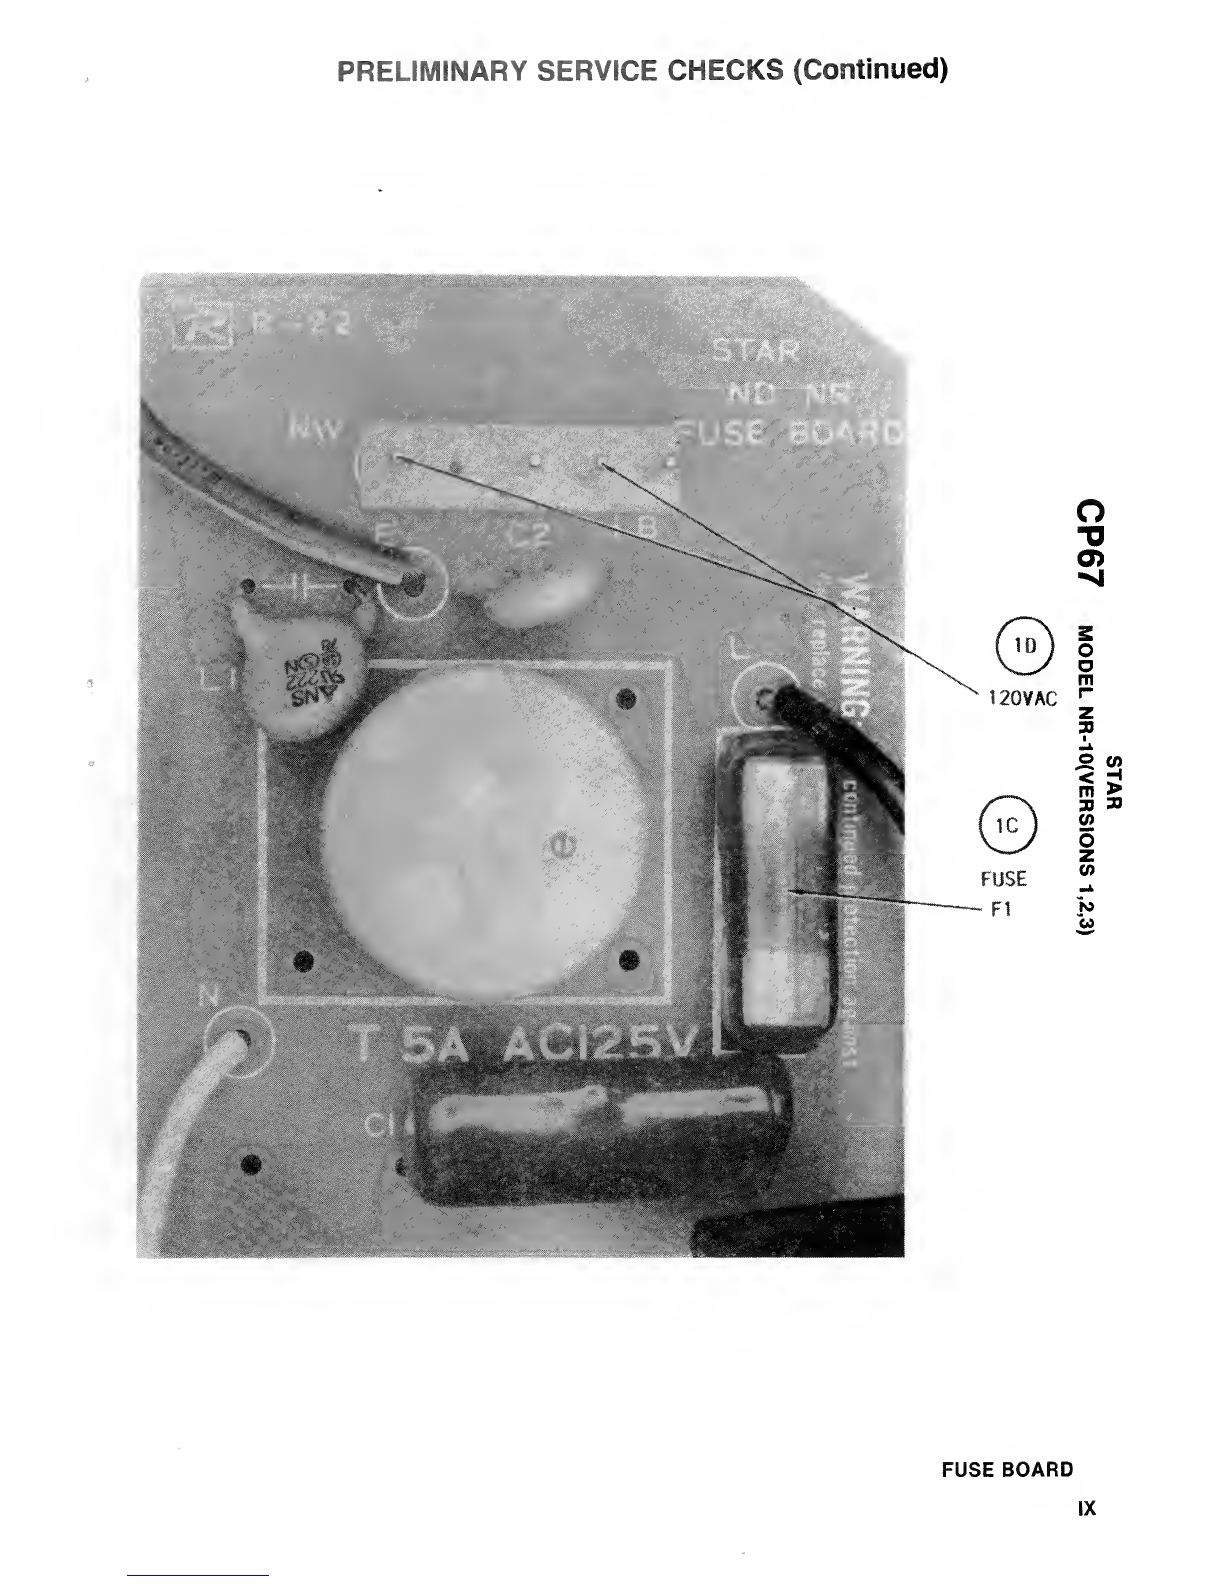
PRELIMINARY SERVICE CHECKS (Continued)
GENERAL OPERATING INSTRUCTIONS
PRINTER SELF-TEST
Printer has ashort and along Self-Test.
Short Self-Test prints six lines of 80-column
text In Draft mode, then stops. Short test Is
started by loading paper and closing the
cover, then holding ON LINE button down while
turning Printer On. Long Self-Test prints
80-column text In Draft and Near Letter Quali-
ty modes In both Standard Roman characters and
Italic characters. The long test Is started
by holding PAPER FEED button down while turn-
ing Printer On. The long test continues
printing until Printer Is turned Off.
PANEL CONTROLS
Cover and Paper switches must be activated for
the printer to go ON LINER. When ON LINE
Indicator LED Is On, Printer Is ready to
receive data from Computer. The MODE, PRINT
PITCH, TOF, and PAPER FEED buttons are
disabled when Printer Is ON LINE. Pressing ON
LINE button once stops Printer from receiving
data from Computer and activates the other
buttons.
Each time MODE button Is pressed print mode
changes between DRAFT and NLQ. Pressing the
PRINT PITCH button cycles thru Proportional,
80, "96 and 136. MODE and PITCH selection Is
Indicated by Control Panel LEDS.
Pressing PAPER FEED button advances paper one
line. Pressing TOF button advances paper to
top of next page or form (Form Feed). Printer
has aforward and reverse microfeed function
to help in aligning the print start position.
To forward microfeed, put Printer Off Line
then hold ON LINE button down and press PAPER
FEED button. To reverse microfeed hold ON
LINE button down and press TOF button.
Margins can be set while printer If OFF LINE.
For left margin hold MODE down and press TOF
until the prlnthead reaches the desired posi-
tion. For right margin hold MODE down and
press PAPER FEED until prlnthead reaches the
desired position.
To make the current paper position the Top of
Form, hold PRINT PITCH down and press TOF.
To disable software control of MODE and PRINT
PITCH, hold either or both buttons down while
turning Printer On. Button selection will
work normally. To select Italic mode and
disable software control of character style,
hold the TOF button down while turning the
Printer ON.
Ahex dump can be performed by holding PAPER
FEED and MODE buttons down while turning
Printer On. Printer will print contents of
print buffer In hex form.
DISASSEMBLY INSTRUCTIONS
UPPER CASE UNIT REMOVAL
Remove Paper and Printer ribbon. Disconnect
power and remove the Platen Knob. Remove the
Interface cover, and remove the Parallel
Interface Board by pulling It straight up.
Remove the two screws securing the Upper Case.
Lift the back of the Upper Case slightly and
push it towards the front of printer to
separate the tabs of Upper Case from the Lower
Case. Disconnect chassis lead to Control
Panel and Connectors (CN2 and CN3). Remove
the Upper Case.
CONTROL PANEL BOARD REMOVAL
Remove the Upper Case unit, remove the tapping
screw securing the Cover Switch. Remove four
screws securing the control panel board.
Remove the Control Panel Board and the switch
out of the Upper Case unit.
PRINTER MECHANISM REMOVAL
Remove the Upper Case. Remove the plastic
door covering the ribbon cable and disconnect
the print Head Cable (CN11) from the Control
Board. Remove four screws securing the
Printer Mechanism to the Lower Case. Dis-
connect Connectors CN6, CN7, CN9 and CN10 from
the Control Board. Lift the Printer Mechanism
out of Lower Case.
CONTROL BOARD REMOVAL
Remove the Printer Mechanism and disconnect
the power supply connector CN1. Disconnect
the Fan connector CN4. Remove eight screws
fastening the Control Board to Lower Case.
Lift the Control Board out of the Lower Case.
PAPER FEED MOTOR REMOVAL
Remove the Printer Mechanism. Remove two
screws holding the Paper Feed Motor to the
Printer Mechanism. Remove the Paper Feed
Motor.
CARRIAGE MOTOR REMOVAL
Remove the Printer Mechanism. Remove four
screws securing the Carriage Motor Holder to
Printer Mechanism. Remove two screws fasten-
ing the carriage motor to holder and remove
carriage motor. When the carriage motor Is
replaced, adjustment of Timing Belt Tension Is
required.
PRINT HEAD
Remove the Printer Cover and ribbon cartridge.
Remove the hook holding the Print Head In
place and pull up the Print Head. Remove the
Print Head Connector Cover mounted to the
frame, then remove the Print Head Cable
connected to CN11 on the Control Board. When
anew Print Head is installed, perform the
Print Head Gap Adjustment.
IV