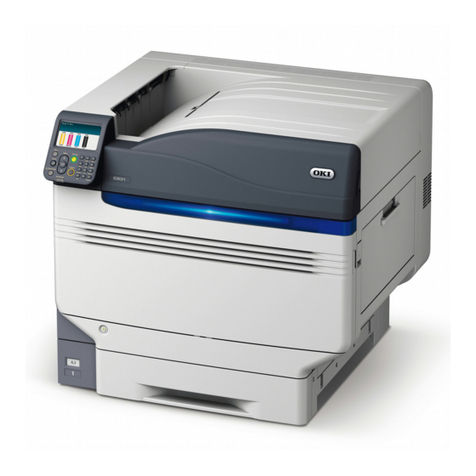
Oki ES8140 User manual

ES8140
User Guide

Preface > 2
P
REFACE
Every effort has been made to ensure that the information in this document is complete,
accurate, and up-to-date. The manufacturer assumes no responsibility for the results of
errors beyond its control. The manufacturer also cannot guarantee that changes in software
and equipment made by other manufacturers and referred to in this guide will not affect
the applicability of the information in it. Mention of software products manufactured by
other companies does not necessarily constitute endorsement by the manufacturer.
While all reasonable efforts have been made to make this document as accurate and helpful
as possible, we make no warranty of any kind, expressed or implied, as to the accuracy or
completeness of the information contained herein.
The most up-to-date drivers and manuals are available from:
www.okiexecutiveseries.com
07112901 Iss.01; Copyright © 2010 Oki Europe Ltd. All rights reserved.
Oki is a registered trademark of Oki Electric Industry Company, Ltd.
Oki Printing Solutions is a trademark of Oki Data Corporation.
Hewlett-Packard, HP, and LaserJet are registered trademarks of Hewlett-Packard
Company.
Microsoft, MS-DOS and Windows are registered trademarks of Microsoft Corporation.
ENERGY STAR is a trademark of the United States Environmental Protection Agency.
Apple, Macintosh, Mac and Mac OS are registered trademarks of Apple Computer.
Other product names and brand names are registered trademarks or trademarks of their
proprietors.
As an ENERGY STAR Program Participant, the manufacturer has determined
that this product meets the ENERGY STAR guidelines for energy efficiency.1
This product complies with the requirements of the Council Directives 2004/
108/EC (EMC), 2006/95/EC (LVD),1999/5/EC (R&TTE) and 2009/125/EC
(EuP), as amended where applicable, on the approximation of the laws of the
member states relating to Electromagnetic Compatibility, Low Voltage, Radio
& Telecommunications Terminal Equipment and Energy Using Products.
The following cables were used to evaluate this product to achieve EMC directive
2004/108/EC compliance and configurations other than this may affect that compliance.
1. If the centronics (parallel) port is enabled, the product is no longer Energy Star compliant.
CABLE TYPE LENGTH
(METRE)
CORE SHIELD
Power 1.8 ✘✘
USB 5 ✘✔
Parallel 1.8 ✘✔
LAN 15 ✘✘

Emergency First Aid > 3
E
MERGENCY
F
IRST
A
ID
Take care with toner powder:
If swallowed, give small amounts of cold water and seek medical attention. DO
NOT attempt to induce vomiting.
If inhaled, move the person to an open area for fresh air. Seek medical
attention.
If it gets into the eyes, flush with large amounts of water for at least 15
minutes keeping eyelids open. Seek medical attention.
Spillages should be treated with cold water and soap to help reduce risk of
staining skin or clothing.
M
ANUFACTURER
Oki Data Corporation,
4-11-22 Shibaura, Minato-ku,
Tokyo 108-8551,
Japan
I
MPORTER
TO
THE
EU/
AUTHORISED
REPRESENTATIVE
Oki Europe Limited (trading as OKI Printing Solutions)
Blays House
Wick Road
Egham
Surrey TW20 0HJ
United Kingdom
For all sales, support and general enquiries contact your local distributor.

Contents > 4
C
ONTENTS
Preface . . . . . . . . . . . . . . . . . . . . . . . . . . . . . . . . . . . . . . . . . . . . . . . . . . .2
Emergency First Aid . . . . . . . . . . . . . . . . . . . . . . . . . . . . . . . . . . . . . . . . .3
Manufacturer. . . . . . . . . . . . . . . . . . . . . . . . . . . . . . . . . . . . . . . . . . . . . . .3
Importer to the EU/authorised representative. . . . . . . . . . . . . . . . . . . . .3
Contents . . . . . . . . . . . . . . . . . . . . . . . . . . . . . . . . . . . . . . . . . . . . . . . . . .4
Notes, cautions and warnings . . . . . . . . . . . . . . . . . . . . . . . . . . . . . . . . . .6
About this guide . . . . . . . . . . . . . . . . . . . . . . . . . . . . . . . . . . . . . . . . . . . .7
Documentation suite . . . . . . . . . . . . . . . . . . . . . . . . . . . . . . . . . . . . . . . 7
On-line usage . . . . . . . . . . . . . . . . . . . . . . . . . . . . . . . . . . . . . . . . . . . . 8
Printing pages. . . . . . . . . . . . . . . . . . . . . . . . . . . . . . . . . . . . . . . . . . . . 8
Introduction . . . . . . . . . . . . . . . . . . . . . . . . . . . . . . . . . . . . . . . . . . . . . . .9
Printer components. . . . . . . . . . . . . . . . . . . . . . . . . . . . . . . . . . . . . . . . .10
Operator panel . . . . . . . . . . . . . . . . . . . . . . . . . . . . . . . . . . . . . . . . . . . .12
Panel elements . . . . . . . . . . . . . . . . . . . . . . . . . . . . . . . . . . . . . . . . .12
Changing language . . . . . . . . . . . . . . . . . . . . . . . . . . . . . . . . . . . . . .13
Power saving mode . . . . . . . . . . . . . . . . . . . . . . . . . . . . . . . . . . . . . .13
Switching off. . . . . . . . . . . . . . . . . . . . . . . . . . . . . . . . . . . . . . . . . . .13
Menu functions . . . . . . . . . . . . . . . . . . . . . . . . . . . . . . . . . . . . . . . . . . . .14
How to change the settings - user . . . . . . . . . . . . . . . . . . . . . . . . . . . . . .14
How to change the settings - administrator . . . . . . . . . . . . . . . . . . . . . . .14
Menus . . . . . . . . . . . . . . . . . . . . . . . . . . . . . . . . . . . . . . . . . . . . . . . . .15
Print jobs menu. . . . . . . . . . . . . . . . . . . . . . . . . . . . . . . . . . . . . . . . .16
Information menu . . . . . . . . . . . . . . . . . . . . . . . . . . . . . . . . . . . . . . .17
Shutdown menu . . . . . . . . . . . . . . . . . . . . . . . . . . . . . . . . . . . . . . . .17
Print menu . . . . . . . . . . . . . . . . . . . . . . . . . . . . . . . . . . . . . . . . . . . .18
Media menu . . . . . . . . . . . . . . . . . . . . . . . . . . . . . . . . . . . . . . . . . . .19
Sys config menu . . . . . . . . . . . . . . . . . . . . . . . . . . . . . . . . . . . . . . . .20
PCL emulation. . . . . . . . . . . . . . . . . . . . . . . . . . . . . . . . . . . . . . . . . .21
PPR Emulation . . . . . . . . . . . . . . . . . . . . . . . . . . . . . . . . . . . . . . . . .22
FX Emulation . . . . . . . . . . . . . . . . . . . . . . . . . . . . . . . . . . . . . . . . . .23
Parallel menu . . . . . . . . . . . . . . . . . . . . . . . . . . . . . . . . . . . . . . . . . .23
USB menu . . . . . . . . . . . . . . . . . . . . . . . . . . . . . . . . . . . . . . . . . . . .24
Network menu . . . . . . . . . . . . . . . . . . . . . . . . . . . . . . . . . . . . . . . . .25
Maintenance menu . . . . . . . . . . . . . . . . . . . . . . . . . . . . . . . . . . . . . .26
Usage menu . . . . . . . . . . . . . . . . . . . . . . . . . . . . . . . . . . . . . . . . . . .27
Printing menu settings . . . . . . . . . . . . . . . . . . . . . . . . . . . . . . . . . . . . . .27
Paper recommendations . . . . . . . . . . . . . . . . . . . . . . . . . . . . . . . . . . . . .28
Paper and envelope types . . . . . . . . . . . . . . . . . . . . . . . . . . . . . . . . . . .28
Transparencies and adhesive labels . . . . . . . . . . . . . . . . . . . . . . . . . . . . .28
Postcards . . . . . . . . . . . . . . . . . . . . . . . . . . . . . . . . . . . . . . . . . . . . . . .29
Installing paper. . . . . . . . . . . . . . . . . . . . . . . . . . . . . . . . . . . . . . . . . . .29
Paper tray . . . . . . . . . . . . . . . . . . . . . . . . . . . . . . . . . . . . . . . . . . . .29
Multi purpose tray . . . . . . . . . . . . . . . . . . . . . . . . . . . . . . . . . . . . . . .31
Paper feed, size and media setting . . . . . . . . . . . . . . . . . . . . . . . . . . . . .33
Interfaces . . . . . . . . . . . . . . . . . . . . . . . . . . . . . . . . . . . . . . . . . . . . . . . .35
Printer drivers . . . . . . . . . . . . . . . . . . . . . . . . . . . . . . . . . . . . . . . . . . . . .36
Windows operating systems . . . . . . . . . . . . . . . . . . . . . . . . . . . . . . . . . .36
Installed options . . . . . . . . . . . . . . . . . . . . . . . . . . . . . . . . . . . . . . . .36
Mac OS X operating systems . . . . . . . . . . . . . . . . . . . . . . . . . . . . . . . . .36
Installed options . . . . . . . . . . . . . . . . . . . . . . . . . . . . . . . . . . . . . . . .36

Contents > 5
Operation . . . . . . . . . . . . . . . . . . . . . . . . . . . . . . . . . . . . . . . . . . . . . . . .37
Printer settings in Windows . . . . . . . . . . . . . . . . . . . . . . . . . . . . . . . . . .37
Printing preferences in Windows applications . . . . . . . . . . . . . . . . . . . .37
PCL emulation. . . . . . . . . . . . . . . . . . . . . . . . . . . . . . . . . . . . . . . . . .37
PS emulation . . . . . . . . . . . . . . . . . . . . . . . . . . . . . . . . . . . . . . . . . .41
Setting from Windows control panel . . . . . . . . . . . . . . . . . . . . . . . . . .44
Printer settings in Mac OS X . . . . . . . . . . . . . . . . . . . . . . . . . . . . . . . . . .47
2-sided printing . . . . . . . . . . . . . . . . . . . . . . . . . . . . . . . . . . . . . . . . . . .48
Auto duplex printing . . . . . . . . . . . . . . . . . . . . . . . . . . . . . . . . . . . . . . .48
Manual duplex printing using the paper tray (Windows only) . . . . . . . . . . .48
Manual duplex printing using the multi purpose tray . . . . . . . . . . . . . . . . .50
Overlays and Macros (Windows only). . . . . . . . . . . . . . . . . . . . . . . . . . .52
What are overlays and macros? . . . . . . . . . . . . . . . . . . . . . . . . . . . . . . .52
Creating PostScript overlays . . . . . . . . . . . . . . . . . . . . . . . . . . . . . . . . . .52
Creating the overlay image. . . . . . . . . . . . . . . . . . . . . . . . . . . . . . . . .52
Create and download the project. . . . . . . . . . . . . . . . . . . . . . . . . . . . .53
Test printing the overlay . . . . . . . . . . . . . . . . . . . . . . . . . . . . . . . . . .53
Defining overlays . . . . . . . . . . . . . . . . . . . . . . . . . . . . . . . . . . . . . . .53
Printing with PostScript overlays . . . . . . . . . . . . . . . . . . . . . . . . . . . . . . .54
Creating PCL Overlays . . . . . . . . . . . . . . . . . . . . . . . . . . . . . . . . . . . . . .55
Creating the overlay image. . . . . . . . . . . . . . . . . . . . . . . . . . . . . . . . .55
Create and download macros . . . . . . . . . . . . . . . . . . . . . . . . . . . . . . .55
Test printing the macro . . . . . . . . . . . . . . . . . . . . . . . . . . . . . . . . . . .56
Defining overlays . . . . . . . . . . . . . . . . . . . . . . . . . . . . . . . . . . . . . . .56
Printing with PCL overlays . . . . . . . . . . . . . . . . . . . . . . . . . . . . . . . . . . .57
Maintenance . . . . . . . . . . . . . . . . . . . . . . . . . . . . . . . . . . . . . . . . . . . . . .58
EP toner cartridge replacement . . . . . . . . . . . . . . . . . . . . . . . . . . . . . . . .58
Cleaning. . . . . . . . . . . . . . . . . . . . . . . . . . . . . . . . . . . . . . . . . . . . . . . .60
...the unit casing . . . . . . . . . . . . . . . . . . . . . . . . . . . . . . . . . . . . . . . .60
...the LED head . . . . . . . . . . . . . . . . . . . . . . . . . . . . . . . . . . . . . . . . .61
...the paper feed rollers . . . . . . . . . . . . . . . . . . . . . . . . . . . . . . . . . . .61
Troubleshooting . . . . . . . . . . . . . . . . . . . . . . . . . . . . . . . . . . . . . . . . . . .64
Status and error messages . . . . . . . . . . . . . . . . . . . . . . . . . . . . . . . . . . .64
Paper Jams. . . . . . . . . . . . . . . . . . . . . . . . . . . . . . . . . . . . . . . . . . . . . .64
Input jam . . . . . . . . . . . . . . . . . . . . . . . . . . . . . . . . . . . . . . . . . . . . . . .65
Feed jam or exit jam . . . . . . . . . . . . . . . . . . . . . . . . . . . . . . . . . . . . . . .65
Print quality problems . . . . . . . . . . . . . . . . . . . . . . . . . . . . . . . . . . . . . .71
Paper feed problems . . . . . . . . . . . . . . . . . . . . . . . . . . . . . . . . . . . . . . .72
Software problems . . . . . . . . . . . . . . . . . . . . . . . . . . . . . . . . . . . . . . . .73
Hardware problems . . . . . . . . . . . . . . . . . . . . . . . . . . . . . . . . . . . . . . . .73
Installing options . . . . . . . . . . . . . . . . . . . . . . . . . . . . . . . . . . . . . . . . . .74
Installation procedure . . . . . . . . . . . . . . . . . . . . . . . . . . . . . . . . . . . . . .74
Setting the driver device options. . . . . . . . . . . . . . . . . . . . . . . . . . . . . . .74
Windows . . . . . . . . . . . . . . . . . . . . . . . . . . . . . . . . . . . . . . . . . . . . .74
Mac OS X . . . . . . . . . . . . . . . . . . . . . . . . . . . . . . . . . . . . . . . . . . . . .74
Specifications . . . . . . . . . . . . . . . . . . . . . . . . . . . . . . . . . . . . . . . . . . . . .76
General . . . . . . . . . . . . . . . . . . . . . . . . . . . . . . . . . . . . . . . . . . . . . . . .76
Paper and tray information . . . . . . . . . . . . . . . . . . . . . . . . . . . . . . . . . . .77
Notes/symbols/terms. . . . . . . . . . . . . . . . . . . . . . . . . . . . . . . . . . . . .81
Index . . . . . . . . . . . . . . . . . . . . . . . . . . . . . . . . . . . . . . . . . . . . . . . . . . . .82

Notes, cautions and warnings > 6
N
OTES
,
CAUTIONS
AND
WARNINGS
For the protection of your product, and in order to ensure that you benefit from its full
functionality, this model has been designed to operate only with genuine original toner
cartridges. Any other toner cartridge may not operate at all, even if it is described as
“compatible”, and if it does work, your product's performance and print quality may be
degraded.
Specifications subject to change without notice. All trademarks acknowledged.
NOTE
A note provides additional information to supplement the main text.
CAUTION!
A caution provides additional information which, if ignored, may
result in equipment malfunction or damage.
WARNING!
A warning provides additional information which, if ignored, may
result in a risk of personal injury.

About this guide > 7
A
BOUT
THIS
GUIDE
D
OCUMENTATION
SUITE
This guide is part of a suite of online and printed documentation provided to help you
become familiar with your product and to make the best use of its many powerful features.
The documentation is summarised below for reference and is found on the manuals DVD
unless indicated otherwise:
>Installation Safety booklet: provides information for safe use of your product.
This is a paper document that is packaged with the product and should be read before
setting up your machine.
>Set-up guide: describes how to unpack, connect and turn on your product.
This is a paper document that is packaged with the product.
>User’s Guide: helps you become familiar with your product and make the best use
of its many features. Also included are guidelines for troubleshooting and
maintenance to ensure that it performs at its best. Additionally, information is
provided for adding optional accessories as your printing needs evolve.
>Network Guide: helps you become familiar with the functionality of the built in
network interface card.
>Security Guide: helps you become familiar with your product’s security features.
>Installation Guides: accompany consumable items and optional accessories to
describe how to install them.
These are paper documents that are packaged with the consumables and optional
accessories.
>On-line Help: on-line information accessible from the printer driver and utility
software.
NOTE
Images used in this manual may include optional features that your product
does not have installed.

About this guide > 8
O
N
-
LINE
USAGE
This guide is intended to be read on screen using Adobe Reader. Use the navigation and
viewing tools provided in Adobe Reader.
There are many cross-references within this book, each highlighted as blue text. When you
click on a cross-reference the display will instantly jump to the part of the manual
containing the referenced material.
By using the button in Adobe Reader, you can navigate directly back to where you were
before.
You can access specific information in two ways:
>In the list of bookmarks down the left hand side of your screen, click on the topic of
interest to jump to the required topic. (If the bookmarks are not available, use the
“Contents” on page 4.)
>In the list of bookmarks, click on Index to jump to the Index. (If the bookmarks are
not available, use the “Contents” on page 4.) Find the term of interest in the
alphabetically arranged index and click on the associated page number to jump to
the page containing the term.
P
RINTING
PAGES
The whole manual, individual pages, or sections may be printed. The procedure is:
1. From the toolbar, select File > Print (or press the Ctrl + Pkeys).
2. Choose which pages you wish to print:
(a) All pages, (1), for the entire manual.
(b) Current page, (2), for the page at which you are looking.
(c) Pages from and to, (3), for the range of pages you specify by entering their
page numbers.
(d) Click OK.
1
2
3

Introduction > 9
I
NTRODUCTION
Congratulations on purchasing this monochrome page printer.
Your new printer is designed with a range of advanced features to give you crisp black and
white pages at high speed on a wide range of print media.
For your information, a summary of the main features of your printer is given below.:
>Memory: 128MB.
>Paper handling: 530 sheets (80g/m²).
>Emulation: standard Printer Control Language PCL5e, PCLXL, Epson FX, IBM
ProPrinter and PostScript3.
>Barcodes: embedded for SIDM emulations.
>USB 2.0 High speed and Parallel interfaces.
>10/100 BASE-TX Network: lets you share this valuable resource among users on
your office network.
>Multi Purpose tray: to extend the range of media your printer can accommodate
(capacity 100 sheets (80g/m²) or 10 envelopes), and can also use as manual
duplex.
Additionally, the following optional features are also available:
>256, 512MB RAM DIMM: to extend the main memory of your printer and speed up
the processing of large files.
>SD card for storage of overlays, macros and downloadable fonts, and automatic
collation of multiple copies of multipage documents.
>Additional paper tray: to increase your printer’s paper handling capacity by 530
sheets (80g/m²).

Printer components > 10
P
RINTER
COMPONENTS
1. Operator panel
2. Output Stacker (250 sheets @ 80g/m2, face down)
3. Output Stacker extension
4. Top cover release button
5. Multi Purpose Tray (100 sheets @ 80g/m2)(shown in open position)
6. Multi Purpose Tray extension
7. Paper size dial
8. Paper Tray (530 sheets @ 80g/m2)
9. ON/OFF switch
10. LED array
11. Fuser unit
12. EP toner cartridge
13. Top c ov er
1
2
4
9
6
8
5
7
3
13
12
10
11

Printer components > 11
14. Cooling fan
15. Power cable connection
16. Parallel interface connection
17. LAN interface connection
18. ACC connection
19. USB interface connection
20. Paper Tray extension
21. Duplex unit
22. Rear Face Up Tray extension
23. Rear Face Up Tray
21
20
22
23
15
19
18
17
16
ACC
LAN
14

Operator panel > 12
O
PERATOR
PANEL
The operator panel consists of a menu driven control panel, an LCD display and two LED
indicators.
P
ANEL
ELEMENTS
1. Liquid crystal display. (LCD) panel. Two rows of up to 16 alphanumeric digits
displaying print status, menu items in menu mode and error messages.
2. Menu Scroll Buttons. Press briefly to enter the MENU mode. Press briefly again to
select the next menu. Press for more than 2 seconds to scroll through the different
menus.
3. Back button. Press briefly to return to the previous higher level menu item or exit
the menu when in MENU mode. In the ONLINE or OFFLINE mode/MENU mode: when
pressed for 4 seconds, the printer starts to shutdown.
4. ENTER button. In the ONLINE or OFFLINE mode: press this briefly to enter the MENU
mode. In the MENU mode: press this briefly to select the menu or setting indicated on
the LCD. When pressed for 2 seconds or longer, it reverts to the previous menu item.
5. On Line button. Press to switch between ONLINE and OFFLINE status.
Press to exit the menu and displays ONLINE, when in the MENU mode.
6. Cancel button. When printing press to cancel a print job. Press to exit the MENU
mode and go ONLINE, when in the MENU mode.
NOTE
When pressed with DATA displayed (press and hold for five seconds), it forces
the printer to print out the remaining data in the printer.
NOTE
When pressed in Menu mode, the Online button returns the printer to ONLINE
status. Also when there is an error indicating wrong paper size, pressing the
Online button forces the printer to print.
When pressed in Sleep Mode, the Online button returns the printer to ONLINE
status.
When manually feeding paper, pressing the Online button will start the
printing.
NOTE
When there is an error, and there are print jobs in queue, pressing the Cancel
button deletes the first job in the queue.
8
1
7
3 4
6
5
2

Operator panel > 13
7. Ready indicator (green). ON indicates ready to receive data. FLASHING
indicates processing data. FLASHING SLOWLY indicates the machine status is
sleep mode. OFF indicates Offline.
8. Attention indicator (red). ON indicates a warning (e.g. low toner). FLASHING
indicates an error, (e.g. toner empty). OFF indicates normal condition.
C
HANGING
LANGUAGE
The default language used by your printer for display messages and for report printing is
English. If required, this can be changed to:
P
OWER
SAVING
MODE
If you do not use the machine for a while, it will enter the power saving mode to control
the power consumption of the device. To cancel power saving mode, press the On Line
button on the control panel.
S
WITCHING
OFF
1. Press the Enter button on the control panel to enter the menu.
2. Press the Menu down button and scroll to the SHUTDOWN MENU.
3. Press the Enter button.
4. Press the Enter button to execute.
5. At the prompt, turn the power switch OFF.
NOTE
If both the Ready and Attention indicators are flashing, there is a minor error
with the printer, for example, toner is low and the image drum needs to be
changed.
German Danish Swedish Polish
French Dutch Russian Greek
Italian Turkish Finnish Czech
Spanish Portuguese Hungarian Norwegian
NOTE
1. The Operator Panel Language Setup Wizard will run automatically when
you install the printer driver. Follow the instructions provided by this
utility to set your chosen language.
2. The list above is neither conclusive nor exhaustive.
CAUTION!
If you have an SD card fitted, always follow the correct shutdown
procedure to ensure that no data is lost.
NOTE
Alternatively, pressing the Back button for longer than 4 seconds will display
the SHUTDOWN MENU.

Menu functions > 14
M
ENU
FUNCTIONS
H
OW
TO
CHANGE
THE
SETTINGS
-
USER
It should be noted that many of these settings can be, and often are, overridden by settings
in the Windows printer drivers. However, several of the driver settings can be left at
“Printer Setting”, which will then default to the settings entered in these printer menus.
Where applicable, factory default settings are shown in bold type in the following tables.In
the normal operating condition, known as “standby,” the printer’s LCD window will show
“ONLINE.”
In this condition, to enter the menu system, press the up and down Menu buttons on the
operator panel to move up and down through the list of menus until the menu you wish to
view is displayed. Then proceed as follows:
1. Press Enter to enter the menu.
2. Use the up or down Menu buttons on the control panel to scroll through the menus.
When the item you want to change is displayed, press Enter to view the sub-menus
for that item.
3. Use the up or down Menu buttons to move up and down through the sub-menu
items. When the item you want to change is displayed press Enter to display the
setting.
4. Use the up or down Menu buttons to move up and down through the available
settings for the sub-menu item. When the item you want to change is displayed
press Enter to display the setting. An asterisk (*) will appear next to the setting,
indicating that this setting is currently in effect.
5. Do one of the following:
>Press Back again to move up to the list of menus;
or…
>Press On Line or Cancel to exit from the menu system and return to standby.
H
OW
TO
CHANGE
THE
SETTINGS
-
ADMINISTRATOR
You can set whether to ENABLE or DISABLE each category in the user menu.
Disabled categories are not displayed in the User’s menu. Only a system administrator can
change these settings.
1. Turn OFF the printer.
2. Turn ON the printer while pressing the Enter button.
When ADMIN MENU appears, take your finger off the button.
3. Press the Enter button.
4. At the ENTER PASSWORD prompt, enter the Admin password:
(a) Using the up and down MENU buttons, scroll to the required letter/digit.
(b) Press the Enter button to input and move to the next letter/digit.
(c) Repeat steps (a) and (b) until all letters/digits are entered.
Enter your 4 to 9 digit password.
(The default password is aaaaaa).
5. Press the Enter button.
6. Press the up or down Menu button until the “category” you want to change is
displayed.

Menu functions > 15
7. Press the Enter button.
8. Press the up or down Menu button until the “item” you want to change is displayed.
9. Press the Enter button.
10. Using the up or down Menu button, identify the parameter as required.
11. Press the Enter button to enter an asterisk (*) on the right side of the setting
selected.
12. Press the On Line button to switch to online. The machine will automatically re-
boot.
M
ENUS
Factory default settings are shown in the following tables.
NOTE
This guide is written to cover a number of models and as such may reference
menu items or features that your machine does not have installed or does not
support.

Menu functions > 16
P
RINT
JOBS
MENU
NOTE
This menu only displays if the optional SD card is installed.
ITEM ACTION REMARKS
ENCRYPTED JOB NOT FOUND
PRINT
DELETE
Used for printing an encrypted authentication print
job (Encrypted Job) stored in the SD card.
After inputting a password, “SEARCHING JOB” is
displayed until a job appropriate to the password is
found.
(Searching time increases in proportion to the
number of jobs stored in the SD card, and the
printer may take up to 20 sec.)
The search can be cancelled by holding down the
CANCEL button.
“NOT FOUND” will be displayed where a file is
unavailable.
One of the following messages will appear if a
printable file is available.
ENCRYPTED JOB
PRINT
DELETE
If PRINT is selected, ALL jobs will be printed.
If DELETE is selected, the following message will
appear.
ARE YOU SURE?
YES
NO
If NO is selected you will return to the source
MENU. If YES is selected, ALL jobs will be deleted.
Print jobs with encrypted authentication stored in
the SD card are deleted by a delete method
specified by the driver after printing or a delete
instruction from the menu.
STORED JOB NOT FOUND
PRINT
DELETE
Used to print out a stored job in the SD card.
“NOT FOUND” will be displayed where a file is
unavailable.
One of the following messages will appear if a
printable file is available.
STORED JOB
PRINT
DELETE
If PRINT is selected, COLLATING AMOUNT is
displayed and the number of pages to print can be
specified. Press the Enter button.
All specified pages will be printed.
If DELETE is selected, the following message will
appear.
ARE YOU SURE?
YES
NO
If NO is selected you will return to the source
MENU. If YES is selected, ALL jobs will be deleted.

Menu functions > 17
I
NFORMATION
MENU
This menu provides a quick method of listing various items stored within the printer.
S
HUTDOWN
MENU
This item should always be selected before switching the printer off, to ensure that no data
is lost.
ITEM ACTION REMARKS
PRINT MENU MAP EXECUTE Prints complete menu listing with current settings
shown.
NETWORK EXECUTE Prints Network configuration information.
PRINT FILE LIST EXECUTE Prints a list of overlays, macros, fonts and other files
stored on the printer’s SD card (if installed).
PRINT PCL FONT EXECUTE Prints complete list of all internal PCL fonts plus
those stored in ROM (slot 0), flash memory and SD
card (if installed).
PRINT PSE FONT EXECUTE Prints complete list of all internal PostScript
emulation fonts.
PRINT PPR FONT EXECUTE Prints complete list of all internal IBM ProPrinter III
XL emulation fonts, including any downloaded to
flash memory or SD card (if installed).
PRINT FX FONT EXECUTE Prints complete list of all internal Epson FX emulation
fonts, including any downloaded to flash memory or
SD card (if installed).
DEMO32 EXECUTE Prints demonstration page containing graphics and
text.
PRINT ERROR LOG EXECUTE Prints a list of all errors and warnings experienced.
USAGE REPORT EXECUTE Prints a list of pages printed.
ITEM ACTION REMARKS
SHUTDOWN START EXECUTE Performs controlled shutdown of the printer.
Only power the printer off when the display indicates
that shutdown is complete.

Menu functions > 18
P
RINT
MENU
This menu provides adjustment of various print job related functions.
ITEM DEFAULT REMARKS
COPIES 1 Enter the number of copies of a document to be
printed from 1 to 999.
DUPLEX OFF Switches the Duplex (2 sided) function ON/OFF.
Duplex must be fitted.
BINDING LONG EDGE Sets the default binding to SEF or LEF.Display
condition: duplex setting is enabled.
See “DUPLEX” on page 18.
PAPER FEED TRAY1 Selects the default tray for paper feed, Tray 1
(upper), Tray 2 (lower, if installed) or MP Tray (multi
purpose tray).
AUTO TRAY SWITCH ON If two trays contain identical paper, the printer can
switch to an alternative source when the current tray
runs out in the middle of a print job.
TRAY SEQUENCE DOWN Determines tray sequence order when automatically
switching.
MP TRAY USAGE DO NOT USE If a document to be printed demands a paper size not
installed in the selected tray, the printer can
automatically feed from the multi purpose tray
instead. If this function is not enabled, the printer will
stop and request the correct size of paper to be
loaded.
MEDIA CHECK ENABLE Determines whether the printer check the size of
paper loaded matches that required for the document
sent to print.
RESOLUTION 600DPI Sets the default resolution for printing (dots per inch).
1200DPI uses more memory and requires more time
to process, but prints at a higher quality.
TONER SAVE MODE DISABLE Use less toner 10pt characters print legibly, but 8 pt
characters do not.
ORIENTATION PORTRAIT Selects default page orientation between portrait
(tall) and landscape (wide). - (PCL, IBMPPR & EPSON
FX only)
LINES PER PAGE 64LINES Sets the number of lines of text per page when raw
text is received from systems other than Windows.
The default for A4 portrait is 64, and for Letter is 60. -
(PCL only)
EDIT SIZE CASSETTE SIZE Sets the size of the printable page area to match the
size of paper in use. This is not the same as the
physical paper size, which is always slightly larger.
For dimensions of physical page sizes, see “Paper
recommendations” section in this guide.
X SIZE 210MILLIMETER Specifies paper width of Custom paper as a default
value.
Sets a paper size at right angles to the paper run
direction.
Y SIZE 297MILLIMETER Specifies paper length of Custom paper as a default
value.
Sets a paper size in the same direction as the paper
run direction.

Menu functions > 19
M
EDIA
MENU
This menu provides adjustment to suit a wide range of print media.
ITEM DEFAULT REMARKS
TRAY1 PAPERSIZE CASSETTE SIZE Selects the size of paper loaded in Tray 1 (upper tray
if both trays installed). For CUSTOM setting see X-
SIZE and Y-SIZE in “Print menu” on page 18.
TRAY1 MEDIATYPE PLAIN Selects the type of media loaded in this tray. This
will help the printer to adjust its internal operating
parameters, such as engine speed and fusing
temperature, to better accommodate the media to
be fed. For example, letterhead may benefit from a
slightly lower fusing temperature to ensure that its
ink does not offset.
Note: USERTYPEn are displayed only if registered in
the host PC/Server.
TRAY1 MEDIAWEIGHT MEDIUM Adjusts the printer for the weight of paper stock
loaded in this tray.
TRAY1 LEGAL SIZE LEGAL14
TRAY1 OTHER SIZE TABLOID
TRAY2 PAPERSIZE CASSETTE SIZE Selects the size of paper loaded in Tray 2 (lower) if
installed. For CUSTOM setting see X-SIZE and Y-
SIZE in “Print menu” on page 18.
TRAY2 MEDIATYPE PLAIN Selects the type of media loaded in this tray (if
installed). This will help the printer to adjust its
internal operating parameters, such as engine speed
and fusing temperature, to better accommodate the
media to be fed. For example, letterhead may
benefit from a slightly lower fusing temperature to
ensure that its ink does not offset.
Note: USERTYPEn are displayed only if registered in
the host PC/Server.
TRAY2 MEDIAWEIGHT MEDIUM Adjusts the printer for the weight of paper stock
loaded in this tray (if installed).
TRAY2 LEGAL SIZE LEGAL14
TRAY2 OTHER SIZE TABLOID
TRAY3 PAPERSIZE CASSETTE SIZE Selects the size of paper loaded in Tray 3 (lower) if
installed. For CUSTOM setting see X-SIZE and Y-
SIZE in “Print menu” on page 18.
TRAY3 MEDIATYPE PLAIN Selects the type of media loaded in this tray (if
installed). This will help the printer to adjust its
internal operating parameters, such as engine speed
and fusing temperature, to better accommodate the
media to be fed. For example, letterhead may
benefit from a slightly lower fusing temperature to
ensure that its ink does not offset.
Note: USERTYPEn are displayed only if registered in
the host PC/Server.
TRAY3 MEDIAWEIGHT MEDIUM Adjusts the printer for the weight of paper stock
loaded in this tray (if installed).
TRAY3 LEGAL SIZE LEGAL14
TRAY3 OTHER SIZE LETTER SEF

Menu functions > 20
S
YS
CONFIG
MENU
This menu adjusts general printer settings to suit the way you prefer to work.
MPT PAPERSIZE A4 LEF Selects the size of paper to be fed from the multi
purpose tray. For CUSTOM setting see X-
DIMENSION and Y-DIMENSION in “Print menu” on
page43.
MPT MEDIATYPE PLAIN Selects the type of media to be fed from the multi
purpose tray so that the printer can adjust its
internal parameters to better accommodate the
selected type of media.Note: USERTYPEn are
displayed only if registered in the host PC/Server.
MPT MEDIAWEIGHT MEDIUM Selects the media weight to be fed from the multi
purpose tray.
UNIT OF MEASURE MILLIMETER Selects the unit of measure.
ITEM DEFAULT REMARKS
POW SAVE TIME 1 MIN Adjusts the idling time before the printer
automatically switches into power saving mode. In
this mode power consumption is reduced to a low
level required to just keep the printer operating and
ready to receive data. When a job is sent the printer
will require a warm-up time of up to 1 minute before
printing can begin.
SLEEP TIME 10 MIN Adjusts the power saving time before the printer
automatically switches into sleep mode.
PERSONALITY AUTO EMULATION This item selects which industry standard emulation
your printer should use. When set to AUTO, incoming
data is examined and the correct emulation is
automatically selected each time a print job is
received.
PARA PS-PROTOCOL ASCII Selects PostScript data format for parallel port.
USB PS-PROTOCOL RAW Selects PostScript data format for USB port.
NET PS-PROTOCOL RAW Selects PostScript data format for network port.
CLRABLE WARNING ONLINE When ONLINE, non-critical warnings, such as
requests for a different paper size, can be cleared by
pressing the ON LINE button. When set to JOB, they
are cleared when the print job resumes.
AUTO CONTINUE OFF Determines whether or not the printer will
automatically recover from a memory overflow
condition.
MANUAL TIMEOUT 60 SEC Specifies how many seconds the printer will wait for
paper to be fed before cancelling the job.
WAIT TIMEOUT 40 SEC Specifies how many seconds the printer will wait
when received data pauses before forcing a page
eject. In PostScript Emulation mode the job will be
cancelled if timeout occurs.
TIMEOUT LOCAL 40 SEC
TIMEOUT NET 90 SEC
ITEM DEFAULT REMARKS
Table of contents
Other Oki Printer manuals

Oki
Oki MICROLINE 8810 User manual

Oki
Oki MICROLINE MX Series User manual

Oki
Oki proColor Pro910 Series User manual

Oki
Oki OKIPAGE 10e Guide

Oki
Oki ML395 User manual

Oki
Oki C5100n User manual

Oki
Oki B6100n User manual

Oki
Oki B930 Series User manual

Oki
Oki MICROLINE 720 User manual

Oki
Oki B710n Quick start guide

Oki
Oki C3600n Original instructions

Oki
Oki MPS9650c Operating and maintenance instructions

Oki
Oki OKIPAGE 4M Manual

Oki
Oki ES5442 Setup guide

Oki
Oki ML690 User manual

Oki
Oki OKIPAGE 12i Series User manual

Oki
Oki C5400 Series User manual

Oki
Oki MB760 Installation and user guide

Oki
Oki C 5650dn User manual

Oki
Oki ML280 Elite User manual