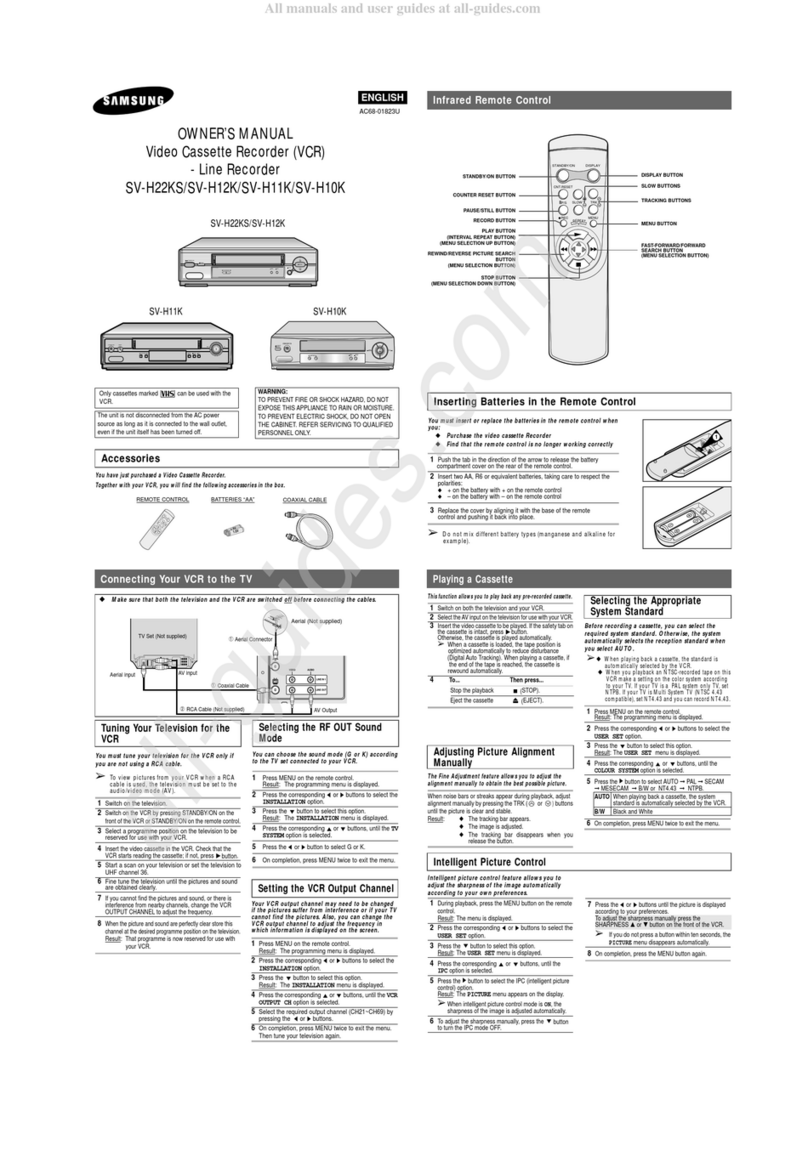
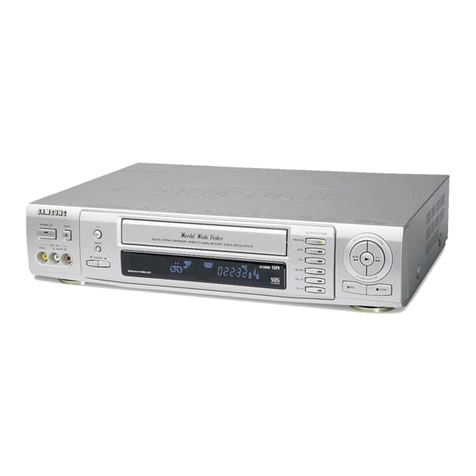
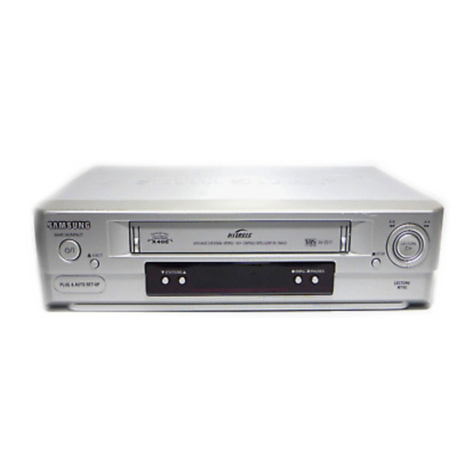
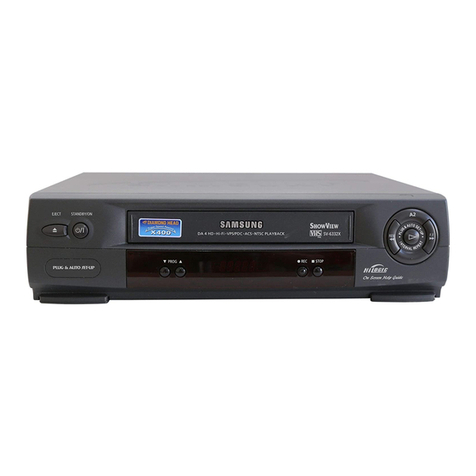
Samsung SV-C90P User manual

Video
Cassette Recorder
Owner’s Manual
Hi-Fi
SV-C90P

Safety Instructions
ii
Note to CATV system installer: This reminder is provided to call CATV system installer's attention to
Article 820-40 of the National Electrical Code (Section 54 of Canadian Electrical Code, Part I) that
provides guidelines for proper grounding and, in particular, specifies that the cable ground shall be
connected to the grounding system of the building as close to the point of cable entry as practical.
Caution: FCC regulations state that any unauthorized changes or modifications to this equipment
may void the user's authority to operate it.
Caution: To prevent electric shock, match wide blade of plug to wide slot, fully insert.
Attention: Pour eviter les chocs electriques, introduire la lame le plus large de la fiche dans la borne
correspondante de la prise et pousser jusqu’au fond.
Important: One Federal Court has held that unauthorized recording of copyrighted TV programs is an
infringement of U.S. copyright laws.
Certain Canadian programs may be copyrighted and any unauthorized recording in whole or in part
may be a violation of these rights.
To prevent damage which may result in fire or electric shock hazard,
do not expose this appliance to rain or moisture.
RISK OF ELECTRIC SHOCK
DO NOT OPEN
CAUTION: TO REDUCE THE
RISK OF ELECTRIC SHOCK,
DO NOT REMOVE COVER (OR
BACK). NO USER SERVICEABLE
PARTS INSIDE. REFER
SERVICING TO QUALIFIED
SERVICE PERSONNEL.
This symbol indicates high voltage is present inside. It is dangerous to
make any kind of contact with any inside part of this product.
This symbol alerts you that important literature concerning operation
and maintenance has been included with this product.
As an ENERGY STAR Partner, Samsung Electronics America, Inc.
has determined that this product or product model meets the ENERGY
STAR guidelines for energy efficiency
Important Safety Instructions
1. Read Instructions-All the safety and operating instructions should be read before the product is operated.
2. Retain Instructions-The safety and operating instructions should be retained for future reference.
3. Heed Warnings-All warnings on the product and in the operating instructions should be adhered to.
4. Follow Instructions-All operating and using instructions should be followed.
5. Cleaning-Unplug this product from the wall outlet before cleaning. Do not use liquid cleaners or aerosol
cleaners. Use a damp cloth for cleaning.
6. Attachments-Do not use attachments not recommended by the product manufacturer as they may cause
hazards.
7. Water and Moisture-Do not use this product near water-for example near a bath tub, wash bowl, kitchen
sink, or laundry tub; in a wet basement; or near a swimming pool; and the like.
8. Accessories-Do not place this product on an unstable cart, stand, tripod, bracket, or table.
The product may fall, causing serious injury to a child or adult, and serious damage to the
product. Use only with a cart, stand, tripod, bracket, or table recommended by the
manufacturer or sold with the product. Any mounting of the product should follow the
manufacturer’s instructions and should use a mounting accessory recommended by the manu-
facturer.

Safety Instructions
iii
9. Cart Usage-A product and cart combination should be moved with care. Quick stops, excessive force, and uneven
surfaces may cause the product and cart combination to overturn.
10. Ventilation-Slots and openings in the cabinet are provided for ventilation and to ensure reliable operation of the
product and to protect it from overheating. these openings must not be blocked or covered. The openings should
never be blocked by placing the product on a bed, sofa, rug, or other similar surface. This product should not be
placed in a built-in installation such as a bookcase or rack unless proper ventilation is provided or the manufacturer’s
instructions have been adhered to.
11. Power Sources-This product should be operated only from the type of power source indicated on the marking label.
If you are not sure of the type of power supplied to your home, consult your product dealer or local power company.
For products intended to operate from battery power, or other sources, refer to the operating instructions.
12. Grounding or Polarization-This product may be equipped with a polarized alternating-current line plug (a plug
having one blade wider than the other). This plug will fit into the power outlet only one way. This is a safety feature.
If you are unable to insert the plug fully into the outlet, try reversing the plug. If the plug should still fail to fit, contact
your electrician to replace your obsolete outlet. Do not defeat the safety purpose of the polarized plug.
13. Power-Cord Protection-Power-supply cords should be routed so that they are not likely to be walked on or pinched
by items placed upon or against them, paying particular attention to cords at plugs, convenience receptacles, and the
point where they exit from the product.
14. Outdoor Antenna Grounding-If an outside antenna or cable system is
connected to the product,be sure the antenna or cable system is
grounded so as to provide some protection against voltage surges and
built-up static charges. Section 810 of the National Electrical Code,
ANSI/NFPA 70 provides information with regard to proper grounding of
the mast and supporting structure, grounding of the lead-in wire to an
antenna discharg
e unit, size of grounding conductors, location of antenna-
discharge unit, connection to grounding electrodes, and requirements
for the grounding electrode.
15. Lightning-For added protection for this product during a lightning storm
or when it is left unattended and unused for long periods of time, unplug it from the wall outlet and disconnect the
antenna or cable system. This will prevent damage to the product due to lightning and power-line surges.
16. Power Lines-An outside antenna system should not be located in the vicinity of overhead power lines or
other electric light or power circuits, or where it can fall into such power lines or circuits. When installing an outside
antenna system, extreme care should be taken to keep from touching such power lines or circuits as contact with
them might be fatal.
17. Overloading-Do not overload wall outlets, extension cords, or integral convenience receptacles as this can result in
a risk of fire or electric shock.
18. Object and Liquid Entry-Never push objects of any kind into this product through openings as they may touch
dangerous voltage points or short-out parts that could result in a fire or electric shock. Never spill liquid of any kind on
the product.
19 Servicing-Do not attempt to service this product yourself as opening or removing covers may expose you to
dangerous voltage or other hazards. Refer all servicing to qualified service personnel.
20 Damage Requiring Service-Unplug this product from the wall outlet and refer servicing to qualified service
personnel under the following conditions:
aWhen the power-supply cord or plug is damaged.
bIf liquid has been spilled or objects have fallen into the product.
cIf the product has been exposed to rain or water.
dIf the product does not operate normally by following the operating instructions. Adjust only those controls
that are covered by the operating instructions as an improper adjustment of other controls may result in damage
and will often require extensive work by a qualified technician to restore the product to its normal operation.
eIf the product has been dropped or damaged in any way.
fWhen the product exhibits a distinct change in performance-this indicates a need for service.
21. Replacement Parts-When replacement parts are required, be sure the service technician has used replacement
parts specified by the manufacturer or that have the same characteristics as the original part.
Unauthorized substitutions may result in fire, electric shock, or other hazards.
22. Safety check-Upon completion of any service or repairs to this product, ask the service technician to perform safety
checks to determine that the product is in proper operating condition.
23. Heat-The product should be situated away from heat sources such as radiators, heat registers, stoves, or other
products (including amplifiers) that produce heat.
Antenna Lead-in Wire
Ground Clamp
Antenna Discharge Unit
(NEC Section 810-20)
Grounding Conductors
(NEC Section 810-21)
Power Service Grounding
Electrode System
(NEC Section 810-21)
Grounding Clamps
Electric Service Equipment
NEC-NATIONAL ELECTRICAL CODE

Table of Contents
iv
Safety Instructions
Your New VCR
Features . . . . . . . . . . . . . . . . . . . . . . . . .1
Accessories . . . . . . . . . . . . . . . . . . . . . . .1
Front Panel and Display . . . . . . . . . . . . .2
VCR Remote Control . . . . . . . . . . . . . . . .3
VCR Setup
Rear Panel . . . . . . . . . . . . . . . . . . . . . . .4
Connections . . . . . . . . . . . . . . . . . . . . . .4
Using Menus and the Remote Control . . .7
Selecting the On-Screen Language . . . . .7
Setting the Clock . . . . . . . . . . . . . . . . . . .8
Setting the Channels . . . . . . . . . . . . . . . .9
VCR Functions . . . . . . . . . . . . . . . . . . . .11
VCR Operation
Playing a cassette . . . . . . . . . . . . . . . . . .12
Instant play . . . . . . . . . . . . . . . . . . . . . . .12
Tape Controls . . . . . . . . . . . . . . . . . . . . .13
Using the DISPLAY Button . . . . . . . . . . . .15
Tracking . . . . . . . . . . . . . . . . . . . . . . . . .16
About Video Cassette Tapes . . . . . . . . . .16
Recording . . . . . . . . . . . . . . . . . . . . . . . .17
One Touch Recording(OTR) . . . . . . . . . .17
Timer Recording . . . . . . . . . . . . . . . . . . .18
Choosing Audio . . . . . . . . . . . . . . . . . . . .19
Care and Maintenance . . . . . . . . . . . . . . . . . . . .20
Troubleshooting . . . . . . . . . . . . . . . . . . . . . . . . .21
Guide de reference rapide . . . . . . . . . . . . . . . . .22
Specifications . . . . . . . . . . . . . . . . . . . . . . . . . .24

Your New VCR
1
• Hi-Fi Stereo sound
• Auto Power off
• Instant Play
• One Touch Recording (OTR) up to four hours
• Tri-lingual on-screen programming (English/Spanish/French)
• Digital Auto Tracking
• Special effects playback, including slow motion
• Built-in HQ (High Quality) video circuitry
• One-month eight event timer programming
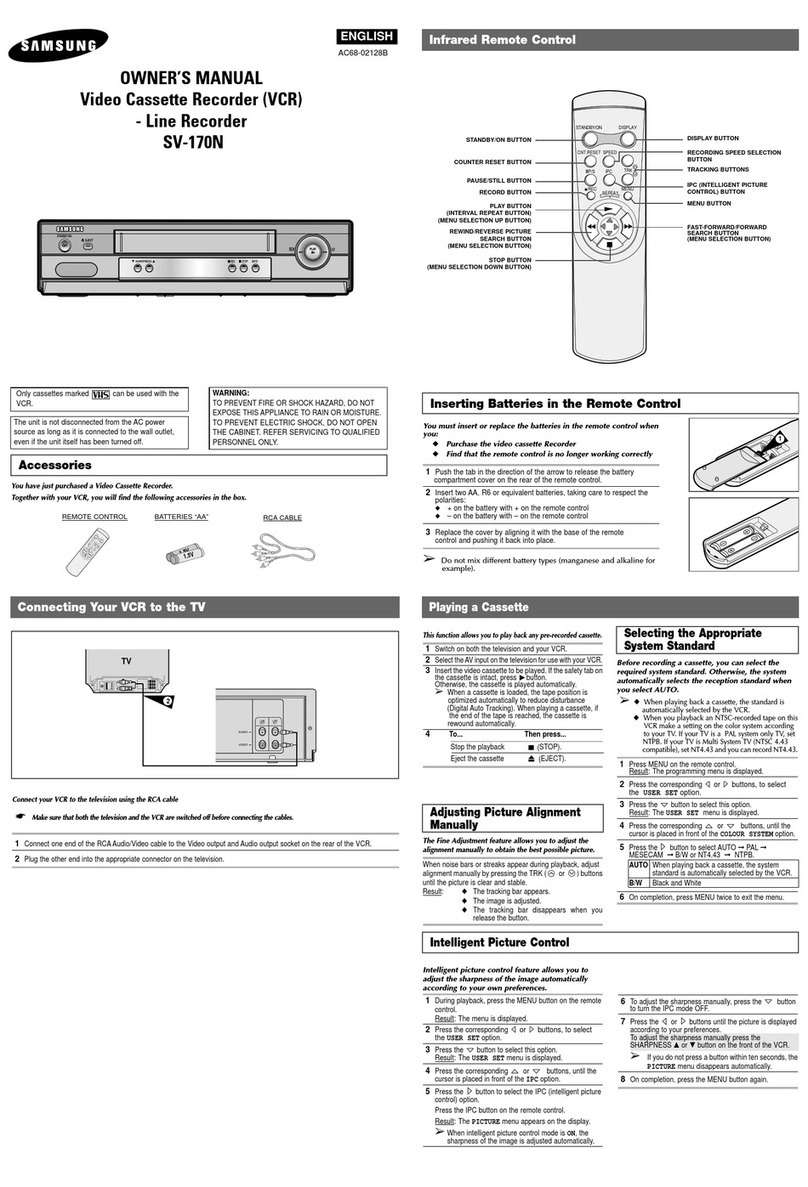
Check to make sure the following items have been included with your VCR.
1.5V
1.5V
ELECTRONICS
Remote
Control Batteries for
remote(2AA) RF-Cable Warranty
Card
Features
Accessories
Owner’s Manual
Owner’s
Manual

Your New VCR
2
POWER Indicator
Lit when VCR is
turned on.
REC Indicator
Lit when VCR is recording
Status and Audio Level Indicator
1
POWER
Press to turn the VCR on and off.
2
EJECT
Press to eject a tape or press.
3
CASSETTE COMPARTMENT
Insert a video cassette.
4
REW (REWIND)
Press to rewind in stop mode or
reverse search in play mode.
5
F.F (FAST FORWARD)
Press to fast forward in stop mode
or forward search in play mode.
6
PLAY
Press to play tape.
7
STOP
Press to stop tape.
SV-C90P
Front Panel and Display
1 2 3 4 6 5 7

3
Your New VCR
Remote Control batteries
If you won’t use the remote for a long time, remove the batteries and store them in a cool, dry place.
Batteries should last about a year. When replacing batteries, use all new batteries, and never mix alka-
line and manganese batteries.
1Remove the battery compartment lid by lifting
the cover.
2Insert two AA batteries as shown.
Match + and
-
ends of the batteries as
indicated inside compartment.
3Replace the compartment cover.
POWER
Press to turn your VCR on and off.
TV/VCR
Switch between TV or VCR source
(See page 4).
CH
Press to change channels.
TRK
Press to adjust cassette tracking.
DISPLAY
Press for on-screen information displays.
REC
Press to start VCR recording.
STOP,PLAY,P/S,REW,FF
Press to control cassette playback
or to move a cursor in the on screen menu.
CLEAR
Press to set counter to zero or to clear timer
record programs.
MENU
Press to display menu screen.
SLOW
Press to slow-motion playback during
playback.
SEARCH/EXIT
Press to enter the variable search
mode or to exit on screen menu.
VCR Remote Control

4
VCR Setup
AUDIO OUT (L/R)
Use to output audio signals to
connected equipment.
CH 3/4
Set to channel 3 or 4
to match the channel
selected at the TV.
IN FROM ANT
Use to input cable or
antenna signal.
OUT TO TV
Use to output VCR
signal to TV.
VIDEO OUT
Use to output video
signal from VCR to
connected equip-
ment.
Use the jacks on the rear panel to connect the VCR to other components and signals, including:
VCRs, TVs, stereo equipment, digital video components, antenna and cable signals.
75-ohm round
antenna lead
300-ohm flat
antenna lead with adapter
Cable/Antenna
IN TO VCR
VCR
OUT TO TV
Antenna Connection
If your outside antenna cable is a 300 ohm flat feeder, use
an adapter to connect the antenna to the VCR input termi-
nal. You can purchase an adapter at an electronics store. If
your antenna already has a round lead, simply connect it to
the terminal on the rear panel of the VCR.
Once your antenna is connected to the VCR, connect a
cable from the VCR to your TV from the “Out to TV”
terminal on the rear panel of the VCR.
Cable Connections
Basic Cable TV Connection
This set-up will enable you to:
- Record an unscrambled channel.
- Watch an unscrambled channel while recording it.
- Record an unscrambled channel while watching
another (only when you connect a cable-compatible TV).
You will need to:
• Select TV channel 3 or 4 to receive video
signals.(See page 9.)
• To record a channel while watching another, press
TV/VCR on the remote control to set the VCR to TV
mode and select a desired channel on the TV.
Rear Panel
Connections

5
VCR Setup
Premium Cable TV Connection 3
This set-up will enable you to:
- Watch an unscrambled or scrambled channel while
recording it.
- Record an unscrambled channel while watching another
unscrambled channel (only when you connect
a cable-compatible TV).
• A/B switch “A” : Record and watch an unscrambled
channel which bypasses the cable box.
• A/B switch “B” : Record and watch a scrambled or
unscrambled channel coming through the cable box.
Premium Cable TV Connection 2
This set-up will enable you to:
- Record an unscrambled channel.
- Watch an unscrambled channel while recording it.
- Record an unscrambled channel while watching
another (scrambled or unscrambled).
You will need to:
• Set TV channel to the output channel of the cable box.
• Turn on the cable box and select cable channel 3
or 4 according to the output channel of the VCR.
• To record a channel while watching another, press
TV/VCR on the remote control to set the VCR to TV mode
and select a desired cable channel on the cable box.
Premium Cable TV Connection 1
This set-up will enable you to:
- Watch an unscrambled or scrambled channel while
recording it.
- Record any channels through the cable box.
You will need to:
• Set TV to channel 3 or 4 to receive video signals.
• Set VCR channel to the output channel of the cable
box, and select a desired cable channel on the
cable box.
• While the VCR is turned off or the VCR is in TV mode, set
TV channel to the output channel of the cable box.

6
VCR Setup
External Stereo Connections
Out to Audio System
Connecting your stereo VCR to an external amplifier
and speakers can improve the sound quality. The
sound from the VCR can be heard through the
stereo.

7
VCR Setup
Your VCR has on-screen menus that allow you to access and control the VCR’s programmable features. You will use the
buttons on the remote control to work with the on-screen programming.
Each button works not only PLAY, STOP, F.F, REW but also as a shift cursor in the on screen menus.
: PLAY,Pause/Still or ▲ cursor
: STOP or ▼cursor : MENU ON or OFF
: REW or Ãcursor : F.F or ¨cursor
1
Press the MENU button on your remote control. The
Main Menu will appear on screen.
2
Select the item you want to adjust using the ▼button
followed by the ¨button on your remote control.
If you want to exit any on-screen menu, simply press the button on the remote control.
If the main menu does not appear, make sure the TV is tuned to the same channel as the CH3/4 switch on the rear panel
of the VCR. Press the TV/VCR button on the remote control to set VCR mode.
Note: The on-screen menu differs from model to model.
1
To select the language for the on-screen menu display,
press the MENU button on the remote control.
2
Press ▼ on the remote control to select “Language.”
3
Press ¨to select the language you want for the on
screen menus (English, Spanish, French).
MAIN MENU
¨
Timer recording
Clock set/adjust
Channel setup
VCR function setup
Language/Lengua/Langue
[
¹
/
¨
] [MENU/EXIT]
MAIN MENU
¨
Timer recording
Clock set/adjust
Channel setup
VCR function setup
Language/Lengua/Langue
[
¹
/
¨
] [MENU/EXIT]
MAIN MENU
Timer recording
Clock set/adjust
Channel setup
VCR function setup
¨
Language/Lengua/Langue
[
¹
/
¨
] [MENU/EXIT]
MENU PRINCIPAL
Programmation
Réglage de l’horloge
Réglage des chaînes
Réglage des fonctions
¨
Language/Lengua/Langue
[
¹
/
¨
] [MENU/EXIT]
Using Menus and the Remote Control
Selecting the On-Screen Language

8
VCR Setup
The VCR has an internal clock which is used to turn the VCR on and off for timer recording.
1
Press MENU on the remote control. Press ▼ and ¨to
select “CLOCK SET/ADJUST.”
2
The first clock setting display appears.
To enter the current time, press ▼or ▲and press ¨to
move to the next setting.
3
To enter the current month and date, press ▼or ▲and
press ¨to move to the next setting.
4
To enter the current year, press ▼or ▲.
The day of the week is automatically added after you set
the year.
5
Press the MENU button to start the clock.
Press the MENU button again when you finish setting
the clock.
Setting the Clock
MAIN MENU
Timer recording
¨
Clock set/adjust
Channel setup
VCR function setup
Language/Lengua/Langue
[
¹
/
¨
] [MENU/EXIT]
CLOCK SET/ADJUST
TIME
DATE
YEAR
9:00
5/05
1999 WED
¹
[
¹
/
è
] [MENU/EXIT]
P
M
CLOCK SET/ADJUST
TIME
DATE
YEAR
9:00
5/05
1999 WED
¹
[
¹
/
è
] [MENU/EXIT]
P
M
CLOCK SET/ADJUST
TIME
DATE
YEAR
12:00 1
/01
1999 FRI
¹
[
¹
/
è
] [MENU/EXIT]
A
M

9
VCR Setup
When the VCR memorizes all the available channels, you can use the CH ▼▲ buttons to select channels.
Setting the Source
Before the VCR can memorize available channels, you must set the signal source for your VCR.
1
With the VCR on, press the MENU button.
Press ▼ and ¨to select “CHANNEL SETUP.”
2
If you have a cable system hooked up to your VCR,
leave CABLE TV displayed in theAnt/Cable screen.
3
If you have an antenna hooked up to your VCR, press
¨until ANTENNA appears. Press the MENU button
when you have selected the correct signal source.
Memorizing the Channels
1
Press the MENU button. Press ▼ and ¨to select
“CHANNEL SETUP.”
2
Press ▼ and ¨to start Auto channel memory function.
3
Your VCR will begin scanning through available chan-
nels. To interrupt, press the MENU button on the remote
control. When the channel number on screen stops
changing, the VCR has finished.
MAIN MENU
Timer recording
Clock set/adjust
¨
Channel setup
VCR function setup
Language/Lengua/Langue
[
¹
/
¨
] [MENU/EXIT]
MAIN MENU
Timer recording
Clock set/adjust
¨
Channel setup
VCR function setup
Language/Lengua/Langue
[
¹
/
¨
] [MENU/EXIT]
CHANNEL SETUP
¨
Ant/Cable
: [CABLE TV]
Autochannel memory
Channel add/delete
[
¹
/
¨
] [MENU/EXIT]
CHANNEL SETUP
¨
Ant/Cable
: [ANTENNA]
Autochannel memory
Channel add/delete
[
¹
/
¨
] [MENU/EXIT]
CHANNEL SETUP
Ant/Cable
: [CABLE TV]
¨
Autochannel memory
Channel add/delete
[
¹
/
¨
] [MENU/EXIT]
Memorizing CH 02
. . . . . please wait . . . . .
Setting the Channels

10
VCR Setup
Adding or Deleting Memorized Channels
You can add or delete channels that have been memorized by the Automatic Channel Memory function. The Auto
Channel Memory function must be performed before Channel Add/Delete can be used.
1
Press the MENU button. Press ▼ and ¨button to select
“CHANNEL SETUP.”
2
Press ▼ and ¨button to select “Channel Add/Delete.”
3
Press CH ▼▲ for the channel you want to add or
delete.
For example : To add a channel, use CH ▼▲.
For example : To delete a channel, use ▼▲.
4
To ADD the selected channel: Press ¨button on the
remote control.
To DELETE the selected channel: Press Ãbutton on
the remote control.
When you have finished, press the MENU button twice.
MAIN MENU
Timer recording
Clock set/adjust
¨
Channel setup
VCR function setup
Language/Lengua/Langue
[
¹
/
¨
] [MENU/EXIT]
CHANNEL SETUP
Ant/Cable
: [CABLE TV]
Autochannel memory
¨
Channel add/delete
[
¹
/
¨
] [MENU/EXIT]
CHANNEL ADD/DELETE
¨
Select channel: [ 1]
and press
[
¨
] to ADD
press
[
Ã
] to DELETE
[
¹
/
è
] [MENU/EXIT]
CHANNEL ADD/DELETE
¨
Select channel: [121]
(in memory)
and press
[
¨
] to ADD
press
[
Ã
] to DELETE
[
¹
/
è
] [MENU/EXIT]

11
VCR Setup
To make all of the VCR’s features available, set the VCR functions before playing or recording a tape.
Record speed
1
Press the MENU button on the remote control. Press ▼to
select VCR function setup, then press ¨.
2
Press ¨to select the record speed, SP or SLP.
(See page 16).
3
Press the MENU button when you are finished.
Audio output
Access the “VCR FUNCTION SETUP” menu as described above.
Press ¨to select the audio mode. (See page 19)
Tape length
Access the “VCR FUNCTION SETUP” menu as described.
Press ¨to select the video cassette length. This information is
usually printed on the tape box. The menu cycles through: T120,
T160 or T180. Once the type of cassette is set, the VCR can
display the amount of time remaining on the tape when you
press the DISPLAY button (see page 15).
Auto play
Access the “VCR FUNCTION SETUP” menu as described.
Press ▼ to set the cursor to “Auto play” then press ¨to set ON
or OFF. When “Auto play” is ON, the VCR will automatically
begin playing a video tape when it is inserted, as long as the
safety tab of the cassette has been removed (see page 16).
Press the MENU button on the remote control when you are
finished.
MAIN MENU
Timer recording
Clock set/adjust
Channel setup
¨
VCR function setup
Language/Lengua/Langue
[
¹
/
¨
] [MENU/EXIT]
VCR FUNCTION SETUP
¨
Record speed: [SP]
Audio output: [MONO]
Tape length: [T120]
Auto play: [ON]
Auto repeat: [OFF]
Auto power off: [OFF]
[
¹
/
¨
] [MENU/EXIT]
VCR FUNCTION SETUP
Record speed: [SP]
¨
Audio output: [MONO]
Tape length: [T120]
Auto play: [ON]
Auto repeat: [OFF]
Auto power off: [OFF]
[
¹
/
¨
] [MENU/EXIT]
VCR FUNCTION SETUP
Record speed: [SP]
Audio output: [MONO]
¨
Tape length: [T120]
Auto play: [ON]
Auto repeat: [OFF]
Auto power off: [OFF]
[
¹
/
¨
] [MENU/EXIT]
VCR FUNCTION SETUP
Record speed: [SP]
Audio output: [MONO]
Tape length: [T120]
¨
Auto play: [ON]
Auto repeat: [OFF]
Auto power off: [OFF]
[
¹
/
¨
] [MENU/EXIT]
VCR Functions

12
VCR Setup
VCR operation
Auto repeat
Access the “VCR FUNCTION SETUP” menu.
Press the ▼ and ¨to set “Auto repeat” ON or OFF.
In the VCR function setup “Auto repeat” sets the VCR to play a
tape repeatedly [unless a tape control is activated (stop, fast
forward or rewind)]. Press the MENU button on the remote con-
trol when you are finished.
Auto power off
Access the “VCR FUNCTION SETUP” menu.
Press ▼ and ¨to set “Auto power off” to 1Hr or 2Hr.
“Auto power off ” sets the VCR to turn off automatically.
Note: VCR will shut off 1 or 2 hours after the last button is pressed.
VCR FUNCTION SETUP
Record speed: [SP]
Audio output: [MONO]
Tape length: [T120]
Auto play: [ON]
Auto repeat: [OFF]
¨
Auto power off: [1Hr]
[
¹
/
¨
] [MENU/EXIT]
VCR FUNCTION SETUP
Record speed: [SP]
Audio output: [MONO]
Tape length: [T120]
Auto play: [ON]
¨
Auto repeat: [ON]
Auto power off: [OFF]
[
¹
/
¨
] [MENU/EXIT]
Playing a cassette
Instant play
1
Load a recorded cassette.
Power is automatically turned on.
2
Press PLAY to start playback.
When playback starts, the VCR automatically adjusts the
tracking for clear pictures and sound.
3
To stop playback, press STOP.
When the VCR has a tape loaded and power is off, simply press the PLAY button to start tape playback.
You don’t need to press the POWER button.

13
VCR Operation
Play and Pause/Still
• Press the PLAY button on t has oe remote control or on the front of the VCR to play a video. (If Auto play is
selected and the video tape has no safety tab, it will begin playing automatically when you insert it in the
VCR.)
• In play or slow motion mode, press the STILL button to stop the tape on a single still frame. Press the button
again to resume normal viewing. (The VCR automatically stops after five minutes of slow motion or still, so
that VCR heads and video tapes are not accidentally damaged.)
Fast Forward and Forward Search
• Press FF when the tape is stopped to fast-forward the cassette at top speed.
• Press FF once while a tape is playing for forward search. Press PLAY to stop search.
• Press and hold to increase speed by 7 times for tapes recorded at SP speed and 21 times for tapes recorded
at SLP speed. Release button to play.
Rewind and Reverse Search
• Press Rewind when the tape is stopped to rewind the cassette at top speed.
• Press the Rewind button once while a tape is playing for rewind search. Press PLAY to stop search.
• Press and hold button while tape is playing to increase reverse speed by 7 times for tapes recorded at SP
speed and 21 times for tapes recorded at SLP speed. Release button to play.
Slow Motion
Press the SLOW while a cassette is playing for slow motion. Press PLAY to resume normal viewing. (The
VCR automatically stops after five minutes of slow motion, pause or still, so that VCR heads and video tapes
are not accidentally damaged.)
Tape Controls

14
VCR Operation
Variable Search System
Press the SEARCH/EXIT button to display or exit the
search screen.
When a program is recorded, the starting point is given
an Index mark for easy location. However, the VHS
Index Search System(VISS) cannot recognize index
marks made by old VCRs. If the VCR has trouble
finding a mark, it is probably because the cassette was
recorded on a VCR without VISS.
If you want to index two programs in a row, set your
VCR to stop. Then start recording each program.
Pause has no effect on index marks.
1. Scan and play
Use scan and play when you don’t know exactly where a program is located on a cassette tape.
1. Press ¨for forward scan or Ãfor reverse scan.
2. The display will show “Scan and Play”.
3. When an index mark is found, the VCR plays for about five seconds.
4. Press PLAY to view that program.
If you don’t press PLAY, the VCR automatically searches for the next index, or until the end of tape is reached.
2. Go to 0:00:00 stop
Use this feature when you want to search for the 0:00:00 counter position on a cassette. Press CLEAR at the
point on the tape where you want to set the counter to 0:00:00. Later, while a cassette is playing or stopped, press
▲button. The VCR will rewind or fast forward, searching for the 0:00:00 counter position, and then
automatically stop at that position.
3. End search
Use this feature when you want to search for a blank position to record a program on a cassette. While a cassette is playing
or stopped, press ▼button. The VCR will rewind or fast forward, searching to a blank position, and then automatically
stop at that position.
If the VCR reach the end of tape while end search, it will eject the tape.
Scan and play:
press [
Ã
] or [
¨
]
Go to [0:00:00]:
Press [
¹
]
End search:
Press [
]
0:00:00 SP

15
VCR Operation
The display function gives you information about the status of your VCR.
Location on screen Display information
Upper left corner The VCR function (play, stop or record).
Upper right corner Channel VCR is tuned to.
Lower left corner Amount of time that has elapsed since
the counter was last reset.
Lower center corner Tape speed (SP or SLP).
Lower right Tape remaining graphic
Accessing the DISPLAY screen
1
Press the DISPLAY button while the cassette is playing or
recording. After approximately 3 seconds, the display
automatically changes, then only the counter and graphic
displays are shown.
2
Press the DISPLAY button to switch the counter mode
between showing the time remaining on the tape and
the present time of day.
3
Press the DISPLAY button again to remove display from
the TV screen.
Note: In order for display information to be accurate, set up the tape length in the VCR Function Setup first (page 11).
0:01:30 SP
1:30
STOP 6
Rem 4:59
0:01:30
Using the DISPLAY Button
6
P
M

16
For the best picture quality when playing a cassette, the video heads must be aligned with the recorded track. This alignment
is called tracking. When playing back a tape, your VCR automatically adjusts the tracking on a video tape, but occasionally a
cassette may require some manual adjustment. Keep in mind that picture distortion often occurs at the beginning of a tape.
Automatic Tracking
1
Turn the TV on and insert a cassette into your VCR. Press
the PLAY button, if necessary.
2
After a few seconds of auto tracking, you would hear the
sound from the video tape.
Manual Tracking
Press the TRK buttons on the remote control up or down until
the picture improves.
During still mode, press the TRK buttons to reduce picture
“jitter” (bouncing up and down).A small amount of “jitter” or
some “streaks” are normal during still viewing.
Note: The noise on the screen may not be completely eliminated
depending on the tape used, especially when the tape
was recorded on another VCR.
Tape speeds
The VCR can record at two tape speeds. The slower speed (SLP) allows the VCR to record more program material on a
tape. Tapes recorded at standard speed (SP) provide a clearer picture. Set the tape speed in the VCR Function Setup
menu (See page 11). You can refer to the following table:
TAPE SP (Standard Play) SLP (Super Long Play)
T-120 2 hrs 6 hrs
T-160 2 hrs 40 minutes 8 hrs
T-180 3 hrs 9 hrs
Record protect tab
Before recording on any video cassette, make sure the record protect safety tab is in place. To prevent accidentally recording
over a program, remove the record protect safety tab on the cassette case. To record on a tape with its tab removed, cover
the hole with adhesive tape.
VCR Operation
TRACKING
Tracking
About Video Cassette Tapes
Table of contents
Other Samsung VCR System manuals

Samsung
Samsung SV-H10K User manual

Samsung
Samsung STLV-24N User manual

Samsung
Samsung SV-M35K User manual

Samsung
Samsung SV-251B User manual

Samsung
Samsung SV-625X User manual

Samsung
Samsung SV-647F User manual

Samsung
Samsung VR3040 User manual

Samsung
Samsung SV-627X User manual

Samsung
Samsung SV-232B User manual

Samsung
Samsung SV-C15P User manual

Samsung
Samsung SV-271B User manual

Samsung
Samsung SV-665B User manual

Samsung
Samsung SV-647X User manual

Samsung
Samsung SV-140G User manual

Samsung
Samsung SV-613X User manual

Samsung
Samsung SV-270GX User manual

Samsung
Samsung SV-5G User manual

Samsung
Samsung SV-646L User manual

Samsung
Samsung SV-641B User manual

Samsung
Samsung VR5260 User manual