SANKI S-CON MINI CURVE SDBR Service manual

1
S-CONⓇMINI CURVE
Wide Roller Edge
SDBR
OPERATING AND SERVICE MANUAL

2
Thank you very much for purchasing our S-CONⓇMINI CURVE SDBR. To use
the machine properly, please read this operating and service manual carefully
before use. Keep the manual where the machine is installed, so that it may be
referred to when needed.
TABLE OF CONTENTS
1.Caution When Handling …………………………………
2.Component Names ………………………………………
3.Running the Conveyor …………………………………
4.Belt Replacement …………………………………………
5.Geared Motor Replacement ……………………………
6.Chain Replacement and Lubrication …………………
7.Inspection and Maintenance ……………………………
4
8
9
10
12
12
13

3
Upon delivery of this product, please check the package contents to ensure the
product matches your order. If the delivered items do not match your order, please
contact our local agent directly before use.
SDBR 120 –90 R24(F 04 –3 A16 )R –BG –H75
Conveyor model code
Date of production 20□□.□□
JOB №□□-□□□□□-□□□-□□
SDBR120-90R24(F04-3A16)R -BG-H75 i = 1/7.5
Manufacturer’s serial number
(Refer to this number when contacting us)
Belt specification
(eg Standard, Green)
→see table below
Direction of belt travel
(eg Clockwise)
Power source frequency and Belt speed
(eg 50Hz 16m/min)
NOTE: Maximum speed is shown.
Nominal belt width in cm
(eg 120cm)
Curve angle (eg 90°)
Power source type
(eg 200V three-phase)
Motor output
(eg 0.4kW)
Motor type
(eg Inverter variable speed)
Inside radius R in cm
(eg 24cm)
Serial number and model label
[Example]
●Belt specification
Belt surface height
H in cm (eg 75cm)
Reduction gear ratio
Inside radius
Code
240mm
R24
340mm
R34
Motor output
Code
0.4kW
04
Motor type
Code
Inverter variable speed
F
Frequency
Code
50Hz
A
60Hz
B
Power source type
Code
200V three-phase
3
other
0
Direction
Code
Clockwise
R
Counterclockwise
L
Code
BG
BW
XG
XW
XB
XX
NO
Specification
Standard
Other
None
Color
Green
White
Green
White
Blue
Other
-

4
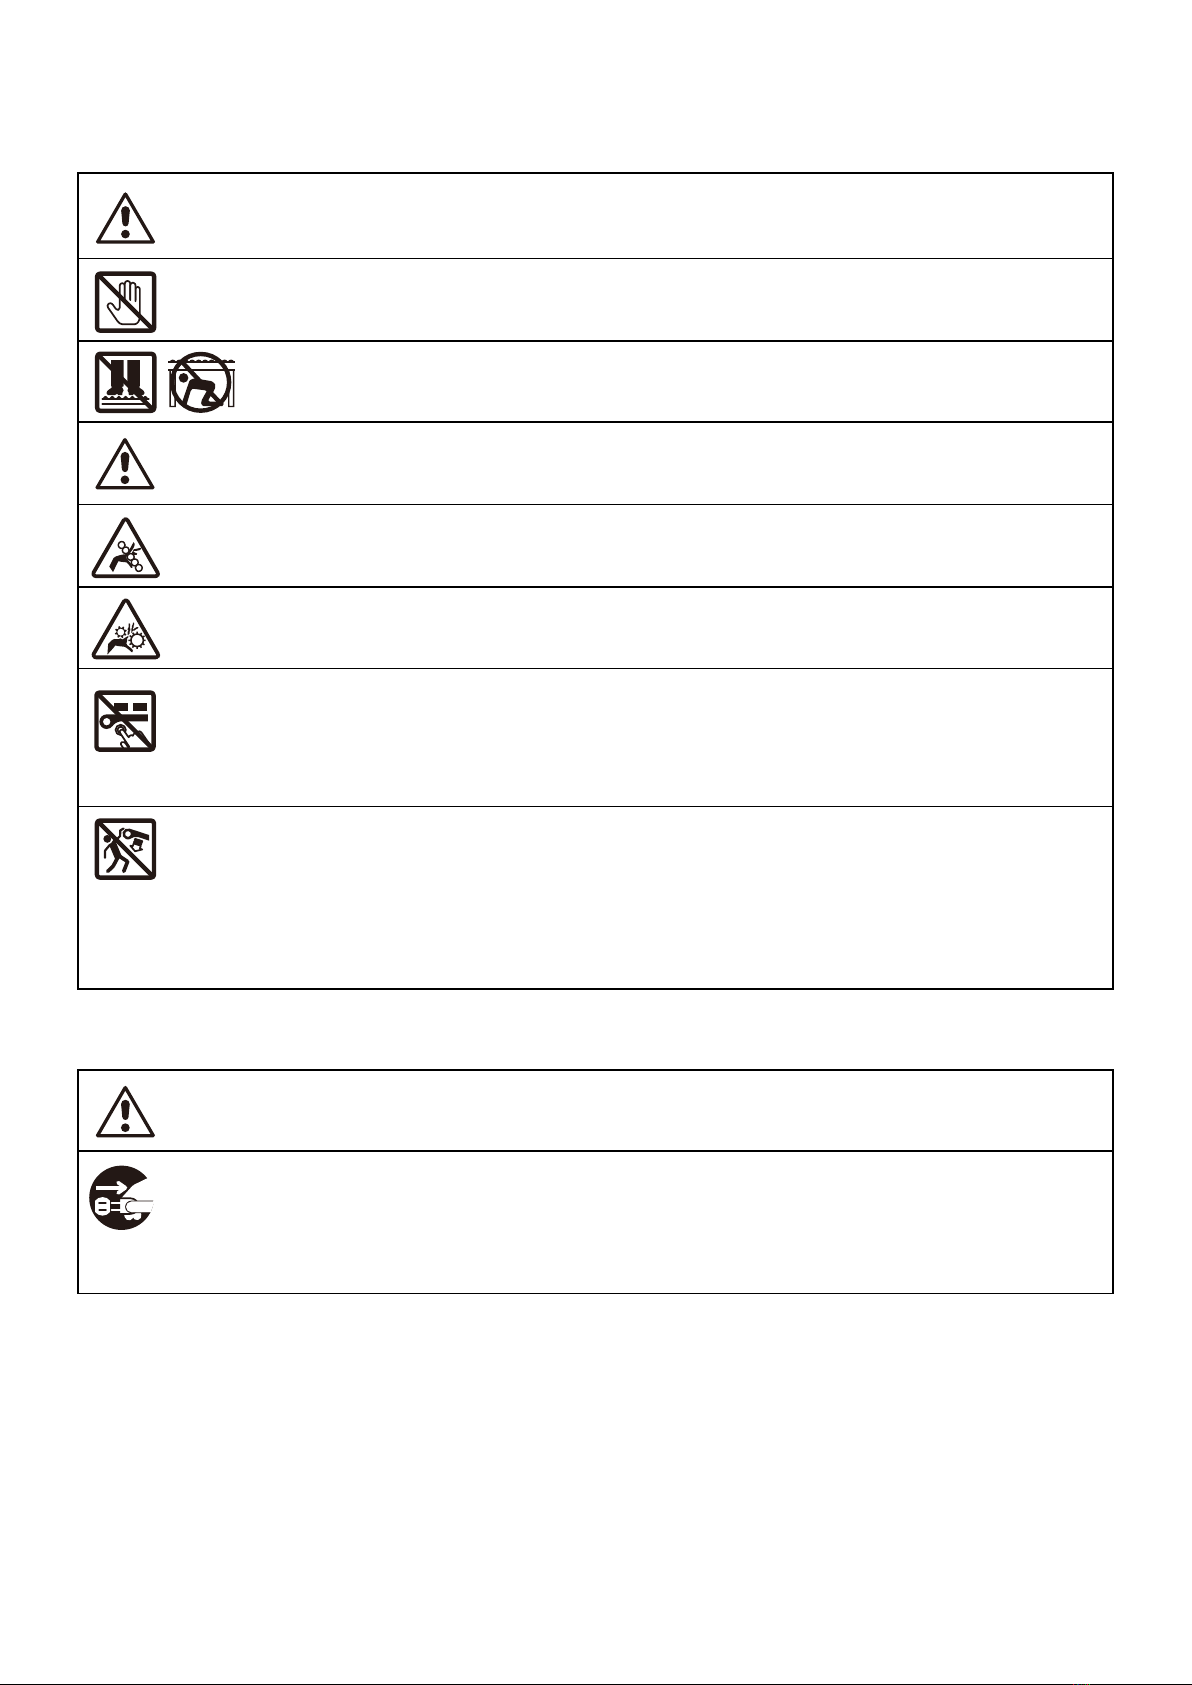
□When using in a high or inclined position:
FOR YOUR SAFE USAGE
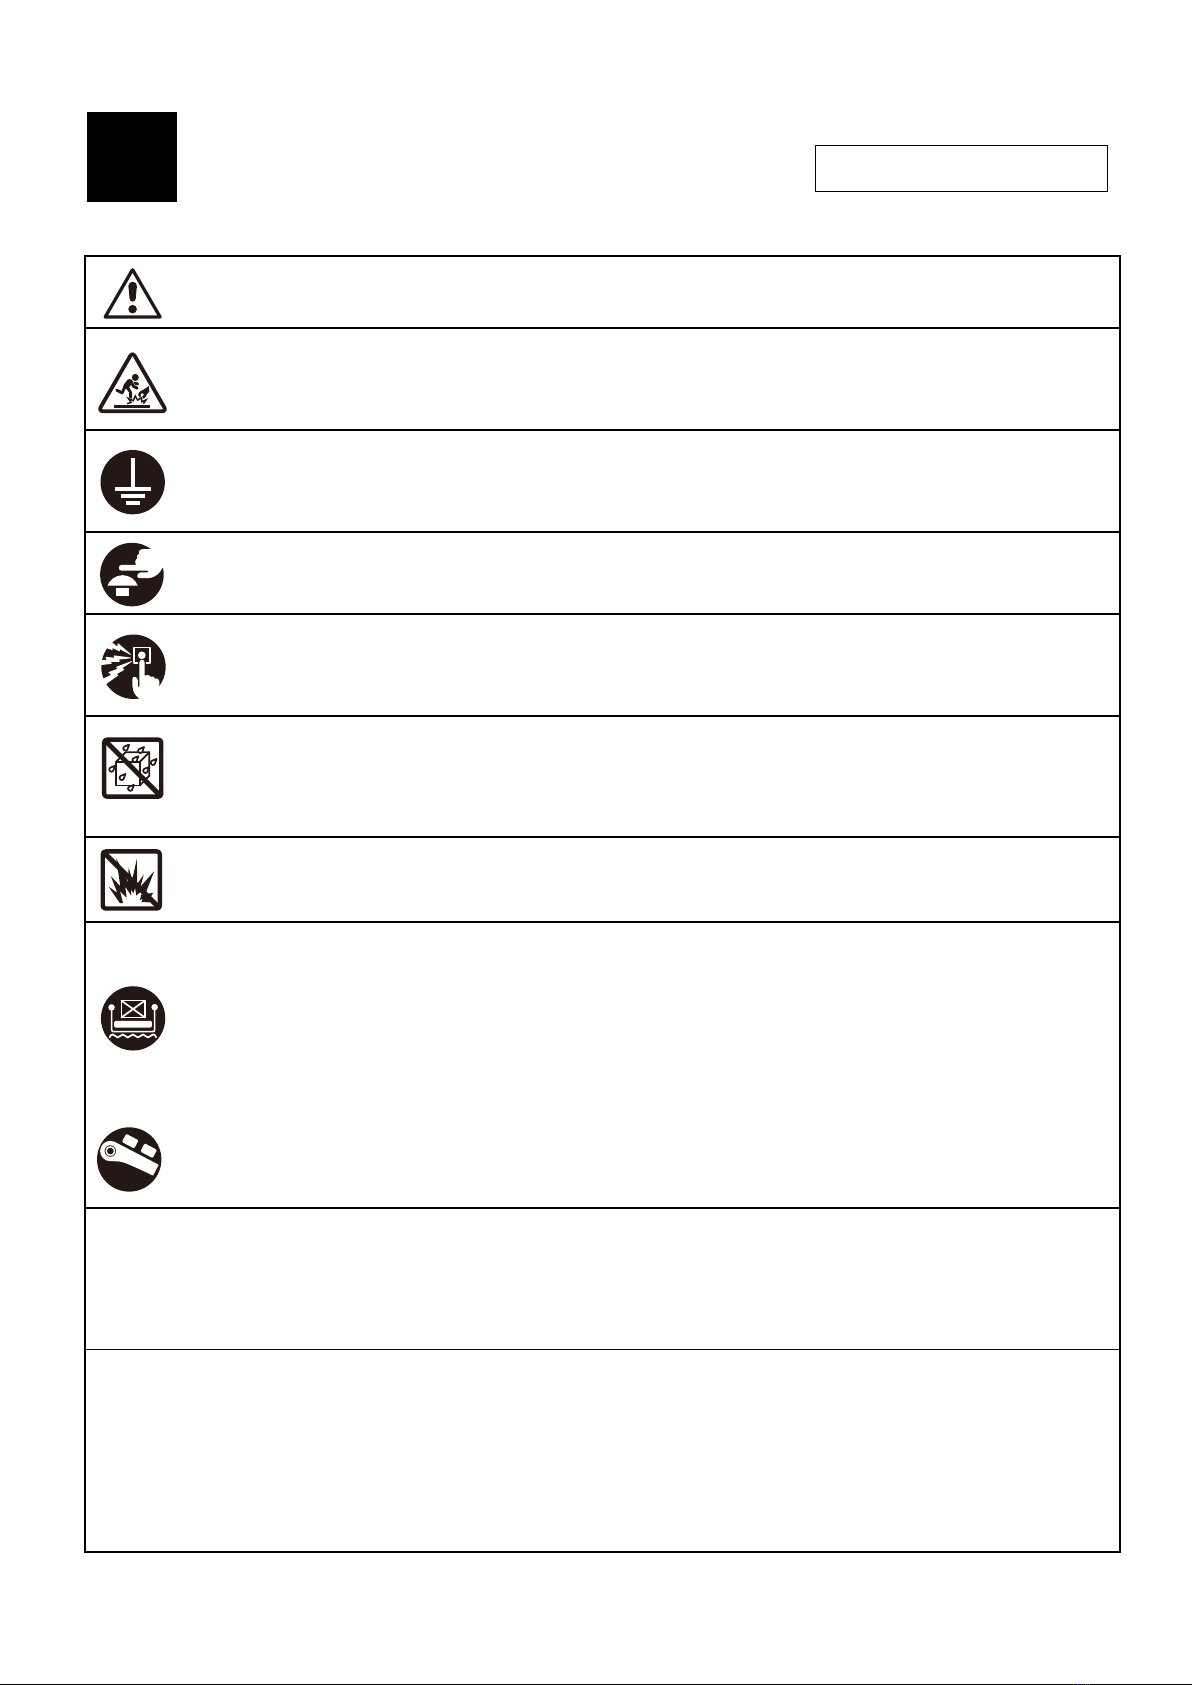
CAUTION : Improper handling of the conveyor may result in physical injury or damage!
■Transport and assembly
When transporting and assembling the conveyor, pay special attention not to drop it in order to
avoid physical injury or damage. When lifting by crane, pay attention to the balance of the conveyor.
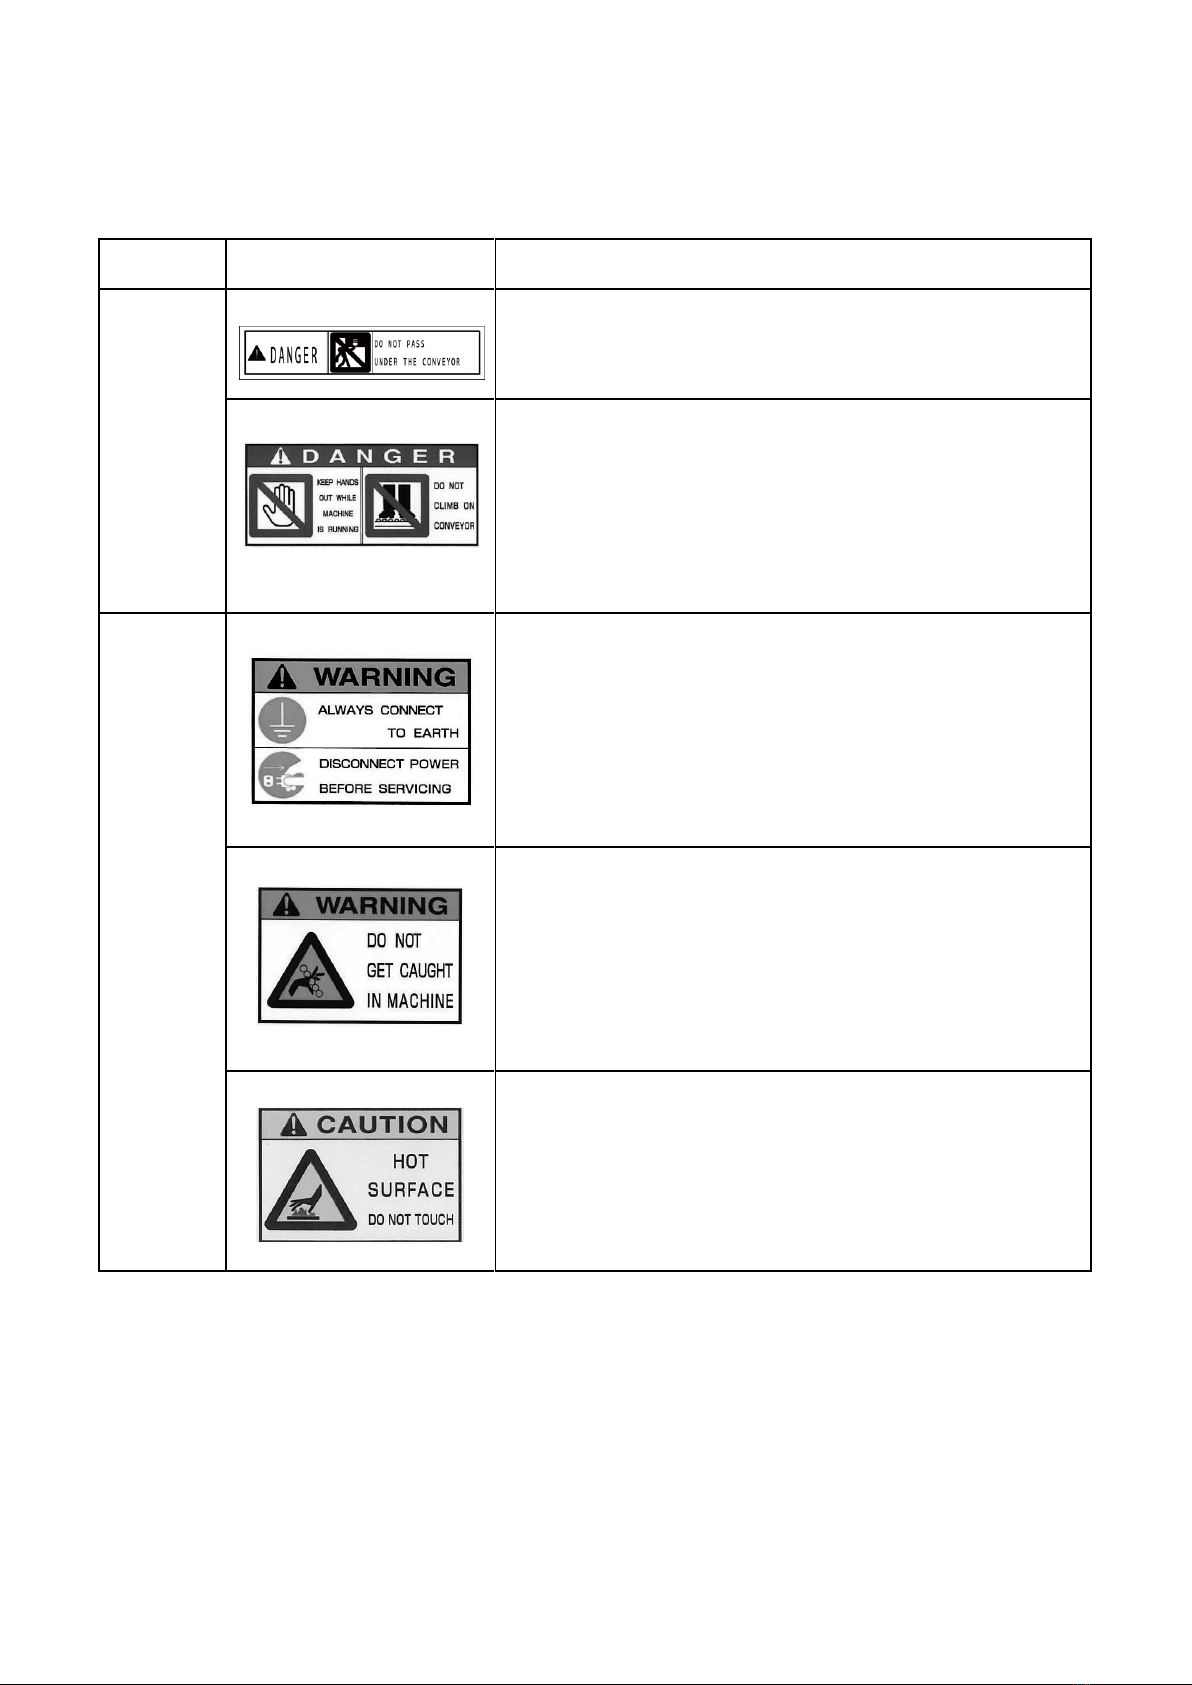
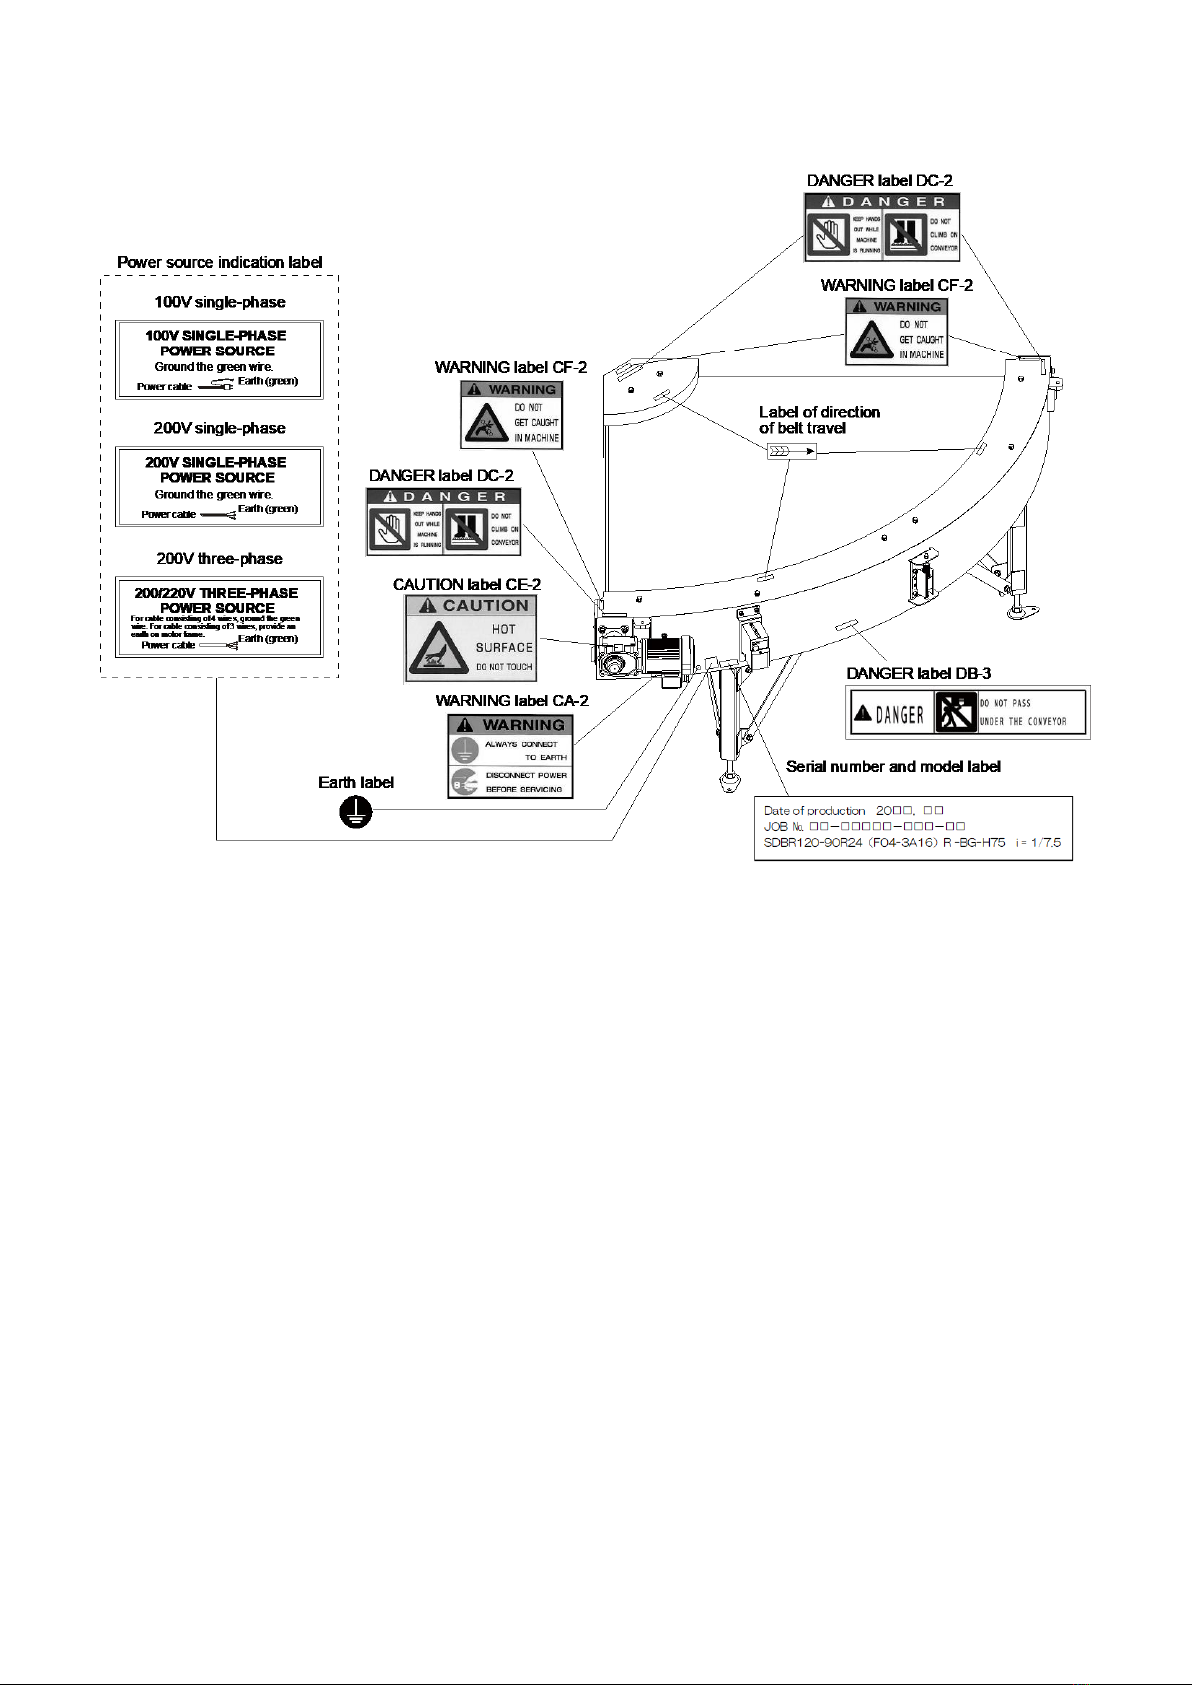
■Earth and leakage breaker
Ensure the conveyor is connected to earth at all times to prevent electric shock. Also ensure that
an earth leakage breaker is connected to the power supply.
A. Prior To Use
■Emergency stop
Install an emergency stop device to immediately stop the conveyor in emergency.
■Start alarm
If it is not possible to supervise the operation of the full length of the conveyor from the operating
position, install a start alarm for increased safety.
■Keep the conveyor dry at all times
Do NOT use the conveyor in wet or humid areas. Do NOT splash liquids onto the conveyor. Do
NOT use or leave the conveyor outdoors. The machine is not waterproof. Do NOT touch electrical
parts with wet hands.
■Do NOT use in an explosive atmosphere
(Avoid explosive gas, explosive dust, etc.)
■Lower cover and guard
Install the optional lower cover or guard in order to prevent entry under the conveyor.
■Guide rail, top and side covers
To prevent objects from falling off the conveyor, install the optional guide rail, top and/or side
covers.
■Braking system
When using the conveyor on an incline, it is recommended that an optional braking system be
installed, in order to prevent reverse or other incorrect running of the conveyor.
■Environmental conditions
Ambient temperature
Ambient humidity
Atmosphere
Elevation
NOTE:
●Using the conveyor in a strong electric field (eg near broadcasting devices or high- frequency welding
machinery/equipment) could cause the conveyor to malfunction. In this case, install the conveyor at a
sufficient distance. Alternatively shield completely to avoid any interference with the conveyor.
●Using an inverter to this machine could cause other machines to get effects of high-frequency. In this
case, install the conveyor at a sufficient distance or shield completely.
1
CAUTION WHEN HANDLING
:0℃ to +40℃
:RH 85% max(Avoid condensation)
:Indoor(Avoid corrosive gases, dust, etc.)
:1,000m or less

5
B. During Operation
C. After Use
WARNING:Improper handling of the conveyor could result in serious physical injury or damage!
■Do NOT touch the conveyor when it is running
There is considerable risk of being caught and injured by the conveyor.
■Do NOT ride on or climb on the conveyor/Do NOT go under the conveyor
There is considerable risk of falling or being caught and injured by the conveyor.
■Beware of entanglement
When working close to the conveyor, take care not to get caught in the conveyor. There is
considerable risk of being injured by the conveyor.
■Do NOT remove safety covers
There is a risk of getting caught in the rotating parts such as pulleys. Only remove in case of
maintenance or inspection.
CAUTION:Improper handling of the conveyor may result in physical injury or damage!
■Do NOT apply force to ends of conveyor
Do NOT press down on, or hang off the sides of the conveyor. Injury may result from a toppling
conveyor.
■Secure the conveyor to the floor/ground
When using the conveyor, be sure to secure it to the floor/ground with anchor bolts etc. to
prevent it from toppling irrespective of indoor use or outdoor use.
■Switch off the power after use
Ensure that the power is switched off when carrying out relocation, inspection, cleaning, etc. of
the conveyor, otherwise there is a risk that the conveyor could start unexpectedly. When leaving
the conveyor unused for a long period, take plug out of the outlet /connector to prevent electric
shock or leakage.
NOTE:1. Always use in accordance with the Occupational Safety and Health Act.
2. If the owner modifies the conveyor, any ill effects will fall outside the conditions of the guarantee.
■Do NOT start the conveyor while it is loaded
The motor may become damaged due to overload. Additionally, the motors of variable-speed type
machines may burn out as a result of running at excessively low speeds for
long periods. Use the conveyor within the specifications, indicated in the instructions for use, and
in the catalogue.
CAUTION:Improper handling of the conveyor may result in physical injury or damage!

6
Label classification
Label
Instruction
■WARNING LABELS etc. AND ATTACHMENT POSITIONS
For standard machines, warning labels etc. and their attachment positions are as follows:
1. WARNING LABELS
DB-3
■DO NOT PASS UNDER THE CONVEYOR
There is considerable risk of falling or being caught and
injured by the conveyor.
DANGER
DC-2
■KEEP HANDS OUT WHILE MACHINE IS RUNNING
There is considerable risk of being caught and injured by
the conveyor.
■DO NOT CLIMB ON CONVEYOR
There is considerable risk of falling or being caught and
injured by the conveyor.
■ALWAYS CONNECT TO EARTH
Ensure the conveyor is connected to earth at all times to
prevent electric shock.
■DISCONNECT POWER BEFORE SERVICING
Ensure that the power is switched off when carrying out
relocation, inspection, cleaning, etc. of the conveyor,
otherwise there is a risk that conveyor may start
unexpectedly.
CA-2
CF-2
■DO NOT GET CAUGHT IN MACHINE
When working close to the conveyor, take care not to get
caught in it. There is a risk of being injured by the
conveyor.
CE-2
■HOT SURFACE, DO NOT TOUCH
When the conveyor is running or immediately after it stops,
do NOT touch the motor, control unit, etc. There is a risk
of getting burned or injured by the heat.
CAUTION
or
WARNING

7
2. ATTACHMENT POSITIONS OF WARNING LABELS
etc.

8
2
COMPONENT NAMES

9
Operate inverter as follows:
NOTE: Before operation, remove cover of inverter operating panel. Reinstall the cover after operation.
1. Turn on power supply and ensure that EXT indicator(*1) is illuminated. Then press PU/EXT key(*2)
and ensure PU indicator(*3) is illuminated. (PU operation mode)
2. To start conveyor, press RUN key(*4); to stop conveyor, press STOP/RESET key(*5).
3. To set speed, turn M-dial(*6) until the monitor(*8) shows intended frequency. Then press SET key(*7).
(Only turning M-dial does not change speed. To complete speed setting, be sure to press SET key.)
4. It is possible to change direction of belt travel or make external control by setting parameter. For
details, refer to inverter instruction manual, appendix.
200V three-phase power source: Standard machine has only lead wire terminal. Before operation,
confirm position and function of emergency stop and that there is no dangerous place around conveyor
and its movable parts.
3-1. BE SURE TO GROUND MACHINE BEFORE OPERATION
3
RUNNING THE CONVEYOR
3-2. RUNNING THE CONVEYOR
Earth (green) Earth label
fig. Inverter operating panel
RUN key (*4)
PU indicator (*3)
EXT indicator (*1)
STOP/RESET key (*5)
PU/EXT key (*2)
SET key (*7)
M-dial (*6)
MODE key
MITSUBISHI inverter FREQROL D700 standard specifications
Applied motor
0.4kW
Rated output voltage
AC 200V three-phase
Power source voltage
Type 710W: AC 100V single-phase
720S : AC 200V single-phase
720 : AC 200V three-phase
Permissible voltage variation
100V: 90-132V
200V: 170-264V
Power source frequency
50/60Hz ±5%
Environmental
conditions
Temperature
-10℃ to +40℃ (Avoid freezing)
Humidity
RH 85% or less (Avoid condensation)
Atmosphere
Indoor, no corrosive/flammable gases,
no oil mist or dust
Elevation
1,000 m or less above sea level
Vibration
5.9 m/s2or less

10
4
BELT REPLACEMENT
4-1. REMOVING THE BELT
1. Switch off power supply. Remove outside and inside covers by pulling out all the cover fixing knob-
bolts.
2. Remove each pulling spring by releasing chain side hook and belt side hook in this order.
3. Pull out bolts. Unlock bracket by pulling it down while supporting lever with your hand.
4. Pull out belt. (Since belt is easy to get damaged if caught on bracket, etc., pull it out while covering with
cardboard etc.)
Fixing knob-bolt
Outside cover
Inside cover
NEXT release
belt side hook.
Releasing/resetting hooks can
be easier by pinching them
with a pair of radio pliers.
Since springs are easy to deform, do not damage or
unnecessarily expand them when releasing/resetting.
CAUTION!
Pulling spring
FIRST release
chain side hook.
Bracket
When locked
When unlocked
Pull out belt this way
Bolt
Lever
Make a space
by pulling down.

11
4-2. INSTALLING THE BELT
1. Insert replacement belt.
(Since belt is easy to get damaged or dirty if caught on bracket, etc., insert it while covering with
cardboard etc.)
2. Combine belt with chain by resetting pulling springs.
(For each pulling spring, reset belt side hook and chain side hook in this order.)

12
5
GEARED MOTOR REPLACEMENT
6
CHAIN REPLACEMENT AND LUBRICATION
6-1. CHAIN REPLACEMENT
1. Switch off power supply. Find joint of chain.
2. Disassemble the joint referring to figure below, and remove chain.
(To disassemble, remove clip from joint using a pair of radio pliers etc.)
3. Set replacement chain. Connect chain ends by assembling joint.
6-2. LUBRICATION
1. Turn and open lid of chain lubrication port, and apply recommended
grease* to chain.
Recommended Grease*
Product name: HI-PWR Lube (by DAIDO KOGYO CO., LTD.)
1. Remove motor shaft end cap.
2. Pull out hexagon socket head cap screw together
with washer.
3. Pull out geared motor from drive shaft.
4. Remove torque arm from motor.
5. Attach torque arm to replacement geared motor.
6. Fit key of drive shaft to key groove of motor and
insert motor. In this case also insert torque arm to
torque arm support.
7. Fix motor with hexagon socket head cap screw and
washer. Reattach motor shaft end cap in initial
position.
Chain lubrication ports are located
on both ends of conveyor.
Chain lubrication ports are
located on both ends of
conveyor.
Joint of chain Clip
Endless condition Image of disassembly

13
PROBLEM
CAUSE
REMEDY
1. Conveyor does
not run when
switched on.
(1) Power plug is not properly
connected to mains.
(2) Power switch is not turned on.
(3) Inappropriate power source
(1) Inspection, correction
(2) Inspection, correction
(3) Check power source. → See p.9.
2. Conveyor is
turned on, but
motor will not
run.
(1) Disconnection or breakage in wiring
(2) Conveyor speed is set too slow.
(3) Circuit protector or emergency stop
switch has been activated.
(4) Failure of motor or inverter
(1) Inspection, repair
(2) Reset to appropriate speed. → See p.9.
(3) Restore protection circuit or emergency
stop switch.
(4) Replace motor or inverter.
3. Motor runs,
but belt does not
move.
(1) Belt is slacked off.
(2) Pulling springs have come off.
(3) Chain has come off or expanded.
(4) Liquids, oil, foreign substances, etc.
are sticking to machine.
(5) Overload
(1) Replace pulling springs if they have
expanded.
(2) Reset pulling springs. →See p.9.
(3) Repair or replacement
(4) Remove any foreign matter and clean.
(5) Inspect and reduce load.
4. Belt runs, but
speed cannot be
changed.
(1) Breakage in wiring of motor and
inverter
(2) Failure of inverter
(1) Inspection, repair
(2) Inspection and repair or replacement
5. Conveyor
makes abnormal
noise and
vibration.
(1) Loose fixing bolts
(2) Rotation malfunction of sprocket
(3) Chain has run out of oil.
(4) Foreign substances are stuck in
machine.
(5) Rotation malfunction of roller
(1) Inspect and tighten loose bolts.
(2) inspection, replacement
(3) Apply grease to chain. →See p.12.
(4) Inspection, cleaning
(5) Inspection, replacement
6. Electric shock
is received from
conveyor.
(1) Static electricity has been charged
in frames.
(2) Electric leakage
(1) Properly ground the machine.
→ See p.9.
(2) Inspection, investigation
7
INSPECTION AND MAINTENANCE
7-1. PROBLEMS AND REMEDIES

14
CHECKING
PERIOD
PART TO
CHECK
THINGS TO CHECK FOR
CHECKING
METHOD
REMEDY
Daily
Belt
Foreign substances on
surface and undersurface
Visual inspection
Clean and remove any
foreign matter.
Getting caught
Visual inspection
Inspection, adjustment
Monthly
Chain
Expansion, looseness,
running out of oil
Visual inspection
and manual check
Adjustment, lubrication*
Sprocket
Wear, damages
Visual inspection
and manual check
Inspection, replacement
Oil pan
Dirt etc.
Visual inspection
Inspection, cleaning
Three
monthly
Drive unit
Geared motor
Rotation malfunction,
loose bolts
Manual check,
listening
Inspection and adjustment
or replacement
Overheat, abnormal noise
Manual check,
listening
Inspection and adjustment
or replacement
Six
monthly
Frame, stand
unit
Attachments
Loose attachment bolts
Visual inspection
and manual check
Inspection, adjustment
Tighten loose bolts.
Damages
Visual inspection
and manual check
Inspection and repair or
replacement
7-2. ITEMS FOR REGULAR INSPECTION
*Apply grease to chain every 3 months or every 1,000 operating hours.
■Switch off the power after use
Ensure that the power is switched off when carrying out relocation, inspection, cleaning, etc. of
the conveyor, otherwise there is a risk that the conveyor could start unexpectedly. When leaving
the conveyor unused for a long period, take plug out of the outlet /connector to prevent electric
shock or leakage.
CAUTION:Improper handling of the conveyor may result in physical injury or damage!

15
MEMO

16
LOGISTIC TECHNOLOGY DEPT., MACHINERY SYSTEMS ADMINISTRATION DIV.
Customer Center
TEL +81-46-273-8989 FAX +81-46-273-8990
URL https://www.hansou.jp
Manual Code SDBR-003 ‘23/01
●Particular attention is given to the manufacture and transportation of SANKI
conveyors. However, if you need any information about the use or failure of the
machine or any other matters, please contact our customer service. Also do not
hesitate to ask us for information about conveyors in general.
●The specification given in this manual are subject to change without notice.
hansou.jp
Contact us
Table of contents
Other SANKI Industrial Equipment manuals
Popular Industrial Equipment manuals by other brands

Siemens
Siemens RM400 C Series operating manual

HydraMaster
HydraMaster Titan 875 owner's manual

Timco Tools
Timco Tools PSJ40W Assembly and operation manual

Burndy
Burndy Continental Industries thermOweld RX-1 instructions

IEMCA
IEMCA SIR52 MS52 P Manual for use and maintenance

Nexen
Nexen AIR CHAMP FMCBE-625 user manual

Seifert
Seifert 730640B001 user manual

Leroy-Somer
Leroy-Somer LSA R 49.1 Installation and Maintenance

Premier
Premier 16 COUPLING Installation, Inspection, Operation & Maintenance Guide

Siemens
Siemens SENTRON PROFINET Proxy SPP2000 manual

Synrad
Synrad Novanta OEM ti Series user manual

Siemens
Siemens Simatic S7-300 Getting started