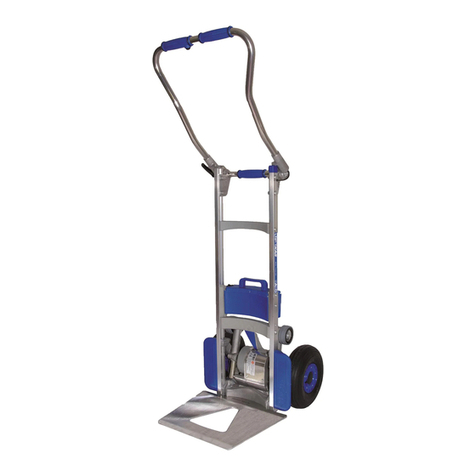
SANO Liftkar PT User manual

Electric-Powered Stairclimbers
For People with Walking Difficulties
Liftkar PT-U
Liftkar PT-S
Liftkar PT-A
INSTRUCTION MANUAL
SANO Transportgeraete GmbH
Am Holzpoldlgut 22
4040 Linz/Lichtenberg
Austria
Tel.: +43 (0) 7239 / 510 10
Fax: +43 (0) 7239 / 510 10 14
www.sano.at
USA Distributor MOBILITY LIFTER, LLC
Issued: 06/2018
Subject to updates!
US

2/52

3/52
Contents
1Introduction...................................................................................................... 6
2General Safety Guidlines................................................................................. 6
3Description/Technical Data............................................................................. 8
3.1 PT-U model for a wide range of wheelchairs..................................................... 8
3.1.1Technical data for PT-U model........................................................................... 9
3.1.2Scope of supply for model PT-U ........................................................................ 9
3.2 PT-S model with integrated seat ..................................................................... 10
3.2.1Technical data for PT-S model......................................................................... 10
3.2.2Scope of supply for model PT-S....................................................................... 11
3.3 PT-A model..................................................................................................... 11
3.3.1Technical data for PT-A model......................................................................... 12
3.3.2Scope of supply for model PT-A....................................................................... 12
3.4 Technical data applying to all models .............................................................. 13
3.5 Technical data for battery pack........................................................................ 14
3.6 Names of main parts........................................................................................ 14
3.6.1Handle unit....................................................................................................... 14
3.6.2Battery pack..................................................................................................... 15
3.6.3Climber unit...................................................................................................... 15
4Control features ............................................................................................. 16
4.1 Control cluster at top end of handle unit column.............................................. 16
4.1.1Main switch (1)................................................................................................. 16
4.1.2Speed selector switch (2)................................................................................. 16
4.1.3Mode switch (3)................................................................................................ 17
4.1.4LED display (4)................................................................................................. 17
4.1.5Beeper function for correct transport angle...................................................... 18
4.2 UP/DOWN switch left and right on handle........................................................ 18
4.3 Clamping nut on adjustable handle.................................................................. 19
5Preparation before you start......................................................................... 20
5.1 Climber unit, battery pack and handle unit....................................................... 20
5.1.1Adjust handle ................................................................................................... 21
5.1.2Headrest........................................................................................................... 21
5.2 Additional preparations (depending on model)................................................. 22
5.2.1Operating seat position on Liftkar PT-S ........................................................... 22
5.2.2Loading a wheelchair onto a Liftkar PT-U (general information) ...................... 24

4/52
5.2.3How to load a self-propelled wheelchair (PT-U)............................................... 26
5.2.4How to load a transport wheelchair (PT-U) ...................................................... 28
5.2.5How to unload a self-propelled wheelchair (PT-U)........................................... 29
5.2.6How to unload a transport wheelchair (PT-U) .................................................. 30
5.2.7Loading a wheelchair onto a Liftkar PT-A ........................................................ 31
5.2.8Detaching the Liftkar PT-A from the wheelchair............................................... 33
6Operation on stairs ........................................................................................ 34
6.1 General instructions for operating on stairs...................................................... 34
6.2 Climbing UP stairs............................................................................................ 35
6.3 Climbing DOWN stairs ..................................................................................... 37
6.4 Operation on spiral staircases.......................................................................... 38
6.5 Parking the Liftkar PT on the stairs.................................................................. 39
6.6 Ideal transport angle ........................................................................................ 39
6.7 Getting on and off the stairclimber ................................................................... 39
7Operation on a ramp...................................................................................... 40
7.1 Moving DOWN a ramp..................................................................................... 40
7.2 Moving UP a ramp ........................................................................................... 40
8Charging the battery pack............................................................................. 41
8.1 Charger unit ..................................................................................................... 41
8.1.1Technical data.................................................................................................. 42
8.1.2Safety guidelines.............................................................................................. 42
8.1.3Use only for the purpose intended ................................................................... 42
8.2 Mobile charger (optional).................................................................................. 43
8.2.1Technical data.................................................................................................. 43
8.2.2Safety guidelines.............................................................................................. 43
8.2.3Use only for the purpose intended ................................................................... 44
8.3 Connecting charger unit to battery pack........................................................... 44
9Maintenance, care and transport.................................................................. 45
9.1 Maintenance..................................................................................................... 45
9.2 Cleaning........................................................................................................... 45
9.3 Battery pack..................................................................................................... 45
9.4 Brakes and inside rims of main wheels............................................................ 46
9.5 Spares and repairs........................................................................................... 46
9.6 Transport.......................................................................................................... 46
9.7 Disposal ........................................................................................................... 46

5/52
9.8 Second Hand Usage........................................................................................ 47
10 Trouble shooting............................................................................................ 47
11 Warranty and product liability....................................................................... 48
11.1 Warranty........................................................................................................... 48
11.2 Product liability................................................................................................. 48
11.3 Declaration of conformity.................................................................................. 48
11.4 Registered patents........................................................................................... 49
11.5 Please note...................................................................................................... 50

6/52
1 Introduction
Congratulations!
Your new Sano Liftkar PT-U and PT-A provides you with an easy method of
conveying wheelchair users up and down stairs safely. The Liftkar PT-S provides you
with a method of transporting a disabled person up or down the stairs while seated
on the device and not in a wheelchair. The Liftkar PT is a mobile stair-climber,
meaning you can take it with you to use on any stairs. Liftkar PT gives you more
freedom as a result. At the same time, professionals or caregivers that have been
trained and certified, no longer need to strain their backs on the stairs.
Releasing a lever that is easily accessible without the operator having to bend down
lets the Liftkar PT be dismantled into 3 handy parts: the climber unit approximately
(15 kg/ 33 lbs) and the battery pack and handle unit approximately (4 kg/ 9 lbs each).
All parts are easy to stow away because they are lightweight and compact.
On stairs the Liftkar PT is remarkably smooth to operate and safe to handle. As a
mobility provider, partner, relative or friend, Sano wishes you all the best in using this
stair-climber. We hope you will find this instruction manual useful in finding out how to
operate your Liftkar PT.
In order to update you about product news as well as technical changes (e.g.
options, accessories) we ask you to register your product online.
http://www.sano.at/en/product-registration
2 General Safety Guidlines
▪Read these instructions carefully. Make sure you comply with all instructions in
this manual and on signs fitted to the equipment. Climbing stairs presents a risk
in itself and not complying with these instructions could cause accidents.
▪The stairclimber may only be used for the purpose for which it has been
designed –transporting people on stairs.
▪Maximum weight should be honoured and never exceed the maximum capacity.
▪The Liftkar PT may only be operated by people who
- have proof of having been trained in how to operate the stairclimber
- can walk upstairs backwards
- are both physically and mentally sound
- are able to maintain balance without great physical strain.
- are not under the influence of alcohol or substance abuse.
▪Never operate the Liftkar PT on surfaces that are wet, slippery, polished or
waxed, smooth, icy or generally do not give the operator sufficient stability, and
impair the braking performance of the brakes on the transport wheels. Rugs and
carpets can also present a risk and must be secured.
▪Under no circumstances may you let go of the handle while operating the
stairclimber on the stairs.

7/52
▪Make sure that nobody is below the Liftkar PT while in operation on stairs.
▪A safety belt must always been used when transporting people with Liftkar
stairclimbers.
▪The safety belt must always be in the closed position regardless of whether a
person is being transported or not. Never allow the safety belt to hang over
the side to the left or right. Risk of jamming the wheels –danger of falling. Risk
of damaging the stairclimber.
▪For transporting people using Liftkar stairclimbers, only use wheelchairs fitted
with a safety belt or other personal retention system.
▪Make sure you always wear closed, non-slip shoes when operating the
Liftkar PT.
▪Do not use the Liftkar PT with a passenger until trained by a certified
Liftkar PT trainer and have taken ample time to perfect the use of the
product on your own. Once trained begin practicing without a payload. Next,
try operating it again with somebody as lightweight as possible who is not
disabled. The test passenger should hold onto a handrail or a second person
during the climb.
▪Always start by using the lowest speed first (setting 1). Do not switch from
single step mode to continuous mode.
▪Never reach into the transport mechanism with your hands while the battery
pack is connected. (Risk of injury may result).
▪When transporting the Liftkar PT itself, Sano recommends undoing the lever
screw (stays on handle, so there is no risk of losing it) and taking the
stairclimber apart. This will prevent it from being switched on inadvertently and
in this form the Liftkar PT is easier to transport.
▪The Liftkar PT is supplied with a powerful, replaceable 5 Ah / 24 Volt battery
pack, which should always be fully charged before using the stairclimber. If, for
whatever reason, the battery pack should run out of power while in operation on
stairs, move the stairclimber down the stairs and replace or recharge the
battery. It is always possible to move down at least one flight of stairs,
even with an empty battery pack. The first sign of the battery pack running
out is indicated by the stairclimber's performance. The Liftkar PT becomes
slower and appears to be struggling. Inexperienced operators are warned by
the LED display: if the battery pack needs to be recharged the LED display
starts flashing, alternating between red and green and an intermittent acoustic
warning signal.
▪Do not use the stairclimber if unusual noises and/or vibrations occur while the
Liftkar stairclimber is in operation. Withdraw the stairclimber from use and have
it inspected by an authorized technician.
▪Please observe the following instructions regarding storing and operating your
Liftkar stairclimber:
Avoid exposing the stairclimber to high temperatures such as direct sunlight and
high humidity, e.g. due to use in saunas, in the rain etc, because there is a risk
of overheating, burning and damaging the stairclimber. Avoid exposing the
stairclimber to very low temperatures below 5°C/41F.

8/52
3 Description/Technical Data
3.1 PT-U model for a wide range of wheelchairs
This model enables you to transport almost any (non-motorized) standard and
transport wheelchair (including children’s and sports wheelchairs) up and down stairs
without any modifications. Features folding platforms on either side for supporting
the wheels of the wheelchair and a handy, easy-to-use adjustable retainer which
clamps the backrest in place (maximum width 495 mm/ 18 inches).
Suitable for professional mobility providers and private users. Takes up slightly more
space on the staircase than the other models. Loading and unloading the wheelchair
takes less than a minute at each end of the journey.
Note: with some wheelchairs it may be necessary to raise or remove any anti-tip
devices. If the anti-tip devices are fixed then they will need to be modified to the
removable or foldable type.
Liftkar PT-U.…………….…………….…………………..item no. 045 728

9/52
Space requirements
on all landings
including u-shaped
(1.1m/ 43.3 in. x .9m/
35.4 in.)
3.1.1 Technical data for PT-U model
•Safe working load: 130 kg
(incl. wheelchair) 160 kg/ 352 lbs
Maximum weight never to be exceeded
•Maximum width of backrest: 495 mm/ 19.49 in.
•Maximum track width of wheelchair: 730 mm/ 28.74 in. (measured on outside
(of wheels)
•Wheel diameter: 200 mm/7.87 inches
•Track width (outside): 297 mm/11.69 inches
•Weight (total):27,6 kg/60.72 lbs
•Weight (climber unit):16,7 kg /36.74 lbs
(incl. side platforms)
•Overall height: 1130 mm/ 44.49 in.
•Overall width: 760 mm/ 29.92 in. (platforms down)
395 mm/ 15.55 in. (with side platforms up)
482 mm / 18.98 in. (handle unit)
•Overall length: 385 mm/ 15.15 in.
(without wheelchair)
•Any Stair depth: 6 inches include winding
•Riser Height: 8.26 inches
Manueverability on stairs is the width of Liftkar plus 4 inches.
NEVER LEAVE A PERSON UNATTENDED ON THE STAIRS UNLESS IN AN
EMERGENCY
3.1.2 Scope of supply for model PT-U
On delivery the box should contain the following components:
•Climber unit with folding side platforms
•Handle unit including backrest clamp
•Headrest
•Battery pack
•Charger
•Instruction manual
If one of these components is missing or damaged, please contact your dealer.

10/52
Space requirements on all
landings including U-
shaped
(.8m. X .9m)
(31.5 in.x 35.4 in.)
3.2 PT-S model with integrated seat
This model includes an integrated chair with
adjustable backrest and armrests attached to
the handle unit. The handle unit, battery pack
and climber unit can be quickly dismantled by
releasing a single lever screw (stays on
handle, so there is no risk of losing it). The
seat folds down to save space. The
maximum passenger weight is160 kg/ 352
lbs.
Highly suitable for very steep, narrow and
spiral staircases. This compact design of
seat and main wheels with a diameter of just
(200 mm/ 7.87 inches) allows for plenty of
clearance.
Liftkar PT-S item no. 045 724
3.2.1 Technical data for PT-S model
•Safe working load:
(passenger weight) 160 kg/ 352 lb.
Maximum weight never to be exceeded
•Wheel diameter: 200 mm/ 7.87 in.
•Track width (outside): 297 mm/ 11.69 in.
•Weight (total):30,5 kg/ 67.1 lb.
•Weight (climber unit + seat): 18,5 kg/ 40.7 lb.
•Overall height: 1130 mm/ 44.49 in.
•Overall width: 505 mm/ 19.88 in. (incl. armrests)
•Overall length: 675 mm/ 26.57 in. (600 mm/23.62 in. with seat and
armrest folded away)
•Any Stair Depth: 6 inches
•Riser Height 8.26 inches
Manueverability on stairs is the width of Liftkar plus 4 inches.
NEVER LEAVE A PERSON UNATTENDED ON THE STAIRS UNLESS IN AN
EMERGENCY

11/52
3.2.2 Scope of supply for model PT-S
On delivery the box should contain the following components:
•Climber unit
•Handle unit including: seat, backrest and folding armrests
•Battery pack
•Safety Belt
•Headrest
•Charger
•Instruction manual
If one of these components is missing or
damaged, please contact your dealer.
3.3 PT-A model
This model is designed to accommodate
all Quick Release wheelchairs by use of
special adapters. Each adapter is
specific to the wheelchair brand and
model. Passenger weight with
wheelchair is 160kg/ 352 lbs.
Liftkar PT-A ……. item no. 045 722

12/52
Space requirements
on all landings
including U-shaped
(.9mx.9m)
(35.4 in.x 35.4 in.)
3.3.1 Technical data for PT-A model
•Safe working load:
(incl. wheelchair) 160 kg / 352 lb.
Maximum weight never to be exceeded
•Minimum wheelchair width
(inside frame): 320 mm/ 12 in.
•Wheel diameter: 200 mm/ 7.87 in.
•Track width (outside): 297 mm/ 11.69 in.
•Weight (total):24,7 kg/ 54.34 lb.
•Weight (climber unit):15,2 kg/ 33.44 lb.
•Overall height: 1130 mm/ 44.49 in.
•Overall width: 482 mm/ 18.98 in. (without wheelchair)
•Overall length: 385 mm/ 15.16 in. (without wheelchair)
•Any Stair Depth: 6 inches
•Riser Height 8.26 inches
Manueverability on stairs is the width of Liftkar plus 4 inches.
NEVER LEAVE A PERSON UNATTENDED ON THE STAIRS UNLESS IN AN
EMERGENCY
3.3.2 Scope of supply for model PT-A
On delivery the box should contain the following components:
•Climber unit
•Handle unit
•Battery pack
•Headrest
•Charger
•Instruction manual
If one of these components is missing or damaged, please contact your dealer.
Important:
Your wheelchair must be fitted with special adapters before it can be
transported using the Liftkar PT stairclimber. Please contact your dealer
immediately if this is not the case.

13/52
3.4 Technical data applying to all models
•Climbing speed: three speeds can be selected on the control cluster:
I = Slow 10 steps per minute
II = Medium 14 steps per minute
III = Fast 18 steps per minute
•Maximum step height: 210 mm/ 8.267 inches.
•Range per recharge: depending on usage a new battery recharge rate is
between 300-500 steps. Rate will change based on: age of battery, weight of
passenger, going up or down stairs, or constant (professional) use.
For professional use it is highly recommended to have a replacement battery
pack, and a mobile charger. Liftkar PT cannot be in use during replacement
of battery.
•Protection against overloading:
1) Mechanical overload protection (sliding hub)
2) Electronic overload protection
•Electrical data
Protection class IPX4
Nominal voltage 24 VDC
Max. current 30 A
Note on electromagnetic compatibility (EMC)
The electric motors corresponds with the protection requirements laid down in
the European Council Directive on the legal regulations of the member states
concerning electromagnetic compatibility (EMC) (2004/108/EC). However, it
cannot be completely excluded that under certain conditions an electrical malfunction
occurs, especially in connection with the use of mobile phones. Do not operate the
stairclimber near life support systems or equipment that could injure users if it fails.
These could be negatively affected under certain conditions, and trouble-free
operation of the stairclimber may be impaired. If you notice the stairclimber
malfunctioning or behaving strangely near other electrical equipment then remove
the stairclimber from service and have it inspected by an authorized dealer.

14/52
3.5 Technical data for battery pack
Weight of battery: 4,3 kg
Capacity: 5,2 Ah
Voltage: 24 VDC
(2x 12 VDC –5,2 Ah)
Type of battery: maintenance-free, leak-safe AGM cell (approved by DOT
and IATA for air freight)
Fuse: internal fuse (30 Amp) and electronic cut-out at charging
contact
Charging contact: DC jack ø 2,1 x 9,5 mm / (8 x .37 inches)
Power outlet: via 2 robust flat contacts to two spring-loaded contacts on
the climber unit
BATTERIES CAN ONLY BE REPLACED BY A SERVICE CENTER
3.6 Names of main parts
3.6.1 Handle unit
Handle unit column 1
Adjustable handle 2
Clamping nut for adjusting handle 3(control
feature)
Crossbar 4
Lever screw 5
Control cluster 6(control feature)
UP/DOWN switch 7(control feature)
2
3
6
5
4
7
1

15/52
5
6
3
4
2
1
3
1
2
3.6.2 Battery pack
Charging socket 1
Power outlet 2
Carrying handle 3
3.6.3 Climber unit
Lifting frame 1
Support wheels on lifting frame 2
Main wheels 3
Automatic step edge brakes 4
Spring-loaded contacts to battery
power outlet 5
Mounting socket for handle unit
column 6

16/52
4 Control features
4.1 Control cluster at top end of handle unit column
4.1.1 Main switch (1)
Use this switch to switch the stairclimber on via a safety circuit. Press it again to
switch off. The Liftkar PT switches itself off automatically after 10 minutes.
4.1.2 Speed selector switch (2)
Use this switch to choose the climbing speed of the lifting frame mechanism. (See
section 3.7 for absolute figures)
I: Slow 10 steps per minute
II: Medium 14 steps per minute
III: Fast 18 steps per minute
4
2
1
3

17/52
4.1.3 Mode switch (3)
Use this mode switch to switch between single-step mode and continuous mode
and back to single-step mode.
For safety reasons, single-step mode is always selected first each time the main
switch on the Liftkar PT is switched on. In this mode the lifting frame and support
wheels come to a halt in a neutral position between the main wheels after each
complete step cycle has been completed. The next step cycle is started by pressing
the UP/DOWN switch (4.2) again.
Operators (mainly professionals) should not switch over to continuous mode unless
they are in complete control of the stairclimber this is used only on straight stairs and
without landings. In this mode the UP/DOWN switch does not need to be pressed for
each step.
4.1.4 LED display (4)
The LED display gives a clear indication of the status of the Liftkar PT:
Green (not flashing): normal and in single-step mode.
Flashing green: Warning! Continuous mode is switched on. Otherwise normal.
Red (not flashing): The Liftkar PT is at too flat an angle to the rear or leaning too far
forward. If the angle is not upright enough the angle sensor blocks operation of the
climbing mechanism. Pressing one of the UP/DOWN switches causes the LED to
display red. If the transport angle is too steep the sensor switches off the climbing
function and the LED displays red as long as the UP/DOWN switch is pressed.
Flashing red: the stairclimber is overloaded and the electronic overload protection
stops the Liftkar PT. (The LED flashes until you let go of the UP/DOWN switch.
Pressing the UP/DOWN switch again allows you to continue up or down).
Alternating red and green: the battery pack is running low and urgently needs to be
recharged. The stairclimber will certainly manage another flight of stairs, but it is
recommended that you move down stairs and either change the battery pack or
recharge it with the quick charger supplied. In addition, an integrated beeper provides
an acoustic signal to indicate that the battery charge is low. The beep frequency
increases the lower the battery level.

18/52
4.1.5 Beeper function for correct transport angle
By default the beeper function is active. While the beeper function is active an
acoustic signal is given as soon as the stairclimber is no longer in the ideal
stairclimbing angle.
To deactivate press the main switch (1) for approx. 30 seconds. A short acoustic
beep signal indicates that the function is now off. Repeat the procedure to reactivate
this function.
WARNING: Deactivating this function eliminates audio notification of incorrect angle
and could be a hazard! Deactivate at your own risk.
4.2 UP/DOWN switch left and right on handle
The UP/DOWN switch is labelled with a
neutral position (0) and two triangles
pointing away from the operator (forwards)
and towards the operator (backwards).
Down:
press triangle pointing forward holding
button down for one complete cycle.
Up:
press triangle pointing backward holding
button for one complete cycle.
UP
DOWN

19/52
4.3 Clamping nut on adjustable handle
The clamping nut is captive (cannot be
lost) and is designed to clamp the height-
adjustable handle unit in place. The
clamping nut features a special design
that allows it to be tightened by hand. It is
not necessary to tighten the nut with
force. To find out how far the clamping
nut should be tightened, Sano
recommends rotating the nut clockwise
with the handle positioned low down so
that the operator can attempt to push the
handle downwards using the weight of the
upper body. Keep tightening the nut until
the handle cannot be shifted. Very little
force is applied to the handle while
moving on steps since the stairclimber is
balanced while in operation. The only time
slight pressure is needed is while tilting
the unit during loading and unloading.
Loosening the clamping nut by one turn is
quite sufficient for the handle to slide easily. The clamping range setting is adjusted
using a concealed setting screw (patented design), which also acts as a safety
screw and may only be adjusted by an authorized dealer. There is no point in
undoing the nut any further since the clamping range does not change. After
approximately three turns the clamping nut is blocked so that it cannot be lost.
Note 1: If the clamping nut cannot be undone, then it usually is already undone. Please
check whether the handle slides freely up and down, or whether you can see a section of
exposed thread between the nut and the handle.
Note 2: The following general rule applies for setting the height of the handle: The upper
edge of the handle (where the UP/DOWN switches are located) should be at about the same
height as the operator's shoulders (see also start-up section).

20/52
5 Preparation before you start
5.1 Climber unit, battery pack and handle unit
The following preparations need to be
made to the Liftkar PT as a base unit:
1. Fit battery pack over the brown
contact housing on the climber unit
with the recess pointing towards the
handle mounting socket (photo 1).
DO NOT FORCE.
2. Insert the handle unit column into the
battery pack recess (photo 2) and into
the mounting socket. Press the handle
unit down into the mounting socket
until the lever screw on top of the
control cluster is pressed upwards
(photo 3).
3. Tighten the lever screw clockwise.
4. Switch on the main switch (LED display should light up green).
5. Select climbing speed I-II-III (Beginners should always select I).
6. Test the brakes (see section 9.4).
7. Experienced/ professional operators only: if required, press mode switch III
to switch from single-step mode to continuous mode.
2
3
1
Other manuals for Liftkar PT
1
This manual suits for next models
6
Table of contents
Other SANO Fitness Equipment manuals
Popular Fitness Equipment manuals by other brands

Christopeit Sport
Christopeit Sport TM2 Running Assembly and exercise instructions

GIBBON Slackline
GIBBON Slackline SLACKRACK FITNESS EDITION user guide

Ironmaster
Ironmaster Spotting Stand operating instructions

Life Span
Life Span CORTEX PR-3 user manual

SportTec
SportTec 28099 user manual

MTR+
MTR+ MyoBravo Operator's manual

Exerfly
Exerfly PORTABLE instruction manual

Exigo
Exigo QUARTER RACK XF-1321 instruction manual

NordicTrack
NordicTrack Nordic Fitness Chair Assembly, operating and training program

Weider
Weider 2990 I Manual do utilizador

Sunny Health & Fitness
Sunny Health & Fitness SF-B1203 user manual

Smith
Smith DA007 owner's manual