SANO Liftkar MTK 190 User manual

Operating Manual
Liftkar MTK 190
Liftkar MTK 310-B
issued: 03/2018 – subject to updates. en

Page 2

Page 3
Table of contents:
1. Model range
................................................................................................................................. 3
2. Technical features
.................................................................................................................... 3
3. Dear user of L FTKAR
............................................................................................................ 4
3.1. Safety measures .....................................................................................................................................
4
4. Starting operation
..................................................................................................................... 4
4.1. System of GO NG DOWNSTA RS .......................................................................................................
5
4.2. System of GO NG UPSTA RS ..............................................................................................................
5
5. Automatic brake
..................................................................................................................... 6/7
6. Operating instructions
........................................................................................................... 8
7. Es gibt zwei Gruppen von Zubehör
................................................................................ 9
7.1. Accessories ...........................................................................................................................................
9
7.2. Accessories ........................................................................................................................................
10
8. Specifications
........................................................................................................................... 11
9. Troubleshooting guide and REMED ES
..................................................................... 11
10. Maintenance
............................................................................................................................ 12
10.1. Directions for using the batteries ..................................................................................................
12
11. Liability
....................................................................................................................................... 13
12. CE-Product declaration
.................................................................................................... 13
13. Patents
....................................................................................................................................... 13

Page 4
1. Model range
L FTKAR MTK 190
L FTKAR MTK 310-B
2. Technical features
• universal for stairs and level ground because of its standard pneumatic t res
• 24 Volt quick-change batter unit
• motor unit with electromagnetic brake and high-power gearbox
• electronic power switch with integrated overload protection(This is re-switching
on automaticall )
• crank drive with sliding clutch against mechanical overload
• model MTK 310 standard with automatic brake on the main wheels
• the support wheels are permanentl braked
• easil balanced because of the wide possible angle of inclination
• small turning radius (important on narrow stair landings)
• also well-functioning on (room ) winding stairs

Page 5
down
up
3. Dear user of L FTKAR
This brochure makes ou familiar with the handling of LIFTKAR.
It is for our own benefit, to read this operating manual ver carefull . You are avoiding
transport damages and after a short time of exercising ou will be able to use this transport
device with all its advantages.
In order to update ou about product news as well as technical changes (e.g. options,
accessories) we ask ou to register our product online.
http://www.sano.at/en/product-registration
3.1. Safety measures
1. Start exercising with a low-weight load onl .
As soon as ou are perfectl handling the s stem of LIFTKAR, ou can increase the
weight up to full load.
2. Keep out of the danger area beneath the cargo.
3. The load has to be fastened at the frame of LIFTKAR b the strap bar.
4. Lifting the load on level ground (that means without steps) onl b switching
direction UP (see picture at the bottom of the page). Till maximum height is reached!
Descending b switch direction DOWN (see picture)
Do not descend b switching direction UP: that means: After having reached the
maximum height the switch direction UP must not be used further, as undesirable
accelerations could accur.
5. For maintenance work and repairing ou must remove the batter unit.
6. Wear onl working clothes and shoes in due order to avoid injuries and accidents
caused b stumbling over or being caught.
4. Starting operation
Put the charged batter unit in its place and insert the plug.
The ellow control LED at the cover of the motor unit is lightning.
The crank drive s stem is switched on b pressing the tumbler switch at the upper or lower
handhold (see picture).
Alwa s pull out the plug after use!
If the plug socket remains inserted more than 24 hours, there is a risk of discharging too
much and the batteries could be permanentl damaged.

Page 6
4.1. System of GO NG DOWNSTA RS
(pictures from top to bottom)
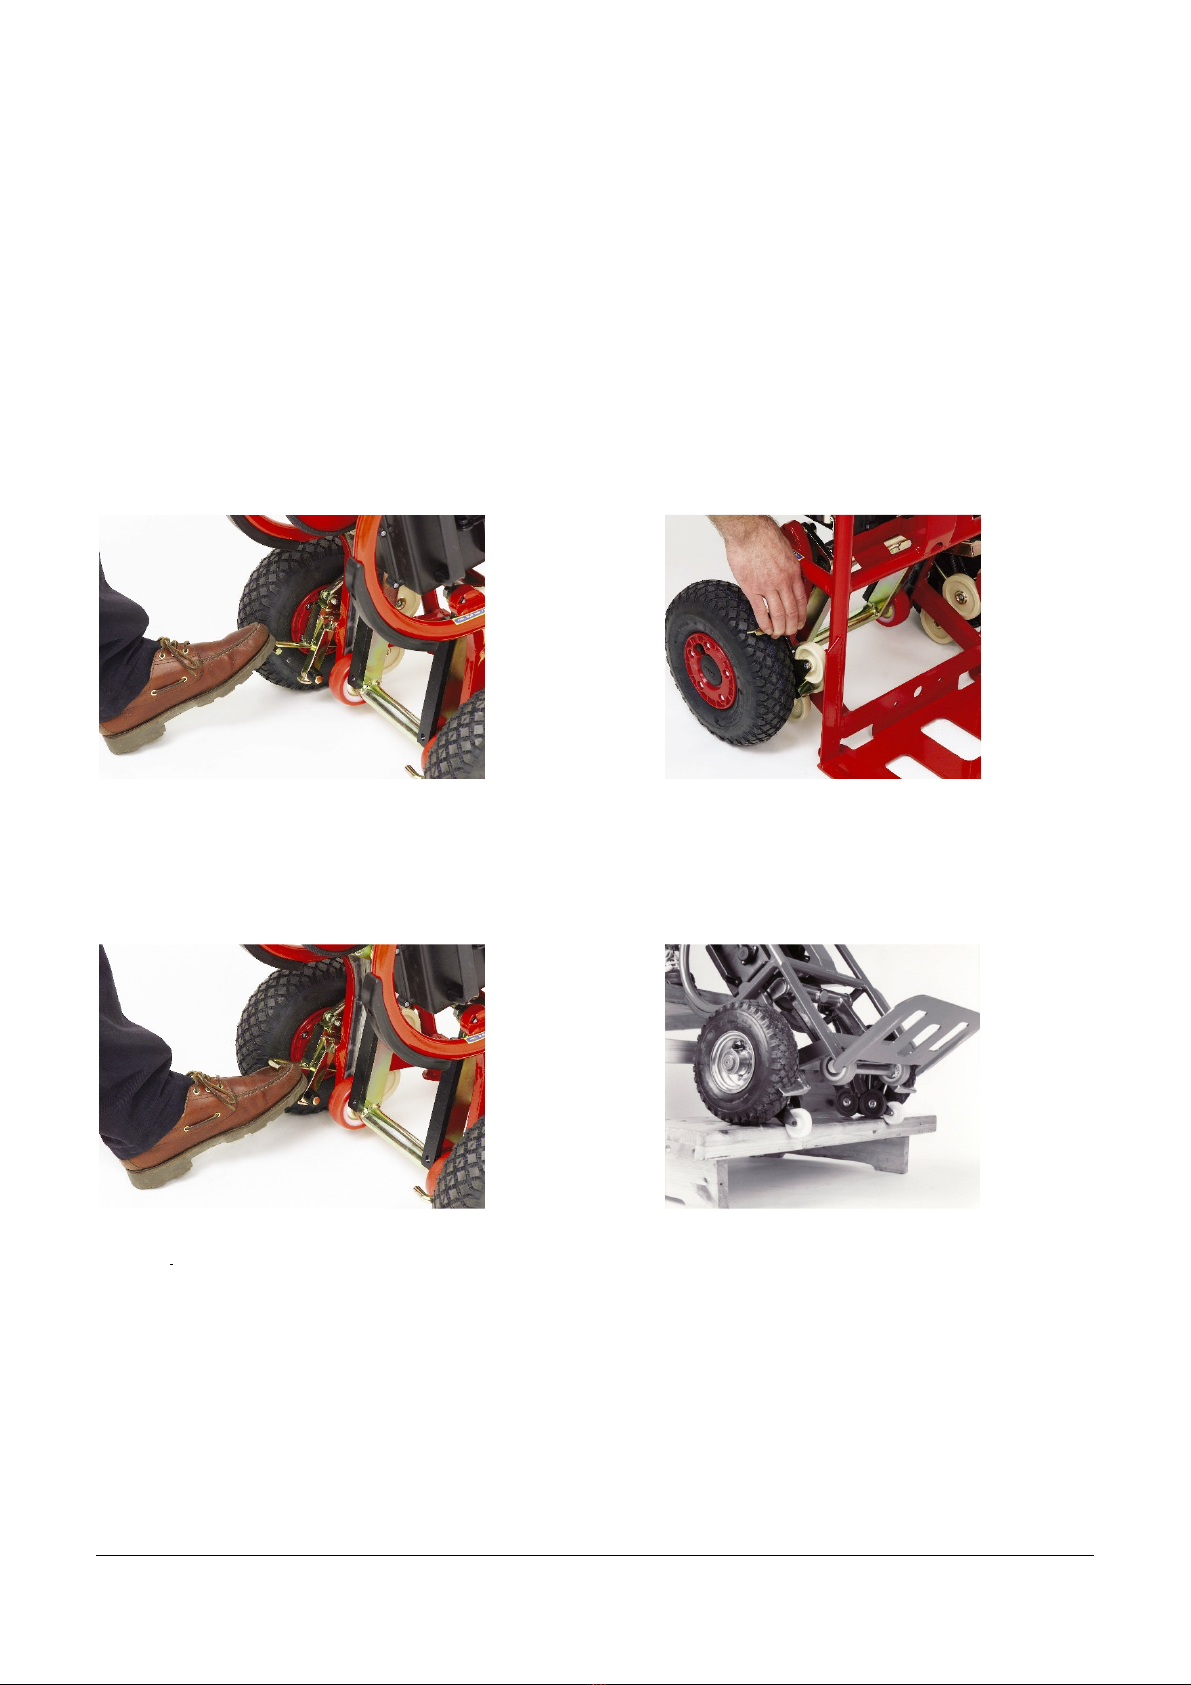
Moving to a safe distance from the step margin -
(4-10 cm distance wheel shaft to step margin) then
STOP!
Actuate the switch (arrow forward).
The crank drive s stem with the small support wheels
moves forward and reaches over to the next step below.
As soon as LIFTKAR is lifting, the permanentl braked
support wheels pull the hand truck forward over the step
margin and LIFTKAR is descending under controlled
balance.
mportant:
1. Moving to 4 - 10 cm to the step margin and STOP!
2. As soon as LIFTKAR is lifting, let it go.
Do not pull back too strongl !
3. On winding stairs: LIFTCAR has to be turned a bit
on each step so that both wheels are stopped at
the same distance from the step margin.
General remark:
Alwa s tr to find the balance.
As soon as ou have this under control ou will see, how
eas it is to work with LIFTKAR.
4.2. System of GO NG UPSTA RS
(pictures from bottom to top)
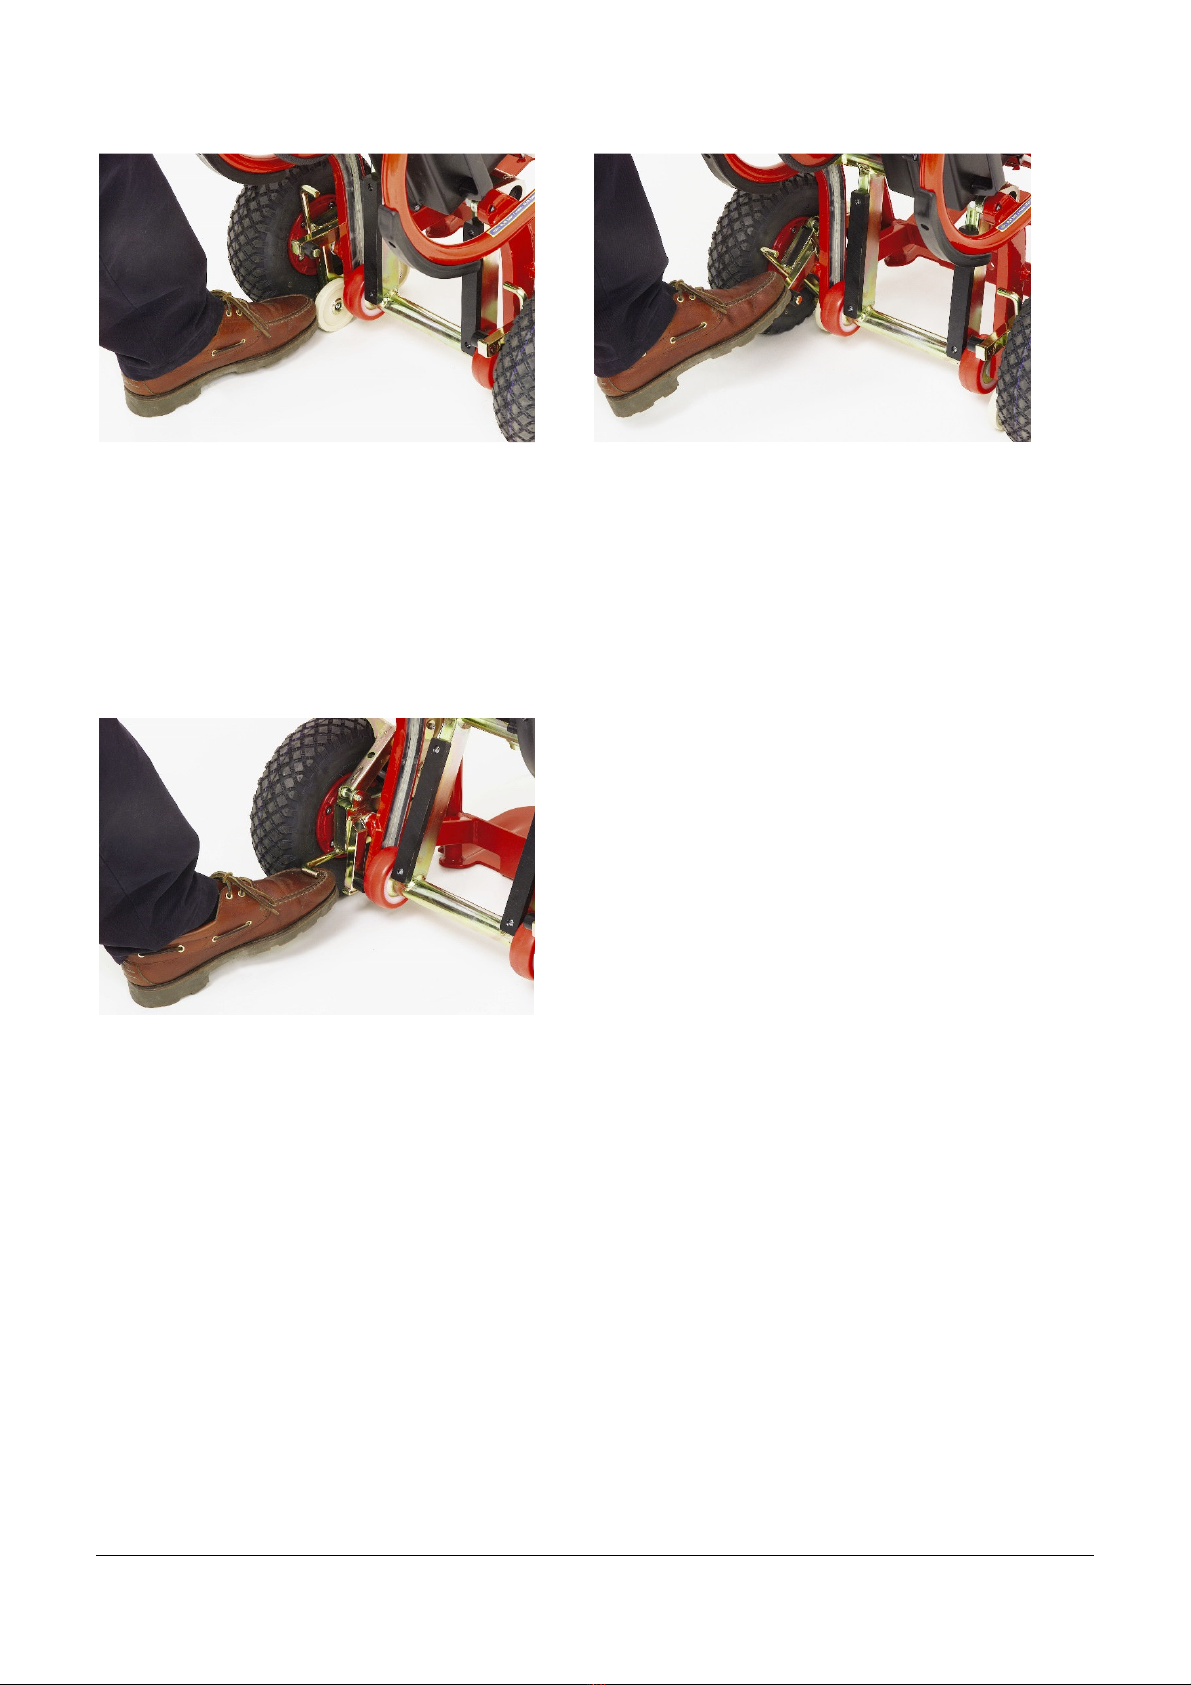
Pull back to the step margin of the next step above. B
actuating the switch (arrow backward) the crank drive
with the support wheels is extending backward and is
lifting LIFTKAR to the next step above.
mportant:
1. Alwa s pull back to the step margin. On winding
stairs both wheels have to be pulled back to the
stap margin on each step. After short exercising
the switch could be pressed permanentl making it
possible to work permanentl and quickl .
2. Minimum t re pressure 2.5 bar.

Page 7
5. Automatic brake
For the LIFTKAR model MTK 310 the automatic brake on the main wheels is part of the
standard equipment.
For the model MTK 190 this brake is available as additional accessor .
It can be built in afterwards.
There are 3 positions of the brake:
1. Free-wheel brake (backward free-wheel / forward braked) for going upstairs safel .
2. Neutral position for driving on level ground.
3. Automatic brake at the step margin for going downstairs safel .
b foot (push hard) or b hand
mportant: minimum t re pressure 2.5 bar because of ground clearance.
Switching on the step margin-brake from the neutral position:
Push up the handle LIFTKAR braked at the step margin
a
mportant:
1. When the step margin-brake is switched on, do not make strong turnings on level
ground or on stair landings.
On rough ground or at grated stairs there could occur damage to the plastic running
wheels of the brake.
2. If ou pull LIFTKAR back too much when going downstairs, it is possible that the step
margin brake will continuousl brake on stairs with low steps.
To release the brake ou have to put LIFTKAR in a more upright position.

Page 8
From step margin-brake back to neutral position:
From the free-wheel brake back to neutral position:
Note:
If there is too little ground clearance for the foot, then lift LIFTKAR a bit b the lifting s stem.
mportant:
If ou want to go upstairs with the brake switched on, the brake has to be switched on
before ou pull the LIFTKAR to the first step margin.
If ou pull the wheels to the step margin first and then switch on the brake it ma occur
that the brakes spring back to neutral position.
Push the back wheel of the brake
forward
Turning further b foot or hand to
neutral position.
(Then the middle wheel of the 3 brake
wheels is stopped b a cam on the
frame- when turning the brake anti-
clockwise.)
Switching the brake back to neutral
position b foot or b hand.

Page 9
6. Operating instructions
Stop position at the stair
The point of balance can be changed b inclining the frame. Please take care that the
working angle of the lifting s stem is changed as well when inclining the frame. This makes
the maximum step height lower.
This is also important when ou are alread on the stair landing and the handtruck still has to
go up the last step.
mportant:
When going down with inclined frame, please note: You are still standing on the stair landing,
holding the upper handholds. The lifting s stem is strongl inclined backwards. On higher
steps this ma cause that the supporting wheels do not touch the next step below
immediatel . Therefore LIFTKAR cannot be lifted from the upper step to the next step below.
Then the supporting wheels are partiall alread moving backwards. So the cargo is not lifted
completel . The handtruck could move downwards uncontrolled to the next step below.
When starting to go downstairs it is therefore important to hold the handtruck as upright as
possible and keep the balance.
This situation should definitel be exercised on the spot.
For high loads such as
drink dispensers
For low loads such as
washing machines
For easier lifting of heav
loads put the shaft of the
supporting wheels
backward. Then push the
foot on it!

Page 10
7. There are 2 groups of accessories
Accessories I: standard
Accessories II: additionall available
7.1. Accessories
1. Quick-change battery BU
The quick-change batter unit includes 2 pieces of gel-sealed, maintenance-free lead
batteries 7 Ah-12V which are connected in series. Maximum charging
current: 2.7 Ampere. Lead batteries are continuousl discharging a bit even when the
are not used.
• Therefore it is recommended to recharge the batteries once a month even when the
are not used.
• If the batteries of the batter unit have to be exchanged, it is absolutel necessar to
connect „+“and „–“correctl .
• In case of wrong connection the electronic power switch will be damaged.
2. Battery charger BC-220 VAC
Charges the batteries with 27.6 Volt and regulates the charging current up to max.0.5
Ampere automaticall . The charging time is about 9 hours, if the batter unit has been
discharged b normal use of LIFTKAR.
The batteries cannot be over-charged b this t pe of batter charger. As soon as the
red LED extinguishes, the batter is charged sufficientl .
3. Fastening strap with ratchet-drill + plastic-
covered hook model SB 3.5 m
For quick, reliable fastening of the load.
quick-change batter BU
batter charger BC 220 VAC

Page 11
7.2. Accessories
1. Quick battery charger BC 10-30 VDC
It makes the continuous use of LIFTKAR possible b
recharging in the truck or van. Even when the motor is
not running, the batteries can be charged. The time for
one full charge is 4-8hours. This batter charger is
speciall made for the capacit of the batteries, that
means that the required charging current and charging
voltage are never exceeded.(Direct charging b 24 Volt
electric tension of the truck would reduce the durabilit
enormousl because the generator capacit of the truck
is too high for these small batteries.)
2. Shovel attachment with 2 swivel castors model SA
It is simpl fixed to the shovel and secured b a spring cotter.
Under the edge at the front there are 2 swivel castors; made from n lon
(75x32 mm).The transport of bulk and heav loads is made much easier.
The load remains a bit tilted. On level ground ou can go on 4 wheels.
The turning on narrow stair landings is eas and safe.
a) shovel-attachment model SA-F: depth: 400 mm
standard
b) shovel-attachment model SA-LF: depth: 500 mm
for bulk loads, with the centre of
load situated in the front.

Page 12
8. Specifications
MTK 190 310
nominal weight
kg
190 310
capacit max. kg 230 340
max. motor power Watt 450 450
speed of climbing steps/min 16-18 8-9
capacit carr ing
nom. weight steps 170 60
own weight
without batter kg 30 35
9. Troubleshooting guide and REMED ES
L FTKAR handtruck must only be repaired by trained personnel!
The battery unit has to be removed from the handtruck during repair!
problem reason remedy
Electronic overload-
protection is switching on
Batter is discharged
Change batter unit or wait
a
few minutes. Then tr again to
press the switch at the hand
hold.
Overload Let the handtruck cool
down15 to 30 minutes
After inserting the plug
in the
batter unit the motor
does
not run and the electro-
magnetic brake does not
release
The fuse in the
batter is
burnt
through
Check the fuse
or tr with 2nd
batter unit
The plug socket does
not
have a good
contact
Change the plug socket.
Take
care: "+" und "–"have to be
placed correctl , otherwise
the electronic power switch
would be damaged
The brake does not
release,
therefore the
overload protection is
switched on
Check the wires of the
brake
at the motor.
LIFTKAR does not lift straight Different t re pressure
Correct the t re pressure
When going upstairs the main
wheels are descending ver
narrow to the step margin
T re pressure is too
low Correct the t re pressure

Page 13
10. Maintenance
In order to guarantee the operabilit and safet of LIFTKAR, it is recommended to have a
check made b trained personnel once a ear, if the LIFTKAR is regularl used.
A) Lubrication chart
1. Rod-end bearing at the crank drive
2. 2 pieces of main wheels
B) Chain drive
1. Check the tension of the chain.
Lubricate the chain onl slightl with chain grease.
(Do not use oil because the oil could reach the sliding clutch,
this would cause a decrease of the torque.)
C) Check of the coal brush
D) Battery check on damages of the covering.
10.1. Directions for using the batteries:
The batteries of the stairclimber are completel closed, maintenance-free gel-
sealed lead batteries.
2 units with 12 V each connected in series.
Rec cling like car batteries.
Note:
The batter is lasting ver long, if ou pa attention to the following:
• Charge the batter unit after each use.
• Use onl the original batter chargers. These are charging with the right tension
and current Overcharging is not possible with these batter chargers.
• If the stairclimber is not used for a longer time, charge the batter unit at least
once a month.
• Never discharge the batter unit completel . In case of a decrease of capacit ,
take a full-charged batter unit for further working. Charge the discharged
batter unit immediatel .
• The best temperature for charging is room temperature.
• Keep the batter unit dr and cool.

Page 14
11. Liability
SANO Transportgeraete GmbH is not liable as manufacturer for an damage to the
LIFTKAR MTK:
the LIFTKAR MTK is used for a purpose for which it is not intended.
the LIFTKAR MTK is not maintained regularl (once a ear) b an authorized
workshop, or b Sano.
the instructions in this manual are not complied with.
non-Sano components are fitted or linked to the LIFTKAR MTK.
original components are removed.
Please contact us for a list of authorised Sano service centres.
12. CE declaration of conformity
SANO Transportgeraete GmbH declares that the LIFTKAR MTK stairclimber
full complies with the relevant health and safet specifications laid down in
the EU directive for machines 2006/42/EG, appendix IIA. An changes made
to the product without our prior consent render this declaration void.
Jochum Bierma (Ing.), Managing Director
13. Patents
European patent

Page 15

Page 16
SANO Deutschland GmbH
Geigelsteinstraße 10
83080 Oberaudorf
Deutschland
Tel. +49 (0) 8033 / 308 96-0
Fax +49 (0) 8033 / 308 96-17
info@sano-treppensteiger.de
www.sano-treppensteiger.de
SANO UK Powered Stairclimbers Ltd.
Bristol Court, Betts Avenue
Martlesham Heath
Ipswich, Suffolk
IP5 3RY, England
Tel. +44 (0) 1473 / 333 889
Fax +44 (0) 1473 / 333 742
info@liftkardirect.com
www.liftkardirect.co.uk
SANO Transportgeraete GmbH
Am Holzpoldlgut 22
4040 Lichtenberg / Linz
Austria
Tel. +43 (0) 7239 / 510 10
Fax +43 (0) 7239 / 510 10-14
office@sano.at
www.sano.at
This manual suits for next models
1
Table of contents
Other SANO Fitness Equipment manuals