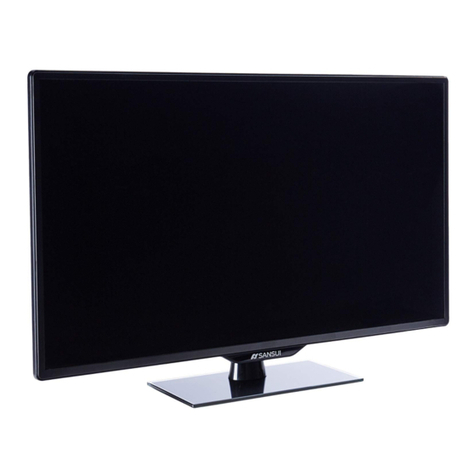
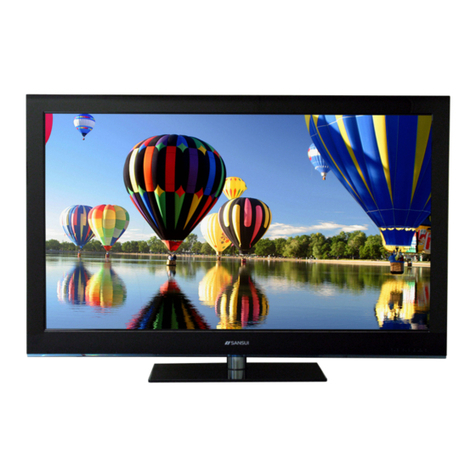
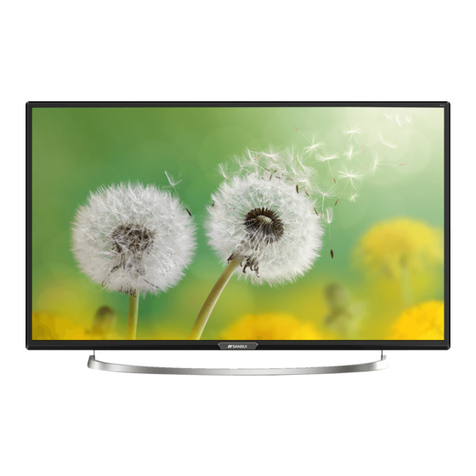
Sansui SMX2219 User manual

1
User Manual
SMX2219
BEFORE USING THIS PRODUCT READ THE INSTRUCTION AND CONSERVE FOR FUTURE REFERENCE, IF AN INCREASING
CORD BECOMES A FULL OR PARTIAL DAMAGE, DO NOT ATTEMPT TO REPAIR IT GO TO THE SERVICE CENTER MARKED IN
YOUR GUARANTEE; WITH A SPECIALIST TECHNICIAN, OR, WITH YOUR MANUFACTURER.
.
IMPORTED BY:
CTM DIGITAL S.A. de C.V.
Av. Lago Zurich No. 219, 12th floor, Plaza Carso Building, Col. Amplicon Granada, 11529
Mexico, Mexico City. Tel. (55) 4124-0114
ELECTRICAL SPECIFICATIONS: 100-240 See 50/60 Hz 70W
THE REMOTE CONTROL USES 2 "AAA" TYPE BATTERIES OF 1.5 V DC each (3 Vcc)
22
” LED
F
HD TV
55.88cm

2
The exclamation symbol within the
equilateral triangle is used to prevent the
user from the presence of important points
that must be observed in the operation and
maintenance of this product.
Caution
The lightning symbol enclosed in an
equilateral triangle is used to warn the user
about the presence of non-isolated "high
voltage" parts, sufficient to be considered a
danger factor by electric shock or
electrocution.
Safety information
High voltages are used in the
operation of this product, to
avoid the risk of electric shock,
do not remove the back cover
of the TV. Please go to the
qualified personnel for service.
The use of controls, adjustments or carrying out procedures
other than those specified here, may cause dangerous
radiation levels.
RISK OF ELECTRIC SHOCK
DO NOT OPEN
CAUTION

3
.
Important security
1. Read these instructions.
2. Keep this instruction manual.
3. Follow all warnings.
4. Follow all instructions.
5. Do not use this equipment near water.
6. Clean only with soft and dry cloth.
7. Do not block the ventilation slots. Install according to the manufacturer's
instructions.
8. Do not install the equipment near sources that emit heat, such as radiators, stoves,
stoves, or other appliances (including amplifiers) that emit heat.
9. Do not try to avoid the purpose of the polarized plug. This TV is equipped with a
polarized plug (one blade wider than the other). This plug must fit correctly in the
outlet. This is a safety feature.
If it is not possible to fully insert the plug, try inverting it. If this is still not possible,
consult an electrician to replace the plug with an appropriate one.
10. Protect the power cord from being stepped on or being bent, particularly at the
plug and at the part where it joins the equipment.
11. Use only the accessories specified by the manufacturer. 12. Use only furniture or
shelves recommended by the manufacturer or sold together with the equipment.
When an unstable piece of furniture or shelf is used, be very careful, the equipment
may fall and cause personal injury.
13. Disconnect the equipment during lightning storms or when it is not used for a long
time.
14. Refer all service to qualified personnel only. Service is required when the
appliance has been damaged in some way, if the power cord or plug is damaged,
liquid has been spilled or objects have fallen into the appliance, been exposed to rain
or moisture, does not operate normally, or has fallen.
15. The equipment must be disconnected from the main socket and place the On /
Standby switch in the Standby position and disconnect the power cord of the
appliance from the AC receiver.
16. The contact must be installed near the equipment and must have easy access.
17. This equipment should be placed in an environment where ventilation is not good,
such as a bookshelf or enclosed space, unless good ventilation is provided.
18. Do not expose the device to dripping or splashing liquids.
19. Do not place any source of danger on the device (e.g. objects filled with liquids,
candles).
20. Wall or ceiling mounting - The appliance must be installed on the wall or sky only
as recommended by the manufacturer.
21. Never place the TV, remote control or batteries near flames or other sources of
heat, including direct sunlight. To prevent the spread of fire, keep candles or other
flames removed from the TV, remote control and batteries all the time.
22. The USB terminal must be charged with 0.5 A under normal operation.

4
Installing the TV on the wall
1. First, put the TV on a flat table, on which you must put something soft to prevent the panel
from being scratched or damaged.
2. Use the screwdriver to remove the 4 screws that hold the base of the TV (the direction of
the arrows, reference image 1) and, remove the base (guard the screws and the base carefully).
3. Make or buy support with which the TV can be mounted on the wall, according to the size
of the part marked with the arrows in image 2 and 3.
4. Make 4 holes in the wall in the right place (the size is only for reference) and put the part of
the bracket that goes on the wall with the 4 screws (optional parts).
5. According to step 4, use a screwdriver to put the screws to the part of the bracket that goes
on the TV, for wall mounting.
Wall installation
A
Product family
Centimeters
VESA
Specification
(A*B)
Standard Screw
<co>
Q
uantity
LED Television
55.88
1
0cm x
1
0cm
BM4*L6
4
NOTE: "D" is the effective length of the thyme in the mounting hole.
The figures and illustrations in this manual are provided for reference only
and may different from your actual appearance. Product design and
specifications may change without prior notice.
Note:
1. Wall mounting bracket is an optional part.
2. When installing the TV, there should be no other items around or in front, please keep a
distance from other items.
3. When installing the TV, please ask qualified personnel about safety to avoid risks.
4. Installation images are for reference only.
5. Please follow the instructions in the manual about the installation of the TV.
6. The VESA wall mount kit is compatible with this TV.
Important security instructions
B
C
D

5
TV buttons
Note: The following is a functional diagram only, the arrangement and
position of the buttons between the different models, may vary.
: To turn on / off the TV.
SOURCE: To select the external input signal.
MENU: To show the main MENU and confirm the selected menu option.
CH+/-: For the selection of channels.
VOL+/-: To perform the volume adjustment.
Connection terminals
Note: The following drawings show various connection terminals, the position,
the accommodation and the number between the different models may vary.
AV Audio Inputs External AV
signal inputs and related sound
Right / Left,
Headphone output(Earephone)
When the headphones are
connected, the speakers are
deactivated
Video Inputs Y / VIDEO Pb Pr
Connections for video input from
your DVD / VCP
*Video input AV Y/VIDEO
* Composite video Y/VIDEO Pb
Pr
U
SB input
Connection for usb
HDMI input
Digitel line input from an HDMI
video corrector.
Digital audio output(COAXIAL)
digital audio output connection
to connect to the audio input of
an amplifier
Connection for antenna ANT 75
Input connection of TV antenna
or cache (75WHF / UHF).
O
ptical
Digital audio output
Entrada VGA
Entrada de sensl analoga ds PC.
P
C audio input
Audio input when you have the
VGA connection
TV buttons and connection

6
Installation and Connection of the TV
TV installation
Put the TV in a firm place, which must support the
weight of the TV.
To avoid risks, please do not expose the TV to hot or
humid places (as well as near lights, candles
heaters), and do not block the ventilation on the
back of the TV.
Connection of antenna and power cord
1. Connect the antenna cable to the antenna input
terminal of the TV.
2. Connect the TV power cord
(100-240V ~ 50/60Hz)
Ignition of the TV
3. Press the power button of the TV and the
indicator light will turn green. If the indicator light is
in standby mode (the light is red), press the power
button on the remote control or TV panel.
Note:
Reference image only.
Installation instructions of the base
1. Match the TV unit to the stand, then hold the TV stand, rotate and lock the TV unit with
force as the arrowhead.
2. Fix the screws in the support TV after installing the TV unit and TV stand.

7
Remote Control
Operation of the remote control
POWER
Turn on or off (standby) the TV
Mute
Press to suspend the sound,
press again or press VOL + to
reset the sound
SLEEP
Select the time in which the TV
will automatically turn off
.
S.SMODE
Press repeatedly to cycle
through the available sound
modes.
P.MODE
Press repeatedly to go through
the modalities available image.
Buttons
Allows you to navigate through the
menus on screen and adjust the
system according to your preference.
EXIT
Press to exit the menu or sub-
menu and cancel the function in
progress (if applicable).
Info
Press to show the source and
channel information.
FAV
: Select or cancel the
current channel as favorite.
FAV+: to move down on
favorite channels.
FAV-: to move up on favorite
channels.
NUMERIC BUTTONS
Press 0-9 to select a channel
directly when it is watching TV.
The channel changes after 2
seconds.
Press “-“to enter a multiple
channel number, as well as 2-
1.etc.
Return to the channel previously
Tuned.
MENU
Allow you to navigate in the
system of menus.
SOURCE
Press to change cyclically the
signal source of entry as follows:
TV->AV->YPBPR->HDMI->PC
->MEDIA
CH+/
-
:
Press to change channel.
VOL+/-: Press to increase or
reduce the volume level.
MTS
Press to select the audio mode,
you can select Stereo. Mono or
SAP.
EPG
E
lectronic program guides
.
Fast rewind in USB mode)
Fast forward (in USB mode)
Previous (in USB mode)
Next (in USB mode)
Stop (in USB mode)
Play / Pause (in USB mode)
Clist: press in TV mode, to
display the channel list.

8
I
nstallation of the batteries in the remote control
1. Open the back cover.
2. Use AAA batteries. When inserting the batteries, make sure that the polarity is correct,
that is, that the "+" marks are oriented as indicated in the compartment.
3. Position the back cover.
To prevent battery leakage that may cause damage to the remote control.
1. Install the batteries correctly according to what is indicated on the remote control.
2. Do not mix the batteries, (old and new, carbon and alkaline, etc.) Remove the batteries
from the control
remote when it is not going to be used for a long period
.

9
Initial Setup
Connect the antenna cable (Air or Cable) to the RF input terminal of your TV "RF-ln".
Select the Language
Press the ◄/► buttons to select the language you want for the menu and messages.
Press the ▼ / ▲ buttons to select go to the next step "and press the ENTER / ►
button to continue.
Select Time
Press the ▼ / ▲ buttons to select the Use Time, Summer Time and Time Format
you want.
Press the ◄ / ► buttons on the remote control to make the adjustment.
Press the ▼ / ▲ buttons on the remote control to select go to the next step "and
press the ENTER / ► button to continue.

10
Initial Setup
Automatic channel search (Auto Sean)
Press the ◄ / ► buttons to select the type of antenna (Air or Cable).
Press the ▼ / ▲
buttons to select go to the next step "and press the ENTER / ►
button to continue.

11
Main menu
Press the SOURCE button to display the list
of signal input sources.
Press the ▼ / ▲ buttons or the SOURCE
button to select the signal input source you
want.
Press the ENTER button to enter the source
of selected signal.
Press the EXIT button to exit.
Input Signal Selection
Press the MENU button to display the main menu, return to the previous
menu or exit the menu.
Press the ◄ / ► buttons to highlight the desired menu icon, and press the
▼ button to select.

12
TV
Operation of the Main Menu
Picture Menu (Picture)
Press the MENU button to enter the main menu. Press the ◄ / ► buttons to select
the menu.
Press the ▼ button to enter.
Press the MENU button again to exit or return to the previous menu.
Press the ▼ / ▲ buttons to select between: Frame Scene / Brilliance / Contrast /
Color / Tint, Sharpness / Temperature Color / Advanced Configuration.
Press the ▼ button to enter.
Press the ◄ / ► buttons to make the adjustment.
Press the
MENU
button again to exit or return to the previous menu.
Sound Menu
Press the
MENU
button to enter the main menu. Press the ◄ / ► buttons to select
the menu.
Press the ▼ button to enter.
Press the MENU button again to exit or return to the previous menu.

13
TV
Press the ▼ / ▲ buttons to select between Sound Mode / Bass / Treble / Balance / MTS /
Sound Languages / Digital Audio Output / Surround Sound / AVL.
Press the ▼ button to enter.
Press the ◄ / ► buttons to make the adjustment.
Press the MENU button again to exit or return to the previous menu.
Time Menu
Press the
MENU
button to enter the main menu. Press the ◄ / ► buttons to select the menu.
Press the ▼ button to enter.
Press the MENU button again to exit or return to the previous menu.
Press the ▼ / ▲ buttons to select between Sleep Timer / Time Zone / EI Summer Time / Time
Format / The Clock Auto / Clock.
Press the ENTER / ▼ button to enter.
Press the ◀/▶ buttons to make the adjustment.
Press the
MENU
button again to exit or return to the previous menu.
Setting Menu
Press the MENU button to enter the main menu. Press the ◀/▶ buttons to select the menu.
Press the ▼ button to enter.
Press the MENU button again to exit or re-enter the previous menu.

14
TV
Lock menu (Lock)
Press the MENU button to enter the main menu. Press the ◀/▶ buttons to select the menu.
Press the ▼ button to enter.
Press the MENU button again to exit or return to the previous menu.
Press the ◄ / ► buttons to select between Change Password / Key Lock / Lock System /
Input Block / USV Canada / RRT To Adjust / Reset RRT
Press the ENTER / ▼ button to enter.
Press the ◄ / ► buttons to make the adjustment.
Press the MENU button again to exit or return to the previous menu.
Enter your 4-digit password. The initial password is 0000. If you forget the password, please call
service center.

15
TV
Press the
MENU
button to enter | Main menu. Press the ◄ / ► buttons to select the menu.
Press the ▼ button to enter.
Press the MENU button again to exit or return to the previous menu.
Channel Menu
Press the ◄ / ► buttons to select between Antenna / Cable I Auto Search / Favorites / Channel
List / Show / Hide / Channel Number (Channel) / Channel Label (Channel).
Press the ▼ button to enter.
Press the ◄ / ► buttons to make the adjustment.
Press the MENU button again to exit or return to the previous menu.

16
PC
PC Menu
Press the
SOURCE
button to select the PC source.
Press the MENU button to enter the main menu. Press the ◄ / ► buttons to select the Settings
menu.
Press the ▼ button to select PC Settings.
Press the ◄ / ► buttons to select between H-Pos / V-Pos / Clock / Phase / Automatic.
Press the ENTER / ▼ button to enter.
Press the ◄ / ► buttons to make the adjustment.
Press the MENU button again to exit or return to the previous menu.

17
Operation of Media (USB)
Note: Before operating the MEDIA menu, connect a USB device, then press the SOURCE
button to select the Media Input Source.
Press the ▲ / ▼ buttons to select Media in the Input Source menu, then press ENTER
to enter,
as shown below:
Press the ◄ / ► buttons to select between PHOTOS, MUSIC and Movie.
Press the ENTER button to confirm and enter the next menu, as shown below.
Press the buttons to select the folder you want to view, then press the ENTER button to enter.
Press the EXIT button to return to the previous menu and to exit the menu.

18
Operation
of Media (USB)
Photos
Press the ◄ / ► buttons to select PHOTO in the main menu, then press ENTER to enter.
Press the ◄ / ► buttons to select the file you want to view, then press the button ENTER to
enter.
Press the ◄ / ► buttons to select the Return to previous menu option.
B
asic operation
The user can play the photo files through the photo player. In the left interface you can press "
▲ / ▼ / ◄ / ►" to select what you want.
While the photos are displayed, it works as follows:
Press ► to play the photo.
Press II to pause the photo.
Press ■ to return to the previous menu.
Press I ◀◀ to return to the previous photo.
Press ▶▶ I to switch to the next photo.
When you finish displaying all the photos, press the ENTER button to show the next function.
Press the ◄ / ► buttons to select Repeat, Music, Playlist (List of Playback), Info (Information),
Rotate, Zoom In, Zoom Out, Move View.

19
Operation of Media (USB)
Repeat all: Press the ◄ / ► buttons to select the Repeat option.... press the
ENTER button to select Repeat none / all / 1.
Music (Music): Press the "◄
/ ►" buttons to select Music, press the ENTER button
to play the music background.
Playlist: Press the buttons to select Playlist, press the ENTER button to enter.
Information (lnfo): Press the ◄ / ► buttons to select Info, press the ENTER button
to en
ter. You can see the detailed information of the Photo.
Rotate: Press the "◄ / ►" buttons to select Rotate.
You can select to rotate it in one direction or in the opposite direction.
Zoom in / Zoom out: You can choose to enlarge or reduce the image.
Move View: If the image is large enough to exceed the screen, you can
use this function to accommodate the image.
Music
Press the ◄ / ► buttons to select MUSIC in the main menu, then press ENTER to enter.
Press the ◄ / ► buttons to select the file you want to view, then press the ENTER button to
enter.
Press the ◄ / ► buttons to select the Return to previous menu option.
While the music is played, it works as follows:
Press Vol +/- to control the volume.
Press ► to play the music.
Press II to pause the music.
Press ◄ ◄ / ► ► to quickly delay / fast forward file that is playing.
Press ■to return to the previous menu.
Press I ◄ ◄ to return to the previous song.
Press ► ► I to switch to the next song.
When you finish displaying all the music, press the ENTER button to show the next function.
Note: The other Music functions are the same as those of Photos.
MUTE: To suspend the sound temporarily.
GO TO TIME: Press to select the file location or file location time multimedia, after entering a
certain location, press the ENTER button to go to the previous location.

20
MULTIMEDIA USB REPRODUCTION FORMATS (Music / Photo)
VIDEO REPRODUCTION FORMATS
Accepted VIDEO format: MPEG, MPEG2, MPEG4, FLV, H.264, H.263.AVI, MKV
Categories
Multimedia
Ext file
Decoder
Notes
Music *. MP3 MPEG1 Audio LAYER1II
(Does not correspond MP3 Pro)
Frequency Radio [kHz]
32 / 44.1 / 48
Bit size [Kbit / s]:
32/40/48/56/64/80/96/112/128 /
160/192/224/256/320 / VBR
Photo *.jpg/jpeg Progressive JPEG
Max. Resolution: 1 024x768
Base JPEG
Max. Resolution: 8 192x8 192
Note: The licenses involved in the above specifications must be obtained by the consumer.
Operation of Media (USB)
Table of contents
Other Sansui LED TV manuals

Sansui
Sansui GQTVOMV03 User manual

Sansui
Sansui SLEDVD198 User manual

Sansui
Sansui LEDTVSKQ48FH User manual

Sansui
Sansui SLED3228 User manual

Sansui
Sansui SMX24Z1SMB User manual

Sansui
Sansui SF4019N18 User manual

Sansui
Sansui SMX4019SM User manual

Sansui
Sansui SLED2280 User manual

Sansui
Sansui SJC24FH-ZMA User manual

Sansui
Sansui SLED2282 User manual