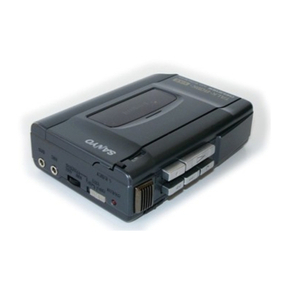
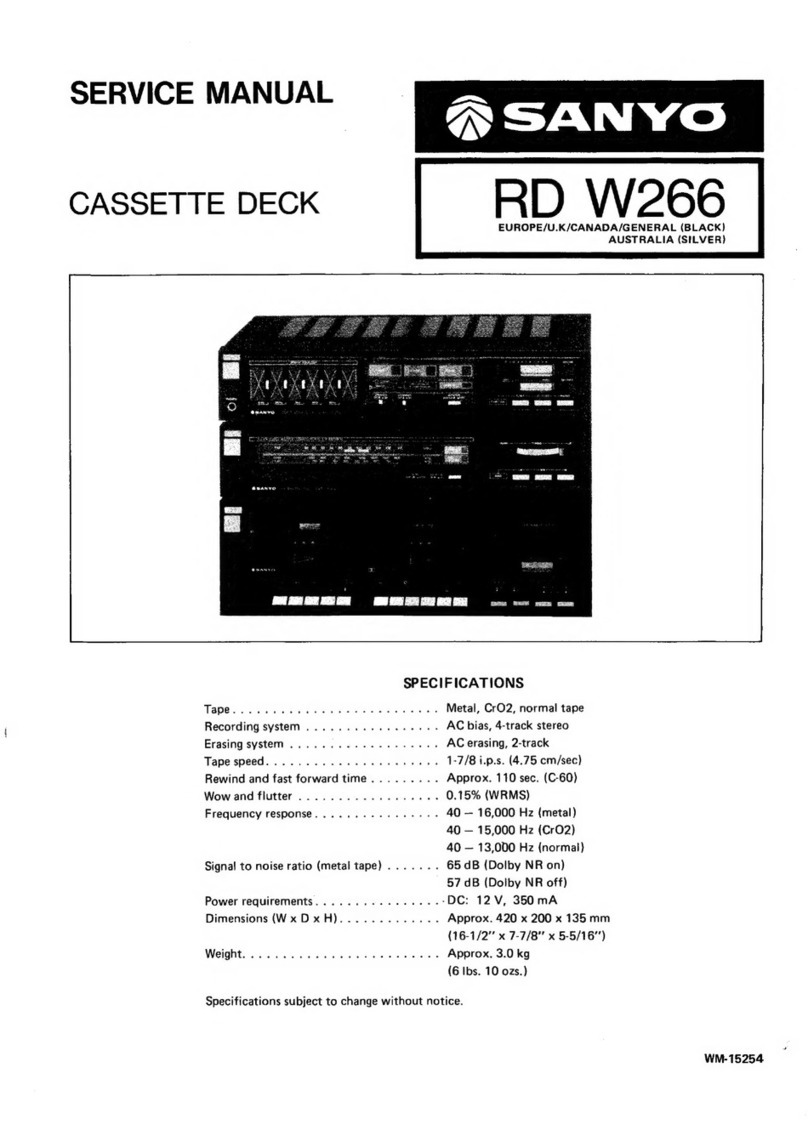
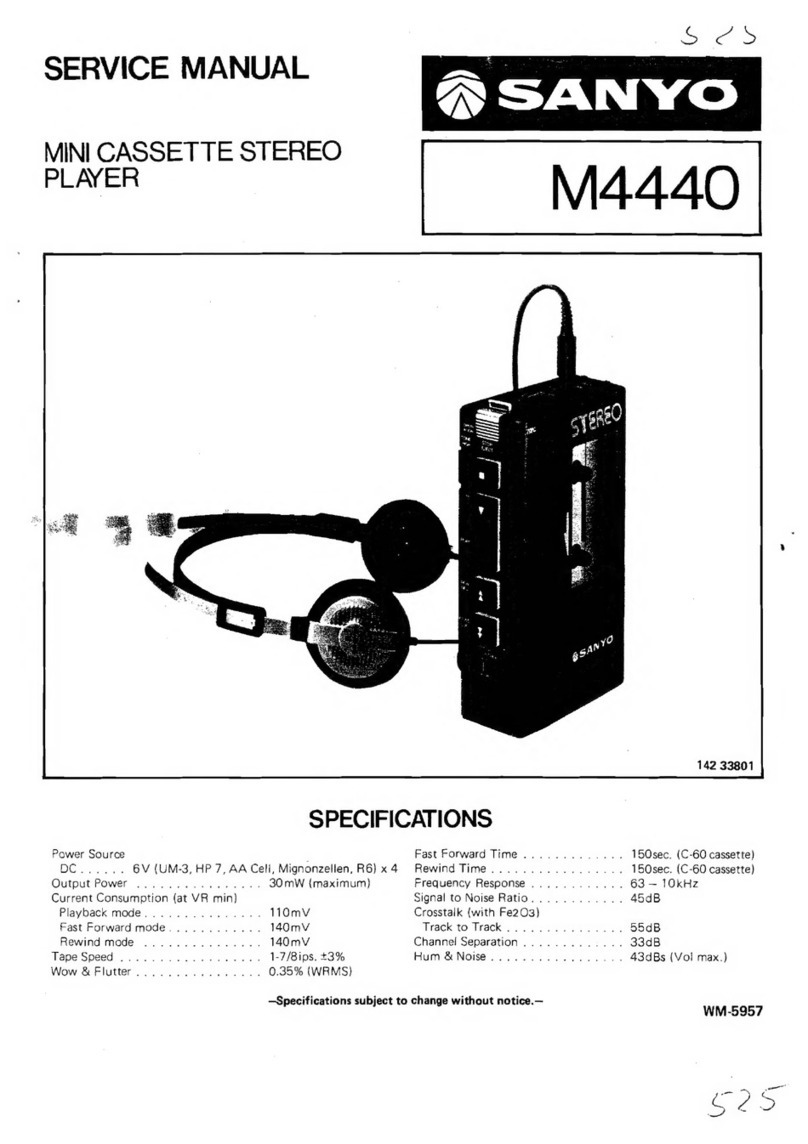
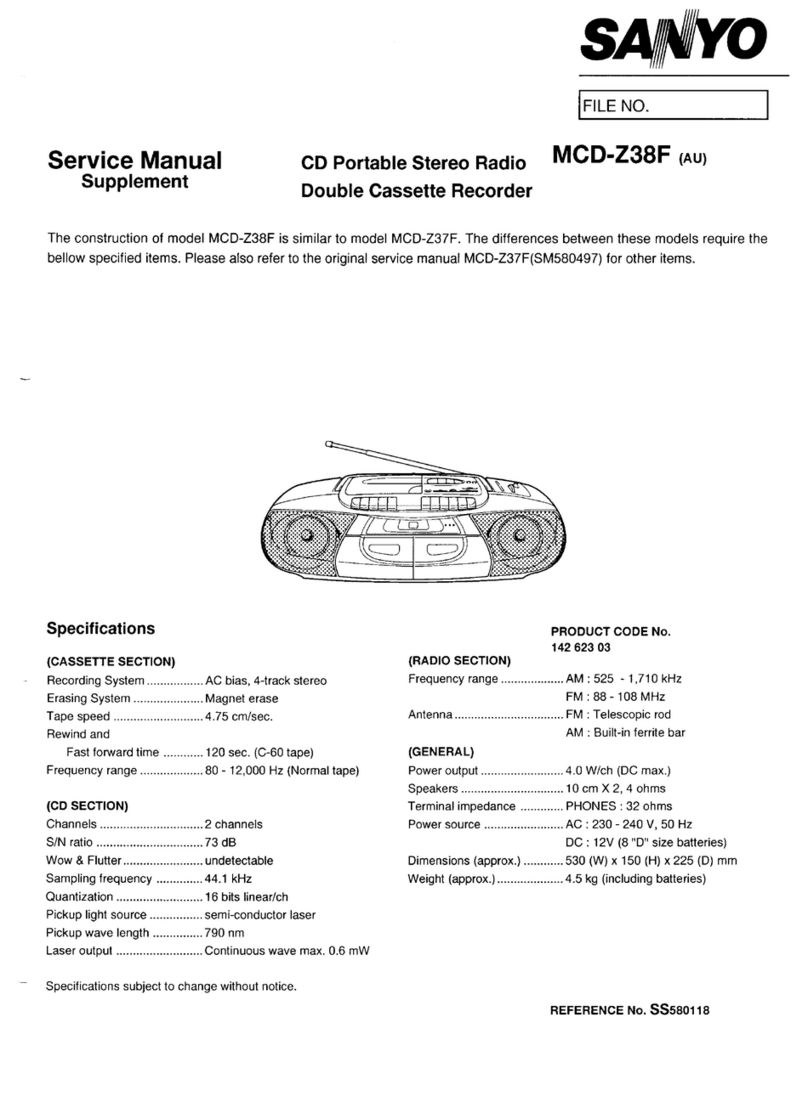
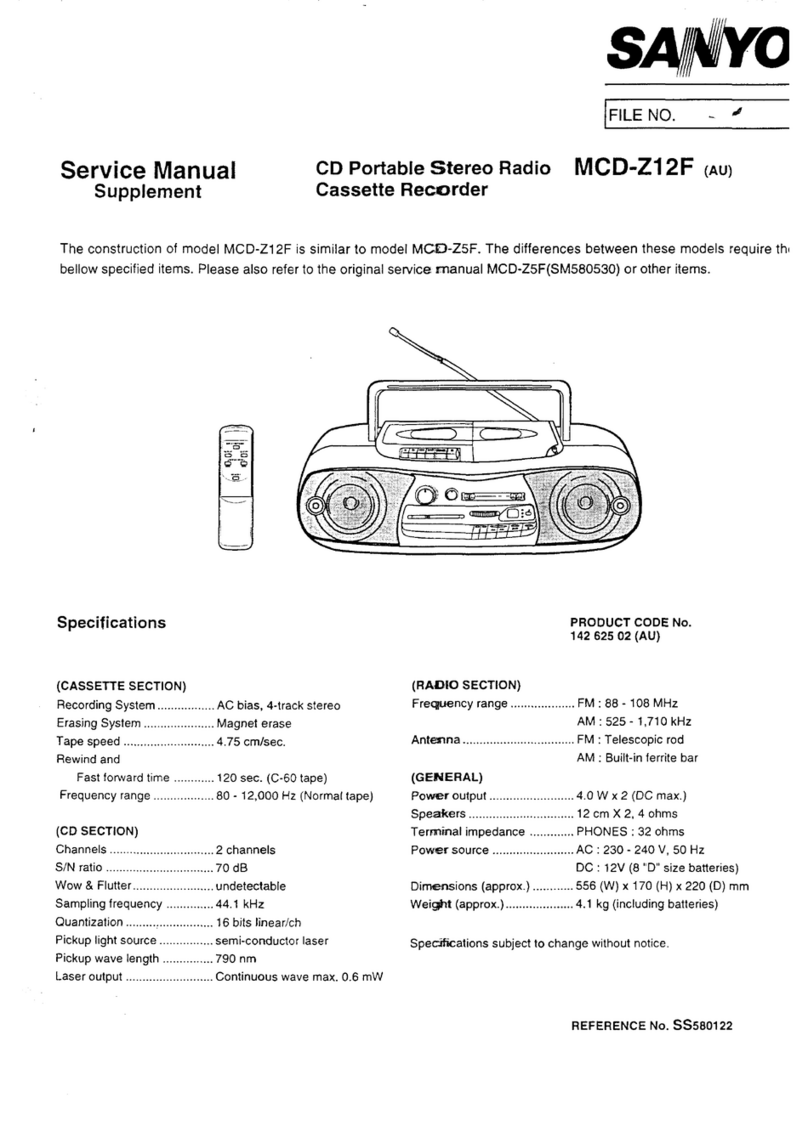
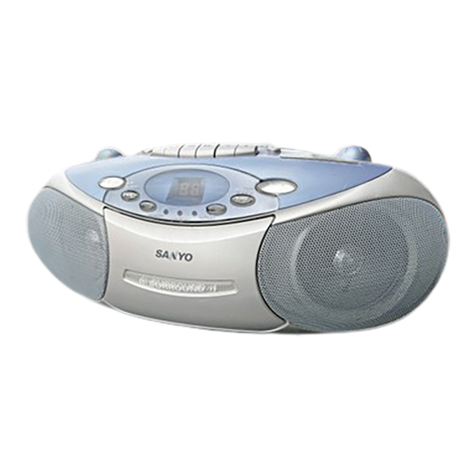
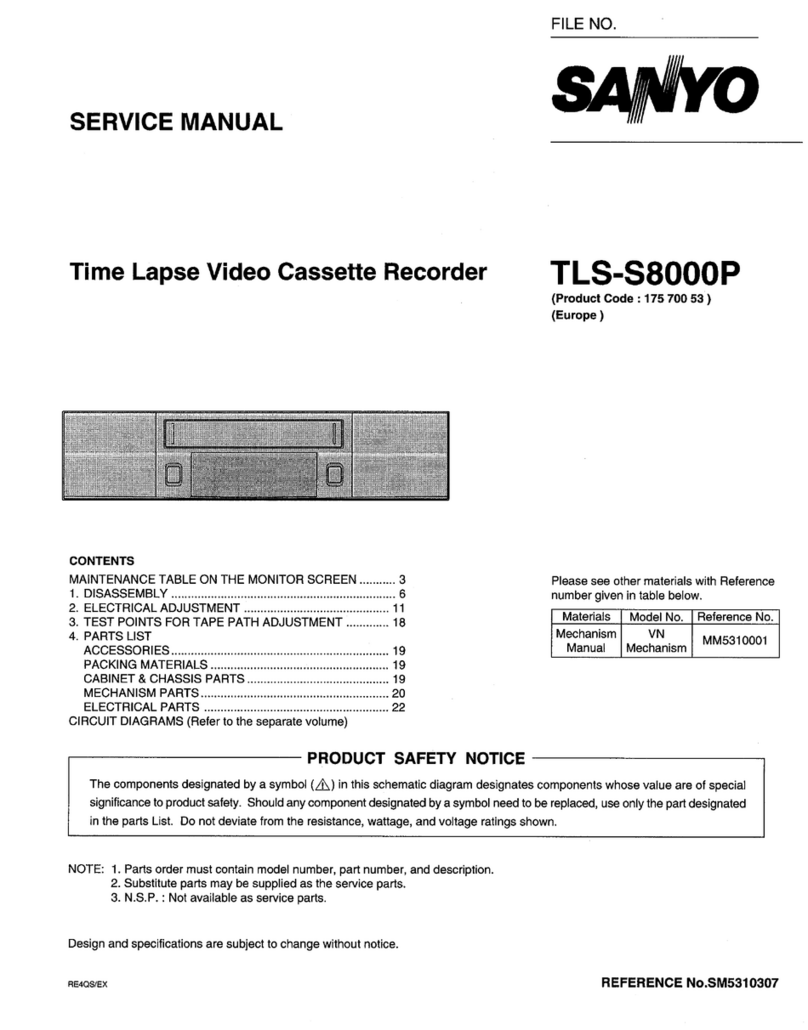
Sanyo MCD-S660F User manual

Service Manual
Specifications
(CASSETTE SECTION )
Recording system . . . .
Erasing system ......
Tape speed .........
Fast forward and
rewind time .........
Frequency response . .
(CD SECTION )
Channels ...........
SIN ratio ...........
Wow&Flutter .......
Sampling frequency . . .
Quantization .........
Pick-up light source . . .
Pick-up wave length ...
Laser output .........
,.
CD Portable
Stereo Radio
Cassette Recorder
-.=. —.—..-
;
._. ..
p-3kjl
●‘m
E3-&3[
—...-..—
IE==ii
A
-.
FILE NO.
MCD-s660F (AU)
PRODUCT CODE No.
142 961 02
(RADIO SECTION )
AC bias, 4track stereo Tuning ranges . . . . . . . FM :88-108 MHz
Magnet erase AM :525-1,710 kHz
4.75 cm Isec. Antennas ........... Built-in ferrite bar and
telescopic rod antennas
110 sec. (C-60 tape)
80- 12,000 Hz (Normal tape) (GENERAL)
2channels
70 dB
undetectable
44.1 kHz
16 bits linear /ch
Semi-conductor laser
790 nm
Continuous wave max.
0.6 mW
Specifications subject to change without notice.
.,.,
...
Output power . . . . . . . . 4.0 Wx2(DC max.)
Speaker . . . . . . . . . . . . 12cmx2,40hms
PIEZO X2
Terminal impedance . . PHONES :32 ohms
MIC :200-600 ohms/mV
Power source ........ AC :230-240 V, 50 HZ
DC: 12V
(8x“D “size batteries )
Dimensions . . . . . . . . . 541( W)x275(H)x215(D)mm
Weight . . . . . . . . . . . . . Approx. 6.0 kg including batteries
REFERENCE No. SfV1580348

.
LASER BEAM SAFETY PRECAUTIONS .....-
.Pick-up that emits alaser beam is used in this CD player.
-J
CAUTION :
USE OF CONTROLS OR ADJUSTMENTS
OR PERFORMANCE OF PROCEDURES on
OTHER THAN THOSE SPECIFIED o0-
HEREIN MAY RESULT IN HAZARDOUS *n.4
-yw-ANNM%c
‘IIY’M!%I ‘=
A~D EKPOSURElU BEAM.
AovARsEL-usvNuGLASERsRAuNG VEDAGNING,
I@ SIKKERHEDSAFBNYDEREERUDEAFFUNKTION.
UNOGAUOSEITELSE FORSTRALING.
VARNING-O.SVNLIGIASERSTtiLNINGNAR
OENNAOE~ARtIPPHAOOCHSPARRARURKOPPLAD.
SIRhEN ARFARLIG.
-VORSICNT-UNSICHTSARELASERSTRAHLUNGTRITTAUS,
~N D~CKELGE6FFNETUNOWENNSICHERHEITSVERRIEGELUNG
UBERBRUCKT1ST.NICHTDEMSTRAHLAUSSEIZEH.
VAROIAvartaessaja [email protected]== oIelawiti
~ittbm~lle l~lyllm Ali Imkodlea$ew
‘REMOVAL AND INSTALLATION
●I)iscorinectthe power cord’s plug from the electrical OUtk?t.
.All wiring should be returned to the original position after work is complet
.First have ready many the new FIXERS (614 129 4971) for replacement.
●Arrange the lead wires so that they are not near the heat sink.
a. CABINET
(1) Remove the battery lid.
(2) Remove the 6rear cabinet mounting screws.(@)
(3) Remove the VOLUME &TONE control knob.(@)
(4) Press the STOP/EJEC,T button.
(5) Open the cassette compartment lid. (@)
b. CD TOP LID
>1 I
MC-grease
EM-50L
1
●Mount the spring wire, attaching parts @, @,
and 0in sequence.
A“...
—
Before attaching the cabinet, secure the buttons of the
tape deck in place using adhesive tape.
c. CHUCK PULLEY
●
-1-
CHUCK.PULLEY
To remove the chuck rxdlev, r)ush in the direction
indicated by the arrows (@j “and pull out (@)
(to prevent hook from breaking off).

ii
..
...-.
.....
...-
J
.. .
REMOVAL AND INSTALLATION
d. WIRING LAYOUT
(a) TAPE MECHANISM
(b) REAR CABINET
LEAD
●Arrange the lead wires as shown illustration. II
RoOANTENNA
r
BATTERYTERMINAL P.C.B
HOOK
I
e. MOUNTING, POINTER
.,’.’
.: ... .
..
‘$ MC-grease
Qi! I1
MC-grease
EM-SOL -2
VIEW-@
f. “O” POINT ADJUSTMENT
/d@

i
TUNER ADJUSTMENTS -.,...
.Use aplastic screw driver for adjustments.
●Adjust the intermediate frequency of AM and FM to the frequency of ceramic filter.
Supply voltage :DC12.OV
Phones impedance :32 ohm
Standard output :0.5 mW (126 mV)
Function switch :RADIO
PARTS LOCATION
a. Al
E
Step
1
2
3
4
5
6
ADJUSTMENT BAND SELECT SWITCH :
Adjusting Connections
Circuit Input output
Closed the output Connect sweep
Itemninai by sweep Igenerator to
IF Igenerator, it place IC2106 (H) &
to L2103. J2101 (G)
I I
Tuning IConnect AM SG IConnect VTVM to
coverage /to Test Loop Ispeaker terminals
(n)
c= 1000P SIGNAL ENERATOR
L=
Gi5i
3l;~16 ~2103 “2’2018 r
002001
mlMm
/,\
“MIF IN vCT-l@ vCT- 3
NO) ~1 @@l
‘2’02 0VCT-2 @vff-~ ❑L2104
m
4
1C201
XF213
FM?Fp/:(H) ~G~;j4 IF OUT
AM/FM IF OU;Z0c210&01
Connect AM SG Connect VTVM to
Tracking to Test Loop speaker terminals
.J
-“.’.
AM 1I1 1
VTVM
SG Frequency Position of tuning dial Adjustment Oscilloscope
—
455 kHz Low XF213 4,
517k Hz Low end L2104
I I Max. I
1750k Hz High end VCT-4
I I I
600 kHz 600 kHz L2103
I I I Max. I
1400 kHz 1400 kHz VCT -3
?eDeat adjustments I
b. FM ADJUSTI
Adjusting
Step Circuit
K
1IF
2Tuning
3coverage
4Tracking
ENT BAND SELECT SWITCH :FM FM Dummy antenna :75 ohm
1
Connections
iSG Frequency IPosition of tuning dial IAdjustment
Input output I
Connect sweep Connect sweep
generator to Igenerator to
IC201 @(H) C2106 (H) I10.7 MHz ILow I---
&D2001 (G) &J2101 (G) I
Connect FM SG Connect VTVM to 87.0 MHz Low end L2102
toTPl (H) &TP2 (G) speaker terminals 109.0 MHz High end VCT-2
Connect FM SG Connect VTVM to
toTPl (H) &TP2 (G) speaker terminals 98.0 MHz 98.0 MHz VCT-1
unbalance
=
A
--i
Max.
Max. I
[5Repeat adjustments
-3-

TAPE DECK
.. ,....
a. HEAD REPLACEMENT AND HEAD AZIMUTH ADJUSTMENT
(a) Head replacement
●After replacement, demagnetize the heads by using adegausser.
●Be sure to clean the heads before attempting to make any adjustments.
●All wiring should be returned to the original position after work is completed.
(b) Head azimuth adjustment
(1)
(2)
(3)
(4)
(5)
-. -.
..
Load the test tape (VTT-703, etc., 10 kHz )for
azimuth adjustment.
Press the PLAY button.
Use across-tip screwdriver to turn the screw for
azimuth adjustment
so that the left and right output are maximized.
Press the the STOP button.
After completion of the adjustment, use thread lock
(TB-1401B )to
secure the azimuth-adjustment screw.
b. MOTOR REPLACEMENT
(a) Motor replacement
AND SPEED ADJUSTMENT
(b) Motor speed adjustment
(1) Insert the test tape (MTT-11 lN, etc., 3000 Hz).
(2) Press the PLAY button.
(3) Use aflat-tip screwdriver to turn the SVR (located inside the rear
of the motor) to adjust SVR so that the frequency counter
becomes 3,000 Hz.
d
RIP HEAD “--’
LOW
WHiTE
m
~MOTOR SPEED ADJUST
oJ
il
BACK SIDE OF SET
c. CHECKING THE MECHANISM TORQUES AND TENSION
.Clean the head, capstan and pinch roller before making any measurement.
Measurement Take-up torque Back tension Tape tension
Cassette for PLAY:TW-211 1A Drive-power cassette
PLAY: TW-21 11A
measurement F.FWD/REW:TW-2231 TW-2412
PLAY 30-60 gr.cm 2.0- 4.5 gr.cm 60 gr or more
F.FWD 55-120 gr.cm
/
... ./ REW 55-120 gr.cm
... ...

i
.
CD PLAYER ADJUSTMENTS .+,...
a. DISASSEMBLYOFTHE CD PLAYER MECHANISM
(a)
●
Replacement of the spindle motor
First, prepare the new turntable (Ml -2 )and new special
washer (Ml -4 )for replacement.
The removed turntable will be deformed by the heat of the
soldering iron, and cannot be reused.
●Prepare dial type calipers.
(1)
(2)
(3)
(4)
(5)
(6)
(7)
I
(b)
(1)
(2)
(3)
(4)
(5)
(6)
The attached bonding material can be dissolved by using a
60W soldering iron to heat the shaft at the top part of the
turntable (Ml-2 )for about one minute.
The turntable can then be removed from the shafl by very
carefully applying force upward at the center of the lower
surface of the turntable.
Remove the two screws (Ml-3 )and remove the spindle
motor (Ml-5 ).
Attach the special washer (Ml-4 )to the spindle motor.
Apply asmall amount of amixture of the “Th~ee Bond 2001”
and “201 5F” bonding materials to the motor’s shaft.
Install the turntable as shown in the figure.
Secure the turntable by pressing gently.
Be sure to wipe away (by using apiece of cloth, or similar
material )any bonding material coming out of the hole.
Replacement and lubrication of the pick-up
Before replacement of the pick-up, be sure to carefully read
the section regarding the pick-up when the unit is moved or
transported.
Remove the two pick-up rail (Ml 2)with care fixing the two
latch with any way driver from bottom of chassis
(Ml-1 ).
If the pick-up is reconditioned or replaced, be sure to wipe
the rails clean and also apply acoating of FLOIL (G-474B )to
their entire circumference and entire length.
After replacement, install the shaft as before.
The pick-up P.C.Board pattern is “shorted”, as shown in the
figure ,so that the new pick-up will not be susceptible to the
effects of static.
Set the pattern to “open” after the pick-up has been
replaced,
SHORT
-5-
1
[3
“e
~-. .-
—Ml-5
Don’t attached bonding material
at the top of shaft.
Bonding material
8-’””/”++
Ml-4 (SPECIAL WASHER) ““
Ml-1 (CHASSIS)
Be sure to wipe away the
bonding matearial \CHUCK PULLEY
I
w
-——
17.?5mm
.- *O.lmm
—
L
—-
M12
II(S=FT) \
M1-5(SPINDLE
II ‘*-i---i?
MOTOR SHAFT)
M6
M12

.......
CD PLAyEf? ADJUSTMENTS
(BE SURE, AT THIS TIME, NOT
TO TOUCH ANY OTHER PART. )
em ‘@ ‘-d
(c)
(1)
(d)
(1)
(2)
(3)
(f)
(5)
(6)
(7)
(e)
(1)
(2)
(/L/
Sled motor replacement
See illustration at right.
+%h
Checking the operation of the CD mechanism
Disconnect the socket (for the sled motor power supply) from
the printed-circuit board. Ml-1
Apply avoltage of DC 2.0 Vto the sled motor’s
terminal.
Measure the current during sled motor operation.
●The direction of movement of the pick-up (outer groove or
inner groove) can changed by changing the battery polarity.
The current during sled motor operation varies .- .-
according to the positional relationship of gears
(M8 and M9 ). -,.
*
If the current exceeds 40 mA ,remove the Direction of pick-up movement Sled motor current
pipe (M7 )and gears (M8, M9 ).
Apply asmall amount of aFLOIL (G-474B )bonding Outer groove 40 mA or less
materials to the chassis shafts.
Install the pipe and gears as shown in the illustration. Inner groove 40 mA or less
M,8 M8 o@
Resetting the pick-up to the home position
The limit switch is switched ON by the projection of the rack
gear secured to the returned pick-up, after which the sled”
motor continues to operate (by the circuit) for approximately
20- 30 milliseconds ;there is then again areverse
operation, and movement to the position at which the switch
is switched OFF.
Rotation continues for about 20 -30 milliseconds after the
switch is switched OFF, and then the pick-up stop at home
position.
..
-6-
&
00
LIMIT ~
SWITCH
G)
*
@@
+- PICK-UP
-..“.
... . .
. . .
.....
:., .
.......
1

CD PLAYER ADJUSTMENTS ....-
b. PREPARATIONS
(a) Measuring instruments, tools and filter -#
(1) Test disc.: YEDS18(SONY)or etc.
(2) oscilloscope: SS5711 (l OMHzor dual-phenomenon)
or Memory scope :DSS6521 (Storagescope)
(3) Screwdrivers (non-metallic) for adjustments
(4) Low Pass Filter (L. P. F.)
(5) Resistor, Carbon 2.2 Kohm, l/4W .—
c. PARTS LOCATION
r)
L- 0
I-J 1:1
l_l l_l
CD MAIN P.C.B
e‘1:”:1%c~33~:
o“;
‘Oscillosco
EYE PATTERN
Adjustment Measuring Short-circuit Input
Item instrument location onnection
(a) Tracking Oscilloscope
balance L.P.F. lJl::w -
(b) Checking
the “eye” Oscilloscope –—
pattern I
1I-~
TRACKING BALANCE
output djustment
connection location Adjustment value
TP 101 :TE SVR101 Waveform symmetry
TP102:VC A=B l. EJVp-p
ICIO1 (pin 72) Check be sure that the “eye”
:RF —pattern is at the center of the
TP 102 :VC waveform and that the dia-
mond shape is clearly defined
,.. .
-7-

.-- ..,.
CD PLAYER ADJUSTMENTS
d. ADJUSTMENTS
(a) TracKng balance adjustment
(1) Pull the CD block out from the unit body and wire
it to the CD main P.C.board test pint. &‘“
. ..
.“. -.
.. (2)
I
(3)
(4)
(5)
(6)
(7)
(8)
(9)
.-,-.
.-.
‘i,
I1
Short-circuit points (JI 137 and J1 138) on the printed-
circuit board.
Connect an oscilloscope to TP101 (TE) and TP102 (VC).
Push the CD block back into the unit body.
Switch ON the POWER.
(Connect the power cord plug from the electrical outlet.)
Cancel the short-circuiting of short-circuit point
(Jl 137 and J1 138) on the printed-circuit board.
Set the test disc. &
PLAY switch push ON.
Adjust SVR101 so that the oscilloscope’s waveform is
symmetrical, as shown in the illustration.
(1O)Switch OFF the POWER.
(Disconnect the power cord plug from the electrical
outlet.)
Switch ON the DC power.
Connect an oscilloscope to IC101 (pin 72)
and TP102 (VC)-
Load the test disc.
PLAY switch push ON.
(b) Checking the eye pattern
(1)
(2)
(3)
(4)
(5) Check to be sure that the “eye “pattern is at the center
of waveform and that the diamond shape is clearly
defined.
(6) Press the STOP button.
(7) Switch OFF the DC power.
-8-
L.P. F.
TP 101
(TE)
TP 102
(Vc) ‘‘El
+
irqOUT OSCILLOSCOPE
-1
“’%’)-
D

.. . .. ... . . . .
iii
.
EXPLODED VIEW (CABINET &CHASSIS ).... -
—. -!
.....
,.
,.

PARTS LIST PARTS LIST
ELECTRICAL PARTS
FFFiimi
. .
PRODUCT SAFETY NOTICE 1tef. NO
4701
4801
4901
49o2
4903
1401
‘2102
r
2103
r
4901
r
,4902
r
4910
r
‘4911
,4912
r
4751
4851
4914
4941
4943
,2101
l,-
,4901
,4903
‘C201
2101
,r
F201
F211
,r
,r
,r
lr
:F212
~r
)r
)r
,r
:F213
;F214
)r
)r
)r
Ii-
Part No.
614 212 3171
614 212 3171
614 034 1317
L?)645 006 8072
614 212 3171
#A614 255 8645
405 017 9600
405 017 9709
405 017 9600
405 017 9709
~405 023 5009
~405 023 53o6
405 017 96oO
405 017 9709
405 017 96OO
405 017 9709
405 004 4502
~405 OZ3 5009
ffA405 023 5306
&402 069 9008
~402 069 9008
~402 041 4601
~402 069 8902
A402 068 8408
614 024 3185
614 244 8335
645 004 6360
614 235 45o6
614 253 6278
645 004 6100
614 231 3183
614 252 1045
614 030 5074
614 030 5081
614 030 5098
614 030 5104
614 030 5111
614 030 5074
614 030 5081
614 030 5098
614 030 6104
614 030 5111
645 004 6094
614 253 6841
614 231 3145
614 231 3152
614 231 3169
614 231 3176
Description
NDLICTOR,FERIIE
NOUCTOR,FERITE
I.S. CCOIL
NOUCTOR
NDUCTOR,FERITE
‘OWERTRANSFORMER
R2SC3330-T
R2SC3330-U
“RZSC3330-T
‘R 2SC3330-U
“R2SD400-E-MP
“R2s0400-F-MP
“R2SC3330-T
“R 2sC3330-U
“R 2SC3330-T
“R 2sC3330-U
‘R 2SA608-F-NP
“R 2s0400-E-MP
“R 2sD400-F-MP
‘USIBLE RES 6.8 JA l/4w
“USIBLE RES 10 J- l/4w
“USIBLE RES 27 JA l/4w
‘USIBLE RES 1.0 JA l/4W
;wITc H, SLIDE, BANO SELECT
;WITCH ,SLIDE ,BANO SELECT
;WITCH, SLIDE, FUNC710N
;wITCH, SLIDE ,BEAT CANCEL
(C, TUNING CAPACITOR
)sC, CERAMIC,456KHZ
RESONATOR, CERAMIC,456KHZ
“ILTER, LC, FM
:.F FILTER, RED, FM
;.F FILTER, BLUE, FM
:.F FILTER, ORANGE. FM
:.F FILTER .8 ROWN, FM
:.F FILTER, WHITE, FM
[.F FILTER, REO, FM
[.F FILTER, BLUE, FM
;.F FILTER, ORANGE, FM
;.F FILTER, BROWN, FM
[.F FILTER, WHITE. FM
:ERAMIC FILTER 455 KHZ
{ESONATOR, CERAMIC, IO.70MHZ
\ESONATOR ,XTAL ,10 .67 MHZ
{ESONATOR ,XTAL ,10. 73 MHz
RESONATOR, XTAL, 10. 64 MHZ
RESONATOR, XTAL,1O.76MHZ
Description
ANTENNA. ROO
Each precaution in this manual should be followed during serv!cmg. Components identified with the IEC symbol ~In the parts
hst and the schematic diagram designate components mwhich safety can be of special sign(f,cance. When replacing acomponent
,dentlf led &use only the replacement parts designated, Or parts with the same ratings of resistance, wattage or voltage that are
,i-.i.nateii in the Darts hst in this manual. Leakaae-current or resistance measurements must be made to determme that exposed
r
FUSE “25ov 2A, FU401
FUSE 250v 2A, FU401
&423 005 9500
614 252 5135
419 002 0.206
or
63 SPEAKER, WOOF ER,12 CM,4 OHM
PIEZO BUZZER.
..... ..... —.
parts are acceptably insulated from the supply circuit before returning the product to the customer. 1
TWEETER SPEAKER,
FRONT SPEAKER BOX MTG
CORO. 4P CONNECTOR,
R/P HEAD-AMP
CORO ,4P CONNECTOR,
TAPE MECHANISM-AMP
CORD, 2P CONNECTOR,
EXT. SPEAKER
CORO, 2P CONNECTOR,
ExT .SPEAKER
CAUTION: Reaular type refi~ors and capacitOr$ are nOt h$ted. TO knOW thO== ~alue$. refer tO the schematic dia9ram.
N.S.P :Not available as service parts. ..
Part No. Description
411 085 1200 WASHER OUT TW 2.6 X5.8 X0.3 MM,
TUNING CAPACITOR
ICN420 I614 258 1148
ACKIN
Ref. NO
&ACCESSORIES
Part No. Description
614 262 4111 ICARTON CASE
614 258 1155
614 25B 1162
CN421
CN471
[
Ref. No
3B
39
41
42
43
44
614 258 0042
614 258 0035
614 262 4142
6!4 256 5674
/h614 250 6578
A614 256 5292
CUSHION, TOP
CUSHION ,BOTTOM
INSTRUCTION MANUAL
SHEET
POWER CORO, AC
POWER CORO ,AC
411 09B 7305 wLT HEX C-SCT 2.6 X20 MM,
TUNING CAPACITOR
ASSY, BOX, FRONT, LEFT
ASSY, BOX, FRONT, RIGHT
ASSY, BOX, REAR, LEFT
ASSY ,BOX ,REAR, RIGHT ,< 1
614 257 9B62
614 258 0059
614 258 0066
614 258 0073
IIP. /POWER S
Part No.
614 260 2829
PPLY P.C.EOARD ASSSY
Description
ASSY .pw8, TUNER/AMP. f
UNER /
Ref. No.
71
C2107
c2116
C4714
C4814
C4918
C4950
CN401
CN402
CN403
CN404
CN405
CN406
CN407
CN409
CN41O
CN412
CN422
02001
D4901
04905
04907
D4908
04909
04910
04911
FCL41
FCL42
HS401
IC201
1C401
IC402
L2101
::102
or
L2103
or
L2104
~’f~
0!’
,.
, ... PoWER SUPPLY
SHIELD, L4902 MTG.
SCR S-TPG BIN 3X8 MM,
1C402 MTG.
NP-ELECT lU Q50V
NP-ELECT lU 1) 50V
PoLYESTER 0.15U M50V
POLYESTER 22ooP J50V
POLYESTER O.lU K50V
SOCKET,8P, CD
PLUG, 4P, R/P HEAO
SOCKET,6P,VOLUME
PLUG,2P, SPEAKER, L-CH
PLUG,2P, SPEAKER, R-CH
PLUG, 4P, TAPE MECHANISM, MOTO
SOCKET,2P, BATTERY
JACK, HEADPHONE
JACK, PHONE 03.6, MIX. MIC
SOCKET, AC IN
CORD.4P CONNECTOR,
R/P CHANGE SWITCH
OIOOE GMAO1
ZENER OIOOE MTz9. 1A
DZODE OSR-1OC-ET5
DIOOE. RL153-BF-S2
OIOOE RL153-BF-S2
OIOOE RL153-BF-S2
OIOOE RL153-8F-S2
ZENER DIOOE MTZ1.2A
FuSE HOLOER
FuSE HOLDER
HEAT SINK, IC402 MTG.
lC TA8122AN
IC TA206BN
IC TA8229K
INDUCTOR, AIR
INDUCTOR, AIR
VHF COIL
VHF COIL
ASSY, BAR ANT.
ASSY ,BAR ANT
TRANsFoRMER,OSC ILLATOR,270U
FILTER, l.OUH
614 264 8070
411 021 64o5
iCHASSIS
Part No.
614 257 1385
614 257 1279
614 257 1286
614 258 0189
614 263 6336
614 069 0385
614 258 0127
614 25& 0134
614 250 0141
614 258 0156
614 258 0165
614 258 0172
614 260 9385
614 257 0647
614 257 0739
614 258 1841
614 240 8308
614 247 6048
614 248 2599
614 258 1544
614 257 1705
614 069 0385
614 257 0654
614 258 0196
614 257 1743
614 257 1538
614 257 66!34
614 257 1293
614 258 0004
614 262 3848
614 257 2023
614 257 2030
614 257 1378
614 248 2551
614 257 1309
614 257 1316
614 259 8405
RTS
Part No.
411 021 4906
ABINE
Ref. No.
1
~
i
4
5
6
7
B
9
10
11
12
13
14
15
16
17
18
19
20
21
22
23
24
25
26
27
28
29
30
31
32
33
34
35
36
37
Description
LIO, CASSETTE
KNOB, ROTARY, VOLUME
KNOL4,ROTARY ,TONE
SPRING WI RE, CASSETTE LIO
ASSY,CABINET
GEAR ASSY .CASSETTE LIO
XN08, LEVER, RECOR0
XNOB, LEVER, PLAY
XNOB, LEVER, REW
XNOB ,LEVER, F.FWD
KNOB, LEVER, STOP/EJECT
KNOB, LEVER .PAUSE
MOUNTING, LEVER KNOB
BuTTON ,CO OPERATION CONTROL
BuTTON, BASSXPANDER
SPRING ,PLATE ,RECORO/PLAY,
TAPE MECHANISM
SPRING ,COMP ,CO MECHANISM
CUSHION ,RUBBER ,CO MECHANISI
ESCUTCHEON ,CO MECHANISM
SLIOE ,CO TOP PANEL MTG.
PANEL, TOP, CO
GEAR ASSY, CO LIO
BuTTON, CO OPEN
SPRING WI RE, CO TOP LIO
POINTER .TUNING
MOUNTING .TUNING
GEAR, TuNXNG SMALL
KN08, ROTARY, TUNING
TERMINAL, ANTENNA
ASSY, CAB INET, REAR
HANOLE
LIO, BATTERY
XING f
Wf.No.
‘o 1
’02
’03
,04
[05
(06
(07
(08
(09
flo
Yll
Ylz
r13
Y14
Y15
Y16
Y17
Y41
Y42
403 106 1603
403 106 1603
403 058 6107
403 05B 6107
403 059 2801
403 057 2902
614 035 5994
614 017 2553
614 035 5970
614 016 B341
614 016 B341
614 017 2119
614 020 6548
614 229 3812
645 005 1111
d1614 020 7590
614 260 7435
407 007 9904
~407 053 B708
407 140 72ol
&407 098 3300
A407 098 33OO
LfJ407 098 33OO
/h407 098 3300
L?J407 053 3109
/h614 208 4540
&614 208 454o
614 249 0754
409 325 7006
409 331 4501
A409 295 74o2
614 233 5664
614 23B 129B
614 035 0012
614 229 0217
614 230 66B8
614 254 9964
614 256 6572
614 028 6625
Description >
jCR S-TPG BIN 3x ZOMM,
:ABINET REAR -
;CR S-TPG “BIN 3X12 MM,
:D BLOCK, REAR CABINET
;CR PAN 3x8 MM, RO0 ANTENNA
;CR S-TPG 81N 3X1ZMM,
NJNER/AMP ./POWER SUPPLY
>.C .BOARD
411 021 4104
411 002 9104
411 021 4005
411 020 9100 SCR S-TPG BRZ+FLG 3X 12 MM,
10WER TRANSFORMER
5CR S-TPG BIN 3X12 MM,
4C SOCKET
3CR S-TPG BRZ+FLG 3X12 MM,
TUNING GEAR
SCR S-TPG BIN 3X12 MM,
TUNING BRACKET
SCR S-TPG BIN 3X1ZMM,
:0 OAMPER
SCR S-TPG BIN 3X12 MM,
CO OPEN/CLOSE SWITCH
SCR TPG PAN PCS 1.7x6 MM.
CO MECHANISM COVER
SPECIAL SCREW, CO MECHANISM
SCR S-TPG BIN 3X12 MM,
CO MAIN P. C. BOARO
SCR S-TPG PAN 2x3 MM,
RECORO/PLAY LEVER
SCR S-TPG PAN 2x4 MM,
RECORO/PLAY SWITCH
P.C .BOARO
SCR S-TPG BIN 3x12 MM,
TAPE MECHANISM
SCR S-TPG BIN 3X12 MM,
TAPE MECHANISM BUTTON
SCR S-TPG BIN 3X20 MM,
SPEAKER BOX
SCR S-TPG BRZ+FLG 3x12 MM,
SPEAKER
411 021 4005
411 020 9100
411 021 4005
411 021 4005
411 021 4005
411 099 0503
412 032 640.9
411 021 4005
411 025 1901
411 025 2001
411 021 400$
411 021 400!
411 021 490(
LIO, CO
ASSY, PULLEY, CHUCK
KNOIF. SLIOE. FUNCTION 411 020 910(
KNOB ,SLIOE ,BANO
GEAR ,VC ,TUNING CAPACITOR
I
-11-
.

1
+—LZ1
07,I
J
—Ozi
Ii
011
!go~!’
,o,_ ~ ‘A
wJ’ ‘fj-zol
‘1” —10[
&ol—&fiiP
J“
.. –z[-
on-q) IICCL
It’l--# A?.r&l-_
A
r
!4%-
8S1
I&6S,
6E1
.
.
3SOlJ/N3d0
‘l?-dl M3A37’H211MS CZ26 bOO S)9 IJO
3SO13/N3d0
‘IZ-d I83 A31’H211MS f8f L bOO sb9 ILOSIS
dZ’13X30S 2S16 LfZ }19 JO
1
dZ”13Y30S 116? SFO P19 I90TN3
H311MS
3S072/N3d0 0) ’8 Md’ASSV ]6661 192 919 9L
uoqd! maa ON U’?d ON .J?)j
ASSV zlSJV08”>”d H311MS 3S01>/ N3d0 a:
AUOR3M’13W1’H311MS
lW3d3U’13Vl’H311MS
MOO H31LV3S/d IXS’12Wl’ H211MS
dll H3MV3S/d I> S’12Vl’H311MS
3SflWd/AWld’ 13Vl’H211MS
dOIS’13Vl’H311MS
sl-c*T3La 81
106s3s2 81
SL-C*T21O HI
106S3S2 Lll
sl-c*\3iLl 81
106SJSZ 81
sl-t*1310 81
106C3SZ 81
S1-tt.l>lo al
I06C2SZ til
S1-S*I31O Ml
106S2S2 81
si-ttil>la U1
106S2S2 U1
si-sk131a Ml 1
T06t3SZ Ml i
sl-th121a u
T06SJSZ Ml
Z9” FSZ9 30010 U3N3Z
T1-81-2SL’I-ZIS 031
11-81 -XCJ-ZIS 031
11-81 -25 CI-ZIS 031
.AVldSItI’SO-SSZI -lS (331
031-02’ 9Ald’ASSV
uo!adp>saa
IZHWC6” 91 ‘H01WNOS3U
3Nfl10A’A8W10U’8A
3N01 ‘ALIWIO!j ‘UA
lNIOd 1S31’1WNIW831
lNIOd lS3L’1’dNItW131
33NV1W9 2NIX3V8L
‘WHOYOI’iJ313WCJIlN310d
U3ClNVdXSSW8” HSod ‘H311MS
n-octfxz Ml
L-0 WS3SZ 81
n-otcr3sz ML
1-0 CCC3SZ Ml
n-octc3sz UI
l-ofxt3sz 81
zeal abz t.19
2001 Oi. zL.19
2001 O*2 *19
ZOO Iabz *I9
2001 0$2 $19
ZOOI O*2 }19
$0s0 SEO SOP
00g6 810 SOP
*OSO Sto so?
00S6 810 SOP
*0’20 qto sop
00S6 810 SO?
}050 Sto sot
00S6 810 SOP
Peso S:o sot
00S6 810 50?
i’oso Sco 509
00S6 810 SOV
tioso Sso sot
00S6 810 SOP
bOSO SCO SOP
00S6 810 SOV
*oSo’ Sco sot
00S6 LIIO SOV
60LS 1S0 LOV
LOOO 120 80ti
LOOO 120 811V
1000 120 80v
902? [El LOV
Z86T 192 t.19
ON 21cd
,ssv ativoa”l.
90s1s
~osls
bos Is
tosls
20s1s
10s1s
Jo
OlslzlJO
60S10
Jo
90S10
Jo
LOS1O
JO
9CN1O
JO
Soslcl
JO
@oSIb
.)0
Coslo
JO
20s10
16s1a
sosta
bo51a
cosla
zosla
n-ocrmz n.
1-0! CF3SZ 8.
Ootcxz H.
s3tz13ia M.
s-c161asz 81
8- S1610S2 H.
~-ocrasz UJ
3-orcasz 8J
1- LZ68SZ Ml
S- LZ68SZ UJ
n-octmsz MJ
l-otrc)sz MJ
1- ZS6VSZ 8J
X- ZS6VSZ U]
dN-3-86S8SZ U]
dN-J-86S9SZ b’J
OIN-d31 Mr313310Md 21
OZN-d31 !dO133108d 21
HllOI ‘u3171s
IbLlt-4b OIIS921 31
U96f C90dfi 31
dd86f9V8 31
3X198131 31
WOIZ6V1 31
mIssI 3aoIc
lovw9 3oaIa
CCISSI 3aoIa
IOVN9 3ooIa
VZ’8Z1W 30010 83N3Z
1911MS 3S013/N3d0’ dZ’J3130S
1211MS 3S013/N3d0’ dZ”13))OS
dWV’d9”13X30S
dWV’d9’13X)OS
dWV’d8”13X20S
dWV’d8’13X30S
NSINVH33W a3’d9’ !mld
dn KIId’dU’13)30S
ASZ wnl”o 0110s-s0
A91 wm“o aIlos-sa
“9H4 zab IO
60L6 L1O SO*
0096 LIO SO?
0092 81a Gob
LObt 000 SO*
90ZL sca sob~
LOIL SCO SOP~
toIc Czo Sobrp
soac cza $o*v7
90t S600 20PQ7
LOZS 600 SOt~
60L6 LIO SO*
0096 LIO 50v
soa~900 sot
606C 900 50P
bOt9 LOO 509
IOL9 LOO 50ti
P88Z Soz v19Tp
L06Z S02 v19YJ7
CCI* 820 tiT9
LOCO 661 OTb
60Zb 6ZC 60b
60S8 Llt 60!JQ?
900V Ifx 60*
208t S$2 60t
!Ott 210 LOP
P066 LOO Lot
}Otib 210 LOV
1066 LOO LOk
20C8 CSO LOV
?SL6 LCZ *19
[16* S:0 $:9
ltOb SS2 b19
3S6t StO t19
!299 602 b19
:L6* Sco b19
!L%Z LIO )19
IOLL LZZ b19
!06t S90 bOb
:066 190 bOt
;OLS 120 TIP
168’3 121 919
5L61 192 b19
ON Ued
MW9XC NIE 3dl-S 83S
“31W ZOti LO’ XNIS 1V3H
NIVW-i13’S?ld4ASSV
uo!+dpxaa
&ASSV ClHV00”3”d
031 a>
L99Z I&Z tT9 Igblx A7ddnS U3MOd’dZ.i3Y20S 8*S9 020 919
8
LCLZ cSZ *J9 ZObHA (-)Au3Mv!3 1VNIW831 9COt 811 t719
S6f I ‘J*Z b19 10bUA aHvo8 1VNIWH31
L6SC $s2 t19 JO ‘11V8’81U’ASSV 1860 8S2 b19
CLZ8 122 t’19 dl uopdpxaa ON 3>Pd ON
Z85L 0s2 *I9 IO18A ASSV Q8V08”3”d lVNllAJL131
AS1
tLS9 ObZ b19 016$S
60L6 110 sot do
0096 LIO SOiI ZU81O AVld/L18033U
60L6 LIO sok
0096 LIO SOb
60L6 LTO SOti
0096 L1O SO*
“ON $Jed
J;
I
‘lZ-dZ HSnd’H211MS ZZk6 bOO S*9
I
2
18810 dWV’d)’W17d C9ZZ LIO t7T9
9
.!0 AVld/08a33!d
---N
Z8LI0 ‘H311MS’8Nd’ASSW 8660 8S2 b19
ON ,a~ .cmd!nsaa WVPd
.ON
)!..- 11,1
ASSV CltlVOS”>”d H>lIMS AVld/aH03
(WSINVH33LAJ EldVl )M31A (13 CJOldX3 1s11
sun

PARTS LIST EXPLODED VIEW (CD MECHANISM )
kPE M
tef. No
r
.02
,03
.04
,05
.06
L07
,08
;09
110
111
112
L13
114
115
116
117
118
119
120
1; 1
122
123
124
125
126
127
131
132
133
134
HANISM (TM-SI jOTN)
Ref. No. Part No. Description
135 614 205 5458 SLIOE, STOP/EJECT
BUTTON LEVER
136 614 205 5540 SLIOE ,F.FwO BUTTON LEVER
137 614 205 5441 SLIOE ,REW BUTTON LEVER
138 614 205 5434 SL1OE ,PLAY BUTTON LEVER
139 614 205 6421 SLIOE ,RECORO BUTTON LEVER
140 614 129 0669 BOSS ,PAUSE STOPPER
141 614 151 7186 SPRING COIL, PAUSE LEVER
142 614 208 0320 LEvER. PAUSE LEVER (E)
143 614 152 1244 SPRING WI RE, PAUSE CONTROL
144 614 139 1120 SL1OE. PUSH BUTTON, ACTUATOR
145 614 140 1539 LEVER, EJECT KICK LEVER
146 614 201 1744 SLIOE .SWITCH ACTUATOR
147 614 129 0676 Bbss, PR STOPPER
151 614 067 3258 SUB CHASSIS ASSY, BASE ASS’Y
152 412 026 1808 SPECIAL WASHER, PWCUT
1.45 X3. BXO.5MM
153 614 070 0916 LEVER ASSY ,GEAR PLATE ASSY
154 614 151 8312 SPRING PLATE ,./
GEAR PLATE SPRING .“ >.
155 614 152 1299 SPRING WIRE ,M CONTROL SPRI
156 614 140 1614 LEvER. SENSING LEVER
151 614 231 2371 ASSY, PINCHROLLER,
PINCH ROLLER ARM ASSY ‘
158 614 205 1306 LEVER, MAGNET, ARM
159 614 021 7605 MAGNETIC HEAO, ERASE
160 614 211 6944 SLISE, HEAO PANEL
161 614 146 5111 BRACKET, TAPE GUIOE
162 412 026 1501 SPECIAL SCREW,
2X6MM
163 412 026 1709 SPECIAL SCREW,
AZIMUTH SCREW 2X7 .7MM
164 614 151 7162 SPRING COIL,
AZIMUTH SPRING ,2X8MM
165 412 031 6607 SPECIAL SCREW,
(+)BINO scREW M2x3MM
166 614 208 0276 LUG ,R/P HEAO EARTH
167 614 208 4052 HEAO ,R/P HEAO
168 614 210 3432 SPRING WI RE, PANEL (P) SPRI
i
.
M*&-?
Part No.
614 204 5695
Description
REEL ASS’f .SUPPLY REEL ASSY
614 208 0351
614 t40 150S
614 204 57o1
614 204 8771
614 134 9046
614 151 8299
412 026 2003
614 067 2?70
614 205 5410
412 026 2201
412 026 23OO
614 152 1282
614 024 1693
614 152 1305
614 152 1275
614 134 9053
412 013 5000
614 205 62o2
614 204 8740
412 026 25o8
614 210 9946
614 205 5373
412 031 65o6
614 260 9392
412 031 94OO
614 264 0388
614 226 7264
614 205 5366
614 152 1268
614 152 1251
614 210 6235
614 211 36o8
SPRING, COMP.
6A(K TENSION SPRING
LEVER, RECORD SAFETY LEVER
REEL ASSY, TAKE-UP REEL ASSY
LEVER, SENSOR
GEAR, F.FWO
SPRING PLATE,
CASSETTE HOLOER SPRING
SPECIAL SCREW,
CTAPPING SCREW 2x4MM
CHASSIS ASSY
SLIOE. EJECT SLIOE LEVER
SPECIAL SCREW,
PTAPPING BINO SCREW 2X5MM
SPECIAL SCREW,
CAMERA TAPPING, 2X4 .5MM
SPRING WI RE, PAUSE LEVER
SWITCH, MOTOR POWER
SPRING WIRE ,RECORO BUTTON
LEVER
SPRING WIRE ,EJECT ACTUATOR
GEAR. CAM GEAR
SPECIAL WASHER
PWASHER CUT 1.2X3 .8X0.3MM
PULLEY ASSY, RF CLUTCH ASSY
SQUARE BELT ,RF 6ELT
SPECIAL WASHER, PWASHER
2X3.5 X0.3MM
FLYWHEEL OISK ASSY
BELT, MAIN BELT
SPECIAL SCREW, MOTOR COLLER
SCREW
6RACKET-M, MOTOR BRACKET
SPECIAL SCREW,
BRACKET MOTOR SCREW
Mi f+ +&r-t ram -y&Ml-l i
+M 1
ASSY ,MOTOR ,
WITH MOTOR PULLEY L# I~u I
I
~L -----------------------
MOTOR (N. S.P)
PULL EY, MOTOR (N. S.P)
SPRING WIRE,
BUTTON LEVER SPRING (B)
SPRING WIRE,
BUTTON LEVER SPRING (A)
SPRIWG .TENSION ,PLAY BUTTON
LEVER SPRING
LEVER. PAUSE BUTTON
1-.”
P?
“~>
Mll
PARTS LIST
:D MEC}
Ref. No.
Ml
Ml-1
MI-2
or
Ml-3
or
Ml-4
Ml-5
or
M2
M3 -
W4
M5
MS
\NISM (PM-DAK ‘SS52/SH) r
Ref. No.
M7
t48
M9
M1O
Mll
Part No.
614 256 2727
Description
ASSY ,CHASSIS
Part No.
614 26o 5790
Description
CORO, PICKUP LEAO
614 252 1380
614 237 8663
614 245 4268
411 044 7205
411 002 4901
412 032 0208
CHASSIS, BASE CHASSIS
Turntable, TURN TA8LE
TURNTA8LE ,TURN TABLE
SCR PAN+SW 2X4 MM, MOTOR FIX
SCR PAN 2X4 MM, MOTOR FIX
614 209 5881
614 209 5898
411 044 7205
614 237 2098
GEAR, PICKUP MOVING
GEAR. RELAY
SCR PAN+SW 2X4 MM, MOTOR FIX
COMMUTATE MOTOR ASSY ,SLED
MOTOR ASSY
SHAFT, PICKUP RAIL
SHAFT, PICKUP RAIL
SWITCH, LIMIT, S1
SWITCH .LIMIT, S1
ASSY ,CONNECTOR-S, MOTOR ANO
SWITCH LEAO
614 145 9622
614 23o 0411
614 024 1617
614 214 9379
614 240 5154
SPECIAL WASHER, AOHESIV&S
ESCAPE STOP Mi2
or
M13
or
M14
or
or
614 045 2105 COMMUTATE MOTOR, SPINOLE
MOTOR
COMMUTATE MOTOR, SPINOLE
MOTOR
SPEIAL SCREW, MPACK GEAR FI
GEAR, PICKUP RACK GEAR
spRING. COMP, RACK GEAR SPRIA
GEAR, PICKUP RACK GEAR
PICKUP, LASER, PICK UP
614 248 2315
412 045 0905
614 209 5911
614 210 9755
614 209 5904
614 239 1303
614 246 6414 ASSY .CONNECTOR-S ,MOTOR ANO
SWITCH LEAO
ASSY, CONNECTOR -S, MOTOR AND
SW LEAO
614 253 6421
L
-14- .. -15–

Y‘1 1
.—..—.
.—-——-.—-—.-—-—-—
%
+4
—
—
—
-J
‘?7‘t%’
h+-llr— .
1
—
E# w
-——–
1
-r
“1L?
—+
*:W
—*
h
—
w’
I
I“1 I
I
I
I
..+
,.,. , I
1
w_~#
“.4!, ,0
-llr———+u—
IC402 12,2) 1A822W :
‘“11 II
II_IIC402 [1/2) 1A8?M A:
tit
#
... ,, .,,,.,/, “,, .:
12345678
A.:?:,?,,,. .11, .,, A
..-. . . ‘: ‘W L4P
-W i% ‘-’’l–1 I1–1:1--1
---W--,l—
,.
.,.

.,. .,.L.,.. .-
i
——.—
1..-..1..-—.
I I \
k-la!
.LL@___ ...L- ....Ici.._
H---J I
m
1
L--+----J._.J
A9 20
—
JDIP+ ~T40, ‘u
I
,,1
I,>
L-
1
I
4+1 :+1
mm

..— ..—
,-
%’
‘, :s –lz– . . .. -oz-
-WI.c
-“.:W,. ----- -- ----- -- ------ -- .------ ------ .-_.-- --. —
*
4
~~.JJ+p$-._..’
L-- “1”l”””””” 1---,’ IAm, I1111
II
tII k!,m
Ill; [Iii+% II ,
II Ili , ,III-PI1=1 II
1111I<!1
II I Ill \J- 1.!
I,,
.!1Ill Ill I II 11111 rb. -
I I 11III
11111
--- .--111-1 $:1 mlLi3 ‘-’”’y 4’”41111
YI
~-- 3)I198L37 ,,.,& Ill Ill 4- X3% ~r =+[) 1IIrm& 3* ml) t
l-! I,. I

ING DIAGRAM (CD )
>
CN102 CD MAIN I?C.B
n. . .. ~~pl.~- “;:, =\
<
CD OPEN /CLOSE
SWITCH P.C.B
CN1O;
+
GMD
L1
‘3P +
5P -
SL +
SL-
CN1O
+
F-
T+
T-
F+
SW
MO
LO
GNO
cog
F
B+O
A+c
CD MECHANISM
‘+ L%T
1I
II
——————————
PICK-UP
l---J Fp#s
1
CD LED f?C.B
-22- -23-

i
ROD ANTENNA
IC20 1(w
w, AM FM
,*0,,
1 0 0
31.1 !8
41.3 !.1
$ao
6 65 47
J6.5 4?
8 65 .7
9 0 0
10
11
,2 1.4 2,1
,1 !0 10
,4 ,0 ,0
,5 25 Z,5
!61 65 1.2
!7 I2.1 21
,81 01 0.7
,91 1< !1
20i 65 47
11 I63 41
22 I6s al
23 I6s .1
la [6S .7
I
3irrI- —
1
1.
HI?A
-i
c
z
m
xl
I
IC201 TA8I22AN II
11
~M40-J 52101-1 S2101-2
..
b
NAB
1N2
NAB
NF2
TAPE
mm
RADIO
LINE
REC
PLAY
Ulc
ON/OFf
,,:
,!
.
,,. ,.

i
I
r.
I-i
I
z
o
i=
n
E
u
(n
w
n
g
II.
‘.
:
.
1
w
N
I
.●
✌✎ ,,
1. i
,,
::
. .
. .
.
.
=3
0
g
,,

i
,,,.
m
,,.
,,
,,
,<,
,,’,,
!,’,1
,!,,,
,,,,,
“LcQ------
I
N
m
I
,,s,,
r,,,,
“!,
!,,
..
..’.
.
.
>
b
tm
c-
L
N
(n
y
0
1A
F
:.
:
—K
_7
~!!_
.—
.
H
—14 -
;. —J-.
n~.
-—n~ —
,.
-—n-=-.
—n -
“
-—u>
Other manuals for MCD-S660F
1
Table of contents
Other Sanyo Cassette Player manuals

Sanyo
Sanyo MCD-Z38F (AU) User manual

Sanyo
Sanyo MCD-S860F User manual

Sanyo
Sanyo VHR-610 User manual

Sanyo
Sanyo M-G12 User manual

Sanyo
Sanyo TRC-2050C User manual

Sanyo
Sanyo CWM-550 User manual

Sanyo
Sanyo MCD-Z530F User manual

Sanyo
Sanyo M7790K User manual

Sanyo
Sanyo TRC-800C User manual
Sanyo
Sanyo TRC970C - Standard Cassette Recorder Model TRC... User manual

Sanyo
Sanyo MCD-ZX700F User manual

Sanyo
Sanyo M-X920LU User manual
Sanyo
Sanyo VHR-350ES User manual

Sanyo
Sanyo MCD-Z165F User manual

Sanyo
Sanyo MG-3 User manual

Sanyo
Sanyo MCD-Z46K User manual

Sanyo
Sanyo M-G12 User manual

Sanyo
Sanyo MCD-Z22L User manual

Sanyo
Sanyo MCD-Z95F User manual
Sanyo
Sanyo TRC-7060 User manual