Sanyo AVL-209 User manual

Before connecting, operating or adjusting this product, please read the manual completely.
Please keep this manual for future reference.
Call our HELPLINE 1-800-263-2244 for further assistance.
SANYO Canada Inc.
www.sanyo.ca
HD (high-definition)*
LCD TV
Instruction Manual AVL-209
* HD Cable or Satellite receiver required.

Table of Contents
ImportantInformation............................................................................................1
Important Safety Precautions..................................................................................2
Preparation ...........................................................................................................5
Identification of Controls........................................................................................7
Connections.........................................................................................................10
Turning the Unit On and Off.................................................................................14
Memorizing the Channels.....................................................................................15
Basic Operations..................................................................................................17
Setting Picture......................................................................................................18
Adjusting Image in D-Sub mode...........................................................................19
Setting Sound.......................................................................................................20
Other Functions ...................................................................................................21
Viewing Closed Captions......................................................................................22
Parental Controls .................................................................................................23
Troubleshooting...................................................................................................28
.........................................................................................29Care and Maintenance

Important Information
WARNING: TO REDUCE THE RISK OF FIRE OR ELECTRIC SHOCK, DO NOT EXPOSE THIS APPARATUS TO
RAIN OR MOISTURE.
The lightning flash with arrowhead symbol
within an equilateral triangle is intended to
alert the user to the presence of
uninsulated dangerous voltage within the
product's enclosure that may be of
sufficient magnitude to constitute a risk of
electric shock to persons.
The exclamation point within an equilateral
triangle is intended to alert the user to the
presence of important operating and
maintenance (servicing) instructions in the
literature accompanying the appliance.
RISK OF ELECTRIC SHOCK
CAUTION
CAUTION-To reduce the risk of electric shock, do
not perform any servicing other than that
contained in the operating instructions
unless you are qualified to do so.
"Note to CATV system installer: This reminder is provided to call the CATV system installer's attention to Article 820-40 of
the National Electrical Code that provides guidelines for proper grounding and, in particular, specifies that the cable
groundshallbeconnectedtothegroundingsystemofthebuilding,asclosetothepointofcableentryaspractical.”
This product utilizes tin-lead solder and fluorescent lamp containing a small amount of mercury. Disposal of these
materials may be regulated due to environmental considerations. For disposal or recycling information, please
contactyourlocalauthoritiesortheElectronicIndustriesAlliance:www.eia.org
FCC STATEMENT
FCC Notice
LCD TV: A CLASS B digital device
ThisequipmenthasbeentestedandfoundtocomplywiththelimitsforaClassBdigitaldevice,pursuanttopart
15 of the FCC Rules. These limits are designed to provide reasonable protection against harmful interference
whentheequipmentisoperatedinacommercialenvironment.
This equipment generates, uses, and can radiate radio frequency energy and, if not installed and used in
accordancewith the instructionmanual, maycause harmful interference toradio communications.Operation
of this equipment in a residential area is likely to cause harmful interference in which case the user will be
requiredtocorrecttheinterferenceathisownexpense.
FCC CAUTION:
Pursuant to 47CFR, Part 15.21 of the FCC rules, any changes or modifications to this monitor not expressly
approvedbythemanufacturercould causeharmfulinterferenceandwouldvoidtheuser'sauthoritytooperate
thisdevice.
WARNING: This is a CLASS B product. In a domestic environment this product may cause radio
interference in which case the user may be required to take adequate measures to
counterinterference.
1
Thank-you for choosing SANYO. This model has many features to enhance your viewing, such as HDTV (via suitable
cable or satellite receiver) and computer monitor capability. Please read all instructions.

Important Safety Precautions
Electrical energy can perform many useful functions, but it can also cause personal injuries and property
damage if improperly handled. This product has been engineered and manufactured with the highest priority
on safety. But IMPROPER USE CAN RESULT IN POTENTIAL ELECTRICAL SHOCK OR FIRE HAZARD. In order to
prevent potential danger, please observe the following instructions when installing, operating and cleaning
the product. To ensure your safety and prolong the service life of your LCD TV product, please read the
followingprecautionscarefullybeforeusingtheproduct.
5. Do not use this apparatus near water---for example, near a
bathtub, washbowl, kitchen sink, or laundry tub, in a wet basement, or
nearaswimmingpool,andthelike.
Do not use immediately after moving from a low temperature to high
temperature environment, as this causes condensation, which may
resultinfire,electricshock,orotherhazards.
Apparatusshallnotbe exposedtodrippingorsplashingandnoobjects
filledwithliquids,suchasvases,shallbeplacedontheapparatus.
6. Clean only with dry cloth---Unplug this product from the wall
outlet before cleaning. Do not use liquid cleaners or aerosol cleaners.
Useadampclothforcleaning.
7. Ventilation---Do not block any ventilation openings. Install in
accordance with the manufacturer instructions. The vents and other
openings in the cabinet are designed for ventilation. Do not cover or
block these vents and openings since insufficient ventilation can cause
overheating and/or shorten the life of the product. Do not place the
product on a bed, sofa, rug or other similar surface, since they can
block ventilation openings. This product is not designed for built-in
installation; do not place the product in an enclosed place such as a
bookcase or rack, unless proper ventilation is provided or the
manufacturer’sinstructionsarefollowed.
8.Heat sources---Do not install near any heat sources such as
radiators, heat registers, stoves, or other apparatus (including
amplifiers)thatproduceheat.
9.Grounding or Polarization---Do not defeat the safety purpose of the polarized or grounding-type plug. A
polarizedplug hastwoblades withonewider thanthe other.Agroundingtypeplug hastwo bladesanda third
grounding prong. The wide blade or the third prong are provided for your safety. If the provided plug does not
fitintoyouroutlet,consultanelectricianforreplacementoftheobsoleteoutlet.
10.Power cord protection---Protect the power cord from being walked on or pinched particularly at plugs,
conveniencereceptacles,andthepointwheretheyexitfromtheapparatus.
11.Attachments---Only use attachments/accessoriesspecified by the manufacturer.Do not useattachments
notrecommendedbythemanufacturer.Useofimproperattachmentscanresultinaccidents.
2

Important Safety Precautions (continued)
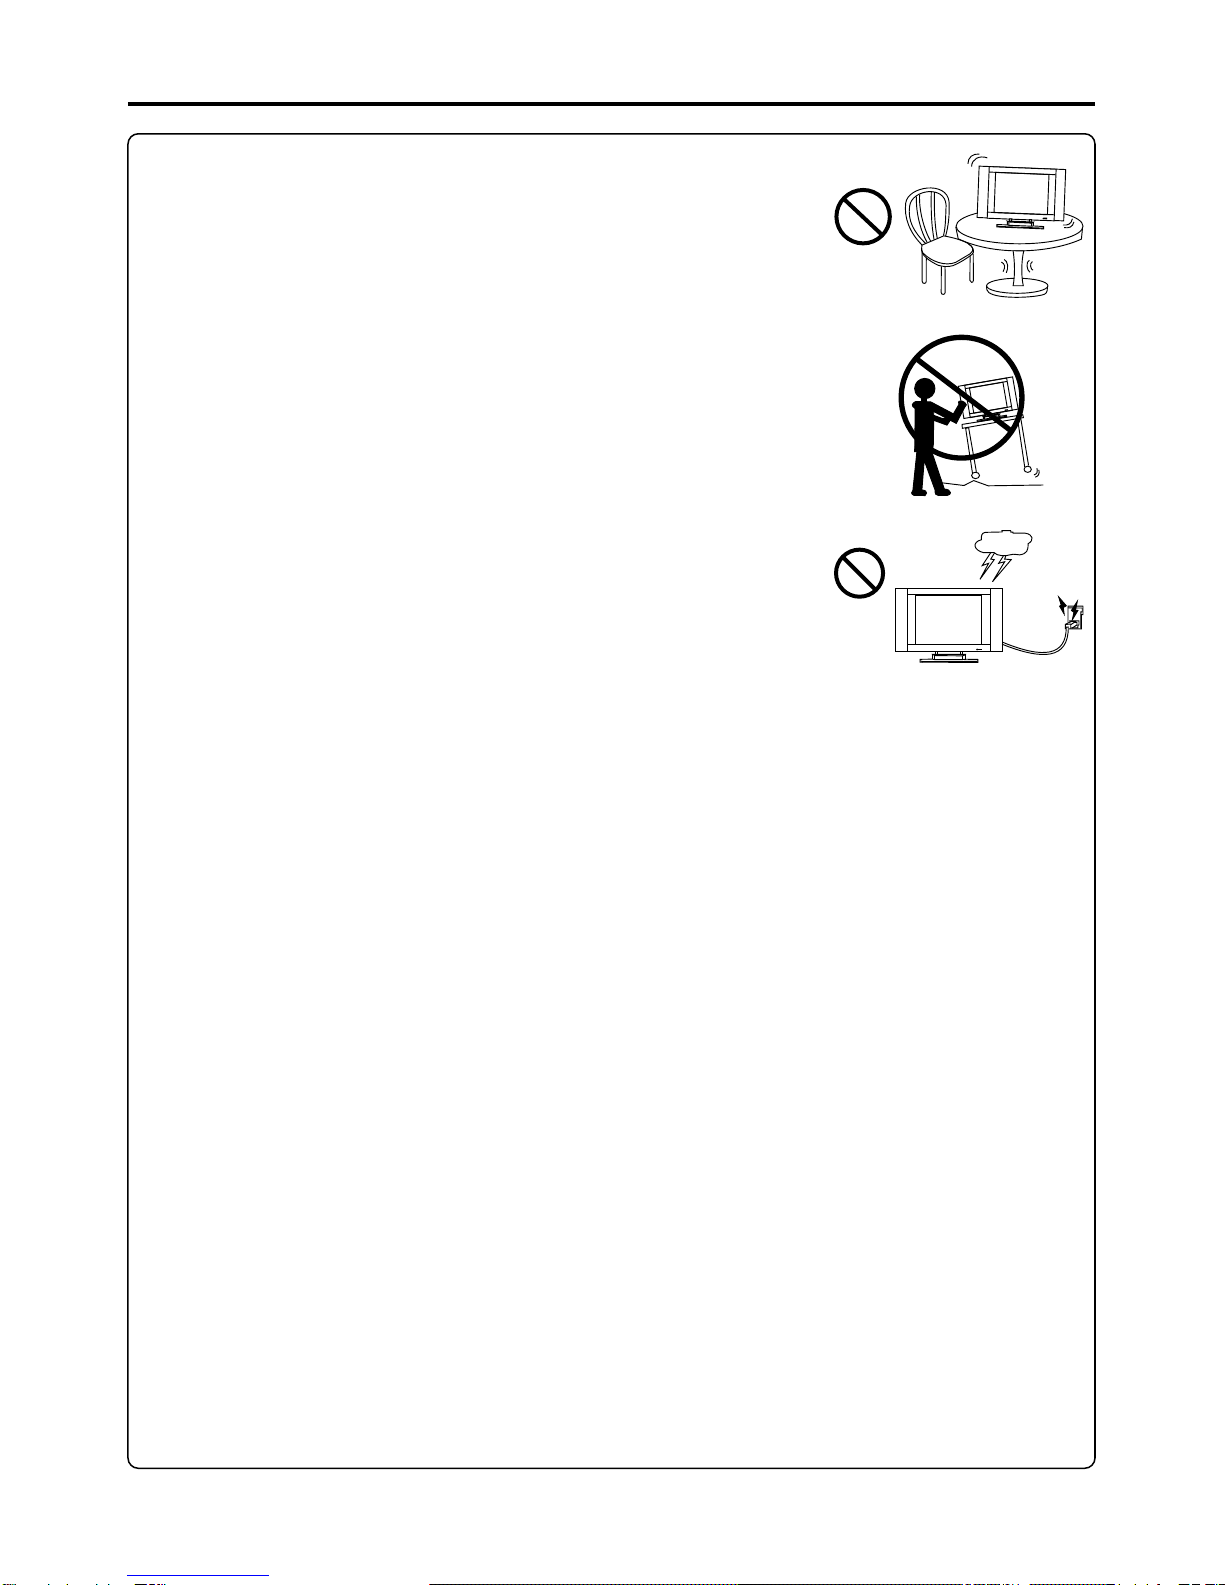
12. Stand---Useonlywith thecart,stand,tripod, bracket,ortablespecifiedby
the manufacturer or sold with the apparatus. Do not place the product on an
unstabletrolley,stand,tripodortable.Placingtheproductonanunstablebase
can cause the product to fall, resulting in serious personal injuries as well as
damage to the product. When mounting the product on a wall, be sure to
follow the manufacturer’s instructions. Use only the mounting hardware
recommendedbythemanufacturer.
13. Move Carefully---When a cart is used, use caution when moving the
cart/apparatus combination to avoid injury from tip-over. Sudden stops,
excessiveforceandunevenfloorsurfacescancausetheproducttofallfromthe
trolley.
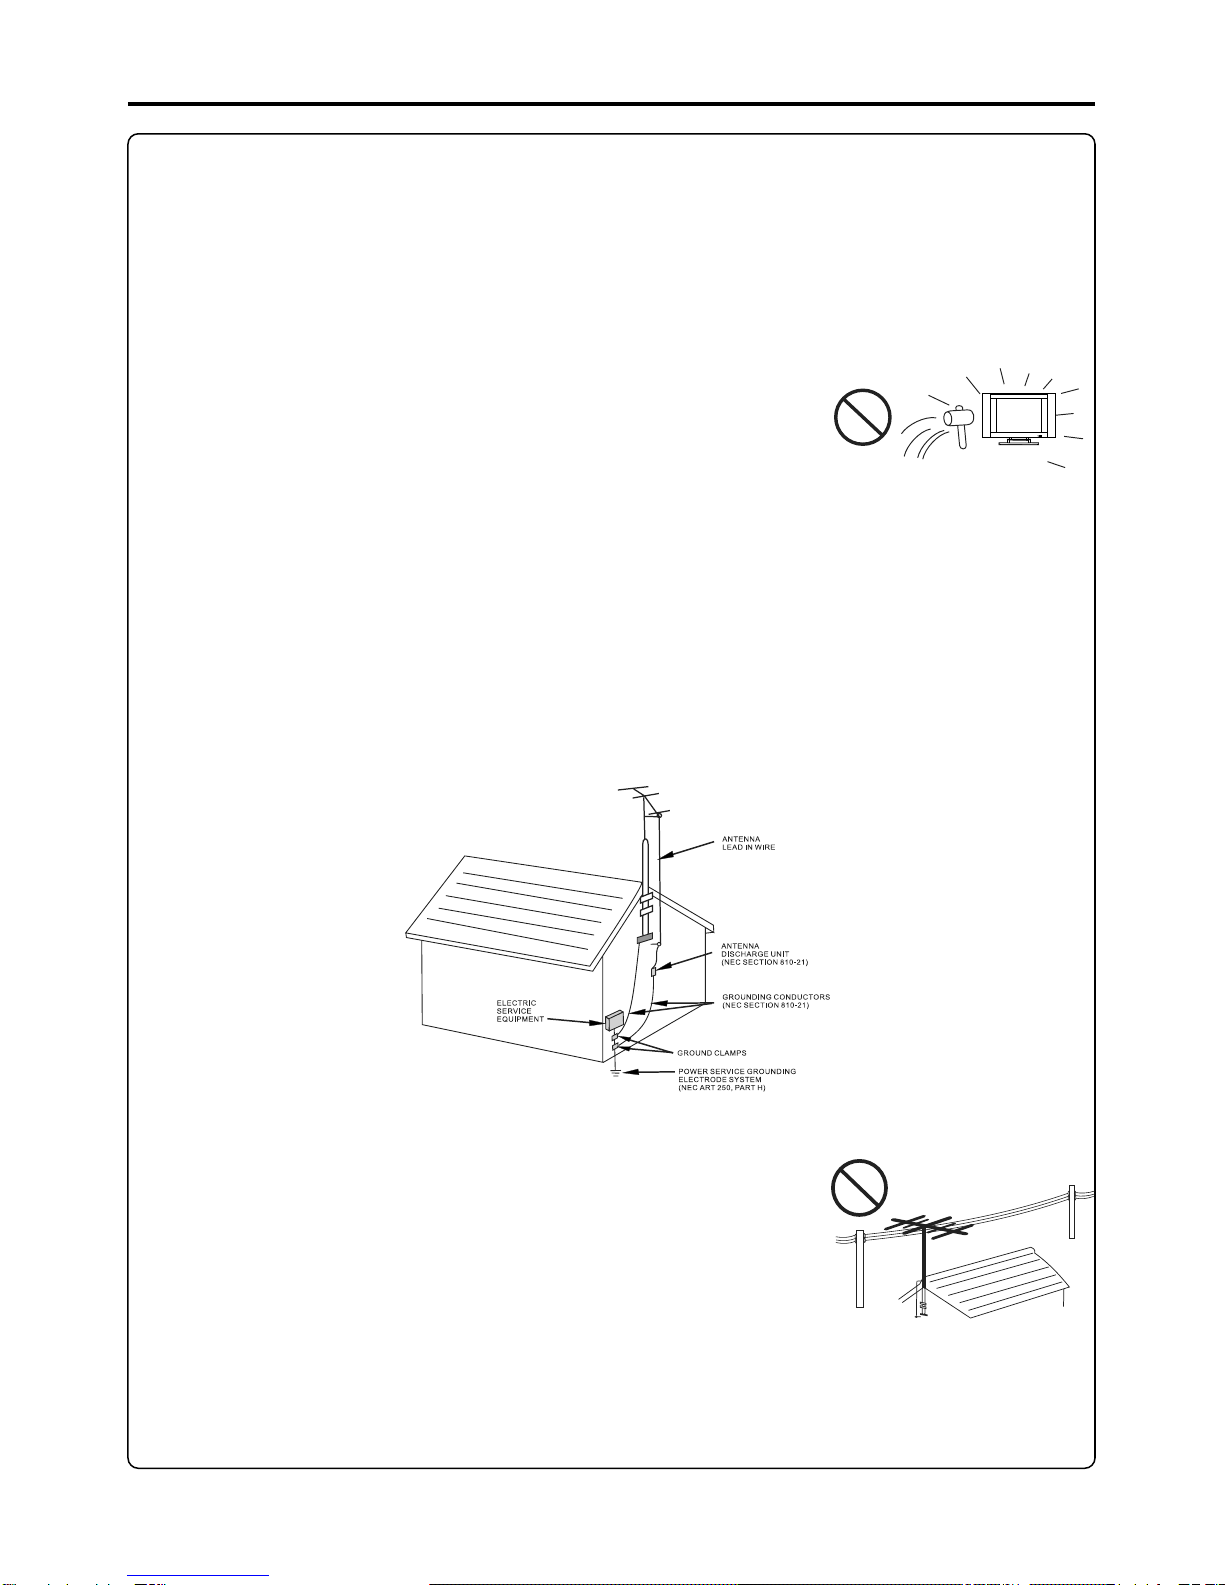
14. Lightning---Unplug this apparatus during lightning storms or when
unusedforlongperiodsoftime.
For added protection for this television equipment during a lightning storm, or
when it is left unattended and unused for long periods of time, unplug it from
the wall outlet and disconnect the antenna. This will prevent damage to the
15. Servicing---Refer all servicing to qualified service personnel. Servicing is required when the apparatus
has been damaged in any way; for example, if the power-supply cord or plug is damaged, liquid has been
spilledor objects have fallen intothe apparatus,the apparatushas beenexposed to rain or moisture,does not
operatenormally,orhasbeendropped.
16. Replacement parts---In case the product needs replacement parts, make sure that the service person
usesreplacementparts specifiedbythe manufacturer,or thosewiththe samecharacteristicsandperformance
astheoriginalparts.Useofunauthorizedpartscanresultinfire,electricshockand/orother danger.
17. Overloading---Do not overload wall outlets, extension cords, or convenience receptacles on other
equipmentasthiscanresultinariskoffireorelectricshock.
18. Entering of objects and liquids---Never insert an object into the product through vents or openings.
High voltage flows in the product, and inserting an object can cause electric shock and/or short internal parts.
Forthesamereason,donotspillwaterorliquidontheproduct.
19. Damage requiring service---Ifanyofthefollowingconditionsoccur,unplug thepowercordfromtheAC
outlet,andrequestaqualifiedservicepersontoperformrepairs.
a.Whenthepowercordorplugisdamaged.
b.Whenaliquidisspilledontheproductorwhenobjectshavefallenintotheproduct.
c.Whentheproducthasbeenexposedtorainorwater.
d.Whentheproductdoesnotoperateproperlyasdescribedintheoperatinginstructions.
Do not touch the controls other than those described in the operating instructions. Improper adjustment of
controls not described in the instructions can cause damage, which often requires extensive adjustment work
byaqualifiedtechnician.
e.Iftheproducthasbeendroppedorthecabinethasbeendamagedinanyway.
f. When the product displays an abnormal condition or exhibits a distinct change in performance. Any
noticeableabnormalityintheproductindicatesthattheproductneedsservicing.
20. Safety checks---Upon completion of service or repair work, request the service technician to perform
safetycheckstoensurethattheproductisinproperoperatingcondition.
21. Wall or ceiling mounting---When mounting the product on a wall or ceiling, be sure to install the
productaccordingtothemethodrecommendedbythemanufacturer.Thisisasafetyfeature.
3

23. Panel protection---The LCD panel used in this product is made of glass.
Therefore,itcanbreakwhenthe productisdroppedorimpacted uponbyother
objects. Be careful not to be injured by broken glass pieces in case the LCD
panelbreaks.
24. Pixel defect---The LCD panel is a very high technology product, giving you finely detailed pictures.
Occasionally, a few non-active pixels may appear on the screen as a fixed point of blue, green or red. Please
notethatthisdoesnotaffecttheperformanceofyourproduct.
Important Safety Precautions (continued)
EXAMPLE OF ANTENNA GROUNDING AS PER
NATIONAL ELECTRICAL CODE
NEC—NATIONAL ELECTRICAL CODE
<Ifanoutsideantennaisconnected tothetelevisionequipment, besuretheantennasystemisgroundedsoas
to provide some protection against voltage surges and built-up static charges. Section 810 of the National
ElectricalCode provides informationwithrespect toproper groundingof the mastand supportingstructure,
grounding of the lead-in wire to an antenna discharge unit, size of grounding conductors, location of
antenna-dischargeunit,connectiontogroundingelectrodes,andrequirementsforthegroundingelectrode.
<An outside antenna system should not be located in the vicinity of overhead
power lines or other electric light or power circuits, or where it can collide
withsuchpowerlinesorcircuits.Wheninstallinganoutsideantennasystem,
extreme care should be taken to keep from touching such power lines or
circuits,ascontactwiththemmightbefatal.
22. Power source---This productis intendedtobe suppliedby alisted powersupply indicated onthemarking
label. If you are not sure of the type of power supply to your home, consult your product dealer or local power
company. For added protection for this product during a lightning storm, or when it is left unattended and
unused for long periods of time, unplug it from the wall outlet and disconnect the cable system. This will
prevent damage to the product due to lightning and power line surges. When the unit has to be used with
another power supply voltage, the power cable must be changed. Consult your product dealer. The socket
outletshouldbeinstalledneartheequipmentandeasilyaccessible.Useonlythepowercorddesignatedbyour
dealer to ensure safety and EMC. When connecting other products such as VCRs and personal computers, you
shouldturnoffthepoweroftheunitforprotectionagainstelectricshock.
4

Preparation
Precaution on battery use
Improper use of batteries can result in a leakage of chemicals and/or explosion. Be sure to follow the
instructionsbelow.
<Placebatterieswiththeirterminalscorrespondingtothe(+)and(–)indications.
<Differenttypesofbatterieshavedifferentcharacteristics.Donotmixbatteriesofdifferenttypes.
<Do not mix old and new batteries. Mixing old and new batteries can shorten the life of new batteries and/or
causeoldbatteriestoleakchemicals.
<Remove batteries as soon as they are non-operable. Chemicals that leak from batteries can cause a rash. If
chemicalleakageisfound,wipewithacloth.
<Thebatteriessuppliedwiththeproductmayhaveashorterlifeexpectancyduetostorageconditions.
<If the remote control is not used for an extended period of time, remove the batteries from the remote
control.
Using the Remote Control
<Use the remote control by pointing it towards the remote sensor window of the
set. Objects between the remote control and sensor window may prevent
Cautions regarding use of remote control
<Do not expose the remote control to shock. In addition, do not expose the
remotecontroltoliquids,anddonotplaceinanareawithhighhumidity.
<The remote control may not work properly if the remote sensor window of the main unit is under direct
sunlight or strong lighting. In such a case, change the angle of the lighting or LCD TV set, or operate the
remotecontrolclosertotheremotesensorwindow.
Batteries for the Remote Control
IftheremotecontrolfailstooperatetheLCDTVfunctions,replacethebatteriesintheremotecontrol.
Openthebatterycover.
1
Inserttwosize-AAAbatteries.
2
3
Note: This illustration is for reference only. The remote sensor may be in
differentlocationsondifferentmodels.
5
Replacethebatterycover.
Install two "AAA"
batteries matching the
+/- polarities of the
batterytothe+/-marks
inside the battery
compartment.
30
30
5m

Preparation (continued)
CABLE TV (CATV) CONNECTION
A 75-ohm coaxial cable connector is built into the set for easy hookup. When connecting the 75- ohm coaxial cable
to the set, screw the 75-ohm cable to the ANT. Terminal.
Some cable TV companies offer “premium pay channels”. Since the signals of these premium pay channels are
scrambled, a cable TV converter/descrambler is generally provided to the subscriber by the cable TV company.
This converter/descrambler is necessary for normal viewing of the scrambled channels. For more specific instructions
on installing cable TV, consult your cable TV company. One possible method of utilizing the converter/descrambler
provided by your cable TV company is explained below. Please note: An RF switch provided with two inputs (A and B)
is required (not supplied).
“A”positionontheRFswitch(notsupplied):YoucanviewallunscrambledchannelsbyusingtheTV’schannelkeys.
“B”position on theRF switch (notsupplied) : Youcanview the scrambledchannels via theconverter/descramblerby
usingtheconverter’schannelkeys.
Antenna Connection
Note:
Consult your Dealer or Service Center for the type of splitter, RF switch or combiner that might be required.
Cable TV converter/
descrambler
(not supplied)
Two-set
signal
splitter
(not
supplied)
Cable TV Line
RF switch (not supplied)
OUT IN
ANTENNAS
The antenna requirements for good color television reception are more important than those for black & white
televisionreception.Forthisreason,agoodqualityoutdoorantennaisstronglyrecommended.
Thefollowingisabriefexplanationofthetypeofconnectionsthatareprovidedwiththevariousantennasystems.
1. A 75-ohm system is generally a round cable with F-type connector that can
easilybeattachedtoaterminalwithouttools(notsupplied).
2. A 300-ohm system is a flat “twin-lead” cable that can be attached to a 75-
ohmterminalthrougha300-75-ohmadapter(notsupplied).
OUTDOOR ANTENNA CONNECTION
Use one of the following two diagrams if you connect an outdoor
antenna.
A:UsingaVHF/UHFcombinationoutdoorantenna.
B:UsingseparateVHFand/orUHFoutdoorantennas.
F-type connector
75-ohm coaxial cable (round)
300-ohm twin-lead cable (flat)
A. CombinationVHF/UHF Antenna
B. Separate VHFand/or
UHF Antennas
Antenna cable
75-ohm
coaxial cable
300-ohm
twin-lead
VHF/UHF
antenna
VHF/UHF
antenna
300/75-ohm
adapter
(not supplied)
300-ohm
twin-lead
300-ohm
twin-lead
75-ohm
coaxial cable
OUT IN
VHF
antenna
UHF
antenna
Combiner
(not supplied)
or
or
6

Identification of Controls
Main Unit
Note:
Functions of VOL+/-, CH+/-, MENU, SOURCE and POWER are also provided to the remote control. This
operation manual provides a description based on operating functions with the remote control.
1. SOURCE
To select the input signal source.
2. MENU
Press this button to access the MENU main page.
3. CH+/-
Press these two buttons to directly change the TV channel;
In OSD MENU, press these buttons to choose the OSD items.
4. VOL+/-
Press the VOL+ or VOL- button to directly increase or decrease the sound volume level;
In OSD MENU, press these buttons to adjust the value or setting of each item.
5. POWER
Press this button to turn the unit ON from STANDBY mode. Press it again to turn the set back to
STANDBY.
7
Power Indicator
Remote Sensor
Power On/ Standby
CH+
CH-
VOL+
VOL-
MENU
SOURCE
Channel Up
Select Input Signal
MENU
Channel Down
Volume Up
Volume Down

Identification of Controls (continued)
Main Unit
1. D-Sub input/Audio Line in
2. Component Inputs (Y, Pb/Cb, Pr/Cr, Audio L, R)
Connect to the audio and component output jacks of a DVD player or Set-Top Box.
3. Antenna input
Allows you to connect cable or outdoor antenna.
4. S-Video input
Receive a S-Video signal from external source such as VCR or DVD player.
5. AV inputs (Video, Audio L, R)
Receive video/audio signals from external sources such as VCR or DVD player.
Connect to the D-Sub/audio output jacks on your PC.
8

Remote Control
Identification of Controls (continued)
9
Turn the unit on or off
To select Stereo mode
Sound mute
[0-9] number buttons:
Direct channel select
To select input signal source
To access the MENU main page
or exit menu operation
To display channel status
or signal information
Picture mode select Audio mode select
To set sleep timer
To quickly jump between current
channel and last selected channel.
To switch channels;
In MENU operation, use CH+/-
to select menu item
To adjust volume;
In MENU operation, use ENTER
or VOL+/- to adjust selected
item
To confirm your operation

Connections
Connect a VCR
Connect the Audio/Video cables between the Audio (L/R)/Video jacks on the unit and VCR.
Note:
For better video, you can use the S-video jack if your source supports it.
The unit automatically identifies S-Video if you are using S-Video jack. We recommend you to disconnect S-Video
cable before you use Video jack.
How to connect:
1. Turn on your LCD TV, press SOURCE button repeatedly to select Video.
2. Turn on your VCR , insert a videotape and press the Play button.
To play VCR
Cautions Before Connecting
Carefullychecktheterminalsforpositionandtypebeforemakinganyconnections.
Theillustrationoftheexternalequipmentmaybedifferentdependingonyourmodel.
Looseconnectorscanresultinimage or color problems. Makesurethatallconnectors are securely inserted into
theirterminals.
Refertotheoperatingmanualoftheexternaldeviceaswell.
Whenconnectinganexternaldevice,turnthepoweroffonthepaneltoavoidanyissues.
VCR
Yellow (VIDEO)
White (AUDIO L)
Red (AUDIO R )
WW
YY
RR
R L VIDEO
AUDIO
-
S VIDEO
ANT IN
ANT OUT AV IN
Rear of the VCR
10
Video
cable
Audio
cable
YY
WW
RR
YY
WW
RR
Input Source
Source-switch
Video
S-Video
cable
AV OUT
or
R L VIDEO
AUDIO

Connections (continued)
Connect a Camcorder
Note:
Connect the Audio/Video cables between the Audio (L/R)/Video jacks on the unit and camcorder.
How to connect:
1. Turn on your LCD TV, press SOURCE button repeatedly to select Video.
2. Turn on your camcorder and set it to output mode. (For details, refer to your camcorder owner's manual.)
3. Insert the tape into the camcorder and press Play button.
To playback Camcorder
The operations of the camcorder may be different and is dependent on your
model. Please read the owner's manual of your camcorder to confirm
operation.
11
Input Source
Source-switch
Video
Yellow (VIDEO)
White (AUDIO L)
Red (AUDIO R )
WW
YY
RR
Video
cable
Audio
cable
YY
WW
RR
YY
WW
RR
R L VIDEO
AUDIO
OUT IN

Connect a DVD player
Connections (continued)
12
Connect the Video cable between the Y, Pb, Pr input jacks on the unit and Y, Pb, Pr ( or Y, Cb, Cr) output jacks
on the DVD player or HDTV receiver.
Connect the Audio cable between the AUDIO input jack on the unit and AUDIO output jacks on the DVD
player. Set the DVD player/HD receiver screen menu to 16:9 widescreen.
1. Turn on your LCD TV, press SOURCE button repeatedly to select YPbPr.
2. Turn on your DVD player or HD receiver.
3. Insert a disc and press PLAY button, or select a channel on the HD receiver.
To play DVD/HDTV Receiver
How to connect a DVD Player or HDTV Cable/Satellite receiver using Component
Video Connections:
Input Source
Source-switch
YPbPr
AUDIOCOMPONENT
-
S VIDEO
AV OUT
RLVIDEO
AUDIO
Rear of the DVD player
or HD receiver
L R
AUDIO
PbPr
Y
RR
GG
BB
Red (AUDIO R, P /C )
Green (Y)
Blue (P /C )
b
r
b
GGRR
WW
RR
Yellow (VIDEO)
r
YY
BB
GGRR
WW
RR
BB
Note: There may be some movies or programs that are formatted in “super wide-
screen”, where a bit of the top and bottom portions of the TV screen might not be
filled.

Connect a PC
Connections (continued)
How to connect:
1. Turn on your LCD TV, press SOURCE button repeatedly to select D-Sub.
2. Turn on your PC and check for PC system requirements.
3. Adjust the screen resolution and settings on your computer to the required
settings for this model: 1280 x 768 resolution with 60 Hz vertical scanning
frequency (or refresh rate).
To Watch the PC screen
Connect a D-Sub cable between the D-Sub jack on the PC and the D-Sub input jack on the unit.
Connect an Audio cable between the AUDIO output on the PC and AUDIO input jack on the unit.
13
Input Source
Source-switch
D-Sub

Turning the Unit On and Off
Turning On
Turning Off
With the power on, press the Power button on the remote control
toturnoff.
Note:
You can also use the Power button on the control panel on the main unit.
Viewing the MENUs and Displays
Viewing the MENUs
Your LCD TV has a simple, easy-to-use menu system that appears on the screen. This system makes it convenient
andfasttousefeaturesontheunit.TheunitalsoletsyoudisplaythestatusofmanyofyourLCDTVfeatures.
With the power on, press the MENU button on the remote
control. The main menu appears on the screen. The picture
menuisselected.
Use the CH+/- to select submenu page. Use ENTER or
VOL+/- to access the selected submenu page.
1
2
Note:
Displaying Status Information
•
•W
T
o clearly introduce the menu operations, this operation manual
provides a description based on operation with the remote control.
hen performing confirmation in MENU operation, you may press
either ENTER or VOL+/- button.
PresstheDSP buttonontheremote; theunitwilldisplaycurrentstatusinformationsuchaschannelnumber,audio
modeorsignalsource,etc.
Insertthepowercordintothewalloutlet.
PressthePower buttonontheremotecontrol.
Theunitwillbeturnedonandyouwillbereadytouseitsfeatures.
14
Normal
Picture Mode
Brightness
Contrast
Color
Tint
Sharpness
50
75
60
50
12
Move Select Menu to exit
Picture
Use the CH+/- to select menu item. Use VOL+/- to adjust value of
item. Use ENTER or VOL+/- to confirm.
You can press the MENU button repeatedly to return or exit the menu
operations.
3

Memorizing the Channels
Selecting the Signal Source
Your LCD TV can memorize and store all the available channels for both antenna and cable channels. After the
availablechannelsarememorized,useCH+/- toscanthechannels.
Press MENU todisplaythemenumainpage.
1
Before your LCD TV can memorize the available channels, you must specify the type of signal source that is
connected to the unit. (i.e., an antenna or cable system)
Press CH+ repeatedly to select Channel page./-
2
Press ENTER or VOL+/- to access the submenu.
3
Press ENTER or VOL+/- to toggle between Antenna or Cable.
5If you are connected to an antenna, please select Antenna. If you
connectcable,pleaseselectCable.
Storing Channels in Memory Automatically
Press ENTER or VOL+/- to store channels in memory automatically.
The unit will begin memorizing all the available channels. During the process
oftheAutoSearch,youcanpressMenu toexit.
1
2
15
Cable
Channel
Auto Searching
Move Select Menu to exit
On Off
Cable
Source
Channel Skip
Fine Tune
AFC
Frequency 55.25 MHz
Channel
Auto Searching
Move Select Menu to exit
On Off
Source
Channel Skip
Fine Tune
AFC
Frequency 55.25 MHz
Press CH+ to select ./- Source item
4
Auto Searching
CH No 11
Repeatsteps1~3in[Selecting the Signal Source]toaccessChannel page.
The Auto Searching item will be highlighted automatically.
Press ENTER or VOL+/- to select On or Off.
3
Press CH+ repeatedly to select AFC item./-
2
When the AFC is set to On, the unit will automatically tune the program
frequencytoprovidethebestpossiblepictureandsound.
Setting Auto Frequency Control (AFC)
1Repeatsteps1~3in[Selecting the Signal Source]toaccessChannel page.
Cable
Channel
Auto Searching
Move Select Menu to exit
On Off
Source
Channel Skip
Fine Tune
AFC
Frequency 55.25 MHz
On Off
On Off
On Off
Cable
Channel
Auto Searching
Move Select Menu to exit
On Off
Source
Channel Skip
Fine Tune
AFC
Frequency 55.25 MHz
On Off
Menu to exit

Memorizing the Channels (continued)
16
Manual Fine Tuning
Press VOL+/- to fine tune till the best possible picture and sound are
obtained.
Adding and Erasing Channels
2
3
Usenumber buttons todirectlyselectachannelthatwillbeaddedorerased.
1
4PressENTER orVOL+/- toselectOn orOff.
When the item is set to on, the selected channel will be erased.
When the item is set to off, the selected channel will be added.
The erased channels can not be selected by using the CH+/- buttons unless you use number buttons to
input channel number directly.
1Repeatsteps1~3in[Selecting the Signal Source]toaccessChannel page. Cable
Channel
Auto Searching
Move Select Menu to exit
On Off
Source
Channel Skip
Fine Tune
AFC
Frequency 55.25 MHz
Press CH+/- repeatedly to select Fine Tune item.
2
3
Cable
Channel
Auto Searching
Move Select Menu to exit
On Off
Source
Channel Skip
Fine Tune
AFC
Frequency 55.25 MHz
Repeatsteps1~3in[Selecting the Signal Source]toaccessChannel page.
Press CH+/- repeatedly to select Channel Skip item.
On Off
On Off
Ifyoufinetuneaprogrammanually,theAFC willbeturnedoff automatically.

Basic Operations
Changing Channels
Using the Channel Buttons (CH+ or CH-)
PresstheCH+ or CH- tochangechannels.
Whenyou press theCH+ or CH-, the unitchanges channelsin sequence.You will seeall thechannelsthat theunit
hasmemorized.
Youwillnotseechannelsthatwereerased.
Direct Accessing Channels
Pressthenumber buttons togodirectlytoachannel.
To select a one-digit channel: press the 0-9 number buttons to input the channel number and press ENTER or
waitforsomesecondstogototheselectedchannel.
To select a two-digit channel: press the 0-9 number buttons to input the channel number and press ENTER or
waitforsomesecondstogototheselectedchannel.
Toselecta three-digit channel: pressthe0-9 number buttons toinput the channel numberoneby one, then the
unitgoestotheselectedchannel.
Whenyouusethenumberbuttons,youcandirectlyselectchannels that wereerased.
Note:
Using the Return button
Pressthisbuttontoswitchbetweenthecurrentchannelandthe previous channel.
Adjusting the Volume
Using the volume buttons (VOL+ and VOL-)
PresstheVOL + orVOL- toincreaseordecreasethevolume.
Using the MUTE button
Atanytime,youcantemporarilycutoffthesoundusingtheMUTE button.
PresstheMUTE buttonandthesoundcutsoff.
1
Toresumesound,pressthe MUTE buttonagain.
2
17
Selecting a MENU Language
Press Menu to exit.
5
Press MENU to display the menu main
1
Press CH+ repeatedly to select Display page./-
2
Press ENTER or VOL+/- to access the submenu.
3
Press ENTER or VOL+/- to toggle between English, French and Spanish.
4
Off
Bright
English
Off
Display
Language
Transparency
Back Light
Captions
CC When Mute
Move Select Menu to exit
Yes
Factory Reset
On
DCDi Off

Setting Picture
Customizing the Picture
Press MENU todisplaythemenumainpage.
1Thepicturepagewillbedisplayedautomatically.
Press CH+/-toselecttheitemyouwishtochange.
3Press VOL+/- toadjustthevalueoftheitem.
4PressMenu toexit.
5
In TV/Video mode
In D-Sub mode
Option Function Operation Range
Color Adjusts color saturation. VOL+
VOL-
deeper
paler 0~100
Brightness Adjusts screen brightness for easier viewing of
dark picture such as night scenes and black hair.
VOL+
lighter
VOL- darker 0~100
Contrast Adjusts image contrast. VOL+ stronger
VOL- weaker
0~100
Sharpness Adjusts image sharpness and displays a sharp
image. 0~24
VOL+ sharper
VOL- softer
Tint Adjusts tint for image. VOL+
VOL-
greenish
purplish 0~100
Option Function Operation Range
Using the Preset Picture Mode
YoumayalsousetheP.M buttontoquicklyselectpicturemode.
There are three preset picture modes (Bright, Soft and Normal)and one user-set picture mode (User). Each
presetmodehasitsownpicturesettings.
Bright:Selectforabrightpicture.
Soft:Selectforafinelydetailedpicture.
Normal:Selectforanormalpicture.
AdjustedsettingsarestoredinUsermode.
When viewing regular (not HDTV) TV channels or sources via video/S-Video, there will be a slight widening of
theimageinordertofillthe16:9screen.
PressENTER orVOL+/- toaccessthePicture submenu.
2
18
User
Picture Mode
55
90
50
49
12
Move Select Menu to exit
Picture
Color Adjusts color saturation. VOL+
VOL-
deeper
paler 0~100
Brightness Adjusts screen brightness for easier viewing of
dark picture such as night scenes and black hair.
VOL+
lighter
VOL- darker 0~100
Contrast Adjusts image contrast. VOL+ stronger
VOL- weaker 0~100
Normal
Brightness
Contrast
Color
Tint
Sharpness
Move Select Menu to exit
Picture
Press MENU to display the menu main
1Thepicturepagewillbedisplayedautomatically.
3Press ENTER orVOL+/- toselectadesiredpicturemode.
PressENTER orVOL+/- toaccessthePicture submenu.
2ThePicture Mode itemishighlightedautomatically.
Picture Mode
Brightness
Contrast
Color
Tint
Sharpness
50
75
60
50
12
Other manuals for AVL-209
1
Table of contents
Other Sanyo LCD TV manuals

Sanyo
Sanyo LCD-27XA2 User manual

Sanyo
Sanyo LCD-46XAZ10FH User manual

Sanyo
Sanyo LCD-32XR8DA User manual

Sanyo
Sanyo LCD-24XAZ10F User manual

Sanyo
Sanyo CLT-1554 User manual

Sanyo
Sanyo LCE-32R40HD User manual

Sanyo
Sanyo DP32642 User guide

Sanyo
Sanyo FS32D05F User manual

Sanyo
Sanyo LCD-32XR9K User manual

Sanyo
Sanyo LCD-22XR9DZ User manual

Sanyo
Sanyo AVL-191 User manual

Sanyo
Sanyo LCD-22R35FHD User manual

Sanyo
Sanyo LCD-23XL2 User manual

Sanyo
Sanyo DP26648 User manual

Sanyo
Sanyo LCD-DP42410 User manual

Sanyo
Sanyo LCD-32CA9S User manual

Sanyo
Sanyo LCD-32XR56DZ User manual

Sanyo
Sanyo LCD-22XR7SN User manual

Sanyo
Sanyo LCD-42XR7H User manual

Sanyo
Sanyo LCD-37XR8DA User manual