Sanyo DP42D24 User manual

720P HDTV
1080P HDTV
DP42D24
DP50E44
DP55D44
DP58D34
DP65E34
Model: DP39D14
Model:

1
The mains plug is used as disconnect device, the disconnect device shall remain readily
operable.
WARNING
apparatus.

2
1.
2.
3.
4.
5.
6.
7.
8.
9.
10.
11.
12.
13.
14.
15.
16

3
Note to CATV system installer:
This reminder is provided to call CATV system installer’s attention to Article 820-40 of the NEC that
provides guideline for proper grounding and , in particular, specifies that the cable ground shall be
connected to the grounding system of the building, as close to the point of cable entry as practical.”
17.
18.
19.
20.
An outside antenna system should not be located in the vicinity of overhead power lines or other
electrical light or power circuits, or where it can fall into such power lines or circuits. When
installing an outside antenna system, extreme care should be taken to keep from touching such
power lines or circuits as contact with them might be fatal.
Wall or Ceiling Mounting – The product should be mounted to a wall or ceiling only as
recommended by the manufacturer.
Apparatus shall not be exposed to dripping or splashing, and no object filled with liquids, such as
vases, shall be placed on it.
When the MAINS plug is used as the disconnect device, the disconnect device shall remain
readily operable.

4
Table of Contents
Chapter 1: Connections and Setup
Chapter 2: Menu Operation
Chapter 3:Other Information
5
5
6
7
7
8
9
10
12
13
13
13
14
16
1
2
16
16
17
18
19
20
21
22
23
23
23
24
25
26
28
28
28
29
Before Initial Setup ..............................................................................................................................
Check Supplied Parts...........................................................................................................................
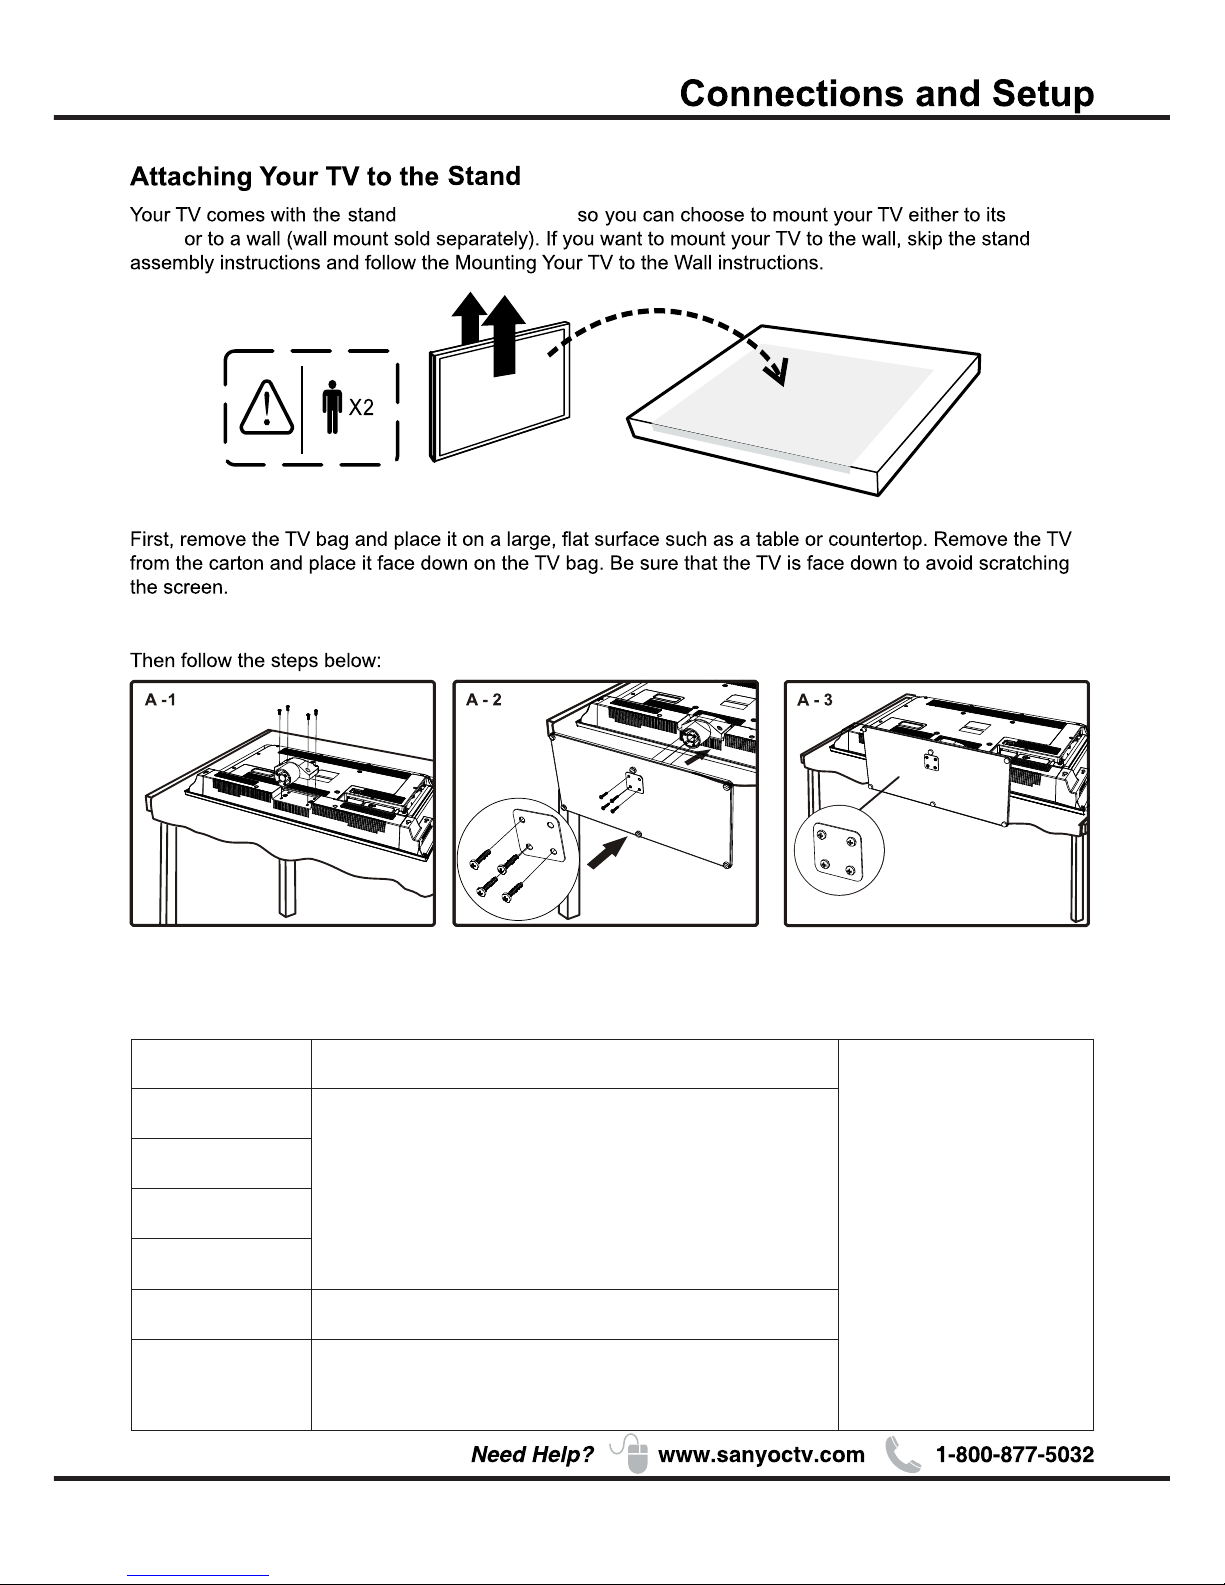
Attaching Your TV to the Stand Base..................................................................................................
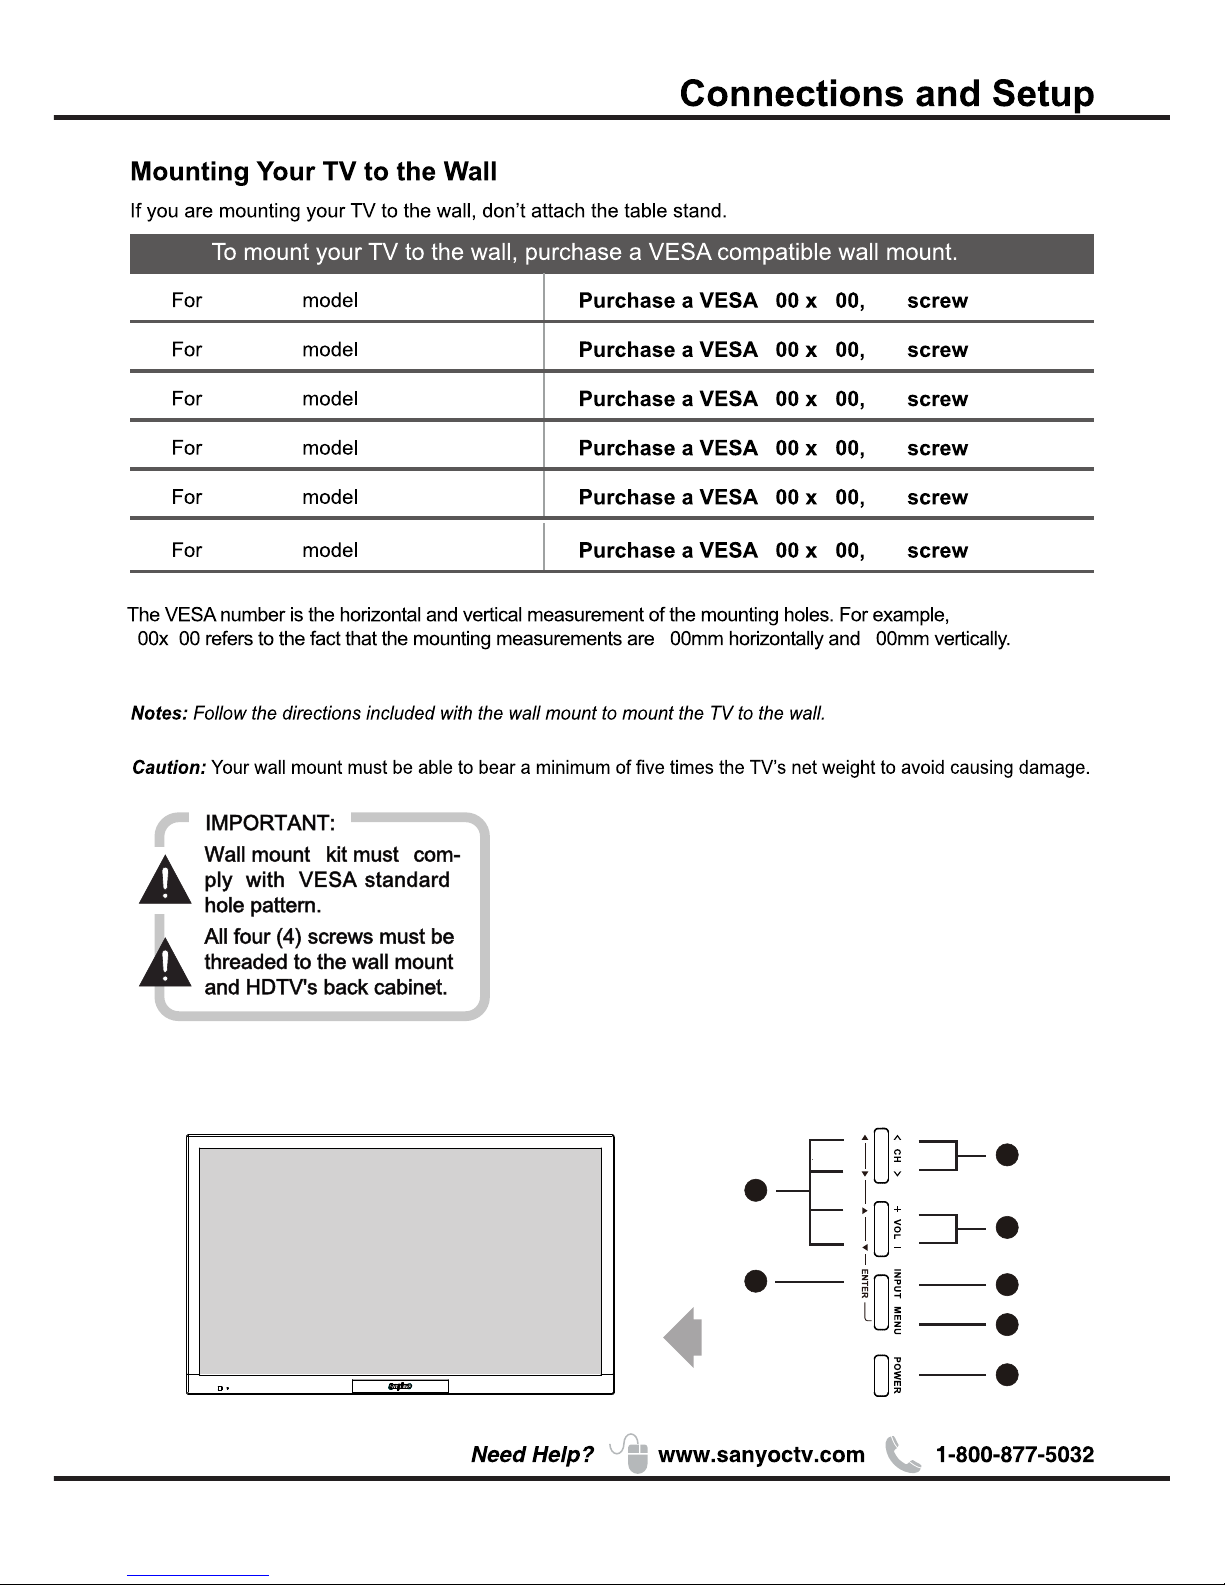
Mounting Your TV to the Wall .............................................................................................................
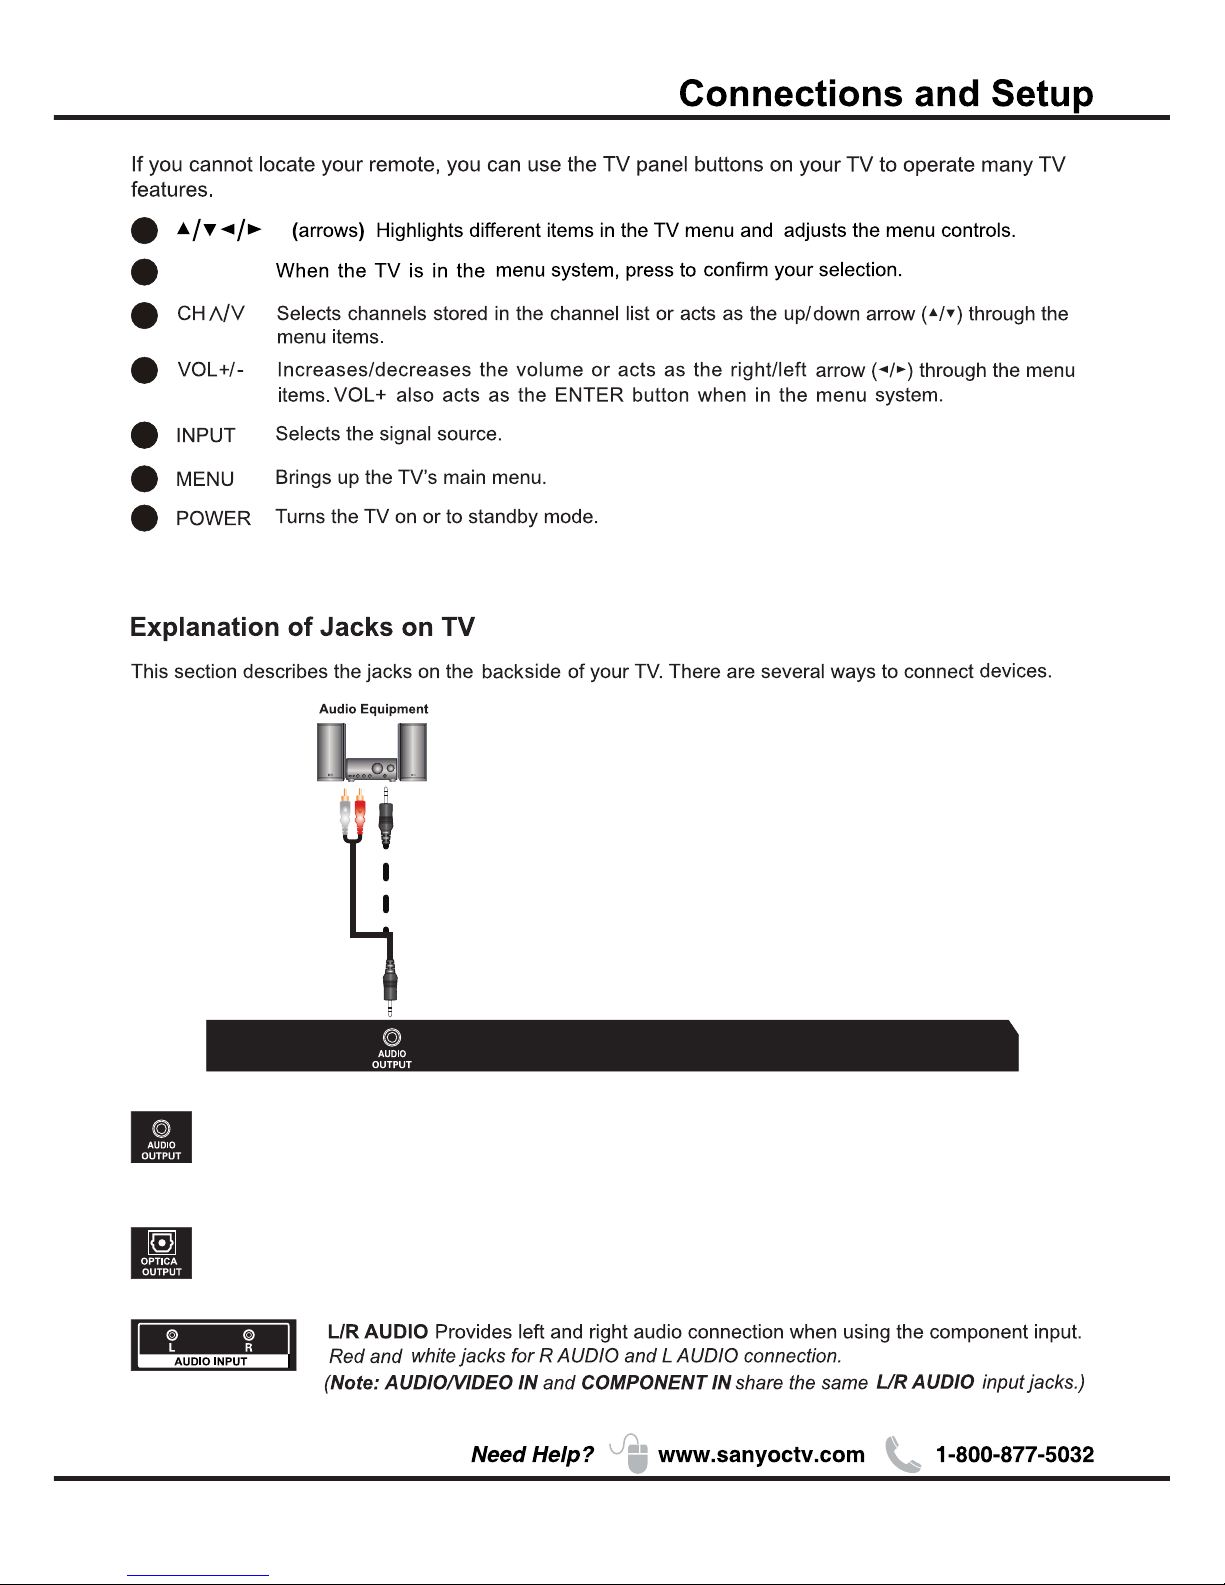
Buttons on the TV ................................................................................................................................
Explanation of jacks on TV ..................................................................................................................
Choose Your Connections ....................................................................................................................
MHL ....................................................................................................................................................
Remote Control Functions ..................................................................................................................
Obtain the Signal ................................................................................................................................
Switching On .......................................................................................................................................
Switching Off .......................................................................................................................................
Setup Wizard .......................................................................................................................................
Input List ..............................................................................................................................................
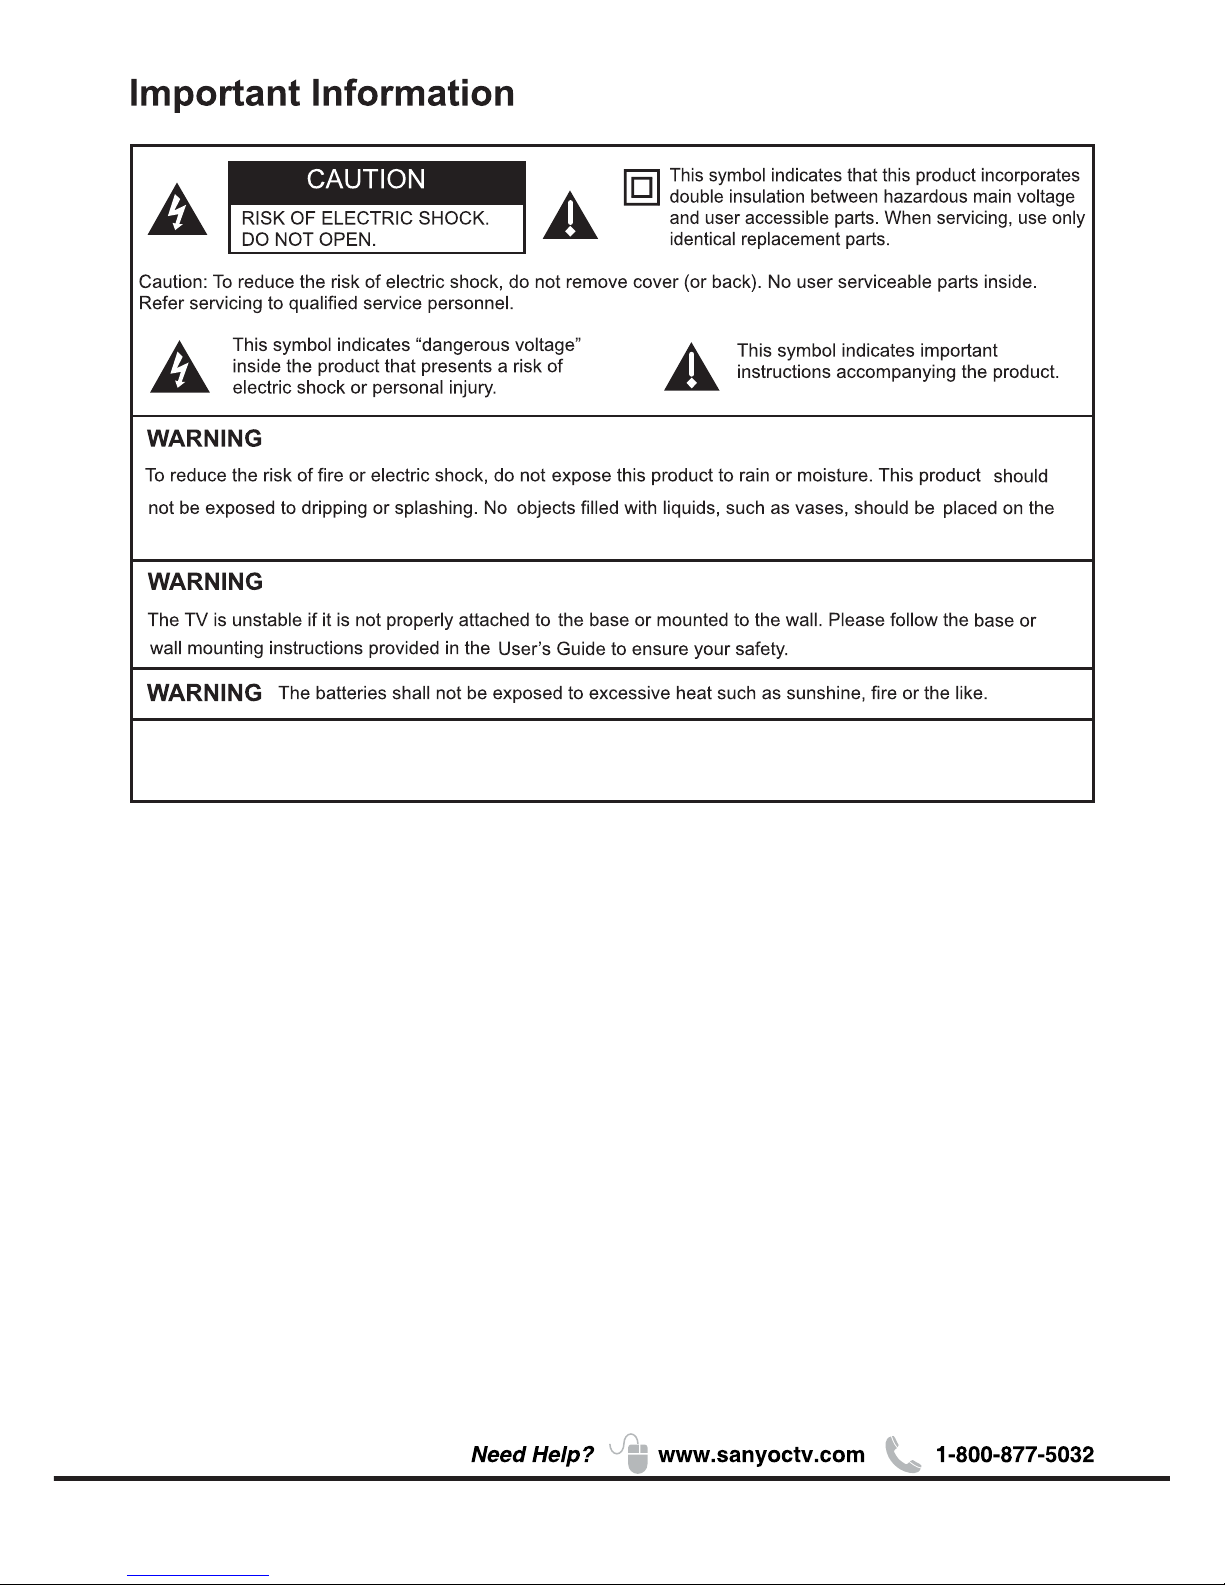
Important Information ...........................................................................................................................
Important Safety Insructions ................................................................................................................
Menu .....................................................................................................................................................
Picture ..................................................................................................................................................
Sound ...................................................................................................................................................
Channel ................................................................................................................................................
Setup ....................................................................................................................................................
Lock .....................................................................................................................................................
Help ......................................................................................................................................................
PC ........................................................................................................................................................
VIDEO/HDMI ......................................................................................................................................
USB ......................................................................................................................................................
Photo ....................................................................................................................................................
Roku .....................................................................................................................................................
Frequently Asked Questions (FAQS) ....................................................................................................
Troubleshooting ....................................................................................................................................
Care and Cleaning ...............................................................................................................................
Television Specifications .......................................................................................................................
.........................................................................................................................................
Limited Warranty ...................................................................................................................................
Specification

5
Chapter 1
QUIK'N EASY Setup Guide
Parts for Stand Base

6
Note:The picture of stand installation is just for the reference, please base on the material object for
the real sample.
For model DP58D34, please just follow A - 2, A - 3.
①M5 (5mm) Diameter, Length-12mm (maximum)
②M4 (4mm) Diameter, Length-20mm (maximum)
Base
base unassembled table
stand
Note:Stand base screws
are located in the
literature package.
Mounting screws measurements
DP42D24
DP50E44
DP55D44
DP58D34
DP65E34
DP39D14
Model
①M5 (5mm) Diameter, Length-12mm (maximum)
M5 (5mm) Diameter, Length-16mm (maximum)
②M5 (5mm) Diameter, Length-16mm (maximum)
① ②①

7
1 11 1
Recommendation to buy screws : top use M6X12. max 15mm); BTM use M6 ( X16. max (20mm)
Buttons on the TV
Take a certain model for an example:
1
2
3
4
5
6
7
DP39D14
DP42D24
DP50E44
DP55D44
DP58D34
DP65E34
M6
M6
M6
M6
M6
M6
2
2
4
2
4
4
2
2
2
2
2
4
For model DP58D34, please remove neck cover and stand neck before mounting.

8
OPTICAL OUTPUT:It is possible to output audio through the digital audio terminal.
AUDIO OUTPUT the socket provides composite audio connection.
support amplified high power audio equipment. Please adjust the volume directly on
the external audio equipment. Please do not connect headphones directly to the TV.
The TV can
(Please base on the material object for the real sample.)
1
2
3
4
55
6
7
ENTER

9
ANTENNA/CABLE IN this socket can be used to connect the outside aerial
(including the analog signal and the digital signal)
HDMI 2/*MHL(High-Definition Multimedia Interface/Mobile High-Definition Link)
Provides an uncompressed digital connection that carries both video and
audio data by way of an integrated mini-plug cable. Since HDMI technology is
based on Mobile High-Definition Link(MHL),the jack on the side of your TV is also
compatible with MHL Device. Connect the Roku Streaming Stick (sold separately)
to quickly enable Smart TV applications.
3Device Digital
(For DVI input, it's audio input is shared with PC audio input)
Note: For the audio receiver control ARC, firstly you must have a device which supports
HDMI ARC, then connect it to the HDMI1 port. When the "ARC/CEC Setting" is enabled on
your TV, the TV set's speakers will mute automatically and the audio will be outputted on
your ARC sound device system.
Visual Interface (DVI), the jack on the side of your TV is also compatible with DVI
devices.
USB Allows you to connect a compatible mass storage device for the display of JPEG
pictures on the TV.

10
The MHL (Mobile High-Definition Link) enables the TV to communicate with connected MHL-compatible
device. When connecting MHL-compatible device, TV simultaneously charges the connected device
while playing photo/music/video from it. You can use the TV remote control to control the connected MHL
-compatible device.
• If “MHL Equipment Control”(P20) is set to “On” , the TV automatically switches to MHL mode
when MHL-compatible device is connected to HDMI I2 (MHL) jack.
• You can continue normal usage of the connected MHL-compatible device (such as receiving calls)
depending on its capability.
• Some remote functions may not be available depending on features of the connected MHL-compatible
device.
Please refer to the device manual for details.
• You can continue charging the MHL-compatible device even when the TV is in standby mode.
• This product is officially MHL-certified for guaranteed operation with other MHL-certified devices. If you
encounter any problems when using the MHL function, please consult the device manufacturer for support.
(*MHL)
MHL
MHL2.11080p/30Hz 1080p/60Hz
Compatibility
WXGA
480i, 480p, 720p/60Hz, 1080i/60Hz, 1080p/60Hz

11
3
3
List
Video
(*MHL)
VIDEO INPUT INPUT
REMARK: Due to slim back cover, we recommend connecting the PC with a standard VGA
cable, avoiding cables with thicker connectors/plugs.
(For Model: DP50E44, DP55D44, DP58D34, DP65E34)

12
Press to
select the desired option
open the Input list, then press / to
.
*
/OK
RECALL press the RECALL button return to the previously
viewed channel and replay for Roku.
Special function for Roku.
SMART Return to the Home screen for Roku.
for Roku.
the menu and Roku control.
and Roku.

13

14
ENERGY STAR is a set of power-saving
guidelines issued by the U.S.
Environmental Protection Agency(EPA).
ENERGY STAR is a joint program of the U.S.
Environmental Protection Agency and the
U.S.Department of Energy helping us all
save money and protect the environment
through energy efficient products and
practices.
A menu screen asks you to set the location for TV.
Choosing“Home Mode” for the TV assigns the
optimal picture settings for most home
environments.
ENERGY STAR qualification. Use ◄/► to
select the desired location setting(“Home
Mode or “Store Mode”); then press ENTER
/OK to continue to the next screen.
Setup Wizard
Connect an RF cable to the TV's ANTENNA/CABLE
IN terminal.
Select TV Location
1. Press / button on the remote control to select
Home Mode or Store Mode.
2. Press ENTER button to go.
1. Choose "Quick setup" or "Step by step" to setup
your new television.
2. Press ENTER button to go.
Use ARROW keys to highlight your choice and then press ENTER/OK key.
Please select proper location for you TV.
Please select proper location for your TV.
Display will be adjusted for best result.
Home mode qualifies
for ENERGY STAR.
Store mode is for the
retail display setup
Home
Home
Store
Store
Home mode is for saving energy
and reducing power consumption.
Previous
Previous
Regresa
Regresa
Use ARROW keys to highlight your choice and then press ENTER/OK key.
Previous
Choose"Quick setup"or"Step by step"
to set up your new television.
Quick setup
(Advanced users)
Setp by setp
(Recommended)
Please Select Language
English
French
Spanish
Use ARROW keys to highlight your choice and then press ENTER/OK key.
A menu screen asks you to select language among
English, French and Spanish.
Choosing“Store Mode”,which is not
ENERGY STAR compliant, sets the unit up
with predefined settings for retail displays.
In this setting, the power consumption may
exceed the requirements of the Previous Air
Search Start Cable
Search Start Skip
Please connect all inputs
to the terminals.
Make sure all of your
equipments switched on.
Use ARROW keys to highlight your choice and then press ENTER/OK key.
If you choose Please connect all
equipment to the TV's inputs and switch them on.
Then press ◄/► button to choose between an Air or
Cable search.
"Quick setup",
(Quick setup chosen)
Choose Initial Setup method
Home mode qualifies
for ENERGY STAR.

15
Chapter 2
Analog channels:0Digital channels:0
Channel search will be complete when blue progress bar reaches 100%
(PLEASE DO NOT INTERRUPT THE CHANNEL SEARCH,IT MAY TAKE A WHILE)
Use ARROW keys to highlight your choice and then press ENTER/OK key.
Analog channels:_ _ Digital channels:_ _
Input search result:
Video HDMI1 HDMI2/MHL HDMI3
Finish Repeat
Channel search result: Successfully Completed
Choose Antenna Information to get a high definition
picture, then press ◄/► button to choose between
an Air or Cable search.
Air
Search channels form an indoor or outdoor antenna.
【 】
Press the Finish button to finalize the Initial Setup and
enjoy watching TV.
NOTE: If you need to do the process again, please
choose Repeat.
【 】Cable
Search channels from the cable provider.
Previous Continue
Use ARROW keys to highlight your choice and then press ENTER/OK key.
Connection check phase: Video
please turn on the power of apparatus and check connection.
DVD/Blu-ray
GAME
Y
(VIDEO)
Pb
Pr
L
R
Composite Component
Video
HDMI 1
HDMI 2/MHL
HDMI 3
Please choose a connection method.
Previous Continue
Use ARROW keys to highlight your choice and then press ENTER/OK key.
Connection check phase: Video
please turn on the power of apparatus and check connection.
DVD/Blu-ray
GAME
Y
(VIDEO)
Pb
Pr
L
R
Composite Component
Video
HDMI 1
HDMI 2/MHL
HDMI 3
Neither type of connection could be confirmed.
Previous Continue
Use ARROW keys to highlight your choice and then press ENTER/OK key.
Connection check phase: HDMI
please turn on the power of apparatus and check connection.
DVD/Blu-ray
GAME
Video
HDMI 1
HDMI 2/MHL
HDMI 3
At least one connection cannot be checked.
Previous Continue
Use ARROW keys to highlight your choice and then press ENTER/OK key.
Connection check phase: HDMI
please turn on the power of apparatus and check connection.
DVD/Blu-ray
GAME
Video
HDMI 1
HDMI 2/MHL
HDMI 3
Connection was successful.
If "Step by step" is chosen, options will be more detailed.
Press Continue button to advance.
Use ARROW keys to highlight your choice and then press ENTER/OK key.
Previous
Choose"Quick setup"or"Step by step"
to set up your new television.
Quick setup
(Advanced users)
Setp by setp
(Recommended)
(Setp by setp chosen)
Looking for a high definition picture?
Please take a moment to review the required connections.
Antenna Information
Previous
Air
Search Start
Cable
Search Start Skip
Use ARROW keys to highlight your choice and then press ENTER/OK key.
Analog channels:_ _ Digital channels:_ _
Input search result:
Video HDMI1 HDMI2/MHL HDMI3
Next Repeat
Channel search result: Successfully Completed
Press
Press Next button to check connection in detail.
Repeat button to do the process again.
Press Continue button to go next.
If any connection is found, then you can see "Connection
was successful." with blue color.

16
Input List
Press INPUT button to select among TV/VIDEO
/HDMI 1/HDMI 2/HDMI 3/PC/USB
Menu
1. Press MENU to display the main menu or return to
the previous menu or close the main menu.
2. Press / to highlight the desired menu icon, and
press to .enter
Menu Operation
Picture
1. Press MENU to enter the main menu, Press /
button to select.
2. Press to enter. (Press MENU again to exit or
back to parent menu.)
Move Select
MENU
Return
【Picture Mode】
Adjust picture mode to change picture appearance.
Press / button to select(Power Saving/Standard /
Vivid / Mild / Manual).
Standard Produces a highly defined image in a
normally lit room.
Vivid Produces a highly defined image in a
brightly lit room
Mild Produces a highly defined image in a
soft lit room.
Manual Select to customize picture settings.
Power Saving Select to power saving mode settings.
Note: "Power Saving"make this product qualify for
ENERGY STAR, if you select some other options,the
power consumption may change.
Picture
Sound
Sound
Setup
Setup
Lock
LockChannel
Picture Mode
Brightness
Contrast
Color
Tint
Sharpness
Color Temperature
Backlight
Detailed Setting
Power Saving
50
50
50
Normal
50
50
90
Picture
Chapter 2
Help
Channel
Help
3.While Picture Mode is "manual",Press / button
to select among Picture Mode/Brightness/Contrast/
Color / Tint / Sharpness / Color Temperature /
Backlight/Detailed Settings.
4.Press ENTER / to enter.
5.Press / button to adjust.
6.Press MENU to exit it.
Analog channels:_ _ Digital channels:_ _
Input search result:
Video HDMI1 HDMI2/MHL HDMI3
Finish Repeat
Channel search result: Successfully Completed
Use ARROW keys to highlight your choice and then press ENTER/OK key.
【Brightness】
Adjust darkness of black sections in the picture.
Press / button to adjust.
Items below are active while Picture mode
set to Manual. otherwise, they are gray.
Previous Continue
Use ARROW keys to highlight your choice and then press ENTER/OK key.
Connection check phase: HDMI
please turn on the power of apparatus and check connection.
DVD/Blu-ray
GAME
Video
HDMI 1
HDMI 2/MHL
HDMI 3
At least one connection cannot be checked.
Press the Finish button to finalize the Initial Setup and
enjoy watching TV.
NOTE: If you need to do the process again, please
choose Repeat.
Connections that are found will be highlighted in blue
color.
Successfully Completed

【Tint】
Adjust the hue (Red,Green,Blue) of the picture.
Press button to adjust. /
【Sharpness】
Object edges are enhanced for picture detail.
Press button to adjust. /
【Color Temperature】
Change the overall color cast of the picture.
Normal
Warm
Cool
Produces a vivid image.
Produces a red-hued image.
Produces a gentle blue-hued image.
【Backlight】
【Detailed Setting】
Adjust the backlight brightness
Press button to adjust. /
Press button to enter.
Menu OperationMenu Operation
Sound
1.Press MENU to enter the main menu, Press /
button
to select.
2.Press to enter. (Press MENU again to exit or back to
parent menu.)
3.While Sound mode is "manual", Press / button to
select among Sound Mode / Bass / Treble / Balance /
MTS / Audio Language / Digital Audio Output / Surround
Sound / ARC/CEC Setting / Auto Volume Control.
4.Press / button to adjust.
5.Press MENU again or back to parent menu.
【 】Surround sound
【Auto Volume Control】
Set the auto volume control.
Press / button to select (On / Off).
【Color】
Adjust the color intensity of the picture.
Press button to adjust. /
【Contrast】
Adjust the white level of the picture.
Press / button to adjust.
17
Aspect Ratio
Adjust how the picture fills the screen.
Wide
Zoom
Automatically Aspect Ratio Normal adjust
based on TV size and TV program.
Use to watch wide screen(16:9)
content.
Expands image to fill screen. Top and
button maybe cut off.
Noise Reduction
Set options to reduce video noise.
Off
Select to turn off video noise detection.
Low Detect and reduce low video noise.
Medium Detect and reduce moderate video
High Detect and reduce enhanced video
noise.
noise.
Move Select
MENU
Return
Setup LockPicture
Picture Sound
Sound Mode
Bass
Treble
Audio Language
ARC/CEC Setting
Surround Sound
Standard
50
50
0
English
Off
RAW
Off
Balance
MTS
Stereo
【MTS】
Configures the multi-track sound. It is only available in ATV.
Press button to select (Stereo/SAP/Mono). /
Mono Sets the sound to mono.
Stereo Sets the sound to stereo when stereo
is not available, the sound is
automatically switched to mono.
SAP Sets the sound to the second audio
program.
【Audio Language】
Select the language supported by the chosen digital
channel. It is available Only in DTV.
Press button to select (English / / ). / French Spanish
Help
Channel
Auto Volume Control
Off
【 】ARC/CEC Setting
Press / button to select (On / Off).
Enhanced Motion
Press / button to select (On / Off).
(Only available for model: DP55D44 )
Enhanced Sync
Press / button to select (On / Off).
(Only available for model: DP58D34, DP65E34 )

Channel
1.Press ENU to enter the main menu, Press M /
button to select.
2.Press to enter. ( ENU again to exit or
back to parent menu.)
MPress
3.If current source is TV,Press / button to select
among Air/Cable / Auto Scan/Favorite / Channel List/
Show/Hide / Channel Number / Channel Label.
4.Press button to adjust. /
5.Press ENU again or back to parent menu. M
【Air/Cable】
Select signal type.
Press button to select (Air/Cable). /
【Auto Scan】
Automatically search for channels.
Press / button to enter. ENTER
Are you sure to Auto
Scan?
No Yes
Analog
Digital
RF CH
Total Found
1
0
4
1
:
:
:
:
【Favorites】
Add channels to create a favorite list.
Press ENTER/ button to enter.
【Channel List】
Create list for channels.
【Show/Hide】
Show or hide the channels in your program list.
Press / button to enter.ENTER
【Channel Number】
Show the channel number.
Press button to adjust. /
【Channel Label】
Create labels for channels, up to 7 characters.
18
Move
Select
Select
Move
MENU
MENU
Return
Return
Sound Setup Lock
PicturePicture Channel
Favorite
Channel List
Show/Hide
Channel Number
Channel Label
Auto Scan
Air/Cable Air
Channel
Channel
Channel Label
Channel Label
3-0
3-0
4-0
4-0
5-0
5-0
6-0
6-0
7-0
7-0
Prev
Prev
1/ 1
1/ 1
Next
Next
Press ok’change ‘
Press‘ok’change
Move
Move
Return
Return
MENU
MENU
Hide
Menu Operation
Help
Sound Setup Lock
PicturePicture Channel Help
Sound Setup Lock
PicturePicture Channel Help
Sound Setup Lock
PicturePicture Channel Help

3.Press / button to select among Menu Language /
Closed Caption /Over Scan/Input Label /
Other settings /Restore Default /Setup Wizard /
Sleep Timer.
4.Press button to adjust. /
5. ENU again or back to parent menu. Press M
【Menu language】
Press button to select language (English / /
Français / Español.)
【Closed Caption】
Adjust Closed Captioning settings. Only available
under TV and AV source.
Press / button to enter. ENTER
CC Mode
Turn Closed Captioning on/off.
Press button to select (CC Off / CC On / CC /
On Mute).
Analog CC
Set Closed Captioning for standard(analog) program.
Press button to select (CC1 / CC2 / CC3 / /
CC4 / Text1 / Text2 / Text3 / Text4).
Digital CC
Set Closed Captioning for digital program.
Press button to select (Service1 / Service2 / /
Service3 / Service4 / Service5 / Service6 / Off).
Setup
1.Press MENU to enter the main menu, Press /
Button to select.
2.Press to enter. (Press MENU again to exit or
back to parent menu.)
19
Move Select
MENU
Return
LockChannelPicture
Picture Sound
English
Off
Setup
Menu Language
Closed Caption
Over Scan
Other Settings
Input Label
Restore Default
Setup Wizard
Adjust the digital Closed Captioning setting.
Mode
Set the look of digital Closed Captioning.
Press button to select (Default / Custom). /
Font Style
Select from 8 font styles.
Press button to select (Default / Font 0 / Font 1 / /
Font 2 / Font 3 / Font 4 / Font 5 / Font 6 / Font 7).
Option
Font Size
Adjust the size of the digital Closed Captioning font.
Press button to select (Default /Normal / Small /Large).
Press / button to enter.ENTER
Menu Operation
FG Opacity
Adjust the transparency of the digital Closed Captioning
font.
Press button to select (Default / Solid / Flashing //
Translucent / ).Transparent
BG Opacity
Adjust the digital Closed Captioning background
transparency.
Press button to select (Default / Solid / /
Flashing / Translucent / ). Transparent
*Note: All the options can be adjusted while the
mode is Custom.
FG Color
Adjust the color of the digital Closed Captioning font.
Press button to select (Default/ White /Red /
Green / Blue / Yellow / Magenta / Cyan).
/
BG Color
Adjust the digital Closed Captioning background color.
Press button to select (Default/ Black / Red /
Green /Blue/ Yellow / Magenta / Cyan).
/
【Input Label】
【Over Scan】
Press / button to enter. ENTER
Press button to select (Off / On). /
The setting of Over Scan on/off
Help
Sleep Timer Off
This manual suits for next models
5
Table of contents
Other Sanyo LCD TV manuals

Sanyo
Sanyo FW32D08F Guide

Sanyo
Sanyo LCD-40XR11F User manual

Sanyo
Sanyo AVL-279 User manual

Sanyo
Sanyo LCD-32XF7 User manual

Sanyo
Sanyo LCD-19E3 User manual

Sanyo
Sanyo LCD-32XA2 User manual

Sanyo
Sanyo DP42841 User manual

Sanyo
Sanyo LCD-22XR7S User manual

Sanyo
Sanyo LCD-32XR10F User manual

Sanyo
Sanyo LCE-32R40HD User manual

Sanyo
Sanyo LCD-22R35FHD User manual

Sanyo
Sanyo LCD-32XAZ10 User manual

Sanyo
Sanyo LCD-42K40TD User manual

Sanyo
Sanyo LCD-42XF6 User manual

Sanyo
Sanyo LCD-32CA9S User manual

Sanyo
Sanyo LCD-20XR1/AU User manual

Sanyo
Sanyo LCD55L4 User manual

Sanyo
Sanyo LCD-32XR56DZ User manual

Sanyo
Sanyo LCD-32XR9DKH User manual

Sanyo
Sanyo LCD-42XR9DKH User manual