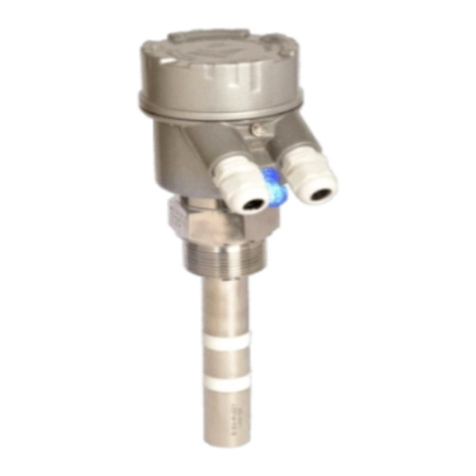
Sapcon CASPER User manual

CASPER
Capacitance Level Limit Switch
INSTRUCTION MANUAL
Version 1.2

User Manual & Datasheet V 1.2
Contents
Revision History . . . . . . . . . . . . . . . . . . . . . . . . . . . . . . . . . . . . . . . . . . . . . . . . . . . . . 7
1 Introduction . . . . . . . . . . . . . . . . . . . . . . . . . . . . . . . . . . . . . . . . . . . . . . . . . . . . . . 8
2 Operating Principle . . . . . . . . . . . . . . . . . . . . . . . . . . . . . . . . . . . . . . . . . . . . . . . . . . 8
3 Features . . . . . . . . . . . . . . . . . . . . . . . . . . . . . . . . . . . . . . . . . . . . . . . . . . . . . . . . 8
4 Applications . . . . . . . . . . . . . . . . . . . . . . . . . . . . . . . . . . . . . . . . . . . . . . . . . . . . . . 8
5 Electrical Specifications . . . . . . . . . . . . . . . . . . . . . . . . . . . . . . . . . . . . . . . . . . . . . . . . 9
6 Mechanical Specifications . . . . . . . . . . . . . . . . . . . . . . . . . . . . . . . . . . . . . . . . . . . . . . . 9
7 Application Specifications . . . . . . . . . . . . . . . . . . . . . . . . . . . . . . . . . . . . . . . . . . . . . . . 10
8 Installation Guidelines . . . . . . . . . . . . . . . . . . . . . . . . . . . . . . . . . . . . . . . . . . . . . . . . . 10
9 Electrical Connections . . . . . . . . . . . . . . . . . . . . . . . . . . . . . . . . . . . . . . . . . . . . . . . . . 10
10 Calibration . . . . . . . . . . . . . . . . . . . . . . . . . . . . . . . . . . . . . . . . . . . . . . . . . . . . . . 11
10.1 For Single Point Switching . . . . . . . . . . . . . . . . . . . . . . . . . . . . . . . . . . . . . . . . . . . . 11
10.1.1 Calibration for Non-conductive Material . . . . . . . . . . . . . . . . . . . . . . . . . . . . . . . . . . . 11
10.1.2 Calibration for Conductive Material . . . . . . . . . . . . . . . . . . . . . . . . . . . . . . . . . . . . . . 11
10.2 For Two Point / Pump Control Logic . . . . . . . . . . . . . . . . . . . . . . . . . . . . . . . . . . . . . . . 12
11 Cover Delay . . . . . . . . . . . . . . . . . . . . . . . . . . . . . . . . . . . . . . . . . . . . . . . . . . . . . . 12
11.1 For Single Point Switching . . . . . . . . . . . . . . . . . . . . . . . . . . . . . . . . . . . . . . . . . . . . 12
11.2 For Two Point / Pump Control Logic . . . . . . . . . . . . . . . . . . . . . . . . . . . . . . . . . . . . . . . 13
12 Uncover Delay . . . . . . . . . . . . . . . . . . . . . . . . . . . . . . . . . . . . . . . . . . . . . . . . . . . . 13
12.1 For Single Point Switching . . . . . . . . . . . . . . . . . . . . . . . . . . . . . . . . . . . . . . . . . . . . 13
12.2 Two Point / Pump Control Logic . . . . . . . . . . . . . . . . . . . . . . . . . . . . . . . . . . . . . . . . . 14
13 Sensitivity . . . . . . . . . . . . . . . . . . . . . . . . . . . . . . . . . . . . . . . . . . . . . . . . . . . . . . . 14
14 Failsafe . . . . . . . . . . . . . . . . . . . . . . . . . . . . . . . . . . . . . . . . . . . . . . . . . . . . . . . . 15
15 Display Indications . . . . . . . . . . . . . . . . . . . . . . . . . . . . . . . . . . . . . . . . . . . . . . . . . . 15
15.1 STATUS LED . . . . . . . . . . . . . . . . . . . . . . . . . . . . . . . . . . . . . . . . . . . . . . . . . . . 16
15.2 LED Bar Display . . . . . . . . . . . . . . . . . . . . . . . . . . . . . . . . . . . . . . . . . . . . . . . . . 16
16 Factory Reset . . . . . . . . . . . . . . . . . . . . . . . . . . . . . . . . . . . . . . . . . . . . . . . . . . . . . 16
17 Selection of Output Options . . . . . . . . . . . . . . . . . . . . . . . . . . . . . . . . . . . . . . . . . . . . . 16
17.1 For Single Point / Two Point Switching . . . . . . . . . . . . . . . . . . . . . . . . . . . . . . . . . . . . . . 16
17.2 For Pump Control Logic . . . . . . . . . . . . . . . . . . . . . . . . . . . . . . . . . . . . . . . . . . . . . 16
18 Indication of Output Options . . . . . . . . . . . . . . . . . . . . . . . . . . . . . . . . . . . . . . . . . . . . . 17
19 Error Indication . . . . . . . . . . . . . . . . . . . . . . . . . . . . . . . . . . . . . . . . . . . . . . . . . . . . 17
20 For Namur Module . . . . . . . . . . . . . . . . . . . . . . . . . . . . . . . . . . . . . . . . . . . . . . . . . . 18
20.1 Electrical Specifications . . . . . . . . . . . . . . . . . . . . . . . . . . . . . . . . . . . . . . . . . . . . . 18
20.2 Mechanical Specifications . . . . . . . . . . . . . . . . . . . . . . . . . . . . . . . . . . . . . . . . . . . . 18
21 Namur Isolation Barrier Specs . . . . . . . . . . . . . . . . . . . . . . . . . . . . . . . . . . . . . . . . . . . . 18
22 Installation Guidelines . . . . . . . . . . . . . . . . . . . . . . . . . . . . . . . . . . . . . . . . . . . . . . . . 19
22.1 Electrical Connections . . . . . . . . . . . . . . . . . . . . . . . . . . . . . . . . . . . . . . . . . . . . . . 19
Sapcon Instruments Pvt.Ltd.®2

User Manual & Datasheet V 1.2
22.2 Calibration . . . . . . . . . . . . . . . . . . . . . . . . . . . . . . . . . . . . . . . . . . . . . . . . . . . . 19
22.3 Normal Calibration . . . . . . . . . . . . . . . . . . . . . . . . . . . . . . . . . . . . . . . . . . . . . . . . 20
22.3.1 Calibration for Non-conductive Material . . . . . . . . . . . . . . . . . . . . . . . . . . . . . . . . . . . 20
22.3.2 Calibration for Conductive Material . . . . . . . . . . . . . . . . . . . . . . . . . . . . . . . . . . . . . . 20
22.4 Remote Calibration . . . . . . . . . . . . . . . . . . . . . . . . . . . . . . . . . . . . . . . . . . . . . . . . 21
22.4.1 Calibration for Non-conductive Material . . . . . . . . . . . . . . . . . . . . . . . . . . . . . . . . . . . 21
22.4.2 Calibration for Conductive Material . . . . . . . . . . . . . . . . . . . . . . . . . . . . . . . . . . . . . . 21
23 Output Current Configuration . . . . . . . . . . . . . . . . . . . . . . . . . . . . . . . . . . . . . . . . . . . . . 22
23.1 Low Current Configuration . . . . . . . . . . . . . . . . . . . . . . . . . . . . . . . . . . . . . . . . . . . . 22
23.2 High Current Configuration . . . . . . . . . . . . . . . . . . . . . . . . . . . . . . . . . . . . . . . . . . . . 22
24 Sensitivity . . . . . . . . . . . . . . . . . . . . . . . . . . . . . . . . . . . . . . . . . . . . . . . . . . . . . . . 23
25 Failsafe . . . . . . . . . . . . . . . . . . . . . . . . . . . . . . . . . . . . . . . . . . . . . . . . . . . . . . . . 24
26 Factory Reset . . . . . . . . . . . . . . . . . . . . . . . . . . . . . . . . . . . . . . . . . . . . . . . . . . . . . 24
27 Certification . . . . . . . . . . . . . . . . . . . . . . . . . . . . . . . . . . . . . . . . . . . . . . . . . . . . . . 24
28 Maintenance . . . . . . . . . . . . . . . . . . . . . . . . . . . . . . . . . . . . . . . . . . . . . . . . . . . . . 24
29 Customer Support . . . . . . . . . . . . . . . . . . . . . . . . . . . . . . . . . . . . . . . . . . . . . . . . . . 25
30 Namur Selection Order Code . . . . . . . . . . . . . . . . . . . . . . . . . . . . . . . . . . . . . . . . . . . . . 26
31 Product Selection Order Code . . . . . . . . . . . . . . . . . . . . . . . . . . . . . . . . . . . . . . . . . . . . 28
Sapcon Instruments Pvt.Ltd.®3

User Manual & Datasheet V 1.2
List of Figures
1 Casper Product Image . . . . . . . . . . . . . . . . . . . . . . . . . . . . . . . . . . . . . . . . . . . . . . . 8
2 Description of Parts . . . . . . . . . . . . . . . . . . . . . . . . . . . . . . . . . . . . . . . . . . . . . . . . 8
3 Proper Mounting Arrangement . . . . . . . . . . . . . . . . . . . . . . . . . . . . . . . . . . . . . . . . . . . 10
4 Casper with Baffle . . . . . . . . . . . . . . . . . . . . . . . . . . . . . . . . . . . . . . . . . . . . . . . . . 10
5 Cable Gland Arrangement . . . . . . . . . . . . . . . . . . . . . . . . . . . . . . . . . . . . . . . . . . . . . 10
6 Electrical Connections (DPDT) . . . . . . . . . . . . . . . . . . . . . . . . . . . . . . . . . . . . . . . . . . . 10
7 Calibration for Non-conductive Material . . . . . . . . . . . . . . . . . . . . . . . . . . . . . . . . . . . . . . 11
8 DIP Switch . . . . . . . . . . . . . . . . . . . . . . . . . . . . . . . . . . . . . . . . . . . . . . . . . . . . . 11
9 Calibration Switch Position . . . . . . . . . . . . . . . . . . . . . . . . . . . . . . . . . . . . . . . . . . . . . 11
10 Setting Calibration . . . . . . . . . . . . . . . . . . . . . . . . . . . . . . . . . . . . . . . . . . . . . . . . . 11
11 Saving Calibration . . . . . . . . . . . . . . . . . . . . . . . . . . . . . . . . . . . . . . . . . . . . . . . . . 11
12 Calibration with Material . . . . . . . . . . . . . . . . . . . . . . . . . . . . . . . . . . . . . . . . . . . . . . 11
13 HIGH Calibration Switch Position . . . . . . . . . . . . . . . . . . . . . . . . . . . . . . . . . . . . . . . . . 12
14 Setting HIGH Calibration . . . . . . . . . . . . . . . . . . . . . . . . . . . . . . . . . . . . . . . . . . . . . . 12
15 Saving HIGH Calibration . . . . . . . . . . . . . . . . . . . . . . . . . . . . . . . . . . . . . . . . . . . . . . 12
16 Low Calibration . . . . . . . . . . . . . . . . . . . . . . . . . . . . . . . . . . . . . . . . . . . . . . . . . . . 12
17 High Calibration . . . . . . . . . . . . . . . . . . . . . . . . . . . . . . . . . . . . . . . . . . . . . . . . . . 12
18 DIP Switch . . . . . . . . . . . . . . . . . . . . . . . . . . . . . . . . . . . . . . . . . . . . . . . . . . . . . 12
19 Cover Delay Switch Position . . . . . . . . . . . . . . . . . . . . . . . . . . . . . . . . . . . . . . . . . . . . 13
20 Setting Cover Delay . . . . . . . . . . . . . . . . . . . . . . . . . . . . . . . . . . . . . . . . . . . . . . . . 13
21 Saving Cover Delay . . . . . . . . . . . . . . . . . . . . . . . . . . . . . . . . . . . . . . . . . . . . . . . . 13
22 Cover Delay Switch Position for Relay 2 . . . . . . . . . . . . . . . . . . . . . . . . . . . . . . . . . . . . . . 13
23 Setting Cover Delay for Relay 2 . . . . . . . . . . . . . . . . . . . . . . . . . . . . . . . . . . . . . . . . . . 13
24 Saving Cover Delay for Relay 2 . . . . . . . . . . . . . . . . . . . . . . . . . . . . . . . . . . . . . . . . . . 13
25 Uncover Delay Switch Position . . . . . . . . . . . . . . . . . . . . . . . . . . . . . . . . . . . . . . . . . . . 14
26 Setting Uncover Delay . . . . . . . . . . . . . . . . . . . . . . . . . . . . . . . . . . . . . . . . . . . . . . . 14
27 Saving Uncover Delay . . . . . . . . . . . . . . . . . . . . . . . . . . . . . . . . . . . . . . . . . . . . . . . 14
28 Uncover Delay Switch Position for Relay 2 . . . . . . . . . . . . . . . . . . . . . . . . . . . . . . . . . . . . . 14
29 Setting Uncover Delay for Relay 2 . . . . . . . . . . . . . . . . . . . . . . . . . . . . . . . . . . . . . . . . . 14
30 Saving Uncover Delay for Relay 2 . . . . . . . . . . . . . . . . . . . . . . . . . . . . . . . . . . . . . . . . . 14
31 Sensitivity Bar Display . . . . . . . . . . . . . . . . . . . . . . . . . . . . . . . . . . . . . . . . . . . . . . . 14
32 Setting Sensitivity . . . . . . . . . . . . . . . . . . . . . . . . . . . . . . . . . . . . . . . . . . . . . . . . . 15
33 Setting Sensitivity . . . . . . . . . . . . . . . . . . . . . . . . . . . . . . . . . . . . . . . . . . . . . . . . . 15
34 Failsafe High . . . . . . . . . . . . . . . . . . . . . . . . . . . . . . . . . . . . . . . . . . . . . . . . . . . . 15
35 Failsafe Low . . . . . . . . . . . . . . . . . . . . . . . . . . . . . . . . . . . . . . . . . . . . . . . . . . . . 15
36 LED Indication on Top Cover . . . . . . . . . . . . . . . . . . . . . . . . . . . . . . . . . . . . . . . . . . . . 15
37 Demonstration of LED Bar Display . . . . . . . . . . . . . . . . . . . . . . . . . . . . . . . . . . . . . . . . . 16
38 Switch Position . . . . . . . . . . . . . . . . . . . . . . . . . . . . . . . . . . . . . . . . . . . . . . . . . . . 16
Sapcon Instruments Pvt.Ltd.®4

User Manual & Datasheet V 1.2
39 Setting Default Value . . . . . . . . . . . . . . . . . . . . . . . . . . . . . . . . . . . . . . . . . . . . . . . . 16
40 Saving Default Value . . . . . . . . . . . . . . . . . . . . . . . . . . . . . . . . . . . . . . . . . . . . . . . . 16
41 Single Point Switching without Material . . . . . . . . . . . . . . . . . . . . . . . . . . . . . . . . . . . . . . 17
42 Single Point Switching with Material . . . . . . . . . . . . . . . . . . . . . . . . . . . . . . . . . . . . . . . . 17
43 Two Point Switching . . . . . . . . . . . . . . . . . . . . . . . . . . . . . . . . . . . . . . . . . . . . . . . . 17
44 Pump Control Logic . . . . . . . . . . . . . . . . . . . . . . . . . . . . . . . . . . . . . . . . . . . . . . . . 17
45 Grounding Length in an Application Tank . . . . . . . . . . . . . . . . . . . . . . . . . . . . . . . . . . . . . 19
46 Calibration at safe zone . . . . . . . . . . . . . . . . . . . . . . . . . . . . . . . . . . . . . . . . . . . . . . 19
47 Casper with Baffle . . . . . . . . . . . . . . . . . . . . . . . . . . . . . . . . . . . . . . . . . . . . . . . . . 19
48 Cable Gland Arrangement . . . . . . . . . . . . . . . . . . . . . . . . . . . . . . . . . . . . . . . . . . . . . 19
49 Electrical Connection during installation . . . . . . . . . . . . . . . . . . . . . . . . . . . . . . . . . . . . . . 19
50 Metallic Test Tank . . . . . . . . . . . . . . . . . . . . . . . . . . . . . . . . . . . . . . . . . . . . . . . . . 20
51 Calibration without Material . . . . . . . . . . . . . . . . . . . . . . . . . . . . . . . . . . . . . . . . . . . . 20
52 DIP Switch . . . . . . . . . . . . . . . . . . . . . . . . . . . . . . . . . . . . . . . . . . . . . . . . . . . . . 20
53 Calibration Switch Position . . . . . . . . . . . . . . . . . . . . . . . . . . . . . . . . . . . . . . . . . . . . . 20
54 Setting Calibration . . . . . . . . . . . . . . . . . . . . . . . . . . . . . . . . . . . . . . . . . . . . . . . . . 20
55 Saving Calibration . . . . . . . . . . . . . . . . . . . . . . . . . . . . . . . . . . . . . . . . . . . . . . . . . 20
56 Calibration for Conductive Material . . . . . . . . . . . . . . . . . . . . . . . . . . . . . . . . . . . . . . . . . 21
57 High Calibration Switch Position . . . . . . . . . . . . . . . . . . . . . . . . . . . . . . . . . . . . . . . . . . 21
58 Setting Calibration . . . . . . . . . . . . . . . . . . . . . . . . . . . . . . . . . . . . . . . . . . . . . . . . . 21
59 Saving Calibration . . . . . . . . . . . . . . . . . . . . . . . . . . . . . . . . . . . . . . . . . . . . . . . . . 21
60 Air Calibration Setup . . . . . . . . . . . . . . . . . . . . . . . . . . . . . . . . . . . . . . . . . . . . . . . . 21
61 Power ON Condition . . . . . . . . . . . . . . . . . . . . . . . . . . . . . . . . . . . . . . . . . . . . . . . . 21
62 Remote High Calibration Setup . . . . . . . . . . . . . . . . . . . . . . . . . . . . . . . . . . . . . . . . . . 22
63 High Calibration Power ON Condition . . . . . . . . . . . . . . . . . . . . . . . . . . . . . . . . . . . . . . . 22
64 Switch Position Low Current Configuration . . . . . . . . . . . . . . . . . . . . . . . . . . . . . . . . . . . . . 22
65 Setting of Low Current Configuration . . . . . . . . . . . . . . . . . . . . . . . . . . . . . . . . . . . . . . . . 22
66 Saving of Low Current Configuration . . . . . . . . . . . . . . . . . . . . . . . . . . . . . . . . . . . . . . . . 23
67 Sensitivity Setting . . . . . . . . . . . . . . . . . . . . . . . . . . . . . . . . . . . . . . . . . . . . . . . . . 23
68 Sensitivity Switch Position . . . . . . . . . . . . . . . . . . . . . . . . . . . . . . . . . . . . . . . . . . . . . 23
69 Setting Sensitivity Position . . . . . . . . . . . . . . . . . . . . . . . . . . . . . . . . . . . . . . . . . . . . . 23
70 Saving Sensitivity . . . . . . . . . . . . . . . . . . . . . . . . . . . . . . . . . . . . . . . . . . . . . . . . . . 23
71 Failsafe High . . . . . . . . . . . . . . . . . . . . . . . . . . . . . . . . . . . . . . . . . . . . . . . . . . . . 24
72 Failsafe Low . . . . . . . . . . . . . . . . . . . . . . . . . . . . . . . . . . . . . . . . . . . . . . . . . . . . 24
73 Switch Position . . . . . . . . . . . . . . . . . . . . . . . . . . . . . . . . . . . . . . . . . . . . . . . . . . . 24
74 Setting Default Value . . . . . . . . . . . . . . . . . . . . . . . . . . . . . . . . . . . . . . . . . . . . . . . . 24
75 Saving Default Value . . . . . . . . . . . . . . . . . . . . . . . . . . . . . . . . . . . . . . . . . . . . . . . . 24
Sapcon Instruments Pvt.Ltd.®5

User Manual & Datasheet V 1.2
List of Tables
1 Electrical Specifications . . . . . . . . . . . . . . . . . . . . . . . . . . . . . . . . . . . . . . . . . . . . . . 9
2 Mechanical Specifications . . . . . . . . . . . . . . . . . . . . . . . . . . . . . . . . . . . . . . . . . . . . . 9
3 Application Specifications . . . . . . . . . . . . . . . . . . . . . . . . . . . . . . . . . . . . . . . . . . . . . 10
4 Sensitivity . . . . . . . . . . . . . . . . . . . . . . . . . . . . . . . . . . . . . . . . . . . . . . . . . . . . . . 15
5 Error Indication . . . . . . . . . . . . . . . . . . . . . . . . . . . . . . . . . . . . . . . . . . . . . . . . . . . 17
6 Electrical Specifications . . . . . . . . . . . . . . . . . . . . . . . . . . . . . . . . . . . . . . . . . . . . . . 18
7 Mechanical Specifications . . . . . . . . . . . . . . . . . . . . . . . . . . . . . . . . . . . . . . . . . . . . . 18
8 Namur Isolation Barrier Specifications . . . . . . . . . . . . . . . . . . . . . . . . . . . . . . . . . . . . . . . 18
9 Operating Conditions of Output Current . . . . . . . . . . . . . . . . . . . . . . . . . . . . . . . . . . . . . . 22
10 Switching Sensitivity . . . . . . . . . . . . . . . . . . . . . . . . . . . . . . . . . . . . . . . . . . . . . . . . 23
11 Certifications . . . . . . . . . . . . . . . . . . . . . . . . . . . . . . . . . . . . . . . . . . . . . . . . . . . . 24
Sapcon Instruments Pvt.Ltd.®6

User Manual & Datasheet V 1.2
Revision History
Revision Date Author(s) Description
1.0 25 Aug 2019 RND First Version Editing
1.1 4 May 2021 RND Image Updation
1.2 3 Jun 2022 RND Namur Section Added
1
1
•Copyright: All content on this document, such as text, graphics, logos and images is the property of Sapcon Instruments Pvt. Ltd. The selection,
arrangement and presentation of all materials on this document and the overall design of this document is the exclusive property of Sapcon Instruments
Pvt. Ltd.
•The images shown in this manual may differ from the actual instrument / housing in terms of dimensions, color and design. Please refer to GA drawings
for dimensional details.
•Values (of performance) described in this manual were obtained under ideal testing conditions. Hence, they may differ under industrial environment and
settings.
General Instructions
•Instrument shouldn’t block the material filling inlet.
•Secure the cover of housing tightly. Tighten the cable glands. For side mounting, the cable glands should point downwards.
•For side mounting, provide a baffle to prevent the material from falling on the probe.
•When handling forks, do not lift them using their tines. While using them with solids, ensure that material size is less than 10mm.
•Deforming the shape of the tines may interfere with the fork’s operating frequency.
•Make all electrical connections as instructed in the manual. Don’t power on the device before verifying the connections.
Sapcon Instruments Pvt.Ltd.®7

User Manual & Datasheet V 1.2
1 Introduction
Casper is a microcontroller-based capacitance level limit
switch. It is suitable for fine, coarse, bulky solids, non-sticky
slurries, and liquids. The measuring system consists of an
electronic insert and a probe. It works by utilizing the dielec-
tric property of the application material.
Figure 1: Casper Product Image
2 Operating Principle
Casper works on the principle of capacitance. The probe
comprises a sense electrode, electrically isolated from the
metallic tank using a suitable insulator. The sense and the
vessel wall serve as the two electrodes of a capacitor with
the service material acting as the dielectric. A change in the
level of material causes a change in the dielectric, which in
turn causes the value of this tank capacitor to change.
Ø90
89
Pressure die-cast aluminium
weatherproof Housing
Cable Entry
Screwed Thread Connection
Sense
Probe Length
Figure 2: Description of Parts
3 Features
•Universal power supply of 18 - 55 V DC and 90 - 265
V AC on the same terminal.
•Customizable probe size.
•Output options: Relay, PNP and Analog.
•High temperature probe suitable for applications up to
250◦C.
•Self-diagnosis for probe and electronics.
•Popular with a wide range of materials: low-to-high
dielectric conductive materials / non-conductive mate-
rial.
4 Applications
•Brewery
•Chemicals
•Dairy
•Food and Beverages
•Grain Handling
Sapcon Instruments Pvt.Ltd.®8

User Manual & Datasheet V 1.2
5 Electrical Specifications
Please refer to Table 6 for Electrical Specifications.
PARAMETER VALUE
Input Power Supply 18 - 55V DC and 90 - 265V AC at 50Hz on same terminal
Available Output Options
•Relay SPDT , PNP
•Relay DPDT
Power Consumption
•1.5W (SPDT, PNP) at 24 V
•2.2W (DPDT) at 24 V
Switching Single-point level switching / Two-point level switching
Switching Indication For Relay 1 and Relay 2
Red - Alarm
Green - Normal
Fail-safe Two Field Selectable FS 1 & FS 2
•Open - Fail-safe High (For High Level)
•Close - Fail-safe Low (For Low Level)
Time Delay Setting 1 - 25 seconds (For both, Covered and Uncovered Delays)
Relay Rating 6 Amps at 230V AC
Table 1: Electrical Specifications
6 Mechanical Specifications
Please refer to Table 7 for Mechanical Specifications.
PARAMETER VALUE
Housing
•SCUTE: Pressure die-cast aluminium weatherproof
(Rating IP-68)
•FP2C: Cast aluminium, weatherproof & flameproof,
powder coated, suitable for Gas Groups IIA, IIB & IIC
as per IS-2148
Electrical Connector 2 x 1/2” BSP/NPT , PG 13.5
Operating Temperature 0◦C to 60◦C (Electronics)
Process Temperature Up to 250◦C
Operating Pressure Up to 10 bar
Mounting
•Screwed: 1/2",1”,1 1/2", 3/4” BSP / NPT
•Flanged: As per user specification
Probe Length 100 mm to 3000 mm
Insulation Full PTFE
Table 2: Mechanical Specifications
Sapcon Instruments Pvt.Ltd.®9

User Manual & Datasheet V 1.2
7 Application Specifications
Please refer to Table 3 for Application Specifications.
PARAMETER VALUE
Response Time 1 second
Sensitivity 1 - 5
Table 3: Application Specifications
8 Installation Guidelines
While installing the instrument, please take care of the
following points:
1. In Single Point Switching, the instrument should
be installed horizontally or vertically whereas in Two
Point Switching/Pump Control Logic it should be
vertically installed.
Material Inlet Source
Figure 3: Proper Mounting Arrangement
2. Observe that when installed directly under the mate-
rial inlet source, a canopy called baffle of appropriate
strength and size should be welded right above the in-
strument as shown.
Material Inlet Source
Baffle
Figure 4: Casper with Baffle
3. To prevent the ingress of moisture and water seepage
in side mounting position, the cable entries should al-
ways point downwards.
Figure 5: Cable Gland Arrangement
4. Secure the cover of housing tightly. Tighten the cable
glands.
5. Make all electrical connections as instructed in the
manual. Don’t power on the device before verifying
the connections.
6. Weatherproofness of enclosure is guaranteed only if
the cover is in place glands adequately tightened.
Damage due to accidental entry of water can be
avoided if the instrument is installed in a rain shade.
7. If the ambient temperature is high, the instrument
should not be installed to receive direct sunlight. In
case such a position of shade is not available, a heat
shield should be fitted above the instrument especially
if the operating temperature lies between 60◦C and
80◦C.
9 Electrical Connections
Electrical connections for the instrument will change with
the models. Please refer to figure 6 and the precautions
mentioned below before connecting the device.
Precautions for connecting casper:
•Power Supply Rating
Make sure the power supplied to the instrument is
within the specified range mentioned in Table 6.
•Connect Earth
When supplying AC power, please make sure that the
grounding screw on the housing and the earth terminal
are all connected to the plant’s earth.
•Power Supply Fluctuations & Noise
External noise or fluctuating power supplies could af-
fect performance and shorten the life of the instrument.
Use external line suppressors and fuse wires to con-
tain the risk of damage to the circuit.
AC Supply DC Supply
L (Live)
N (Neutral)
90-265 V AC 18-55 V DC
+
ENTER
CASPER
+
-
NC NCC NO CNO
3 4 561 2
COVER
UNCOVER
CALIBRATE
HI CALIBRATE
FS1
FS2
RELAY 1
RELAY 2
SENSITIVITY
1
2
3
4
5
6
ON
Figure 6: Electrical Connections (DPDT)
Sapcon Instruments Pvt.Ltd.®10

User Manual & Datasheet V 1.2
10 Calibration
The DIP switches for calibration and settings can be ac-
cessed by opening the top aluminium cover. Calibrating pro-
cess depends on the conductivity of application material.
10.1 For Single Point Switching
10.1.1 Calibration for Non-conductive Material
Note: Calibration in air is specific to the tank, if the
tank changes, the instrument needs to be calibrated
again.
This calibration is also known as Air Calibration and Cali-
bration without material. It should be done without the ap-
plication material (i.e only air, no material). Once calibrated
in the empty tank, the device can be used with a wide range
of materials. Calibrating the instrument outside the tank can
cause malfunctions.
Calibration in empty
tank (without material)
Figure 7: Calibration for Non-conductive Material
Follow the given procedure to calibrate the sensor:
•Install Casper in an empty tank.
•Unscrew the cover and ensure that all DIP switches
are in the OPEN position as shown in Figure 52. Make
sure that the STATUS LED is not blinking for error.
ON
3 4 561 2
COVER
UNCOVER
CALIBRATE
HI CALIBRATE
FS1
FS2
Figure 8: DIP Switch
•To start the calibration process, set the CALIBRATE
switch to CLOSE (Opposite of OPEN for DIP switch)
position as shown in Figure 53.
ENTER
CASPER
ON
3 4 561 2
COVER
UNCOVER
CALIBRATE
HI CALIBRATE
FS1
FS2
RELAY 1
RELAY 2
SENSITIVITY
1
2
3
4
5
6
CLOSE
Lo
Figure 9: Calibration Switch Position
•Press and hold ENTER key. The STATUS LED for RE-
LAY 1 will glow in RED color.
ENTER
ON
3 4 561 2
COVER
UNCOVER
CALIBRATE
HI CALIBRATE
FS1
FS2
RELAY 1
RELAY 2
SENSITIVITY
1
2
3
4
5
6
CLOSE
Lo
CASPER
Figure 10: Setting Calibration
•Release the ENTER key and set the CALIBRATE
switch back to OPEN position.
ENTER
ON
3 4 561 2
COVER
UNCOVER
CALIBRATE
HI CALIBRATE
FS1
FS2
RELAY 1
RELAY 2
SENSITIVITY
1
2
3
4
5
6
CLOSE
Lo
CASPER
Figure 11: Saving Calibration
•Calibration is done.
10.1.2 Calibration for Conductive Material
This calibration is also known as Calibration with ma-
terial. For applications using conductive materials (water,
acid based pastes etc.), Casper needs to be calibrated with
the application material. This will make the instrument spe-
cific to the application material i.e. if the application material
is changed; calibration should be repeated.
Figure 12: Calibration with Material
Follow the given procedure to calibrate the sensor:
•Fill the tank with the application material such that the
Casper’s probe is completely covered with the mate-
rial.
•Unscrew the cover and make sure that all DIP switches
are in the OPEN position as shown in Figure 52. En-
sure that the STATUS LED is not blinking for error.
•To start with the calibration, set the HI CALIBRATE
switch to CLOSE (Opposite of OPEN for DIP switch)
Sapcon Instruments Pvt.Ltd.®11

User Manual & Datasheet V 1.2
position as shown in Figure57 and wait until Green
LED becomes stable.
ENTER
1 2 341 2
COVER
UNCOVER
CALIBRATE
HI CALIBRATE
FS1
FS2
RELAY 1
RELAY 2
SENSITIVITY
1
2
3
4
5
6
CLOSE
Lo
CASPER
ON
Figure 13: HIGH Calibration Switch Position
•Press and hold ENTER key, the STATUS LED for RE-
LAY 1 will glow in RED color as shown in Figure 58.
ENTER
1 2 341 2
COVER
UNCOVER
CALIBRATE
HI CALIBRATE
FS1
FS2
RELAY 1
RELAY 2
SENSITIVITY
1
2
3
4
5
6
CLOSE
Lo
CASPER
ON
Figure 14: Setting HIGH Calibration
•Release the ENTER key and set the HI CALIBRATE
switch back to OPEN position as shown in Figure 59.
ENTER
1 2 341 2
COVER
UNCOVER
CALIBRATE
HI CALIBRATE
FS1
FS2
RELAY 1
RELAY 2
SENSITIVITY
1
2
3
4
5
6
CLOSE
Lo
CASPER
ON
Figure 15: Saving HIGH Calibration
•Calibration is complete.
10.2 For Two Point / Pump Control Logic
1. Low Calibration For Low Calibration, fill the tank with
the application material such that it touches the tip of
Casper’s probe as shown in Figure 16 and follow the
instructions given in the section Calibration for Non-
conductive Material.
2. High Calibration For High Calibration, fill the tank with
the application material such that the Casper’s probe is
completely covered with the material as shown in Fig-
ure 17 and follow the instructions given in the section
Calibration for Conductive Material.
11 Cover Delay
Figure 16: Low Calibration
HIGH Calibration
Figure 17: High Calibration
When the application material covers the probe, the
changeover of the output can be delayed by a pre-
determined time. This time is called Cover Delay. For a
different value of cover delay, the number of blinks can be
adjusted as per requirement.
The STATUS LED will start blinking RED if the switch point
is reached. It will blink for the number of seconds for which
the cover delay is set. 1 blink is equal to 1 second during
switching.
Note: Set the value of COVER DELAY between 1-25
secs.
11.1 For Single Point Switching
•Unscrew the cover and ensure that all DIP switches
are in OPEN position as shown in Figure 18. Make
sure that STATUS LED is not blinking for error.
ON
3 4 561 2
COVER
UNCOVER
CALIBRATE
HI CALIBRATE
FS1
FS2
Figure 18: DIP Switch
•Set the COVER switch to CLOSE (Opposite of OPEN
for DIP switch) position as shown in Figure 19.
•Press and hold ENTER key as shown in Figure 20.
The STATUS LED for RELAY 1 starts blinking. Blink
the LED according to value of cover delay.
Sapcon Instruments Pvt.Ltd.®12

User Manual & Datasheet V 1.2
ENTER
CASPER
ON
3 4 561 2
COVER
UNCOVER
CALIBRATE
HI CALIBRATE
FS1
FS2
RELAY 1
RELAY 2
SENSITIVITY
1
2
3
4
5
6
CLOSE
Lo
Figure 19: Cover Delay Switch Position
ENTER
CASPER
ON
3 4 561 2
COVER
UNCOVER
CALIBRATE
HI CALIBRATE
FS1
FS2
RELAY 1
RELAY 2
SENSITIVITY
1
2
3
4
5
6
CLOSE
Lo
Figure 20: Setting Cover Delay
•Delay is entered, but not saved. To save and test the
cover delay, set the COVER switch back to OPEN po-
sition as shown in Figure 21.
ENTER
CASPER
ON
3 4 561 2
COVER
UNCOVER
CALIBRATE
HI CALIBRATE
FS1
FS2
RELAY 1
RELAY 2
SENSITIVITY
1
2
3
4
5
6
CLOSE
Lo
Figure 21: Saving Cover Delay
•To test, dip Casper into the application material until
the switching point is reached.
11.2 For Two Point / Pump Control Logic
•Unscrew the cover and ensure that all DIP switches
are in OPEN position as shown in Figure 18. Make
sure that STATUS LED is not blinking for Error.
•For setting cover delay for RELAY 1, follow the instruc-
tion given in section Single Point Switching.
•For setting cover delay for RELAY 2, set the COVER
and HI CALIBRATE switch to CLOSE (Opposite of
OPEN for DIP switch) position as shown in Figure 22.
•Press and hold ENTER key as shown in Figure 23.
The STATUS LED for RELAY 1 starts blinking. Blink
the LED according to value of cover delay.
•Delay is entered, but not saved. To save and test the
cover delay, set the COVER and HI CALIBRATE switch
back to OPEN position as shown in Figure 24.
•To test, dip Casper into the application material until
the switching point is reached.
ENTER
CASPER
ON
3 4 561 2
COVER
UNCOVER
CALIBRATE
HI CALIBRATE
FS1
FS2
RELAY 1
RELAY 2
SENSITIVITY
1
2
3
4
5
6
CLOSE
Lo
Figure 22: Cover Delay Switch Position for Relay 2
ENTER
CASPER
ON
3 4 561 2
COVER
UNCOVER
CALIBRATE
HI CALIBRATE
FS1
FS2
RELAY 1
RELAY 2
SENSITIVITY
1
2
3
4
5
6
CLOSE
Lo
Figure 23: Setting Cover Delay for Relay 2
ENTER
CASPER
ON
3 4 561 2
COVER
UNCOVER
CALIBRATE
HI CALIBRATE
FS1
FS2
RELAY 1
RELAY 2
SENSITIVITY
1
2
3
4
5
6
CLOSE
Lo
Figure 24: Saving Cover Delay for Relay 2
12 Uncover Delay
When the application material uncovers Casper’s probe,
the changeover of the output can be delayed by a pre-
determined time. This time is called UNCOVER Delay. For
a different value of uncover delay, the number of blinks can
be adjusted as per requirement.
The STATUS LED will start blinking RED if the switch point
is achieved. It will blink for the number of seconds for which
the uncover delay is set.
Note: Set the value of UNCOVER DELAY between
1-25 secs.
12.1 For Single Point Switching
•Unscrew the cover and ensure that all DIP switches
are in OPEN position as shown in Figure 18. Make
sure that STATUS LED is not blinking for error.
•Set the UNCOVER switch to CLOSE (Opposite of
OPEN for DIP switch) position as shown in Figure 25.
•Press and hold ENTER key as shown in Figure 26.
The STATUS LED for RELAY 1 starts blinking. Blink
the LED according to value of uncover delay.
Sapcon Instruments Pvt.Ltd.®13

User Manual & Datasheet V 1.2
ENTER
CASPER
ON
3 4 561 2
COVER
UNCOVER
CALIBRATE
HI CALIBRATE
FS1
FS2
RELAY 1
RELAY 2
SENSITIVITY
1
2
3
4
5
6
CLOSE
Lo
Figure 25: Uncover Delay Switch Position
ENTER
CASPER
ON
3 4 561 2
COVER
UNCOVER
CALIBRATE
HI CALIBRATE
FS1
FS2
RELAY 1
RELAY 2
SENSITIVITY
1
2
3
4
5
6
CLOSE
Lo
Figure 26: Setting Uncover Delay
•Uncover delay is entered, but not saved. To save and
test the uncover delay, set the UNCOVER switch back
to OPEN position as shown in figure 27.
ENTER
CASPER
ON
3 4 561 2
COVER
UNCOVER
CALIBRATE
HI CALIBRATE
FS1
FS2
RELAY 1
RELAY 2
SENSITIVITY
1
2
3
4
5
6
CLOSE
Lo
Figure 27: Saving Uncover Delay
•To test, dip Casper into the application material until
the switching point is achieved.
12.2 Two Point / Pump Control Logic
•Unscrew the cover and ensure that all DIP switches
are in OPEN position as shown in Figure 18. Make
sure that STATUS LED is not blinking for error.
•For setting uncover delay for RELAY 1, follow the in-
struction given in section Single Point Switching.
•For setting uncover delay for RELAY 2, set the UN-
COVER and HI CALIBRATE switch to CLOSE (Oppo-
site of OPEN for DIP switch) position as shown in Fig-
ure 28.
•Press and hold ENTER key as shown in Figure 29.
The STATUS LED for RELAY 1 starts blinking. Blink
the LED according to value of uncover delay.
•Uncover Delay is entered, but not saved. To save and
test the uncover delay, set the UNCOVER switch back
to OPEN position as shown in figure 30.
ENTER
CASPER
ON
3 4 561 2
COVER
UNCOVER
CALIBRATE
HI CALIBRATE
FS1
FS2
RELAY 1
RELAY 2
SENSITIVITY
1
2
3
4
5
6
CLOSE
Lo
Figure 28: Uncover Delay Switch Position for Relay 2
ENTER
CASPER
ON
3 4 561 2
COVER
UNCOVER
CALIBRATE
HI CALIBRATE
FS1
FS2
RELAY 1
RELAY 2
SENSITIVITY
1
2
3
4
5
6
CLOSE
Lo
Figure 29: Setting Uncover Delay for Relay 2
ENTER
CASPER
ON
3 4 561 2
COVER
UNCOVER
CALIBRATE
HI CALIBRATE
FS1
FS2
RELAY 1
RELAY 2
SENSITIVITY
1
2
3
4
5
6
CLOSE
Lo
Figure 30: Saving Uncover Delay for Relay 2
•To test, dip Casper into the application material until
the switching point is achieved.
13 Sensitivity
Sensitivity of the level sensor may have to be adjusted
depending on the dielectric constant of the application me-
dia. Casper has a LED bar display which helps in visualizing
the desired sensitivity level. The device ships with a default
sensitivity level of 3.
Note: Set the sensitivity value between 1-5.
Traverse the following steps to set the sensitivity:
•Set the UNCOVER and CALIBRATE switch to CLOSE
position.
ENTER
CASPER
ON
3 4 561 2
COVER
UNCOVER
CALIBRATE
HI CALIBRATE
FS1
FS2
RELAY 1
RELAY 2
SENSITIVITY
1
2
3
4
5
6
CLOSE
Lo
Figure 31: Sensitivity Bar Display
Sapcon Instruments Pvt.Ltd.®14

User Manual & Datasheet V 1.2
•The Sensitivity Bar Display will indicate the current
sensitivity value. As can be seen in the Figure 31, the
value been shown here is 3.
•To modify the set value, Press ENTER and HOLD the
key, RED STATUS LED for RELAY 1 will start blink-
ing. Count the number of times the LED blinks and
release the ENTER key after the required value. e.g.
For setting the sensitvity to 4, count up to four blinks
and release the ENTER key.
ENTER
CASPER
ON
3 4 561 2
COVER
UNCOVER
CALIBRATE
HI CALIBRATE
FS1
FS2
RELAY 1
RELAY 2
SENSITIVITY
1
2
3
4
5
6
CLOSE
Lo
Figure 32: Setting Sensitivity
•To save the sensitivity value, set the UNCOVER and
CALIBRATE switches back to OPEN position.
ENTER
CASPER
ON
3 4 561 2
COVER
UNCOVER
CALIBRATE
HI CALIBRATE
FS1
FS2
RELAY 1
RELAY 2
SENSITIVITY
1
2
3
4
5
6
CLOSE
Lo
Figure 33: Setting Sensitivity
•Check operation of Casper by filling in and draining out
the material.
•If the instrument does not switch when covered with
the material, try again with a higher value of sensitivity.
•If the instrument does not switch back to the uncovered
state, try with a lower sensitivity value.
Please refer to Table 10 before selecting sensitivity value.
SENSITIVITY DIELECTRIC CONSTANT
1>30
2 20-30
3 5-20
4 2-5
5>1.5 & <2
Table 4: Sensitivity
14 Failsafe
In a condition of device failure, known errors and input
power failure the outputs of the device resemble the ALARM
condition. This is meant to prevent overflow or dry run con-
ditions in case of failures.
Prevent Overflow - High Level Switch Failsafe High
(default) is set by moving the FS 1 and FS 2 switch for relay
1 and 2 to OPEN position.
1. When not in contact with the material, LED turns
GREEN.
2. When in contact with the material, LED turns RED.
CASPER
ENTER
ON
3 4 561 2
COVER
UNCOVER
CALIBRATE
HI CALIBRATE
FS1
FS2
RELAY 1
RELAY 2
SENSITIVITY
1
2
3
4
5
6
CLOSE
Lo
Figure 34: Failsafe High
Prevent Dry run - Low Level Switch Failsafe Low is set
by moving the FS 1 and FS 2 switch for relay 1 and 2 switch
to CLOSE position.
Note: LO in top cover indicates failsafe low.
1. When in contact with the material, LED turns GREEN.
2. When not in contact with the material, LED turns RED.
CASPER
ENTER
ON
3 4 561 2
COVER
UNCOVER
CALIBRATE
HI CALIBRATE
FS1
FS2
RELAY 1
RELAY 2
SENSITIVITY
1
2
3
4
5
6
CLOSE
Lo
Figure 35: Failsafe Low
15 Display Indications
As seen in Fig.36, Casper has STATUS LEDs and a 6-
point LED bar display.
ENTER
CASPER
+
-
NC C NO
ON
DIP
3 4 561 2
COVER
UNCOVER
CALIBRATE
HI CALIBRATE
FS1
FS2
RELAY 1
RELAY 2
SENSITIVITY
1
2
3
4
5
6
Lo
+
-
OUT
LNE Relay-1 PNP
STATUS
LED
Figure 36: LED Indication on Top Cover
Sapcon Instruments Pvt.Ltd.®15

User Manual & Datasheet V 1.2
15.1 STATUS LED
Two separate STATUS LED sections indicate switching
status for RELAY 1 and RELAY 2.
•RED LED: Alarm Condition
•GREEN LED: Normal Condition
Continuous blinking of Red or Green LED could indicate an
error, refer to Error Indication
15.2 LED Bar Display
A numeric LED Bar displays helps to visualize switching
point and senstivity values.
Use of LED Bar Display: The bar display can be used
for two purpose:
•Sensitivity: Refer to section Sensitivity for more details.
•Display Mode: The display mode shows the material
distance from the instrument’s probe. The movement
of LEDs in upward direction depicts the movement of
application media towards Casper’s probe and vice-
versa, as shown in Figure 37.
1
2
3
4
5
6
1
2
3
4
5
6
1
2
3
4
5
6
1
2
3
4
5
6
1
2
3
4
5
6
1
2
3
4
5
6
Upward movement of LEDs
Downward movement of LEDs
Material get closer
Material moves far
Figure 37: Demonstration of LED Bar Display
16 Factory Reset
Follow the steps given below to reset the time delays and
sensitivity value to default values. Factory Reset does not
reset any calibration values:
•Set the CALIBRATE, COVER and UNCOVER switches
to CLOSE position.
ENTER
CASPER
ON
3 4 561 2
COVER
UNCOVER
CALIBRATE
HI CALIBRATE
FS1
FS2
RELAY 1
RELAY 2
SENSITIVITY
1
2
3
4
5
6
CLOSE
Lo
Figure 38: Switch Position
•Press and hold the ENTER key until the STATUS LED
blinks.
•Set the CALIBRATE, COVER and UNCOVER switches
back to OPEN position.
ENTER
CASPER
ON
3 4 561 2
COVER
UNCOVER
CALIBRATE
HI CALIBRATE
FS1
FS2
RELAY 1
RELAY 2
SENSITIVITY
1
2
3
4
5
6
CLOSE
Lo
Figure 39: Setting Default Value
ENTER
CASPER
ON
3 4 561 2
COVER
UNCOVER
CALIBRATE
HI CALIBRATE
FS1
FS2
RELAY 1
RELAY 2
SENSITIVITY
1
2
3
4
5
6
CLOSE
Lo
Figure 40: Saving Default Value
•This will set the time delay to 0 and the sensitivity level
to 3.
17 Selection of Output Options
Casper can be used with 3 output options as per require-
ment which are as follows:
1. Single Point Switching
2. Two Point Switching
3. Pump Control Logic
Note: While changing the configuration mode the
value of Time Delays and Sensitivity will changed to
default value.
17.1 For Single Point / Two Point Switching
•Set the COVER and UNCOVER switches to CLOSE
position.
•Press and hold ENTER Key. The STATUS LED of RE-
LAY 1 starts blinking.
•Release the ENTER key after 1 blink to set Single
Point Switching.
•Release the ENTER key after 2 blink to set Two Point
Switching.
17.2 For Pump Control Logic
•Set the COVER and CALIBRATE switches to CLOSE
position.
•Press and hold ENTER Key. The STATUS LED of RE-
LAY 1 starts blinking.
•Release the Enter key after 1 blink to ON the Pump
Control Logic.
Sapcon Instruments Pvt.Ltd.®16

User Manual & Datasheet V 1.2
•Release the Enter Key after 2 blink to OFF the Pump
Control Logic.
18 Indication of Output Options
Depending on the selection mode for output, the two re-
lay outputs can also operate independently for two different
switch points. Refer to Order Code
•All keys should be in the OPEN position.
•To see the output mode, press and hold ENTER key.
•If the only the first LED lights up, Casper is operating
in the single point switching mode without material.
ENTER
CASPER
ON
3 4 561 2
COVER
UNCOVER
CALIBRATE
HI CALIBRATE
FS1
FS2
RELAY 1
RELAY 2
SENSITIVITY
1
2
3
4
5
6
CLOSE
Lo
Figure 41: Single Point Switching without Material
•If only the 2nd LED light up, then the instrument is op-
erating in the single point swithing mode with material.
ENTER
CASPER
ON
3 4 561 2
COVER
UNCOVER
CALIBRATE
HI CALIBRATE
FS1
FS2
RELAY 1
RELAY 2
SENSITIVITY
1
2
3
4
5
6
CLOSE
Lo
Figure 42: Single Point Switching with Material
•If only the 3rd LED light up, then the instrument is op-
erating in the two point swithing mode.
ENTER
CASPER
ON
3 4 561 2
COVER
UNCOVER
CALIBRATE
HI CALIBRATE
FS1
FS2
RELAY 1
RELAY 2
SENSITIVITY
1
2
3
4
5
6
CLOSE
Lo
Figure 43: Two Point Switching
•If 3rd & 4th LED light up, then the instrument is operat-
ing in the pump control logic.
ENTER
CASPER
ON
3 4 561 2
COVER
UNCOVER
CALIBRATE
HI CALIBRATE
FS1
FS2
RELAY 1
RELAY 2
SENSITIVITY
1
2
3
4
5
6
CLOSE
Lo
Figure 44: Pump Control Logic
19 Error Indication
On error, the status LED starts blinking RED and GREEN
alternately at a faster rate. Normal LED blinks are always
at the rate of 1 blink per second, in either RED or GREEN
color. In some cases, a GREEN or a RED blinking could
indicate an error. Refer to Table 5 for a list of errors and
their indication.
INDICATION DESCRIPTION TROUBLESHOOTING
RED-GREEN
Blinking
Calibration Error Recalibrate the instru-
ment, make sure that
the probe is calibrated
in an empty metal-body
tank.
RED Blinking Probe Short-
Circuit
Moisture deposition in
the probe connector.
Clean the connector and
use the instrument.
GREEN
Blinking
Probe Open Remove the electronic
insert from the hous-
ing and check the ca-
ble connections of the
probe.
3 Times
GREEN
Blinking and
1 Red Blink
Illegal Key Com-
bination
Switch all DIP switches
to open position. Use
only legal combination
of keys.
3 Times RED
Blinking and
1 GREEN
Blink
Circuit Error Contact the Customer
Support department at
Sapcon.
Table 5: Error Indication
Sapcon Instruments Pvt.Ltd.®17

User Manual & Datasheet V 1.2
20 For Namur Module
20.1 Electrical Specifications
Please refer to Table 6 for Electrical Specifications.
PARAMETER VALUE
Input Power Supply NMR: 8.5±0.2V DC. Namur type current output (I ON ≥2.1 mA, I OFF ≤
1.2 mA) Namur compliance can be attained with a Namur certified isolator.
Switching Single-point level switching / Pump Control Logic
Switching Indication Red - Alarm & Green - Normal
Fail-safe Field Selectable: Open - Fail-safe High (For High Level)
Close - Fail-safe Low (For Low Level)
Table 6: Electrical Specifications
20.2 Mechanical Specifications
Please refer to Table 7 for Mechanical Specifications.
PARAMETER VALUE
Housing •SCUTE: Pressure die-cast aluminium weatherproof (Rating IP-68)
•FP2C: Cast aluminium, weatherproof & flameproof, powder coated,
suitable for Gas Groups IIA, IIB & IIC as per IS-2148 (Rating IP-66)
Cable Gland 2 x 1/2” BSP/NPT , PG 13.5
Operating Temperature −20◦C to 60◦C (Electronics)
Mounting •Screwed: 1/2",1”,1 1/2", 3/4” BSP / NPT
•Flanged: As per user specification
Probe Length 100 mm to 3000 mm
Insulation Full PTFE
Table 7: Mechanical Specifications
21 Namur Isolation Barrier Specs
The ’NMR’ electronics of the Coat-Endure requires the following specifications to be functional:
Parameter Value
Functional Operating Voltage 8.5±0.2V DC
Internal Source Resistance 1KΩ
Absolute Maximum Voltage UI & UO = 13 V
Current Consumption II & IO = 16 mA
Power Consumption PI & PO = 65 mW
Input Capacitance 0 uF
Input Inductance LI = 22 uH
Certification Ex ia IIC T6 Ga (-20°C≤Tamb ≤60°C)
Table 8: Namur Isolation Barrier Specifications
Sapcon Instruments Pvt.Ltd.®18

User Manual & Datasheet V 1.2
22 Installation Guidelines
The Casper can be installed in the vessel in almost any
position. While installing, please take care of the following
points:
•Ensure that atleast 10 mm for the "Grounding" elec-
trode on the Casper probe should be completely inside
the application tank. i.e. No part of sense electrode
should be inside the nozzle.
Ground
10mm
Ground
Sense
Sense
Nozzle
Nozzle
Figure 45: Grounding Length in an Application Tank
•Before Installing the device, ensure that the calibra-
tion process has been already carried out in safe area
(Zone 2) then install the instrument in hazardous area
as shown in Figure 51
Safe Area (Zone 2) Hazardous Area (Zone 0)
18-24 V DC
+
-
Power Supply
Tank
Namur
Namur
Barrier
8.2 V DC
GND
Casper
Figure 46: Calibration at safe zone
•For remote calibration, install the instrument in an ap-
plication tank and then perform the calibration process
in hazardous area (Zone 0).
•The instrument shouldn’t block the material filling inlet.
•Secure the cover of housing tightly. Tighten the cable
glands.
•For side-mounting, provide a baffle to prevent the ma-
terial from falling on the probe. Please refer to Figure
47.
•To prevent the ingress of moisture and water seepage
in side mounting position, the cable entries should al-
ways point downwards as shown in Figure 48.
•Make all electrical connections as instructed in the
manual. Don’t power on the device before verifying
connections.
Material Inlet Source
Baffle
Figure 47: Casper with Baffle
Figure 48: Cable Gland Arrangement
•Weatherproofness of enclosure is guaranteed only if
the cover is in place glands adequately tightened.
Damage due to accidental entry of water can be
avoided if the instrument is installed in a rain shade.
•If the ambient temperature is high, the instrument
should not be installed to receive direct sunlight. In
case such a position of shade is not available, a heat
shield should be fitted above the instrument especially
if the operating temperature is 60°C.
•While screwing the Casper, the hexagonal mounting
bush should be turned and not the housing.
22.1 Electrical Connections
Please refer to the Figure 49 for electrical connections
while connecting the instrument in an application tank.
OPEN
1 2
ENTER
CALIBRATE
FAILSAFE
CASPER
STATUS
LED
RED
GREEN
1 2 3
+NOT USED
-
+
-
+
-
NAMUR
GROUND
8.5 ± 0.2 V DC
24 V DC
GROUND
Internal Resistor
1KΩ
BARRIER
3 4
UNCOVER
COVER
NAMUR
Figure 49: Electrical Connection during installation
22.2 Calibration
Calibration for the level sensor has to be carried out at the
installation site. Calibration cannot be skipped and is essen-
tial for level sensor’s operation. Calibration of Casper can be
performed with the help of two different methods which are
as follows:
•Normal Calibration
•Remote Calibration
Sapcon Instruments Pvt.Ltd.®19

User Manual & Datasheet V 1.2
22.3 Normal Calibration
Note: Perform the Normal Calibration of the level in-
strument only in a Safe Zone (Zone 2).
22.3.1 Calibration for Non-conductive Material
This calibration is also known as Air Calibration and Cal-
ibration without material. It should be done without the
application material (i.e only air, no material).
It is recommended to first calibrate the Casper in a more
convenient setup in Safe Zone(Zone 2) before installing
it in an application tank.
To carry out calibration process, please follow the steps
mentioned below:
•Prepare a transparent Metallic Test Tank as shown in
the following Figure 50.
Figure 50: Metallic Test Tank
•Refer to given Figure 49 for Electrical Connections to
power up and connect the device.
•Dip the Casper into test tank as shown in Figure 51.
Calibration in empty
tank (without material)
Figure 51: Calibration without Material
•Unscrew the cover and ensure that all DIP switches
are in the OPEN position as shown in Figure 52. Make
sure that the status LED is not blinking for error.
1 2
CALIBRATE
FAILSAFE
3 4
UNCOVER
COVER
Figure 52: DIP Switch
•To start the calibration process, set the CALIBRATE
switch to CLOSE (Opposite of OPEN in a DIP switch)
position as shown in Figure 53.
•Press and hold ENTER key. The STATUS LED will
glow in RED color.
•Release the ENTER key and set the CALIBRATE
switch back to OPEN position.
OPEN
1 2
ENTER
CALIBRATE
FAILSAFE
CASPER
STATUS
LED
RED
GREEN
3 4
UNCOVER
COVER
NAMUR
Figure 53: Calibration Switch Position
OPEN
1 2
ENTER
CALIBRATE
FAILSAFE
CASPER
STATUS
LED
RED
GREEN
3 4
UNCOVER
COVER
NAMUR
Figure 54: Setting Calibration
OPEN
1 2
ENTER
CALIBRATE
FAILSAFE
CASPER
STATUS
LED
RED
GREEN
3 4
UNCOVER
COVER
NAMUR
Figure 55: Saving Calibration
•Air calibration is done.
•Proceed to Section Installation Guidelines for installing
the product in an application tank.
22.3.2 Calibration for Conductive Material
This calibration is also known as Calibration with ma-
terial. For applications using conductive materials (water,
acid based pastes etc.), Casper needs to be calibrated with
an application material. This will make the instrument spe-
cific to the application material i.e. if the application material
is changed; calibration should be repeated.
It is recommended to first calibrate the Casper in a more
convenient setup in Safe Zone(Zone 2) before installing
it in the application tank.
To carry out calibration process, please follow the steps
mentioned below:
•Prepare a transparent Metallic Test Tank as shown in
the following Figure 50.
•Refer to given Figure 49 for Electrical Connections to
power up and connect the device.
•Dip the Casper in test tank & fill the tank with the ap-
plication material such that the Casper’s probe is com-
pletely covered with the material.
•Unscrew the cover and make sure that all DIP switches
are in the OPEN position as shown in Figure 52. En-
sure that the STATUS LED is not blinking for error.
Sapcon Instruments Pvt.Ltd.®20
Table of contents
Other Sapcon Switch manuals
Popular Switch manuals by other brands

Cisco
Cisco Catalyst 9200 Series Configuration guide

Pakedge Device & Software
Pakedge Device & Software SE-USB1-EP quick start guide

ABB
ABB UniSec SDS Installation guides

Allied Telesis
Allied Telesis AT-GS950/48 user guide

Elenco Electronics
Elenco Electronics K-36 Assembly and instruction manual

TomTom
TomTom BRIDGE user manual