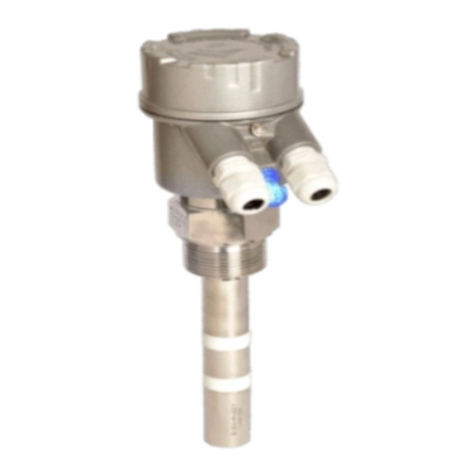
Sapcon COAT-ENDURE User manual

COAT-ENDURE
Admittance Level Limit Switch
INSTRUCTION MANUAL
Version 3.0

Coat-Endure User Manual & Datasheet V 3.0
Contents
Revision History . . . . . . . . . . . . . . . . . . . . . . . . . . . . . . . . . . . . . . . . . . . . . . . . . . . . . 5
1 Introduction . . . . . . . . . . . . . . . . . . . . . . . . . . . . . . . . . . . . . . . . . . . . . . . . . . . . . . 6
2 Operating Principle . . . . . . . . . . . . . . . . . . . . . . . . . . . . . . . . . . . . . . . . . . . . . . . . . . 6
3 Features . . . . . . . . . . . . . . . . . . . . . . . . . . . . . . . . . . . . . . . . . . . . . . . . . . . . . . . . 6
4 Applications . . . . . . . . . . . . . . . . . . . . . . . . . . . . . . . . . . . . . . . . . . . . . . . . . . . . . . 6
5 Electrical Specifications . . . . . . . . . . . . . . . . . . . . . . . . . . . . . . . . . . . . . . . . . . . . . . . . 7
6 Mechanical Specifications . . . . . . . . . . . . . . . . . . . . . . . . . . . . . . . . . . . . . . . . . . . . . . . 7
7 Application Specifications . . . . . . . . . . . . . . . . . . . . . . . . . . . . . . . . . . . . . . . . . . . . . . . 8
8 Installation Guidelines . . . . . . . . . . . . . . . . . . . . . . . . . . . . . . . . . . . . . . . . . . . . . . . . . 8
9 Electrical Connections . . . . . . . . . . . . . . . . . . . . . . . . . . . . . . . . . . . . . . . . . . . . . . . . . 8
10 Calibration . . . . . . . . . . . . . . . . . . . . . . . . . . . . . . . . . . . . . . . . . . . . . . . . . . . . . . 9
10.1 Calibration for Non-conductive Material . . . . . . . . . . . . . . . . . . . . . . . . . . . . . . . . . . . . . 9
10.2 Calibration for Conductive Material . . . . . . . . . . . . . . . . . . . . . . . . . . . . . . . . . . . . . . . . 9
11 Cover Delay . . . . . . . . . . . . . . . . . . . . . . . . . . . . . . . . . . . . . . . . . . . . . . . . . . . . . . 10
12 Uncover Delay . . . . . . . . . . . . . . . . . . . . . . . . . . . . . . . . . . . . . . . . . . . . . . . . . . . . 10
13 Sensitivity . . . . . . . . . . . . . . . . . . . . . . . . . . . . . . . . . . . . . . . . . . . . . . . . . . . . . . . 11
14 Failsafe . . . . . . . . . . . . . . . . . . . . . . . . . . . . . . . . . . . . . . . . . . . . . . . . . . . . . . . . 12
15 Display Indications . . . . . . . . . . . . . . . . . . . . . . . . . . . . . . . . . . . . . . . . . . . . . . . . . . 12
15.1 STATUS LED . . . . . . . . . . . . . . . . . . . . . . . . . . . . . . . . . . . . . . . . . . . . . . . . . . . 12
15.2 LED Bar Display . . . . . . . . . . . . . . . . . . . . . . . . . . . . . . . . . . . . . . . . . . . . . . . . . 12
16 Factory Reset . . . . . . . . . . . . . . . . . . . . . . . . . . . . . . . . . . . . . . . . . . . . . . . . . . . . . 12
17 Output Options . . . . . . . . . . . . . . . . . . . . . . . . . . . . . . . . . . . . . . . . . . . . . . . . . . . . 13
18 Error Indication . . . . . . . . . . . . . . . . . . . . . . . . . . . . . . . . . . . . . . . . . . . . . . . . . . . . 13
19 Customer Support . . . . . . . . . . . . . . . . . . . . . . . . . . . . . . . . . . . . . . . . . . . . . . . . . . 13
20 Product Selection Order Code . . . . . . . . . . . . . . . . . . . . . . . . . . . . . . . . . . . . . . . . . . . . 15
Sapcon Instruments Pvt.Ltd. R
2

Coat-Endure User Manual & Datasheet V 3.0
List of Figures
1 Coat-Endure . . . . . . . . . . . . . . . . . . . . . . . . . . . . . . . . . . . . . . . . . . . . . . . . . . . . 6
2 Description of Parts . . . . . . . . . . . . . . . . . . . . . . . . . . . . . . . . . . . . . . . . . . . . . . . . 6
3 Proper Mounting Arrangement . . . . . . . . . . . . . . . . . . . . . . . . . . . . . . . . . . . . . . . . . . . 8
4 Coat-Endure with Baffle . . . . . . . . . . . . . . . . . . . . . . . . . . . . . . . . . . . . . . . . . . . . . . 8
5 Cable Gland Arrangement . . . . . . . . . . . . . . . . . . . . . . . . . . . . . . . . . . . . . . . . . . . . . 8
6 Electrical Connections . . . . . . . . . . . . . . . . . . . . . . . . . . . . . . . . . . . . . . . . . . . . . . . 8
7 Calibration for Non-conductive Material . . . . . . . . . . . . . . . . . . . . . . . . . . . . . . . . . . . . . . 9
8 DIP Switch . . . . . . . . . . . . . . . . . . . . . . . . . . . . . . . . . . . . . . . . . . . . . . . . . . . . . 9
9 Calibration Switch Position . . . . . . . . . . . . . . . . . . . . . . . . . . . . . . . . . . . . . . . . . . . . . 9
10 Setting Calibration . . . . . . . . . . . . . . . . . . . . . . . . . . . . . . . . . . . . . . . . . . . . . . . . . 9
11 Saving Calibration . . . . . . . . . . . . . . . . . . . . . . . . . . . . . . . . . . . . . . . . . . . . . . . . . 9
12 Calibration for Conductive Material . . . . . . . . . . . . . . . . . . . . . . . . . . . . . . . . . . . . . . . . . 9
13 High Calibration Switch Position . . . . . . . . . . . . . . . . . . . . . . . . . . . . . . . . . . . . . . . . . . 10
14 Setting Calibration . . . . . . . . . . . . . . . . . . . . . . . . . . . . . . . . . . . . . . . . . . . . . . . . . 10
15 Saving Calibration . . . . . . . . . . . . . . . . . . . . . . . . . . . . . . . . . . . . . . . . . . . . . . . . . 10
16 DIP Switch . . . . . . . . . . . . . . . . . . . . . . . . . . . . . . . . . . . . . . . . . . . . . . . . . . . . . 10
17 Cover Switch Position . . . . . . . . . . . . . . . . . . . . . . . . . . . . . . . . . . . . . . . . . . . . . . . 10
18 Setting Cover Delay . . . . . . . . . . . . . . . . . . . . . . . . . . . . . . . . . . . . . . . . . . . . . . . . 10
19 Saving Cover Delay . . . . . . . . . . . . . . . . . . . . . . . . . . . . . . . . . . . . . . . . . . . . . . . . 10
20 Uncover Switch Position . . . . . . . . . . . . . . . . . . . . . . . . . . . . . . . . . . . . . . . . . . . . . . 11
21 Setting Uncover Delay . . . . . . . . . . . . . . . . . . . . . . . . . . . . . . . . . . . . . . . . . . . . . . . 11
22 Saving Uncover Delay . . . . . . . . . . . . . . . . . . . . . . . . . . . . . . . . . . . . . . . . . . . . . . . 11
23 Sensitivity Bar Display . . . . . . . . . . . . . . . . . . . . . . . . . . . . . . . . . . . . . . . . . . . . . . . 11
24 Setting Sensitivity . . . . . . . . . . . . . . . . . . . . . . . . . . . . . . . . . . . . . . . . . . . . . . . . . 11
25 Setting Sensitivity . . . . . . . . . . . . . . . . . . . . . . . . . . . . . . . . . . . . . . . . . . . . . . . . . 11
26 Failsafe High . . . . . . . . . . . . . . . . . . . . . . . . . . . . . . . . . . . . . . . . . . . . . . . . . . . . 12
27 Failsafe Low . . . . . . . . . . . . . . . . . . . . . . . . . . . . . . . . . . . . . . . . . . . . . . . . . . . . 12
28 LED Indication on Top Cover . . . . . . . . . . . . . . . . . . . . . . . . . . . . . . . . . . . . . . . . . . . . 12
29 Demonstration of LED Bar Display . . . . . . . . . . . . . . . . . . . . . . . . . . . . . . . . . . . . . . . . . 12
30 Switch Position . . . . . . . . . . . . . . . . . . . . . . . . . . . . . . . . . . . . . . . . . . . . . . . . . . . 13
31 Setting Default Value . . . . . . . . . . . . . . . . . . . . . . . . . . . . . . . . . . . . . . . . . . . . . . . . 13
32 Saving Default Value . . . . . . . . . . . . . . . . . . . . . . . . . . . . . . . . . . . . . . . . . . . . . . . . 13
33 Single Point Switching without Material . . . . . . . . . . . . . . . . . . . . . . . . . . . . . . . . . . . . . . 13
Sapcon Instruments Pvt.Ltd. R
3

Coat-Endure User Manual & Datasheet V 3.0
List of Tables
1 Electrical Specifications . . . . . . . . . . . . . . . . . . . . . . . . . . . . . . . . . . . . . . . . . . . . . . 7
2 Mechanical Specifications . . . . . . . . . . . . . . . . . . . . . . . . . . . . . . . . . . . . . . . . . . . . . 7
3 Application Specifications . . . . . . . . . . . . . . . . . . . . . . . . . . . . . . . . . . . . . . . . . . . . . 8
4 Sensitivity . . . . . . . . . . . . . . . . . . . . . . . . . . . . . . . . . . . . . . . . . . . . . . . . . . . . . . 12
5 Error Indication . . . . . . . . . . . . . . . . . . . . . . . . . . . . . . . . . . . . . . . . . . . . . . . . . . . 14
Sapcon Instruments Pvt.Ltd. R
4

Coat-Endure User Manual & Datasheet V 3.0
Revision History
Revision Date Author(s) Description
1.0 27 Jan 2014 RND First Version Editing
1.1 10 Aug 2014 MRK Applications Revision
1.2 29 May 2015 RND Features Revision
1.3 19 Nov 2015 RND Specs Revision
1.4 25 Jul 2016 RND Specs Revision
2.0 08 Jan 2017 BRND Revised Format
2.1 17 Oct 2017 BRND Branding Revisions
2.2 05 Feb 2018 MRK Marketing Revisions
2.3 11 Oct 2018 RND Specs Revisions
3.0 27 Dec 2019 BRND Specs Revisions
3.0 28 Mar 2019 BRND Features Revisions
1
1
•Copyright: All content on this document, such as text, graphics, logos and images is the property of Sapcon Instruments Pvt. Ltd. The selection,
arrangement and presentation of all materials on this document and the overall design of this document is the exclusive property of Sapcon Instruments
Pvt. Ltd.
•The images shown in this manual may differ from the actual instrument / housing in terms of dimensions, color and design. Please refer to GA drawings
for dimensional details.
•Values (of performance) described in this manual were obtained under ideal testing conditions. Hence, they may differ under industrial environment and
settings.
General Instructions
•Instrument shouldn’t block the material filling inlet.
•Secure the cover of housing tightly. Tighten the cable glands. For side mounting, the cable glands should point downwards.
•For side mounting, provide a baffle to prevent the material from falling on the probe.
•When handling forks, do not lift them using their tines. While using them with solids, ensure that material size is less than 10mm.
•Deforming the shape of the tines may interfere with the fork’s operating frequency.
•Make all electrical connections as instructed in the manual. Don’t power on the device before verifying the connections.
Sapcon Instruments Pvt.Ltd. R
5

Coat-Endure User Manual & Datasheet V 3.0
1 Introduction
Coat-Endure is a microcontroller based compact coat im-
mune admittance level limit switch. It is a compact level
switch which is suitable for sticky solids, pastes and slur-
ries. The device is specially suited for compact silos and
packaging machines where material has a tendency to stick
on the probe.
Figure 1: Coat-Endure
2 Operating Principle
Coat-Endure is an improvement over traditional principle
of admittance. The ring type probe has an alternating active
and an inactive region, which collectively help the controller
to calculate the extent of coating on the probe. In effect,
the device is able to identify the differential coating between
the sense and the shield by measuring their individual ca-
pacitances. As the coating immunity is controlled by the on-
board microcontroller, the extent of coating immunity can be
set easily.
Figure 2: Description of Parts
3 Features
•Universal power supply of 18 - 55 V DC and 90 - 265
V AC on the same terminal.
•Compact and customizable probe size.
•Passive shielding compensation with adjustable coat-
ing immunity.
•Output options: Relay, PNP and Analog.
•High temperature probe suitable for applications up to
250◦C.
•Self-diagnosis for probe and electronics.
•Popular with a wide range of materials: low-to-high di-
electric conductive materials.
4 Applications
•Food & Beverages
•Foundry
•Material Handling
•Poultry
•Packaging Industry
•Chemicals
•Pharmaceuticals
•Dairy
Sapcon Instruments Pvt.Ltd. R
6

Coat-Endure User Manual & Datasheet V 3.0
5 Electrical Specifications
Please refer to Table 1 for Electrical Specifications.
PARAMETER VALUE
Input Power Supply 18 - 55V DC and 90 - 265V AC at 50Hz on same terminal
Available Output Options Relay SPDT , PNP - Single Point Switching
Power Consumption 1.5W at 24 V
Switching Indication Bi-color LED:
Red - Alarm
Green - Normal
Fail-safe Field Selectable
•Open - Fail-safe High (For High Level)
•Close - Fail-safe Low (For Low Level)
Time Delay Setting 1 - 25 seconds (For both, Covered and Uncovered Delays)
Relay Rating 6 Amps at 230V AC
Table 1: Electrical Specifications
6 Mechanical Specifications
Please refer to Table 2 for Mechanical Specifications.
PARAMETER VALUE
Housing
•SCUTE: Pressure die-cast aluminium weatherproof
(Rating IP-68)
•FP2C: Cast aluminium, weatherproof & flameproof,
powder coated, suitable for Gas Groups IIA, IIB & IIC
as per IS-2148
Electrical Connector 2 x 1/2” BSP/NPT , PG 13.5
Operating Temperature 0◦C to 60◦C (Electronics)
Process Temperature Up to 250◦C
Operating Pressure Up to 10 bar
Mounting
•Screwed: 1/2",1”,1 1/2", 3/4” BSP / NPT
•Flanged: As per user specification
Probe Length 65 mm and (85 mm to 1500 mm)
Insulation Part PTFE / Full PTFE
Table 2: Mechanical Specifications
Sapcon Instruments Pvt.Ltd. R
7

Coat-Endure User Manual & Datasheet V 3.0
7 Application Specifications
Please refer to Table 3 for Application Specifications.
PARAMETER VALUE
Response Time 1 second
Sensitivity Refer Table No. 4
Table 3: Application Specifications
8 Installation Guidelines
While installing the instrument, please take care of the
following points:
1. The instrument should be installed in horizontal or ver-
tical position only.
Material Inlet Source
Figure 3: Proper Mounting Arrangement
2. Observe that when installed directly under the mate-
rial inlet source, a canopy called baffle of appropriate
strength and size should be welded right above the in-
strument as shown.
Material Inlet Source
Baffle
Figure 4: Coat-Endure with Baffle
3. To prevent the ingress of moisture and water seepage
in side mounting position, the cable entries should al-
ways point downwards.
Figure 5: Cable Gland Arrangement
4. Secure the cover of housing tightly. Tighten the cable
glands.
5. Make all electrical connections as instructed in the
manual. Don’t power on the device before verifying
the connections.
6. Weatherproofness of enclosure is guaranteed only if
the cover is in place glands adequately tightened.
Damage due to accidental entry of water can be
avoided if the instrument is installed in a rain shade.
7. If the ambient temperature is high, the instrument
should not be installed to receive direct sunlight. In
case such a position of shade is not available, a heat
shield should be fitted above the instrument especially
if the operating temperature lies between 60◦C and
80◦C.
9 Electrical Connections
Electrical connections for the instrument will change with
the models. Please refer to figure 6 and the precautions
mentioned below before connecting the device.
Precautions for connecting Coat-Endure :
•Power Supply Rating
Make sure the power supplied to the instrument is
within the specified range mentioned in Table 1.
•Connect Earth
When supplying AC power, please make sure that the
grounding screw on the housing and the earth terminal
are all connected to the plant’s earth.
•Power Supply Fluctuations & Noise
External noise or fluctuating power supplies could af-
fect performance and shorten the life of the instrument.
Use external line suppressors and fuse wires to con-
tain the risk of damage to the circuit.
AC Supply DC Supply
L (Live)
N (Neutral)
90-265 V AC 18-55 V DC
+
ENTER
COAT-ENDURE
+
-
NC C NO
ON
DIP
1 2 341 2
COVER
UNCOVER
CALIBRATE
HI CALIBRATE
FS1
FS2
RELAY 1
RELAY 2
SENSITIVITY
1
2
3
4
5
6
Lo
+
-
OUT
R
L
(Available only in DC Power Supply)
LNE Relay-1 PNP
(a) Electronics option SPDT Relay and PNP Output(SPN)
Figure 6: Electrical Connections
Sapcon Instruments Pvt.Ltd. R
8

Coat-Endure User Manual & Datasheet V 3.0
10 Calibration
The DIP switches for calibration can be accessed by
opening the top aluminium cover. Calibration process
depends on the conductivity of the application material.
10.1 Calibration for Non-conductive Material
Note: Calibration in air is specific to the tank, if the
tank changes, the instrument needs to be calibrated
again.
This calibration is also known as Air Calibration and Cali-
bration without material. It should be done without the ap-
plication material (i.e only air, no material). Once calibrated
in the empty tank, the device can be used with a wide range
of materials. Calibrating the instrument outside the tank can
cause malfunctions.
Calibration in empty
tank(without material)
Figure 7: Calibration for Non-conductive Material
Follow the procedure given below to calibration the
sensor:
•Install Coat-Endure in an empty tank.
•Unscrew the cover and ensure that all DIP switches
are in the OPEN position as shown in Figure 8. Make
sure that the status LED is not blinking for error.
ON
3 4 561 2
COVER
UNCOVER
CALIBRATE
HI CALIBRATE
FS1
FS2
CLOSE
Figure 8: DIP Switch
•To start the calibration process, set the CALIBRATE
switch to CLOSE (Opposite of OPEN in a DIP switch)
position as shown in Figure 9.
ENTER
COAT-ENDURE
ON
3 4 561 2
COVER
UNCOVER
CALIBRATE
HI CALIBRATE
FS1
FS2
RELAY 1
RELAY 2
SENSITIVITY
1
2
3
4
5
6
CLOSE
Lo
Figure 9: Calibration Switch Position
ENTER
COAT-ENDURE
ON
3 4 561 2
COVER
UNCOVER
CALIBRATE
HI CALIBRATE
FS1
FS2
RELAY 1
RELAY 2
SENSITIVITY
1
2
3
4
5
6
CLOSE
Lo
Figure 10: Setting Calibration
•Press and hold ENTER key. The STATUS LED for RE-
LAY 1 will glow in RED color.
•Release the ENTER key and set the CALIBRATE
switch back to OPEN position.
ENTER
COAT-ENDURE
ON
3 4 561 2
COVER
UNCOVER
CALIBRATE
HI CALIBRATE
FS1
FS2
RELAY 1
RELAY 2
SENSITIVITY
1
2
3
4
5
6
CLOSE
Lo
Figure 11: Saving Calibration
•Low calibration is done.
10.2 Calibration for Conductive Material
For applications using conductive materials (water, acid
based pastes etc.), Coat-Endure needs to be calibrated with
the application material. This will make the instrument spe-
cific to the application material i.e. if the application material
is changed; calibration should be repeated.
Figure 12: Calibration for Conductive Material
Follow the procedure given below to calibration the
sensor:
•Fill the tank with the application material such that the
Coat-Endure’s probe is completely covered with the
material.
•Unscrew the cover and make sure that all DIP switches
are in the OPEN position as shown in Figure 8. Ensure
that the STATUS LED is not blinking for error.
•To start with the calibration, set the HI CALIBRATE
switch to CLOSE (Opposite of OPEN for DIP switch)
position as shown in Figure13 and wait until Green
LED becomes stable.
Sapcon Instruments Pvt.Ltd. R
9

Coat-Endure User Manual & Datasheet V 3.0
ENTER
COAT-ENDURE
ON
DIP
1 2 341 2
COVER
UNCOVER
CALIBRATE
HI CALIBRATE
FS1
FS2
RELAY 1
RELAY 2
SENSITIVITY
1
2
3
4
5
6
CLOSE
Lo
Figure 13: High Calibration Switch Position
•Press and hold ENTER key, the STATUS LED for RE-
LAY 1 will glow in RED color as shown in Figure 14.
ENTER
COAT-ENDURE
ON
DIP
1 2 341 2
COVER
UNCOVER
CALIBRATE
HI CALIBRATE
FS1
FS2
RELAY 1
RELAY 2
SENSITIVITY
1
2
3
4
5
6
CLOSE
Lo
Figure 14: Setting Calibration
•Release the ENTER key and set the HI CALIBRATE
switch back to OPEN position as shown in Figure 15.
ENTER
COAT-ENDURE
ON
DIP
1 2 341 2
COVER
UNCOVER
CALIBRATE
HI CALIBRATE
FS1
FS2
RELAY 1
RELAY 2
SENSITIVITY
1
2
3
4
5
6
CLOSE
Lo
Figure 15: Saving Calibration
•High Calibration is complete.
11 Cover Delay
Note: Set the value of Cover Delay between 1-25 secs.
When the application material covers the probe, the
changeover of the output can be delayed by a pre-
determined time. This time is called Cover Delay. For a
different value of cover delay, the number of blinks can be
adjusted as per requirement. Follow the procedure given
below for setting cover delay:
1. Ensure that all DIP switches are in OPEN position as
shown in Figure 16. Make sure that STATUS LED is
not blinking for error.
2. Set the COVER switch to CLOSE (Opposite of OPEN
in a DIP switch) position as shown in Figure 17.
3. Press ENTER. The STATUS LED for RELAY 1 starts
blinking. Blink the STATUS LED according to value of
cover delay.
ON
3 4 561 2
COVER
UNCOVER
CALIBRATE
HI CALIBRATE
FS1
FS2
CLOSE
Figure 16: DIP Switch
ENTER
COAT-ENDURE
ON
3 4 561 2
COVER
UNCOVER
CALIBRATE
HI CALIBRATE
FS1
FS2
RELAY 1
RELAY 2
SENSITIVITY
1
2
3
4
5
6
CLOSE
Lo
Figure 17: Cover Switch Position
ENTER
COAT-ENDURE
ON
3 4 561 2
COVER
UNCOVER
CALIBRATE
HI CALIBRATE
FS1
FS2
RELAY 1
RELAY 2
SENSITIVITY
1
2
3
4
5
6
CLOSE
Lo
Figure 18: Setting Cover Delay
4. Cover delay is entered, but not saved. To save and test
the cover delay, set the COVER switch back to OPEN
position as shown in Figure 19.
ENTER
COAT-ENDURE
ON
3 4 561 2
COVER
UNCOVER
CALIBRATE
HI CALIBRATE
FS1
FS2
RELAY 1
RELAY 2
SENSITIVITY
1
2
3
4
5
6
CLOSE
Lo
Figure 19: Saving Cover Delay
5. To test, dip Coat-Endure into the application material
until the switching point is reached.
6. The STATUS LED will start blinking RED if the switch
point is reached. It will blink for the number of seconds
for which the cover delay is set. 1 blink is equal to 1
second during switching.
12 Uncover Delay
Note: Set the value of Uncover Delay between 1-25
secs.
When the application material uncovers Coat-Endure’s
probe, the changeover of the output can be delayed by a
pre-determined time. This time is called Uncover Delay. For
a different value of uncover delay, the number of blinks can
be adjusted as per requirement. Follow the below proce-
dure for setting uncover delay:
Sapcon Instruments Pvt.Ltd. R
10

Coat-Endure User Manual & Datasheet V 3.0
1. Ensure that all DIP switches are in OPEN position as
shown in Figure 16. Make sure that STATUS LED is
not blinking for error.
2. Set the UNCOVER switch to CLOSE (Opposite of
OPEN in a DIP switch) position as shown in Figure 20.
ENTER
COAT-ENDURE
ON
3 4 561 2
COVER
UNCOVER
CALIBRATE
HI CALIBRATE
FS1
FS2
RELAY 1
RELAY 2
SENSITIVITY
1
2
3
4
5
6
CLOSE
Lo
Figure 20: Uncover Switch Position
3. Press ENTER. The STATUS LED for RELAY 1 starts
blinking. Blink the STATUS LED according to value of
uncover delay.
ENTER
COAT-ENDURE
ON
3 4 561 2
COVER
UNCOVER
CALIBRATE
HI CALIBRATE
FS1
FS2
RELAY 1
RELAY 2
SENSITIVITY
1
2
3
4
5
6
CLOSE
Lo
Figure 21: Setting Uncover Delay
4. Uncover Delay is entered, but not saved. To save and
test the uncover delay, set the UNCOVER switch back
to OPEN position as shown in Figure 22.
ENTER
COAT-ENDURE
ON
3 4 561 2
COVER
UNCOVER
CALIBRATE
HI CALIBRATE
FS1
FS2
RELAY 1
RELAY 2
SENSITIVITY
1
2
3
4
5
6
CLOSE
Lo
Figure 22: Saving Uncover Delay
5. To test, dip Coat-Endure into the application material
until the switching point is achieved.
6. The STATUS LED will start blinking GREEN if the
switch point is achieved. It will blink for the number
of seconds for which the Uncover Delay is set.
13 Sensitivity
Note: Set the sensitivity value between 1-5.
Sensitivity of the level sensor may have to be adjusted de-
pending on the dielectric constant of the application media.
Coat-Endure has a LED bar display which helps in visual-
izing the desired sensitivity level. The device ships with a
default sensitivity level of 3.
Traverse the following steps to set the sensitivity of
Coat-Endure:
1. Set the UNCOVER and CALIBRATE switch to CLOSE
position.
ENTER
COAT-ENDURE
ON
3 4 561 2
COVER
UNCOVER
CALIBRATE
HI CALIBRATE
FS1
FS2
RELAY 1
RELAY 2
SENSITIVITY
1
2
3
4
5
6
CLOSE
Lo
Figure 23: Sensitivity Bar Display
2. The Sensitivity Bar Display will indicate the current
sensitivity value. As can be seen in the Figure 23, the
value been shown here is 3.
3. To modify the set value, Press ENTER and HOLD the
key, RED Status LED for RELAY 1 will start blinking.
Count the number of times the LED blinks and release
the ENTER key after the required value. e.g. For set-
ting the sensitvity to 4, count up to four blinks and re-
lease the ENTER key.
ENTER
COAT-ENDURE
ON
3 4 561 2
COVER
UNCOVER
CALIBRATE
HI CALIBRATE
FS1
FS2
RELAY 1
RELAY 2
SENSITIVITY
1
2
3
4
5
6
CLOSE
Lo
Figure 24: Setting Sensitivity
4. To save the sensitivity value, set the UNCOVER and
CALIBRATE switches back to OPEN position.
ENTER
COAT-ENDURE
ON
3 4 561 2
COVER
UNCOVER
CALIBRATE
HI CALIBRATE
FS1
FS2
RELAY 1
RELAY 2
SENSITIVITY
1
2
3
4
5
6
CLOSE
Lo
Figure 25: Setting Sensitivity
5. Check operation of Coat-Endure by filling in and drain-
ing out the material.
6. If the instrument does not switch when covered with
the material, try again with a higher value of sensitivity.
Sapcon Instruments Pvt.Ltd. R
11

Coat-Endure User Manual & Datasheet V 3.0
7. If the instrument does not switch back to the uncovered
state, try with a lower sensitivity value.
Select the sensitivity value with the help of Table 4.
SENSITIVITY DIELECTRIC CONSTANT
1>30
2 20-30
3 5-20
4 2-5
5>1.5 & <2
Table 4: Sensitivity
14 Failsafe
In a condition of device failure, known errors and input
power failure the outputs of the device resemble the ALARM
condition. This is meant to prevent overflow or dry run con-
ditions in case of failures.
Prevent Overflow - High Level Switch: Failsafe High
(default) is set by moving the FS 1 and FS 2 switch for RE-
LAY 1 and 2 to OPEN position.
1. When not in contact with the material, LED turns
GREEN.
2. When in contact with the material, LED turns RED.
ENTER
COAT-ENDURE
ON
3 4 561 2
COVER
UNCOVER
CALIBRATE
HI CALIBRATE
FS1
FS2
RELAY 1
RELAY 2
SENSITIVITY
1
2
3
4
5
6
CLOSE
Lo
Figure 26: Failsafe High
Prevent Dry run - Low Level Switch:
Note: LO in top cover indicates failsafe low.
Failsafe Low is set by moving the FS 1 and FS 2 switch for
RELAY 1 and 2 switch to CLOSE position.
1. When in contact with the material, LED turns GREEN.
2. When not in contact with the material, LED turns RED.
15 Display Indications
As seen in Fig.28, Coat-Endure has STATUS LEDs and
a 6-point LED bar display.
15.1 STATUS LED
Two separate STATUS LED sections indicate switching
status for RELAY 1 and RELAY 2.
ENTER
COAT-ENDURE
ON
3 4 561 2
COVER
UNCOVER
CALIBRATE
HI CALIBRATE
FS1
FS2
RELAY 1
RELAY 2
SENSITIVITY
1
2
3
4
5
6
CLOSE
Lo
Figure 27: Failsafe Low
ENTER
COAT-ENDURE
+
-
NC C NO
ON
DIP
3 4 561 2
COVER
UNCOVER
CALIBRATE
HI CALIBRATE
FS1
FS2
RELAY 1
RELAY 2
SENSITIVITY
1
2
3
4
5
6
Lo
+
-
OUT
LNE Relay-1 PNP
STATUS
LED
Figure 28: LED Indication on Top Cover
•RED LED: Alarm Condition
•GREEN LED: Normal Condition
Continuous blinking of Red or Green LED could indicate an
error, refer to Error Indication
15.2 LED Bar Display
A numeric LED Bar displays helps to visualize swithching
point and senstivity values.
Use of LED Bar Display: The bar display can be used
for two purpose:
•Sensitivity: Refer to section Sensitivity for more details.
•Display Mode: The display mode shows the material
distance from the instrument’s probe. The movement
of LEDs in upward direction depicts the movement of
application media towards Coat-Endure’s Probe and
vice-versa, as shown in Figure 29.
1
2
3
4
5
6
1
2
3
4
5
6
1
2
3
4
5
6
1
2
3
4
5
6
1
2
3
4
5
6
1
2
3
4
5
6
Upward movement of LEDs
Downward movement of LEDs
Material get closer
Material moves far
Figure 29: Demonstration of LED Bar Display
16 Factory Reset
Follow the steps given below to reset the time delays and
sensitivity value to default values. Factory Rest does not
reset any calibration values:
1. Set the CALIBRATE, COVER and UNCOVER switches
to CLOSE position.
Sapcon Instruments Pvt.Ltd. R
12

Coat-Endure User Manual & Datasheet V 3.0
ENTER
COAT-ENDURE
ON
3 4 561 2
COVER
UNCOVER
CALIBRATE
HI CALIBRATE
FS1
FS2
RELAY 1
RELAY 2
SENSITIVITY
1
2
3
4
5
6
CLOSE
Lo
Figure 30: Switch Position
2. Press and hold the ENTER key until the STATUS LED
blinks.
ENTER
COAT-ENDURE
ON
3 4 561 2
COVER
UNCOVER
CALIBRATE
HI CALIBRATE
FS1
FS2
RELAY 1
RELAY 2
SENSITIVITY
1
2
3
4
5
6
CLOSE
Lo
Figure 31: Setting Default Value
3. Set the CALIBRATE, COVER and UNCOVER switches
back to OPEN position.
ENTER
COAT-ENDURE
ON
3 4 561 2
COVER
UNCOVER
CALIBRATE
HI CALIBRATE
FS1
FS2
RELAY 1
RELAY 2
SENSITIVITY
1
2
3
4
5
6
CLOSE
Lo
Figure 32: Saving Default Value
4. This will set the time delay to 0 and the sensitivity level
to 3.
17 Output Options
Depending on the selection mode for output, the two re-
lay outputs can also operate independantly for two different
switch points. Refer to Order Code
•All keys should be in the OPEN position.
•To see the output mode, press and hold ENTER key.
•If the only the first LED lights up, Coat-Endure is oper-
ating in the single point switching mode.
18 Error Indication
On error, the status LED starts blinking RED and GREEN
alternately at a faster rate. Normal LED blinks are always
at the rate of 1 blink per second, in either RED or GREEN
color. In some cases, a GREEN or a RED blinking could
ENTER
COAT-ENDURE
ON
3 4 561 2
COVER
UNCOVER
CALIBRATE
HI CALIBRATE
FS1
FS2
RELAY 1
RELAY 2
SENSITIVITY
1
2
3
4
5
6
CLOSE
Lo
Figure 33: Single Point Switching without Material
indicate an error. Refer to Table 5 for a list of errors and
their indication.
19 Customer Support
Thank you for going through the instructions given in this
manual. To further ease the process of installation and use,
we have developed special demo videos which are hosted
on YouTube.
Sapcon’s YouTube channel, SAPCON INSTRUMENTS,
lists all these videos: https://goo.gl/dnxfcz
Should you require further information regarding installa-
tion, use or working of the instrument, please don’t hesitate
to contact us. Kindly provide the following information at the
time of contacting:
•Instrument Model and Serial Number
•Purchase Order Number and Date of Purchase
•Description of the query
•Your contact details
In an attempt to serve you better, we are open seven days
a week (9:30am to 7:30pm). We are available at:
•www.sapconinstruments.com
•+91-731-4757575
Sapcon Instruments Pvt.Ltd. R
13

Coat-Endure User Manual & Datasheet V 3.0
LED ERROR INDICATION DESCRIPTION TROUBLESHOOTING
RED-GREEN Blinking Calibration Error Recalibrate the instrument, make
sure that the probe is calibrated in
an empty metal-body tank.
RED Blinking Probe Short-Circuit Moisture deposition in the probe
connector. Clean the connector
and use the instrument.
GREEN Blinking Probe Open Remove the electronic insert from
the housing and check the cable
connections of the probe.
3 Times GREEN Blinking and 1
Red Blink
Illegal Key Combination Switch all DIP switches to open
position. Use only legal combina-
tion of keys.
3 Times RED Blinking and 1
GREEN Blink
Circuit Error Contact the Customer Support de-
partment at Sapcon.
Table 5: Error Indication
Sapcon Instruments Pvt.Ltd. R
14

Coat-Endure User Manual & Datasheet V 3.0
20 Product Selection Order Code
Product
CE : Coat Endure - Compact Admittance Level Limit Switch (Use in Sticky Solids, Pastes and Slurries)
Type
I : Integral (sensor in same unit)
Indication (Optional)
WL : External LED Indication infrared output
Housing
SCUTE : Pressure Die Cast Aluminium weather proof (Rating IP68) SCUTE
FP2C : Cast Aluminium weather & flame proof powder coated paint suitable for gas group IIC
Probe Housing Cable Entry
PCPG13 : PG 13.5, Polyamide
PCB5D : 1/2” BSP, DC Gland, Brass
PCN5D : 1/2” NPT, DC Gland, Brass
Output
D : 2NO, 2NC DPDT Relay Output (rated at 6 A, 230 V AC for non-inductive load)
SPN : SPDT Relay Output 1NO, 1NC (Relay rated at 6 A, 230 V AC for non-inductive load) and PNP Output (only for supply voltage
18V to 35V DC)
Power Supply (Depend on “Housing”)
U : Universal (18 to 55V DC) and (90 to 265V at 50Hz AC) on same terminals
Insulation Type
P : Part PTFE
F : Full PTFE
Mounting
MB5S4 : Screwed Thread, BSP 1/2”, SS 304
MB5S6 : Screwed Thread, BSP 1/2”, SS 316
MN5S4 : Screwed Thread, NPT 1/2”, SS 304
MN5S6 : Screwed Thread, NPT 1/2”, SS 316
MB75S4 : Screwed Thread, BSP 3/4”, SS 304
MB75S6 : Screwed Thread, BSP 3/4”, SS 316
MN75S4 : Screwed Thread, NPT 3/4”, SS 304
MN75S6 : Screwed Thread, NPT 3/4”, SS 316
MB10S4 : Screwed Thread, BSP 1”, SS 304
MB10S6 : Screwed Thread, BSP 1”, SS 316
MN10S4 : Screwed Thread, NPT 1”, SS 304
MN10S6 : Screwed Thread, NPT 1”, SS 316
MB15S4 : Screwed Thread, BSP 1-1/2”, SS 304
MB15S6 : Screwed Thread, BSP 1-1/2”, SS 316
MN15S4 : Screwed Thread, NPT 1-1/2”, SS 304
MN15S6 : Screwed Thread, NPT 1-1/2”, SS 316
F10S4 : 1" ASA Flange, 10mm thickness, SS 304
F10S6 : 1” ASA Flange, 10mm thickness, SS 316
F15S4 : 1-1/2” ASA Flange, 10mm thickness, SS 304
F15S6 : 1-1/2” ASA Flange, 10mm thickness, SS 316
Sapcon Instruments Pvt.Ltd. R
15

Coat-Endure User Manual & Datasheet V 3.0
Mounting
F20S4 : 2” ASA Flange, 10mm thickness, SS 304
F20S6 : 2” ASA Flange, 10mm thickness, SS 316
F25S4 : 2-1/2” ASA Flange, 10mm thickness, SS 304
F25S6 : 2-1/2” ASA Flange, 10mm thickness, SS 316
FA10S4 : 1” ANSI Flange, SS 304
FA10S6 : 1” ANSI Flange, SS 316
FA15S4 : 1-1/2” ANSI Flange, SS 304
FA15S6 : 1-1/2” ANSI Flange, SS 316
FA20S4 : 2” ANSI Flange, SS 304
FA20S6 : 2” ANSI Flange, SS 316
FA25S4 : 2-1/2” ANSI Flange, SS 304
FA25S6 : 2-1/2” ANSI Flange, SS 316
Sense
S20S4 : 20mm Length, SS 304 (Only for Probe Length ≤150mm)
S20S6 : 20mm Length, SS 316 (Only for Probe Length ≤150mm)
S40S4 : 40mm Length, SS 304 (Only for Probe Length ≥151mm)
S40S6 : 40mm Length, SS 316 (Only for Probe Length ≥151mm)
Shield (Depends on “Sense”)
SH11S4 : 11mm Length, SS 304 (Only with “S20S4”)
SH11S6 : 11mm Length, SS 316 (Only with “S20S6”)
SH20S4 : 20mm Length, SS 304 (Only with “S40S4”)
SH20S6 : 20mm Length, SS 316 (Only with “S40S6”)
Grounding Length (Depends on Probe Length ≥85mm or 0.85H)
GS4 : SS 304
GS6 : SS 316
Operating Temperature
10T : Upto 100◦C
25T : Upto 250◦C
Standoff Material (Only with “25T”)
STGI : GI (Galvanized Iron)
STS4 : SS 304
STS6 : SS 316
Probe Length
0.65H : 65mm
0.85H1.5H : 85mm to 150mm
1.5H15H : 151mm to 1500mm
CE-I-SCUTE-PCPG13-D-U-P-MB10S4-S20S4-SH11S4-10T-0.65H
Example -
Shows First Priority Entity
Sapcon Instruments Pvt.Ltd. R
16
Other manuals for COAT-ENDURE
1
Table of contents
Other Sapcon Switch manuals
Popular Switch manuals by other brands

CALEFFI
CALEFFI Uni-Switch 626 Series quick start guide

milleteknik
milleteknik PoE Switch 8p FLX M+ manual

Planet Networking & Communication
Planet Networking & Communication XGS-6320 Series user manual

IBM
IBM Redbooks G8264CS Product guide

Transition Networks
Transition Networks SISPM1040-582-LRT quick start guide

NSi INDUSTRIES
NSi INDUSTRIES TORK TU40 quick start guide