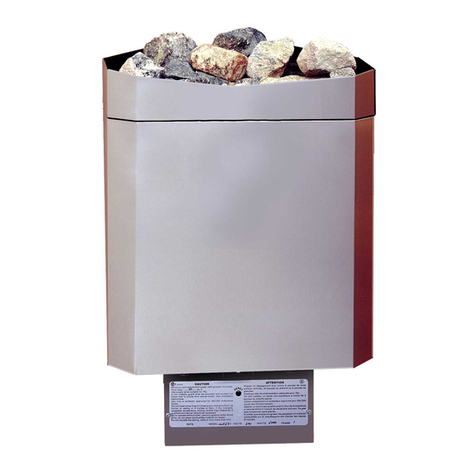
Sauna Craft CTTS User manual

Sauna Craft CTT Heater
Installation Manual
NOTES FOR ALL HEATERS
Heater Guard Fence:
A non-metallic guard (not included) shall be provided and installed as follows:
a) 4” from CW Series heaters
b) 6” from FM Series heaters
Sauna Rocks (included):
1) Wash the rocks before placing on heater.
2) Do not pack rocks too tightly into rock tray. There should be pockets of air. Stack
rocks loosely in a “pyramid” like pile. Packing rocks too tightly will trap heat and
cause the hi-limit to trip.
3) These units must not be operated without the igneous rocks in place
Water:
Do not soak the heater with water. Water should be used in moderation Sprinkling with a ladle is
recommended.
Manual Reset High Limit Control:
1) This safety device must not be by-passed in the wiring of this sauna heater.
2) Should the high temperature limit control trip frequently, a qualified serviceman should be
contacted.
• A licensed electrical contractor should do all electrical work.
• Do NOT use a G.F.I breaker.
• All cables used in the installation of these units must be rated for 300 VAC.
• All cables supplied and connected to these units must be rated for 90o Celsius.
FIRST TIME USE
When using the sauna for the first time it is normal to have a little smoke. The elements are
burning off oil residue left by the manufacturing process. Turn the sauna on for ½ hour,
leave the door open and do not go inside.

6"
2"
CEILING
Extrarocksare supllied.Use1/2
to 2/3. Keeptherest forextra. Do
not "choke"theheater. Ideally,
leaveoneof siderockcompart-
ment open. Chokingtheheater
will result innuisencehi-limit
trippingat lowtemperatures.
24"
ROCKS
45"minimum
2"
2"10"
18"
24"
SAUNACRAFTCTTHEATERw/BUILTINCONTROL
Wall mountingbracket
Securedontoponly
SAUNA
Craft
SAUNA
Craft
Thermostat&
Timeratbottom

CTT heaters have controls built into the front bottom of heater
Wire Circuit
Watts Volts Phase Size Breaker
4000 240 1 10 30
5000 240 1 10 30
6000 240 1 10 30
Wire/breaker size is recommendation only
Consult your licensed electrician to confirm
your requirements
Control rated to 30 amps.
No magnetic contactor
required for heaters
up to 6 kw (240volt)
Wire Circuit
Watts Volts Phase Size Breaker
7500 240 1 8 40
9000 240 1 8 40
Wire/breaker size is recommendation only
Consult your licensed electrician to confirm
your requirements
L1 L2
Sauna Heater
controls pre-wired
L1 L2
Circuit
Breaker Circuit
Breaker
L1 L2
L1 L2
T1 T2
Contactor
Coil
L1 L2
Hi-Limit
Contactor
Field install contactor in
664 enclosure provided.
(Not suitable for wet
area. Use weather proof
box if installing inside
sauna or outdoors.)
Timer
To Contactor
supply To Contactor
coil

Timer Heater
High Limit
Thermostat
Heater Elements
ground
Timer
L1
L2
T1
T2
T3(n/a)
L1 L2
Circuit
Breaker
High Limit capillary
DO NOT TOUCH
Thermostat
capillary
DO NOT TOUCH
G
CTT INTERNALWIRING 4 to 6 kW
Heater
High Limit
Thermostat
ground
Timer
L1
L2
T1
T2
T3(n/a)
Contactor
Coil
L1 L2
T1 T2
Connect To
Contactor Coil
Connect to Contactor Supply
Dotted Lines show
Field connections
L1 L2
Circuit
Breaker
CTT INTERNAL WIRING 7.5 & 9 kW (with separate contactor)
G
Magnetic Contactor
field installed
(not inside heater)
Dotted Lines show
Field connections
Heater
Elements
Timer
High Limit capillary
DO NOT TOUCH
Thermostat
capillary
DO NOT TOUCH

SAUNA ROCK PLACEMENT-SC
SAUNA CRAFT HEATERS
FILLING THE ROCK COMPARTMENT (FIGURES 10-14)
The rocks should not be stuffed into every nook and cranny. This will "choke" the heater,
trapping the heat inside and will result in nuisance tripping of the heater’s built-in hi-limit.
Placing the rocks properly improves heater operation and speeds up the heat up time.
Extra rocks are supplied. Depending on the heater model, you will use about 1/2 to 2/3. Keep
the rest for extra.
The rocks should filled as indicated below:
CWS, CWM (Figure 10): Fill center and one side chamber. Leave the other side chamber
open. CW-XR (Figure 12): Fill center. Leave side chambers open. .
10. MODEL: CTTS, CTTM
12.
MODEL: CTT-XR

44
2
3
1. Inlet
1. Inlet vent installed behind heater approx. 6"
above floor. Cut opening or drill ho
terior: use painted aluminum grill (not supplied)
2. Outlet vent installed far corner from heater. Generally,
high on wall, but can be on ceiling.
3. Vent to room adjoining sauna. Do not vent to outdoors
4. If outlet is exterior (block) wall, you must duct
or construct chase through stud cavity and over
drop ceiling. Exhaust into room in front of sauna.
13"
7"
If outlet is exterior wall, you must run duct or construct a chase through
stud cavity and over drop ceiling. Exhaust into room in front of sauna.
Slide Vent:
Vent when open = 7" x 13"
Wall opening = 4.5" x 4.5"
The inlet vent should be driven straight through the wall directly below the center of the heater.
The cross-section of the vent for a family sauna is approx. 19 sq.in.
For larger saunas approx. 40 sq.in
Position the air inlet and outlet vents as far away from one another as possible (diagonally opposite). The outlet
vent should be located high on a wall or in the ceiling, and should have the same cross-section area as the inlet
vent. Spent air should always be led back into the same room from which it is drawn into the sauna – it must never
be discharged directly into the open air. In this way, the air flowing from the sauna is continually being replenished
in the room outside.
A: Outlet vent through the sauna wall (seen from above). The vent is placed high up, near the ceiling.
B: Outlet vent through the cavity above the sauna ceiling (seen from the side).
C: Outlet vent through a drum under the ceiling in the sauna (seen from the side). The outlet duct should be placed
at an angle between the ceiling and the wall. The drum can be built of wooden panelling and have the same area as
the outlet vent.
2a
Commercial Sauna:
Vent to unconditioned space above drop ceiling
or via duct to unconditioned space. Do not vent
direct to outside.

Problem Probable Cause Remedy
Heater will not start Control wired incorrectl
y
High temperature control has tripped
Thermostat off or set below room temperature
Timer off Turn timer clockwise
No Power
Call for assistance.
Call service person.
Sauna not hot enough Temperature not set high enough Set thermostat higher-
Thermostat sensor not positioned properly
Thermostat miscalibrated Recalibrate or replace
Replace element
High Limit tripped Reset. (See above)
High Limit defective Replace high limit
Thermostat broken or miscalibrated Recalibrate or replace
High Limit defective Replace high limit
Sauna too hot Sensor not properly positioned
Thermostat broken or miscalibrated Recalibrate or replace
Breaker trips frequently G.F.C.I. breaker was used Replace with standard breaker
Breaker to small for heater installed Replace with properly rated breaker
Short circuit or ground in wiring Call service person.
Note: Except where noted otherwise, reference to control refers to TPT3 mechanical control
Sauna on, but no real heat.
Elements are not glowing red.
Sauna has been wired at 120 volt. (Note:two 120
volt lines does not make 240 volt.
SAUNA TROUBLE SHOOTING
Using pencil or other non-condutive material, carefully
push in "reset" button at front bottom of heater
Turn thermostat clockwise. Saunas are generally set
to between
Faulty magnetic contactor (applies only to
heaters 7.5 kw & larger)
Check wiring diagram carefully to ensure control
circuit is wired correctly
Too many rocks or rocks packed too
tightly, trapping heat inside.
(very common)
Leave one side of rock tray free of rocks. Rocks
should be stacked so that air can pass through.
(Public) Sauna being tampered with by
users; i.e splashing water or placing wet
towel on thermostat sensor bulb
Close sauna to public use. Run heater for 2-3 three
hours. If sauna does not trip, this suggests the
problem is user tampering.
One or more elements burned out
Call qualified service person. Using meter, confirm there
is 240 across line 1 and line 2.
High Limit trips frequently
Pilot light on. No Heat
Turn on breaker. If on, it may be faulty or installed
incorrectly. Call for service.
Reposition sensor or lower thermostat setting to
compensate.
One or more elements not
glowing red

HOW TO TAKE A SAUNA
1. Start with a brief shower using warm water and soap. Rinse thoroughly. Do not towel dry.
2 Enter the pre-heated sauna - 9 or 10 on numbered dial (80°-90° C on temp dial). Take a towel
in with you to sit on.
Relax and allow your body to perspire freely in the soft dry heat. Do not throw water on the rocks
in this first session. Do not expect to begin and finish your sauna in a few minutes. Even in the
extreme heat of a sauna, it takes time for your body temperature to rise and for you to begin to
perspire freely.
3 Stay inside the sauna only as long as it feels pleasant. Go out now and then to cool off and
freshen up with a quick cool shower. How long you stay in the sauna is up to you. It depends on
your comfort level. It is not an endurance test. People often start at 5-10 minute intervals and
work up to longer periods.
Young children love saunas. Let them splash about in a tub of water on the floor or the lower
benches where it is somewhat cooler. But remember to keep an eye on them at all times
4 Re-enter the sauna. Sprinkle water on the hot rocks to bring up a little steam and increase the
humidity. This will increase the feeling of heat and assist the perspiration process. If you like add
a few drops of scented essence such as eucalyptus into the water you splash on the rocks. It will
disperse throughout the sauna.
5 Take a cold shower. Repeat the sauna/cold water cycle as often as you desire.
6 Dry yourself completely. Then sit or lie down, letting your body relax.
7 Relax, treat yourself to a cold drink and enjoy a sensation of true well-being. Don’t get dressed
until your body has cooled down and your pores have closed. Never get dressed right after your
sauna. This will only cause you to perspire
NOTE: When used for the first time, you will notice smoke coming off the heater
elements. This is normal. Leave the door open and allow the sauna to run about
30 minutes.
Technical Support Contact Information
Before calling, please review the trouble-
shooting guide in this manual. When calling
please have the following information:
Heater Model #
Contactor Model #
(Applies only to heaters 7.5 kw or larger)
Sauna Craft
115 Bowes Rd, Unit 2
Concord, ON
L4K 1H7
Phone: 905-738-9443
Fax: 905-738-2486
This manual suits for next models
2
Table of contents
Other Sauna Craft Heater manuals
Popular Heater manuals by other brands

Generac Power Systems
Generac Power Systems MAC1.2G owner's manual

EINHELL
EINHELL HGG 300 Niro operating instructions

Aspira
Aspira ASPIRCOMFORT CLASS 620H Installation, use and maintenance manual

BIEMMEDUE
BIEMMEDUE BH 50 instruction manual

THERMOFAN
THERMOFAN TF2400S installation guide

Val6
Val6 KBE5S owner's manual