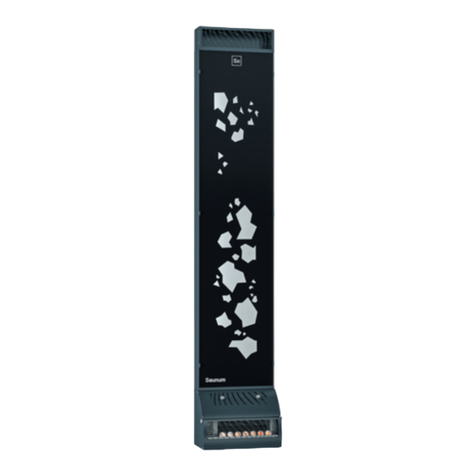
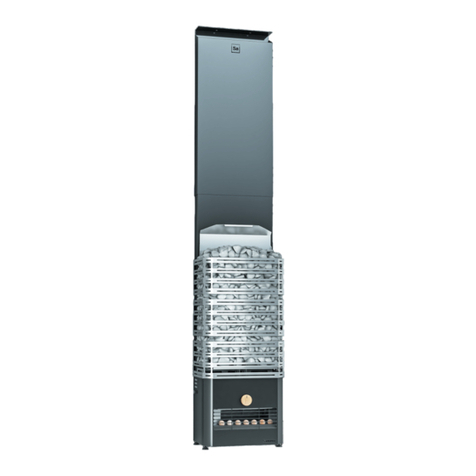
Saunum Professional Operation manual


Steam room heater with air conditioner Professional
instructions for use and installation

EC Declaration of Conformity
Manufacturer: Saunum Saunas OÜ
Address: Järvevana tee 7b, 10138, Tallinn, Estonia
Certies that the product Saunum Professional complies with the requirements
of the following Council of Europe directives, provided that the installation has
been carried out in accordance with the installation instructions issued by the
equipment manufacturer and the instructions EN 60204-1 ‘Safety of machinery.
Electrical equipment of machines – Part 1: General requirements’:
Machinery Directive 2006/42/EC
Low Voltage Directive 2014/35/EU
Electromagnetic Compatibility Directive 2014/30/EU
Signed by: Andrus Vare
Position: Member of the Board
City: Tallinn
Date: 27 March 2019

Saunum Saunas OÜ congratulates you on
choosing an innovative steam room heater
with air conditioner!

SAFETY INFORMATION
These installation and operating instructions are intended for the owner or
maintainer of the sauna, as well as the electrician responsible for installing
the heater with air conditioner in the steam room. After installing the heater,
the instructions must be handed over to the owner or maintenance staff.
Before using the Professional heater with air conditioner (hereinafter ‘sauna
climate device’), read the installation and safety instructions.
The sauna climate device is intended for heating the steam room at 60...95
°C and for levelling the steam room climate while in the steam room.
Please note! The use of the sauna climate device for other purposes is
prohibited.
Please note! To connect the sauna climate device to the electrical
network, a control device for controlling electric heaters is required.
The control device must correspond to the power of the heater used in
accordance with Table 1.
The control device must have the ability to control the fan of the sauna
climate device. In addition, the function of simultaneously switching off the
heater and the fan of the sauna climate device is recommended.
To ensure the longevity of the device, make sure that the temperature in the
steam room at the height of the lower part of the device does not exceed
80 °C. If it is exceeded, the thermal protection will trip and the fan will stop.
When the temperature drops below the tripping limit, the fan will start
working again.
The manufacturer is not liable for equipment failures caused by exceeding
the permitted operating temperature.
Warranty
• The warranty period of the sauna climate device when used in a private
sauna is two (2) years.
• The warranty period of the sauna climate device when used in a public
sauna is one (1) year.
• The warranty does not cover malfunctions caused by non-observance
of the installation, operating, or maintenance instructions.
• The warranty does not cover defects caused by the use of stones and
salt balls not recommended by the manufacturer.
• The warranty does not extend to heating elements and salt balls.

Table 1.
1. INSTRUCTIONS FOR USE
1.1 Heating the steam room
Before using the sauna climate device for the first time, make sure that:
• the electrical connections meet the requirements;
• the supply voltage corresponds to the nominal ratings allowed for the
sauna climate device;
• the protective earth (PE) is in working order;
• the attachments of the housing of the sauna climate device are in order;
• the sauna climate device is properly attached to the wall;
• operational over-current protection devices are used;
• the fan rotor rotates smoothly;
• there are no tools or material left after mounting the device in the
housing.
When turning on the sauna climate device, check:
• the direction of air ow – the intake of air from the upper and the outlet
from the lower opening;
• that there is no vibration or loud noise from the fan.
When the sauna climate device is turned on for the rst time, odours are
emitted from the heaters and stones – the steam room must be properly
ventilated to remove the odour. If the power of the heater is suitable for the
steam room, it will take 45–90 minutes to reach the desired temperature in
a properly insulated steam room.
The stones are usually heated to the steam temperature at the same time
as the steam room.
The fan of the device must be turned on only immediately before entering
the steam room – this helps to prevent the sauna bench from overheating
Device Power 3-phase protection Power cable mm2
3 phases / fan
Safety distance from the
heater mm
Sauna room volume
m3
Saunum Professional 12 kW C 20A 4/1,5 250 10-15
Saunum Professional 15 kW C 24A 4/1,5 250 13-18
Saunum Professional 18 kW C 32A 6/1,5 250 16-22
Saunum Professional 23 kW C 40A 10/1,5 250 20-32
Saunum Professional C¹ 12 kW C 20A 4/1,5 250 10-15
Saunum Professional C 15 kW C 24A 4/1,5 250 13-18
Saunum Professional C 18 kW C 32A 6/1,5 250 16-22
Saunum Professional C 23 kW C 40A 10/1,5 250 20-32
¹ Saunum Professional C – corner-mounted Professional heater

and excessive energy consumption.
Saunum recommends the temperature range of 65...80 °C for sauna proce-
dures.
1.2. Using the sauna climate device
Please note! Before turning on the sauna climate device, always make
sure that nothing is above or near it.
The temperature and operating time of the sauna climate device
Professional are regulated by a separate control module.
• It is forbidden to connect the device directly to the mains!
• The sauna climate device must not be used if the components of
its housing have been removed and/or the wiring diagram has been
changed.
• Keep away from children!
• When turning the sauna climate device on and off, follow the operating
instructions for the control module.
Please note! After using the sauna, make sure that all parts of the sauna
climate device are turned off (heating has stopped and the fan has
stopped).
1.2.1. Adjusting the temperature
Please note! It is recommended to keep the air circulation fan of the
sauna climate device turned off while heating the steam room!
This way, the sauna heats up faster and the sauna platform does not get
too hot during heating.
To nd the right setting, start at the lowest temperature and lowest
airow rate.
If the temperature gets too high while in the steam room, lower the
maximum temperature in the steam room or the fan speed of the sauna
climate device.
1.2.2. Adjusting the sauna climate
The volume of air circulation generated by the device can be adjusted by
changing the fan speed: the fan has 3 speeds (connect via control panel).
1.2.3. Using Himalayan salt balls
Himalayan salt balls are included with the sauna climate device. The use of
salt balls in the device is optional and does not affect the main function of
the device.
To use the salt balls, they must be installed in the slots behind the air outlet

grille. To install or remove the salt balls, loosen the screws holding the salt
ball base and slide the base out between the grilles.
Please note! The use of third-party salt balls is not covered by the device
warranty.
1.3. Throwing water on the heater
The air in the steam room becomes dry when heated, so water must be
thrown on the heater to achieve the appropriate humidity level. The effects
of heat and steam on humans are different. When testing the different
settings of the sauna climate device, you will nd the most suitable combi-
nation of temperature and humidity.
The volume of the sauna ladle should not exceed 0.2 litres. The amount of
water should not exceed 0.2 litres, because by pouring too much water on
the stones at once, some of it can be sprayed as splashes of boiling water.
Make sure that people are at a safe distance from the heater when
throwing water! Hot steam and water splashes cause skin burns. The water
thrown into the heater must meet the requirements for clean domestic
water. The water may only contain fragrances specially designed for sauna.
Follow the instructions on the package.
Please note! Do not pour water into the ventilation openings of the sauna
climate device!
1.4. Warnings
• Staying in the steam room for a long time raises body temperature,
which can be dangerous to health.
• Do not touch the hot heater – the stones and the outside of the heater
can burn you.
• Do not allow children, disabled, or sick persons in the steam room
without supervision!
• Consult a doctor about the medical contraindications to going to the
sauna.
• Consult your doctor about the medical contraindications to salt
treatment.
• Make sure that the sauna user is not allergic to salt treatment. Saunum
is not responsible for the side effects of salt treatment.
• Be careful when moving in the steam room, as the platform and oor
may be slippery.
• Do not allow anyone in the sauna under the inuence of alcohol, drugs,
or narcotics.
• Do not allow anyone to sleep in a hot steam room.
• Sea air and humid climates can create an oxide layer (rust) on the metal
surfaces of the heater.
• Make sure you have proper ventilation in the sauna. Saunum is not
responsible for possible salt corrosion of equipment and machinery. If
necessary, consult a specialist.
• Do not hang clothes and sauna towels in the steam room to dry out, as
this may cause a re hazard.
• Excessive moisture can damage electrical equipment.

Please note! Do not leave the fan of the sauna climate device running
when you are not in the steam room as this will cause excessive energy
consumption and the sauna platform will become too hot.
1.5. Solving problems
Please note! Contact qualified specialists for maintenance.
In the event of any malfunction of the sauna climate device, stop using
the device immediately and have the device inspected by a person
authorised by Saunum.
The sauna climate device does not heat or blow air.
• Make sure that the heater fuses are in working order.
• Make sure the connection cable is connected.
• Make sure that the sauna climate device is turned on.
• Increase the maximum temperature of the steam room.
The steam room heats up slowly. The water thrown at the stones cools
them quickly.
• Make sure that the air circulation fan of the sauna climate device is
turned off during heating.
• Make sure that the sauna climate device fuses are in working order.
• Make sure that all heating elements are hot when the sauna climate
device is working.
• Raise the sauna temperature using the control device.
• Make sure that the power of the heater is sufficient.
• Check the stones. Stones that are placed too tightly, sinking of stones
over time, or the wrong type of stone can interfere with the air flow
through the heater and therefore reduce the heating rate.
• Make sure that the ventilation of the sauna room is correct.
The steam room heats up quickly, but the temperature of the stones is
insufficient. The water thrown at the stones flows down.
• Make sure that the power of the heater is not too high. If the power of
the heater is suitable for the steam room, it will take 45–90 minutes to
reach the desired temperature in a properly insulated steam room.
• Make sure that the ventilation of the sauna room is correct.
• Reduce the fan speed of the sauna climate device.
The wall covering or other material near the heater becomes dirty quickly.
• Follow the safety distance requirements.
• Check the stones. Stones that are placed too tightly, sinking of stones
over time, or the wrong type of stone can interfere with the air flow
through the heater and cause surrounding materials to overheat.
• Make sure that no heating elements are visible between the stones.
If the heating elements are visible, lift the stones so that the heating
elements are completely covered.
Please note! Stones that are placed too sparingly allow the heating
elements to overheat and worsen the indoor climate of the steam
room. Risk of fire!

The wooden surfaces of the steam room become dirtier over time.
This process may be accelerated by:
• sunlight;
• heat from the heater;
• wall protectors (the protective devices have poor heat resistance);
• fine particles from the stones.
The heater smells.
• See section 1.1.
• A hot heater can amplify odours mixed with air, which, however, is not
caused by the sauna or heater. The causes are, for example, paint, glue,
oil, or spices.
The sauna climate device is making a sound.
• A certain sound can always be heard when the fan is running. If it is
continuous and/or has a metallic sound,
• the fan likely needs service or repair. Check that there are no foreign
objects in the fan air vents.
• Try switching the fan to a lower speed.
• Loud sounds are likely to be caused by stones cracking due to heat.
• Thermal expansion of the heater parts can cause sounds when the
heater heats up.
1.6. Loading stones
Loading stones has a great effect on the operation of the heater.
Important:
• The diameter of the stones must be 10–15 cm.
• Only heater stones are intended for use in heaters. Suitable rock types
are peridotite, olivine-dolerite, and olivine.
• Light, porous ceramic stones or soft tiles must not be used in the
heater. They do not store enough heat when heated and can result in
damage to the heating elements.
• Wash dust off the stones before placing stones in the heater.
When loading the stones, note:
• do not allow stones to fall into the heater;
• do not force the stones between the heating elements;
• do not allow the stones to rest on the heating elements with their own
weight, but load the stones so that they support each other;
• do not stack the stones on the heater;
• do not place objects in the vicinity of the stone area or the fan of the
sauna climate device that may change the amount or direction of air
flowing through the sauna climate device.
1.7. Maintenance
Due to large temperature fluctuations, the stones tend to break down. The
stones must be restacked at least once a year or even more frequently
if you use the sauna often. When restacking the stones, remove stone
fragments from the bottom of the heater and replace the broken stones

with new ones. This enables the heater to provide optimal heating and the
risk of overheating is avoided.
If Himalayan salt balls are used with the sauna climate device, it is
recommended to check the salt balls once a year and, if necessary, replace
the balls with new ones.
Make sure that there are no foreign objects in the air vents of the fan of the
sauna climate device.
Children must not clean the device!
CAUTION! Before maintaining and cleaning the sauna climate device,
the device must be disconnected from the mains and the moving parts of
the device must completely stop.
Before maintaining and cleaning the sauna climate device, ensure that:
• the sauna climate device is disconnected from the power supply (in
addition to the power switch of the device, also by means of over-
current fuses);
• the fan of the device has stopped completely;
• required occupational safety and personal protective equipment is used
during the work;
• the connection cables are undamaged. If the connection cables
are damaged, have the cables replaced by a qualified electrician in
accordance with the applicable standards and requirements before
continuing maintenance and cleaning work.
The housing of the device can be cleaned with a cloth dampened with water.
Do not use a pressure washer, running water, chemical cleaners, or solvents
to clean the housing!
Use 10% citric acid solution to remove limescale and rinse with water.
Excessive dirt can prevent the fan rotor from operating correctly, causing an
increase in noise when operating the sauna climate device. Noise may also
increase as a result of damaging/bending the fan blades.
Make sure that there are no foreign objects in the working area of the fan
rotor.
Generally, the fan does not need to be cleaned more than once a year. The
fan may only be cleaned by a person authorised by Saunum.
Using compressed air to clean the fan can cause irreversible damage to the
fan rotor!
The fan bearings must be replaced if problems occur.
It is recommended to check all electrical connections of the sauna climate
device at least once a year. This can be done by a suitably qualified
person.
2. STEAM ROOM
A prerequisite for the installation of the sauna climate device is a properly
prepared steam room. The thermal insulation of walls and ceilings must be
good. Otherwise. it will take too much time and energy to heat the room.
The power supply cables for the heater and the fan must be shown on the
electrical connection board of the sauna in accordance with Table 1.

2.1. Steam room ventilation
The air in the steam room must be changed at least six times an hour.
When using mechanical air extraction, place the air supply above the sauna
climate device. When using natural air extraction, place the air supply under
or next to the sauna climate device.
There must be a gap of at least 100 mm under the steam room door.
Exhaust ventilation in the sauna room is mandatory.
The venting hole for drying (optional) must be installed in the ceiling near
the wall opposite to the sauna climate device (closed during heating and
bathing). The sauna can also be dried after leaving the door open after using
the sauna.
The ventilation system of the sauna should preferably prevent the exhaust
air of the sauna from entering other rooms, especially when using the sauna
climate device with salt balls.
2.2. Power of the heater
If there is sufficient insulation behind the wall and ceiling covering, the
power of the heater is determined by the volume of the steam room. Non-
insulated walls (brick, glass block, glass, concrete, floor tiles, etc.) need
a more powerful heater. Add 1.2 m3 to the volume of the sauna for each
square meter of uninsulated wall.
For example, a 10 m3 sauna room with a glass door corresponds to the
capacity requirement of a 12 m3 sauna room. If the sauna room has log
walls, multiply the volume of the sauna by 1.5. The optimal sauna sizes for
the sauna climate device Saunum Professional are given in Table 1. The
height of the sauna is usually 2,100…2,300 mm.
The minimum height for installing the sauna climate device Professional is
2,100 mm.
3. INSTALLATION INSTRUCTIONS
3.1. Before installation
The installation of the sauna climate device must be performed by a
qualified electrician. The device must be permanently connected with a
cable that is suited for the ambient temperature. Protective earthing must
be connected to the connection terminal of the device, with the cross-
sectional area of the cable being at least 2.5 mm2. The device must be
powered from the control device’s supply circuit, which is protected by over-
current fuses. The required over-current fuse sizes and connection cable
dimensions are given in Table 1.
All certified sauna control devices with the operating capacity
corresponding to the capacity of the Professional model used in accordance
with Table 1 can be used to control the sauna climate device.
Before starting the installation work, read the installation instructions
and pay attention to the following:

• the power and type of the heater are suitable for the given steam room.
The recommended steam room volume is given in Table 1;
• the supply voltage is suitable for the sauna climate device;
• at the installation site of the sauna climate device, the minimum safety
distances given in Table 1, measured from the heater housing, are
guaranteed.
• The dimensions of the device are shown in Figures 1 and 3.
• It must also be ensured that the upper edge of the fan outlet of the
sauna climate device is lower than the lower edge of the platform. There
must be no obstructions in front of the air outlet from the device;
• the exhaust air flow must be able to flow freely across the steam room.
The safety distances must be complied with unconditionally, as failure to
do so may result in a fire hazard. Only one sauna climate device may be
installed in the steam room.
3.2 Installing the sauna climate device
3.2.1. Connect the sauna climate device to the control device (clause 3.3).
3.2.2. Fill the stone area of the sauna climate device with stones (clause 1.6).
3.3. Electrical connections
The electrical connection of the device must be carried out by a qualified
person in accordance with the applicable standards and requirements.
The sauna climate device must be connected in a half stationary position
to the junction box on the wall of the steam room. The junction box must be
splash-proof and its maximum height from the floor can be up to 500 mm.
The connecting cable must be a rubber insulated type H07RN-F cable or
equivalent.
Please note! Due to thermal embrittlement, it is forbidden to use a PVC-
insulated cable as the connection cable for the sauna climate device.
The internal connections of the device are made by means of screw or
spring terminals in accordance with Figure 2 and Table 1 in this manual.
Protective earthing must be connected to the connection terminal of the
device, with the cross-sectional area of the cable being at least 2.5 mm2.
The heater must be powered from the 380 VAC (3-phase) supply circuit
through a control device protected by an over-current protector of the size
shown in Table 1.
If you want to connect the air circulation fan of the device separately from
the heater control device, the fan must be connected via a residual-current
device. In this case, the protective earth (PE) of the fan supply input terminal
of the sauna climate device must not be connected to the protective earth
of the heater supply input terminal. In this case, use earthed cables of at
least 1.5 mm2 to power the fan.
The power cable must enter the housing of the sauna climate device so that
water does not flow into the housing of the sauna climate device and into
the connection box on the wall along the cable. The outer insulation (sheath)
of the cable can only be peeled off from the part of the cable that is in the
housing.

If the connecting and installation cables are higher than 1,000 mm from the
floor of the steam room or inside the walls of the steam room, they must be
able to withstand at least 170 °C (e.g. SSJ). Electrical equipment installed
higher than 1,000 mm above the floor must be permitted for use at 125 °C
(marking T125). A recommended cross-section of the connecting cable
grooves is given in Table 1.
Please note! The sauna climate device may only be connected by a
professional electrician in accordance with the applicable regulations.
3.3.1. Electric heater insulation resistance
During the final inspection of the electrical installation, a ‘leakage’ may be
detected when measuring the insulation resistance of the sauna climate
device, which has occurred due to the insulation material of the heating ele-
ments absorbing moisture from the air (storage, transport). After a few uses
of the sauna climate device, this moisture will disappear.
Do not connect the heater to the mains via a residual-current device!

Figures
Figure 1. Sauna Professional dimensions
600
525
75
2150
750
420 105
600

Figures
Figure 2. Sauna Professional device parts
Toitekaabel
Lõõr
Kiviruum
Leiliõhu jahutus
siiber
Flue
Stone area
Power cable
Steam cooling
damper

Figures
Figure 3. Sauna Professional C dimensions
2150
810
855
650
700
50
813
227

Figures
Figure 4. Sauna Professional C device parts
Toitekaabel
Lõõr
Kiviruum
Leiliõhu jahutus
siiber
Steam cooling
damper
Power cable
Stone area
Flue

ASSEMBLING THE HEATER PROFESSIONAL C
M5
M6
M6
1.
Eemaldage tagumised katteplekid.
Kumbagi kattepleki kinnitamiseks on kasutatud M5 polte (4tk).
2.
Paigaldage lõõr. Lõõri kinnitaatakse kerisele
M6 poltidega (4tk).
3.
Veenduge, et lõõr oleks korralikult kerise külge
kinnitatud!
4.
Paigaldage esimes etapis eemaldatud katteplekid.
Katteplekkide paigaldamisel kinnitage lõõr katteplekkide
külge M6 poltidega (4tk).
1. Remove the rear cover plates. M5 bolts (4 pcs.) have been used to
fasten both cover plates.
2. Install the ue. The ue is attached to the heater from the rear with
M6 bolts (4 pcs.). The ue is fastened with two M6 bolts from the up-
per edge of the stone area.
3. Make sure that the ue is properly attached to the heater.
4. Reinstall the covers removed in the rst step.

Reguleeritavad jalad
Lamellid
Soolavann
Soolapallid
5.
Asetage seade paigaldatavasse kohta ruumis.
6.
Kontrollige, et seade oleks loodis. Vajadusel reguleerige
seadme all asetsevate jalgade kõrgust soovitud tulemuse saavutamiseks.
7.
Paigaldage seadme vastavasse peasdess soola pallid. Pallide
lisamiseks eemaldage kattelamellid. Lamellid on kinnitatud M6
sõrmega keeratavate poltidega (1tk).
8.
Eemaldake soolavann ning lisage vastavatesse pesadesse soolapallid (10tk)
.
9.
Paigaldage soolavann koos pallidega oma kohale tagasi. Kinnitage lamellid
oma kohale.
10.
Täitke kiviruum vastavate kerisekividega. Kontrollige, et seadmel ei esineks
väliseid vigastusi. Seadme vooluvõrku ühendamiseks tutvuge elektrijuhistega.
5. Place the device in the space to be installed in the room.
Adjustable foot
Cover
Salt balls
Salt bath
6. Check that the device is level. If necessary, adjust the height of the legs
under the device to achieve the desired result.
7. Place the salt balls on the appropriate base. To add the balls, remove the
covers that are fastened with M6 nger-operated bolts.
8. The salt ball base is attached to the device with M6 nger-operated bolts. To
remove the salt ball base, loosen the M6 bolts and carefully lift the base out of the
device.
9. Place the salt balls in the recesses on the base (10 pcs.).
10. Put the salt ball base back in the device, fasten it with M6 bolts. Secure the covers
in place.
11. Fill the stone area with the appropriate stones. Check the device for external da-
mage. Read the electrical instructions to connect the device to the mains.
This manual suits for next models
1
Table of contents
Other Saunum Heater manuals
Popular Heater manuals by other brands

Crane
Crane EE-8079GR instruction manual

Wacker Neuson
Wacker Neuson HI 770XHD Operator's manual

Claudgen
Claudgen CA1309S Installation, operation and maintenance instructions

ALURAD
ALURAD Meltem Mounting and user instructions

Smart+ Products
Smart+ Products SPP1500SBH owner's manual

Cadet
Cadet CEH-003M owner's guide