Thank you for purchasing this light fitting. Please read the instructions carefully before use to ensure safe and satisfactory
operation of this product. Please retain these instructions for future reference.
Warning
This is a Class 2, double insulated product and must
not be earthed.
Please read these instructions carefully before
commencing any work.
This unit must be fitted by a competent and qualified
electrician.
Install in accordance with IEE Wiring regulations and
current Building Regulations.
To prevent electrocution switch off at mains supply
before installing or maintaining this fitting. Ensure other
persons cannot restore the electrical supply without
your knowledge. If you are in any doubt, please consult a
qualified electrician.
This light fitting should be connected to a fused circuit.
If replacing an existing fitting, make a careful note of the
connections.
Always use the correct type and wattage bulb. Never
exceed the wattage stated.
When changing a bulb, always switch off at the mains and
allow the old bulb to cool down before handling. Dispose
of used bulbs carefully and responsibly.
Waste electrical products should not be disposed of with
household waste. Please recycle where facilities exist.
Check with your local authority or retailer for recycling
advice.
This product is rated at IP44.
This product is not suitable for location in or near a
marine environment.
The entire unit gets hot whilst on for a period of time.
Diagrams may show 4-sided lantern, but instructions also
apply to 6-sided.
Specification
Voltage: 240V 50Hz a.c.
Lamp: 1 x Max. 60W E27 GLS
IP rating: 44
Layout
Installation
• Planthedesiredlayoutofthisfittingcarefully,ensuring
the cables will reach the distance between the junction
box and the light fitting
• Avoidlocatinganycablesinpositionsthatwould
cause a hazard. Position cables and junction boxes (not
supplied) away from areas where they may be at risk
from being cut, trapped or damaged
• Cablesinthegroundmustbeprotectedusingsuitable
conduit or plastic trunking.
• WerecommendthatyouuseH05RN-Fspecification
cable (not supplied) which is an outdoor grade, rubber
sheathed cable. The mains supply cable must have a
minimum cross sectional area of 1.0mm²
• Thesefittingmustbemountedoneitheraconcrete
surface or a paving slab that has been concreted in
position.
Existing fittings must be completely removed before
installation of a new product. Before removing the existing
fitting, carefully note the position of each set of wires.
• Usingthebaseplateasatemplate,markthefixing
holes onto the mounting surface.
• Drillholestothenecessarysizeanddepth-takingcare
not to damage any concealed pipes or wiring below the
mounting surface.
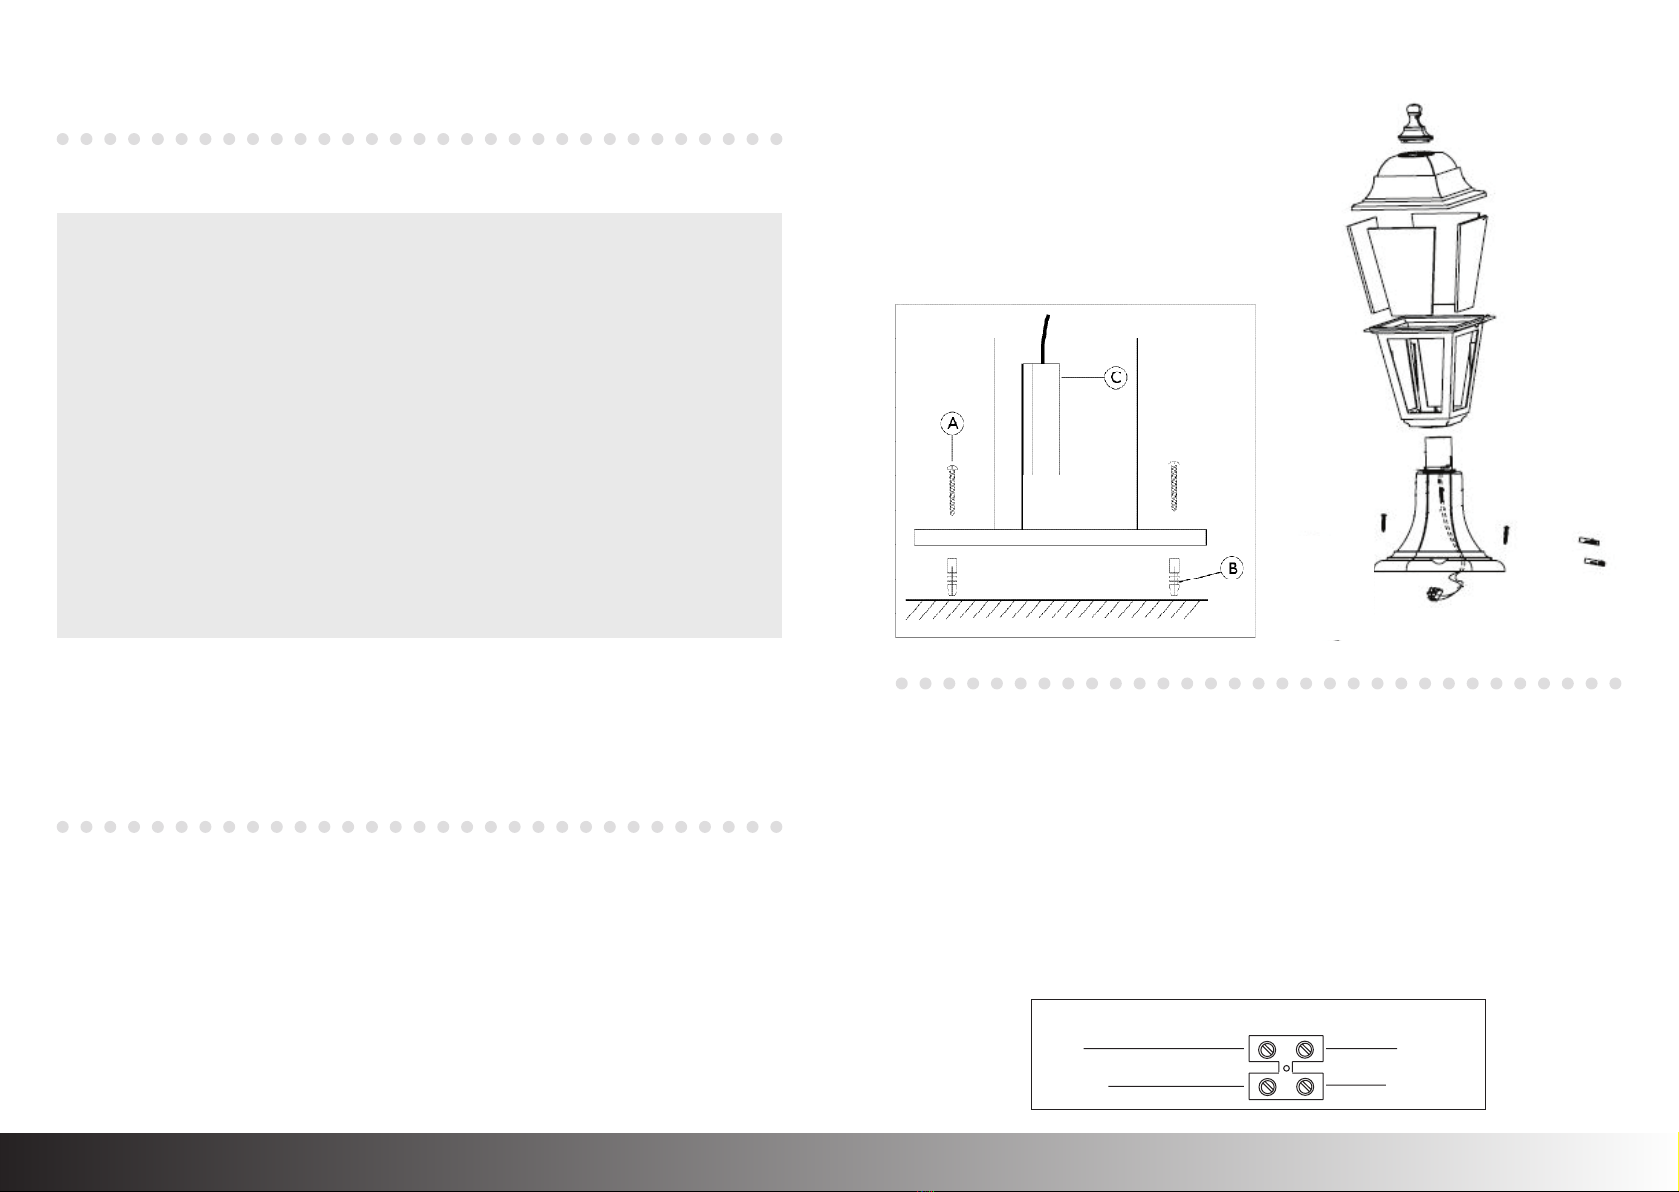
Wiring
Having correctly identified the wiring from your existing
light fitting, pull the wire through the hole and connect to
the connection block inside the product in the following
way:
• Pullterminalblockfrominsideoftube,andunscrewthe
terminal block box. Wire as below.
• Checkthatyouhavecorrectlyidentifiedthesupply
wires, the connections are tight and that no loose
strands have been left out of the connection block.
• Screwtheterminalblockboxbacktogetherwiththe
long tab downwards. This tab will lift the terminal block
off the mounting surface ensuring the block cannot sit
in any puddle which lies underneath the post. Push the
terminal block up into the top of the base and fix the
base to the mounting surface with the 2 screws.
SUPPLY
NEUTRAL
LIGHT FITTING
BLUE(N)
BROWN (L)
SWITCHED LIVE


