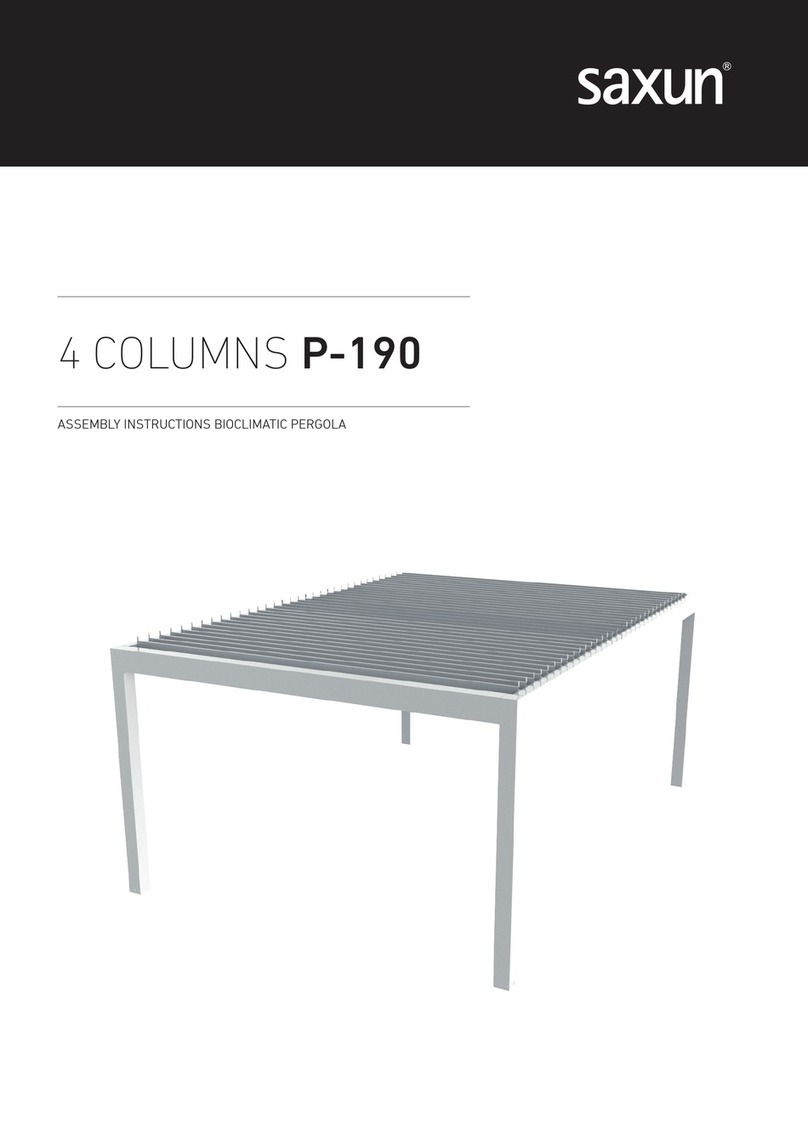
Saxun 4 COLUMNS P-190 User manual

ASSEMBLY INSTRUCTIONS BIOCLIMATIC PERGOLA
2 DUPLEX COLUMNS P-190


INDEX
01 INSTALLATION 02
We do not provide the screws for fixing-anchoring to the wall and/or foundations. The fitter must choose the adequate
rod/screw/plug/nut/washer system for fixing and flushing to the foundations ad/or wall, based on the nature of these
surfaces. In any case, the screws must be in stainless steel.
1.1 INSTALLING THE FIXATION FOR THE COLUMN BASE 02
1.2 FIXING THE CLOSING BEAM 05
1.3 ASSEMBLING THE SIDES 06
1.4 ELECTRIC PRE-INSTALLATION 07
1.5 SIDE JOINTS WITH CLOSING BEAM 08
1.6 JOINING WITH OPENING BEAM 09
1.7 JOINING WITH CENTRAL BEAM 10
1.8 JOINING THE SURFACE MANIFOLDS 13
1.9 INSTALLING THE SLATS 14
1.10 INSTALLING THE TRANSMISSION PLATE 16
1.11 INSTALLING THE “U” PROFILE 17
1.12 MOTOR INSTALLATION 18
02 ELECTRICAL CONNECTIONS 19
The connection of the electrical installation must be in compliance with the rules and regulations of each country (Low
voltage electrotechnical regulation).
2.1 ELECTRICAL DIAGRAM OF COMPONENTS 19
03 INSTALLING THE COLUMN CAP 22
04 SWITCHBOARD PROGRAMMING (factory set up) 23
4.1 ADVANCED MOTOR PROGRAMMING (factory set up) 23
05 MAINTENANCE 24
Before assembling, please read the maximum tightening torque for each type of screw, as indicated in this section.
—ANNEX A - DISMANTLING AND DISPOSING OF PRODUCT PACKAGING AND COMPONENTS
AT THE END OF THEIR USEFUL LIFE 25
—PERGOLA ASSEMBLING CHECKLIST 29v

BIOCLIMATIC PERGOLA
1
1
2
2
3
3
4
4
A A
B B
C C
D D
SHEET 1 OF 1
DRAWN
CHECKED
QA
MFG
APPROVED
paco 28/07/2014
DWG NO
NIVELAR
TITLE
SIZE
C
SCALE
REV
PERGOLA 2 COLUMNAS
1
1
2
2
3
3
4
4
A A
B B
C C
D D
SHEET 1 OF 1
DRAWN
CHECKED
QA
MFG
APPROVED
paco 28/07/2014
DWG NO
COLOCAR BASES COLUMNAS
TITLE
SIZE
C
SCALE
REV
MURO
PERGOLA 2 COLUMNAS
LARGO
TOTAL HEIGHT ON THE WALL
COLUMN BASE FIXING
WIDTH
LENGTH
SIDE VIEW
TOP VIEW
WALL
90º 90º
Attention: Leave a clearance of 100 mm above
the beam for the slats to turn.
HEIGHT - SLOPE = TOTAL HEIGHT ON THE WALL
2 COLUMN PERGOLA
2 COLUMN PERGOLA
LEVEL OFF
POSITION COLUMN BASES
01 INSTALLATION
1.1 INSTALLING THE FIXATION FOR THE COLUMN BASE
Check the slope of the
floor and verify the total
height of your pergola
3D scale plan in order to
place the column bases
and the wall beam.
Position the column
bases according to the
measurements on the
plan and the foundation
slope, considering that
the columns must form
a 90º angle with the wall
where the pergola is go-
ing to be installed.

ASSEMBLY INSTRUCTIONS 2 DUPLEX COLUMNS P-190
3
250,00
250,00
28,00
28,00
144,00
144,00
Ø14,00
TOTAL WIDTH OF THE PERGOLA
2000 2000
2000
2000
2828,4
2828,4
4
3
2 2
1
43
To obtain the 90º angle with the wall, follow the steps indi-
cated below:
1Mark the total width of the pergola on the wall where it
will be installed.
2At each end of the pergola width mark a point parallel to
the wall at a distance of 2000 mm from it.
3Make another two marks perpendicular to the ends of
the pergola length at a distance of 2000 mm.
4The exact measurement of the diagonal lines between
the points marked to obtain the 90º angle must be 2828,4
mm (as shown in the drawing).
After measuring the 90º angle, install the base fixings using
M12 screws (not included), with a quality of at least AISI 304
(stainless steel).
- Recommended installation is against a wall with reinforced
concrete floor of at least 150 mm thickness (or surface of
equivalent strength) by means of 12 mm stainless steel fit-
tings (not included).

BIOCLIMATIC PERGOLA
CLOSING BEAM
LEFT BEAM RIGHT BEAM
OPENING BEAM
C COLUMN D COLUMN
CENTRAL BEAM

ASSEMBLY INSTRUCTIONS 2 DUPLEX COLUMNS P-190
5
57,00
Max. 500 mm
90º
90º
90º
90º
1.2 FIXING THE CLOSING BEAM
Drill through holes along the beam at a maximum distance
of 500 mm, to insert the screws. The holes must have a di-
ameter large enough to insert the tools on the side that is not
in contact with the wall.
After verifying the height, fix the beam against the wall,
screwing it through the holes.
The beam will be installed using the adequate screws for the
type of wall and they will always be in stainless steel.
IMPORTANT: Screws and wall anchors, not provided.

BIOCLIMATIC PERGOLA
1.3 ASSEMBLING THE SIDES
Join the LEFT beam to column C.
Join the RIGHT beam to column D.
Follow the screwing sequence indicated in the image.
1
2
3
5
4

ASSEMBLY INSTRUCTIONS 2 DUPLEX COLUMNS P-190
7
CONNECTOR LED SLAT
WATERTIGHT BOX
INTERIOR CABLING
1.4 ELECTRIC PRE-INSTALLATION
VERY IMPORTANT!
At this stage of the assembly, it is necessary to consider all the cabling required, as it will have to be taken outside the
pergola, motor, LED, Bluetooth..., and the outlets must be left clear before assembly continues.
Verify the position of the LED slats in order to pre-install the cabling all the way to the holes.
It will be necessary to place a watertight box outside to house all the connections and automatic mechanisms of the per-
gola.
IMPORTANT: Remember this step before continuing with the assembly. For a greater safety, it will be necessary to
ground the pergola.

BIOCLIMATIC PERGOLA
A
A
B B
CLOSING BEAM
ULS (ISO 7380) A2 M6x16
Code 051103
ULS (ISO 7380) A2 M6x16
Code 051103
LEFT BEAM
C COLUMN
D COLUMN
RIGHT BEAM
1.5 SIDE JOINTS WITH CLOSING BEAM
When the two sides have been assembled, they will be joined to the CLOSING beam fixed to the wall. The CLOSING beam
has some framing brackets on its ends, where the RIGHT and LEFT beams will be inserted and fixed with USL (ISO 7380)
A2 M6x16 mm screws.
After inserting the RIGHT and LEFT beams into the closing beam, we will lower the C and D columns until they reach the
bases and then we will fix them with USL (ISO 7380) A2 M6x16 mm screws.
One side will be joined first, and the other one second.

ASSEMBLY INSTRUCTIONS 2 DUPLEX COLUMNS P-190
9
CLOSING BEAM
LEFT BEAM
OPENING BEAM
C COLUMN
D COLUMN
RIGHT BEAM
A
A
1.6 UNION OPENING BEAM
Join the OPENING beam to the C and D columns.

BIOCLIMATIC PERGOLA
CLOSING BEAM
OPENING BEAM
CENTRAL BEAM
1.7 UNION CENTRAL BEAM
Attach the CENTRAL beam to the CLOSING and OPENING beams. Tilt the CENTRAL beam and insert the cut end at a 45º
angle to the CLOSING beam brackets, then rest the end of the CENTRAL beam, which has a fixed plate, on the beam AP-
ERTURE.

ASSEMBLY INSTRUCTIONS 2 DUPLEX COLUMNS P-190
11
CLOSING BEAM
OPENING BEAM
CENTRAL BEAM A
A
ULS (ISO 7380) A2 M6x16
Cod. 051103
VA-A WS9350 A4 M8x110
Code 050136
With the CENTRAL beam in place, proceed to fix it as shown in the image.

BIOCLIMATIC PERGOLA
CAP OPENING BEAM
A
A
A
To finish joining the CENTRAL beam, install cap the OPENING beam.

ASSEMBLY INSTRUCTIONS 2 DUPLEX COLUMNS P-190
13
SEALANT
Before continuing the installation, create
a groove for the water run-o at each
end of both manifolds (use a hammer
and a flat screwdriver).
1.8 JOINING THE SURFACE MANIFOLDS
Apply the provided sealant between the contact sides of
the OPENING and CLOSING beams and their correspond-
ing surface manifolds.
The opening and closing surface manifolds will be joined,
screwing them to the beams.
IMPORTANT: Do not bypass this step, it
is very important to seal the manifold
joint properly (sealant provided).
OPENING CLOSING
130,00 125,00
130,00 125,00

BIOCLIMATIC PERGOLA
16 cm
1.9 INSTALLING THE SLATS
When the structure has been assembled, and before installing the slats, place the 16,3 mm plastic rimmed caps in the
machined beam holes where no LEDs are going to be installed.
Start the slat installation from the opening side.
When reaching a hole for LED slats, connect the connector and insert it inside the beam (as shown in the images below).
Then install the 16,3 rimmed plastic cap.
Prepare the fixed axles for the left side of the slats and the mobile axles for the right side.

ASSEMBLY INSTRUCTIONS 2 DUPLEX COLUMNS P-190
15
To install the slats, they must be tilted with the end caps facing down, inserting the fixed axle first (left) and then the mo-
bile one (right).
Using a Nº 4 Allen key, pull back the axle until it stops in the grooved hole.
When it stops, fasten the screw of the cap.
Turn the axle 180º and insert the safety screw.

BIOCLIMATIC PERGOLA
BOTTOM
Respect the transmission plate position
NUT M6 A2 DIN 985
Cod. 051048
RIMMED CAP 6,3
Cod. 051033 ULS (ISO 7380) A2 M6x16
Cod. 051103
IMPORTANT: When installing the plate in the slats, do not tighten too much the screw nuts, so they are set without
tightening. Thus the plate can perform manually the opening and closing movements with no friction whatsoever.
1.10 INSTALLING THE TRANSMISSION PLATE
With the slats already in the structure, install the two transmission plates in the slat end caps. One of the slats will include
an integrated support with a motor fixing stud. It is necessary to know the side of the pergola where the motor will be
installed, so the plate can be mounted on that side.
Install the two plates simultaneously if possible. Start by fixing the first, the last and the centre slats to the transmission
plate. This facilitates the rest of the installation.
Join the plates to the end caps with their corresponding ULS (ISO 7380) A2 M6x16, screws, 6,3 mm rimmed plastic caps
and M6. DIN 985 nut.

ASSEMBLY INSTRUCTIONS 2 DUPLEX COLUMNS P-190
17
SEALANT
Check that all the “U” profile holes match the M6 machined ones on the beam. If all of them match, apply the sealant be-
tween the “U” profile and the beam after screwing the profiles with the ULS (ISO 7380) A2 M6x16.
Use the sealant provided to seal the “U” profiles to the beams and the joints that could suer water leaks.
1.11 “U” PROFILE INSTALLATION
Start by installing the “U” profile with the pre-installed motor on the CENTRAL beam. To do this, insert the profile end
through the draining hole machined on the OPENING beam. Proceed in the same manner with the “U” profiles of the LEFT
and RIGHT beams, inserting one end of the profile through the draining hole machined on the C and D columns.
ORIFICIO
TORNILLO
ORIFICIO
TORNILLO
CANAL “U”
SELLADO

BIOCLIMATIC PERGOLA
A
B
Steps to install the motor:
1Unscrew the ULS (ISO 7380) A2 M6x16 screws from the “U” profile motor support (A).
2Insert the tip of the motor piston rod into the transmission plate stud (B).
3Mount the nut on the transmission plate stud so the motor does not come out (B).
4Lastly, the motor support is mounted again on the “U” profile its 2 screws (A).
1.12 MOTOR INSTALLATION
The motor is already pre-installed in the “U” profile. The motor piston rod needs to be halfway through its stroke so it can
be inserted into the plate stud and the support with the engine can be taken to the profile position.
Other manuals for 4 COLUMNS P-190
2
Table of contents
Other Saxun Lawn And Garden Equipment manuals