manuals.online logo
Brands
  1. Home
  2. •
  3. Brands
  4. •
  5. Scallywag Kids
  6. •
  7. Indoor Furnishing
  8. •
  9. Scallywag Kids Robe Carcass User manual

Scallywag Kids Robe Carcass User manual

- 1 -
Assembly Instructions
Robe Carcass
RH SIDE
SHELF
BOTTOM
PLINTH
LH SIDE
TOP
COMPONENTS;
1 x RH side
1 x LH side
1 x Bottom
1 x bottom plinth
2 x rear top & bottom
bracing rails
1 x Shelf
1 x Top
2 x 3mm thick back
panels
2 x robe door
(Separate box)
1 x box fittings
(Contents as below)
Tool required
16 x cam
bolt
A
31 x 8mm
dowel (pre-
inserted)
B
16 x cam
C
2 x hanging
rail bracket
D
1 x
hanging
rail
E
1 x“H” profile
rear panel
connector
F
14 x
15mm
screw
G
2 x striking
plate
H
4 x hinge
I
4 x hinge
mounting
plate
J
6 x rear
panel
connector
L
Please read & check through these instructions before proceeding with assembly.
- 2 -
Shelf
Bottom
Plinth
B
B
B
B
B
B
B
B
B
B
B
1. Press fit plinth into underside of bottom,
locating pre-inserted plinth dowels (B) into
holes in bottom panel.
C
C
A
A
bottom
side
2. Insert cam bolt A to 5mm holes on robe sides.
Insert cam C to 15mm holes on shelf, bottom and
the rear bracing rails. Lay sides on back edge
and fit bottom, shelf and top and bottom rear
bracing rails. (You may wish to fit the bracing
rails with the cam to the back of the unit so they
are unseen when the unit is complete).
Turn cams clockwise to lock
F
Rearbracingrail
3. Using rear panel connector strip (F), slide
back panels into groove at the rear of the
carcass. They will be a little proud at the top –
this will slot into the robe top later.
- 3 -
A
A
A
A
C
C
C
C
J
D
5
6
G
H
J
7
4. With care, lay the robe top upside down on a
clean surface to insert cam bolt (A) into the four
5mm holes.
Insert the cam (C) into the 15mm holes at the top
of robe sides. Carefully fit the top to the sides –
ensure the back slots into the groove on the top.
Lock the cams by rotating clockwise as before.
Nearly there!
5. Attach the hanger rail bracket (D) to the
holes shown above, fix with 15mm screw (G)
6. Attach hinge-mounting plate (J) to the
holes shown above. Take care to ensure the
longer part of the “crucifix” is to the front of the
unit.
7.Fix the striking plate (H) to top & bottom
using screws (G).
- 4 -
8.With care, fix the hinges to the doors using
screw (G)
9. Fit hinge to mounting plate and tighten
screw “Y” (see below )
10.
Hinge adjustment:
X –Lateral adjustment up to 3mm
Y –Vertical adjustment by mounting
plate only, after loosening screw
Front to back adjustment up to 4mm
Cabinet back panel
9.
For added strength and stability, the white rear
panel connectors (L) can be screwed through the
back panel as shown opposite.
Position the connectors: two to the top and
bottom and one into each side at approximately
half way.
This product is designed to conform to the latest safety regulations and we hope you will be happy with your purchase.
Whist every effort is made to ensure this product reaches you in good condition, in the unlikely event you find a problem
with any component, please do not attempt to assemble –and contact your retailer. As you will appreciate, we cannot
accept liability for damage once an attempt to assemble has been made.
CLEANING: - A damp cloth should be sufficient to keep this product in good order. Please do not attempt to use abrasive
cleaning materials, as this will incur damage. Thank you for choosing our product. We hope you will be happy with your
purchase.
X
Y

Other Scallywag Kids Indoor Furnishing manuals

Scallywag Kids BUNK CONVERSION KIT User manual

Scallywag Kids

Scallywag Kids BUNK CONVERSION KIT User manual

Scallywag Kids BOSTON BUNK User manual

Scallywag Kids

Scallywag Kids BOSTON BUNK User manual

Scallywag Kids 3 Drawer Chest User manual

Scallywag Kids

Scallywag Kids 3 Drawer Chest User manual

Scallywag Kids Bookcase User manual

Scallywag Kids

Scallywag Kids Bookcase User manual

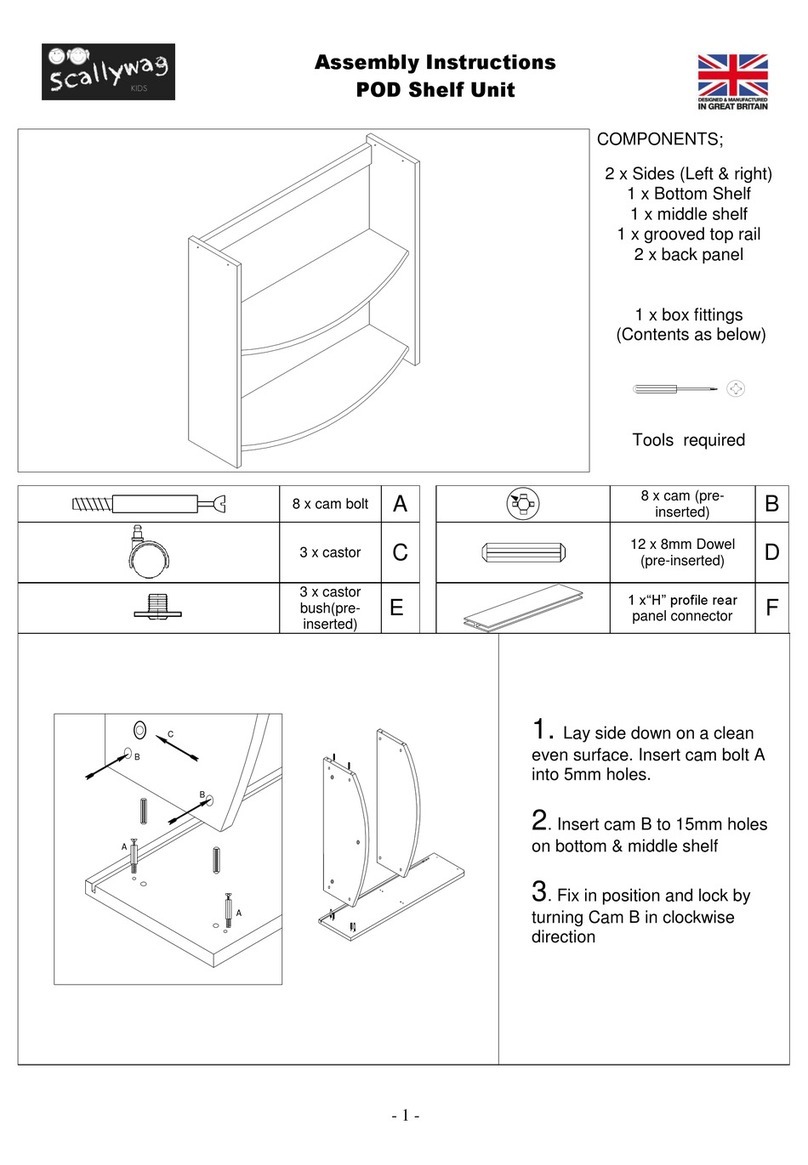
Scallywag Kids POD Shelf Unit User manual

Scallywag Kids

Scallywag Kids POD Shelf Unit User manual

Popular Indoor Furnishing manuals by other brands

Furniture of America CM1738F-4 Assembly instructions

Furniture of America

Furniture of America CM1738F-4 Assembly instructions

World Market Jagger 626728 Assembly instructions

World Market

World Market Jagger 626728 Assembly instructions

IKEA SNILLE manual

IKEA

IKEA SNILLE manual

rst brands Oklahoma SL-SHSTOR-2 Assembly instructions

rst brands

rst brands Oklahoma SL-SHSTOR-2 Assembly instructions

Furniture of America CM3577SC-2PK Accessories assembly

Furniture of America

Furniture of America CM3577SC-2PK Accessories assembly

Crosswater GLIDE II Series manual

Crosswater

Crosswater GLIDE II Series manual

Zanzini 09130203 Assembly instructions

Zanzini

Zanzini 09130203 Assembly instructions

PW DESIGNER Series quick start guide

PW

PW DESIGNER Series quick start guide

Winners Only A1-SF154B-C Assembly instructions

Winners Only

Winners Only A1-SF154B-C Assembly instructions

Astonica Hadley IV instruction manual

Astonica

Astonica Hadley IV instruction manual

italor E-8002 Assembly instructions

italor

italor E-8002 Assembly instructions

World Market 589815 Assembly instructions

World Market

World Market 589815 Assembly instructions

Deuba Wicker bar-set 992851 instructions

Deuba

Deuba Wicker bar-set 992851 instructions

Rowlinson Garden Products Bali SS262A Assembly instructions

Rowlinson Garden Products

Rowlinson Garden Products Bali SS262A Assembly instructions

Lightolier Lytecaster 1076 specification

Lightolier

Lightolier Lytecaster 1076 specification

Dripex Q201A-DL installation manual

Dripex

Dripex Q201A-DL installation manual

Otto Rustic 744020 Assembly instructions

Otto

Otto Rustic 744020 Assembly instructions

Julian Bowen Limited Fullerton FUL002 Assembly instructions

Julian Bowen Limited

Julian Bowen Limited Fullerton FUL002 Assembly instructions

manuals.online logo
manuals.online logoBrands
  • About & Mission
  • Contact us
  • Privacy Policy
  • Terms and Conditions

Copyright 2025 Manuals.Online. All Rights Reserved.