Schönes Bauen TPHFP24 User manual

1
INDUCTION
NON STICK
FRY PAN
PREMIUM
Induction Ready
EN Instruction Manual
ES Manual de Instrucciones
DE Bedienungsanleitung
FR Manuel d’instructions
IT Manuale di istruzioni

2
CONTENT
Fry pan...................................................4
Usage....................................................5
Induction Cooktop Cooking...................6
Cleaning and Storge............................10
Overheating.........................................12
Warranty...............................................13

3
EN

4
Remove all packaging and labels, wash the pan in hot
soapy water, rinse and dry thoroughly.
For items with a non-stick coating we recommend
conditioning the non-stick surface before using for the
first time. Rub a film of vegetable or corn oil over the
entire cooking surface using a pad of kitchen paper
towels. Rinse with hot water, dry thoroughly. The pan
is now ready for use. Occasional re-conditioning after
this will help to protect the surface and promote lon-
ger life.
INDUCTION NON-STICK
FRY PAN

5
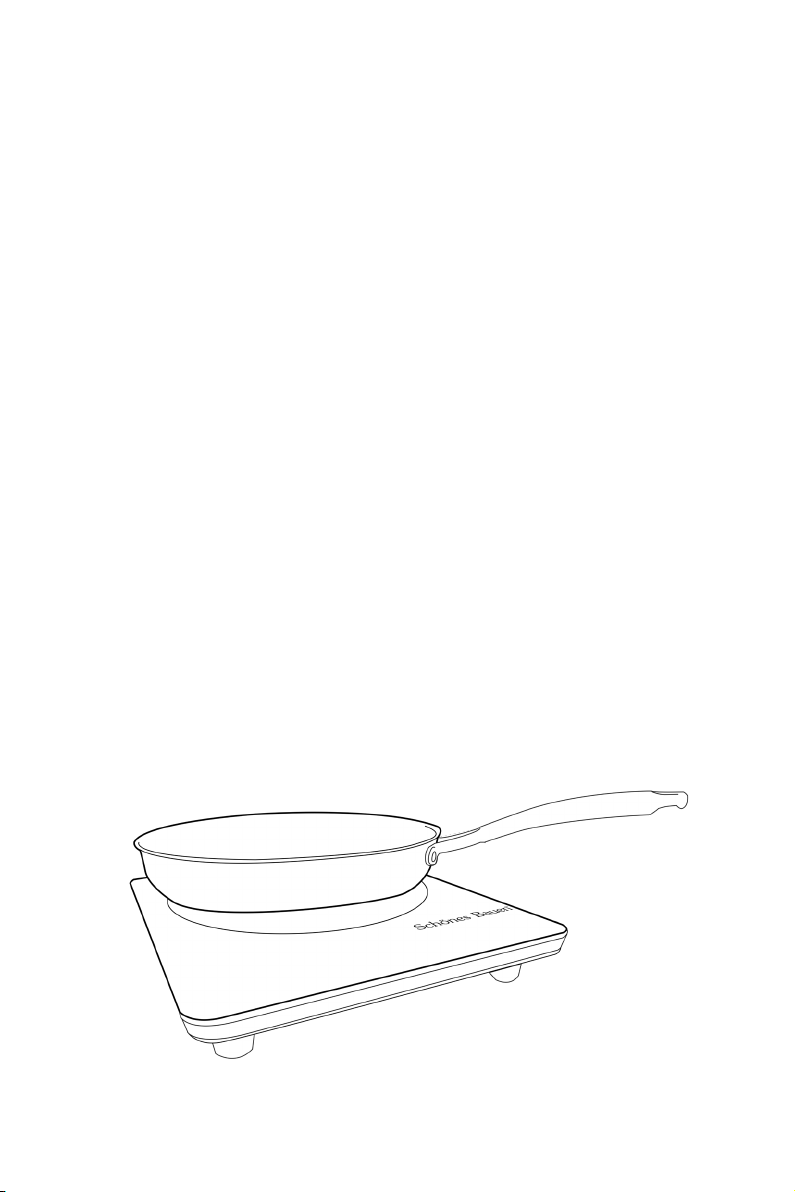
Heat Zones & Sources
3-ply stainless steel pans are:
• Suitable for use on all hobs, including induction.
They can also be used in all types of conventional
ovens.
• The 3-ply construction of the pans means you
do not need to cook on high heat settings.
Only MEDIUM to LOW heat is needed for most
cooking, including frying and searing.
• ALWAYS match the pan base size to the hob heat
zone it is to be used on. Gas flames must always
be confined to the base area and NEVER extend
up around the side walls of the pan
• On any glass-topped hob always lift the pan on
and off, or across the surface. Never slide the pan
as this may cause damage to the pan base as well
as to the glass.
• NEVER heat an empty pan
• If using salt, always add it to the hot cooking li-
quid or food so that it can dissolve thoroughly.
Never pour directly onto the stainless steel sur-
face as it may cause pitting.
To protect and prevent damage to the surface of Non-
stick pansNon-stick pans - to protect and prevent
damage to the surface, use only MEDIUM and LOW
heats for all cooking. NEVER use high heats.
USAGE EN

6
INDUCTION COOKTOP
COOKING
Always match the diameter of the pan base to the in-
duction hob cooking zone
Using a pan with a small base diameter on a large
cooking zone may result in a weaker magnetic field
being created and reduced heat output. In some ca-
ses the hob may not “recognise” the pan and no heat
will be generated.
DO NOT use the boost function for longer than is re-
quired to bring the pan’s contents to a boil. The boost
function should only be used for rapid heating of large
quantities of water e.g. for boiling pasta or vegetables.
During cooking, you may notice some slight noise
being generated in the pan by the induction hob. This
will not damage the pan or affect cooking
performance.

7
FAT-FREE COOKING
(NON-STICK PANS ONLY)
When cooking with no added fat or oil, pre-heat the
pan on a medium setting for approximately 2 minutes
before adding the food.
DO NOT leave the pan unattended during this time or
allow the dry non-stick surface to overheat as perma-
nent damage may occur.
REDUCED-WATER COOKING
The even heat distribution and excellent heat retention
qualities of 3-ply Stainless Steel cookware allows coo-
king with very little liquid. This method is ideal for ve-
getables and fruit where flavour can be concentrated
and nutrients retained.
Place the food and liquid into a cold pan. In 16-20cm
pans allow 100ml water for a 20-30 minute cook. In a
24cm pan allow 150ml water.
EN

8
FOOD STORAGE AND
MARINATING
Do not store raw, marinating or cooked foods in the
pans. Ingredients may cause damage to the surface.
TOOLS TO USE
To protect your pans we recommend using silicone,
heat-resistant plastic or wooden tools in both uncoa-
ted and non-stick coated pans.
However, metal tools, spoons or balloon whisks
may be used with care, but should not be used
harshly or scraped over the surface.

9
OVEN USE
Suitable for use in all types of conventional ovens
(not suitable for microwave ovens).
Oven safe to 260°C
GRILL USE
Shallow shapes can be used under the grill.
When using a non-stick pan under a hot grill there
should be a minimum distance of 5cm between the
heat source and the top rim of the pan.
HANDLES
Handles are secured to each pan with stainless steel
rivets.
Always use a dry oven glove or cloth when handling
hot pans during and after cooking.
EN

10
CLEANING AND STORAGE
Cool pans for a few minutes before washing in hot
soapy water, rinse and dry thoroughly or clean in the
dishwasher.
For more stubborn residues fill the pan with warm wa-
ter and leave to soak for 10-15 minutes.
Do not fill hot pans with or plunge into cold
water.
Use only soft, nylon pads or brushes for removing stub-
born residues. Do not use any harsh abrasive pads or
cleaning agents on any of the surfaces as they may cau-
se damage.
A stainless steel cleaner can be used to remove
hard water lime scale deposits and other marks. It
can also be used to condition, polish and protect
the inner ands).

11
CLEANING NON-STICK PANS
After each use, cool the pan for a few minutes before
cleaning then wash thoroughly.
The tough, reinforced non-stick coating offers exce-
llent food release and is therefore very easy to clean.
To maintain the appearance and performance of the
non-stick coating, we recommend washing by hand in
hot soapy water rather than cleaning in the dishwas-
her. This will prolong the life of the non-stick surface
and enhance cooking performance.
If the non-stick pan is cleaned in the dishwasher:
• Use only domestic strength dishwashing detergent
(we recommend non-lemon varieties)
• The cooking surface should be re-conditioned with
vegetable or corn oil before each subsequent use.
• Please note, prolonged, regular dishwashing may
eventually mark or discolour any item of cookware
and affect the release properties of non-stick surfa-
ces. This regarded as normal wear and tear and is
not covered by the Lifetime Guarantee.
EN

12
OVERHEATING
Damage from overheating is instantly recognisable
as the stainless steel surface may change colour
producing a golden/brown/blue appearance. This is
not reversible and cannot be cleaned off.
However it will not alter performance in any way.
Items with a non-stick surface may also become
discoloured and in severe cases the coating may
detach from the pan in the form of blistering or
peeling.

13
INTERNATIONAL GUARANTEE POLICY
Distributed and Imported in EU by:
Astor Warehouse Europe GmbH, Goerzalle 299,
14167 Berlin, Germany
Product: Induction non stick fry pan
Brand: Schönes Bauen
Model: TPHFP28JR-F2/TPHFP24JR-F2/TPHFP20JR-F2
For any clarification or doubt of its use, please
contact the following numbers:
• UK (+44) 2392160813
• GER (+49) 303977387
• Email: soporte@astor.mx
To make the warranty valid, you must fill in the
following information
email: soporte@astor.mx
Customer’s name:
Address:
Phone:
Email:
Ticket or proof of purchase:
Model:
Serial:
Shop Warranty Seal
EN

14
INTERNATIONAL GUARANTEE POLICY
Importer in USA by: Astor Warehouse S.A de C.V,
Av. Jorge jiménez Cantú Lote 14, Col. Rancho Viejo,
Atizapán de Zaragoza, Estado de México, México.
CP 52930 RFC AWA100224BI8.
Product: Induction non stick fry pan
Brand: Schönes Bauen
Model: TPHFP28JR-F2/TPHFP24JR-F2/TPHFP20JR-F2
For any clarification or doubt of its use, please
contact the following numbers:
- USA (+1) 2064 5236 01
- Email: soporte@astor.mx
To make the warranty valid, you must fill in the
following information
email: soporte@astor.mx
Customer’s name:
Address:
Phone:
Email:
Ticket or proof of purchase:
Model:
Serial:
Shop Warranty Seal

15
This warranty covers the following points:This warranty covers the following points:
•• Manufacturing defects that prevent all or part ofManufacturing defects that prevent all or part of
the proper operation of the zl, which are presentedthe proper operation of the zl, which are presented
within the term of surveillance of this warrantywithin the term of surveillance of this warranty
•• Labor and transportation costs arising from the ful-Labor and transportation costs arising from the ful-
fillment of the guarantee within our service networkfillment of the guarantee within our service network
•• Repair, replacement of parts and componentsRepair, replacement of parts and components
Requirements to validate your warranty:Requirements to validate your warranty:
1. have previously read the warranty manual to know in1. have previously read the warranty manual to know in
which cases no longer applies the same.which cases no longer applies the same.
2. Have a ticket or proof of purchase.2. Have a ticket or proof of purchase.
3. Enter within the time indicated to validate the warran-3. Enter within the time indicated to validate the warran-
ty (2 years).ty (2 years).
Astor Warehouse S.A de C.V/ Astor WarehouseAstor Warehouse S.A de C.V/ Astor Warehouse
Europe GmbH guarantees all parts and accesoriesEurope GmbH guarantees all parts and accesories
that the unit contains.that the unit contains.
This warranty will be void in the following cases:This warranty will be void in the following cases:
When the warranty has expiredWhen the warranty has expired
•• If the product has any impact, scratches or breaks.If the product has any impact, scratches or breaks.
•• If the product was altered or repaired by personsIf the product was altered or repaired by persons
not authorized by the manufacturer.not authorized by the manufacturer.
EN

16
ÍNDICE
Sartén...................................................18
Uso......................................................19
Cocinar en Estufa de Inducción...........20
Limpieza y almacenamiento................24
Sobrecalentamiento.............................26
Garantía...............................................27

17
ES

18
Retire todo el embalaje y las etiquetas, lave la
sartén con agua y jabón caliente, enjuague y seque
completamente.
Para artículos con un revestimiento antiadherente,
recomendamos acondicionar la superficie antiadhe-
rente antes de usar por primera vez. Frote una pelícu-
la de aceite vegetal o de maíz sobre toda la superficie
de cocción con una almohadilla de papel. Enjuague
con agua caliente, seque completamente y el sartén
estará listo para usar. Repetir este paso ocasional
mente ayudará a proteger la superficie y promover
una vida más larga.
SARTÉN
ANTIADHERENTE

19
Los sartenes antiadherentes de acero inoxidable de 3
capas son:
• Aptos para su uso en todas las estufas, incluidas
las estufas de inducción. También se pueden usar
en todo tipo de hornos convencionales.
• La construcción de 3 capas de los sartenes hace
que no es necesario cocinar a altas temperaturas.
Solo se necesita calor MEDIO a BAJO para la ma-
yoría de las cocciones, incluidas las frituras y asa-
do.
• SIEMPRE haga coincidir el tamaño de la base de la
sartén con la zona de calor de la estufa en la que
se va a utilizar. Las llamas de gas siempre deben
limitarse al área de la base y NUNCA se extiendan
alrededor de las paredes laterales del sartén.
• En cualquier estufa de vidrioceramica siempre
coloque el sartén cuidadosamente sobre la super-
ficie. Nunca deslice la sartén ya que esto puede
dañar la base de la sartén y el vidrio.
• NUNCA caliente una sartén vació.
• Si usa sal, siempre agréguela al líquido de coc-
ción o comida caliente para que se disuelva
completamente. Nunca vierta directamente
sobre la superficie de acero inoxidable, ya que
puede causar picaduras.
Para proteger y prevenir daños a la superficie del
sartén antiadherente Sartenes antiadherentes: use
solo calores MEDIO y BAJO para toda la cocción.
NUNCA use altas temperaturas.
USO ES

20
COCINAR EN ESTUFA DE
INDUCCIÓN MAGNÉTICA
Haga coincidir siempre el diámetro de la base de
la sartén con la zona de cocción de la estufa de
inducción magnética.
El uso de una sartén con un diámetro de base
pequeña en una zona de inducción más grande
puede generar un campo magnético más débil y re-
ducir la producción de calor. En algunos casos, la es-
tufa puede no “reconocer” el sartén y no se ge-
nerará calor.
NO use la función de Boost por más tiempo del nece-
sario para hervir el contenido de la sartén. La función
Boost solo debe usarse para el calentamiento rápido
de grandes cantidades de agua, para hervir pasta o
verduras.
Durante la cocción, es posible que la placa de in-
ducción genere un ligero ruido en la sartén. Esto no
dañará el sartén ni afectará la cocción.
This manual suits for next models
2
Table of contents
Languages:
Popular Skillet manuals by other brands

Vulcan-Hart
Vulcan-Hart VECTS16 Installation & operation manual

Solaris Steam
Solaris Steam GS-30 Installation and operation manual

Proctor-Silex
Proctor-Silex 38520G user guide

Crown
Crown GS-40 Installation & operation manual

Cleveland
Cleveland SGL-30-TR Specifications

Coleman
Coleman 9933-750 Instructions for use