8 Freedrive (Teach-Modus)
Alternativ zum Roboter-Teach-Button, können Sie den Freedrive-Modus direkt am Greifer folgendermaßen akti-
vieren:
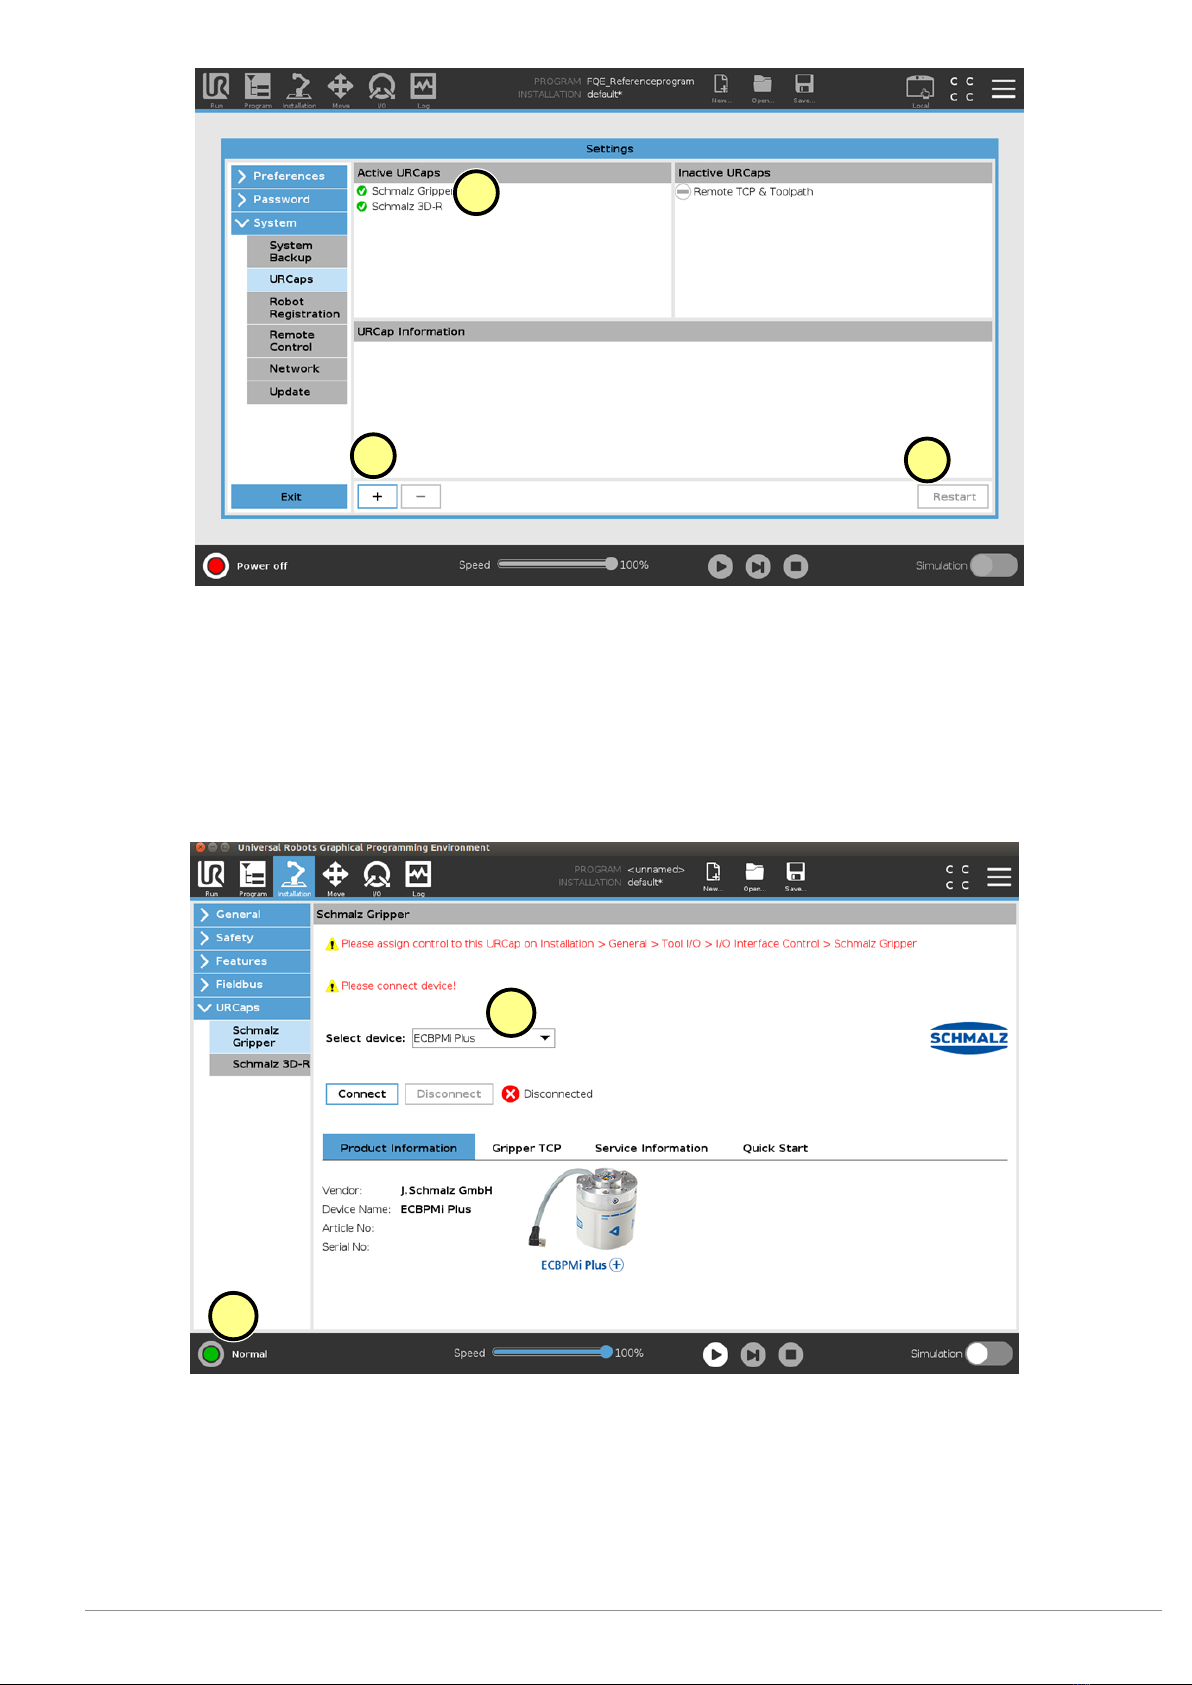
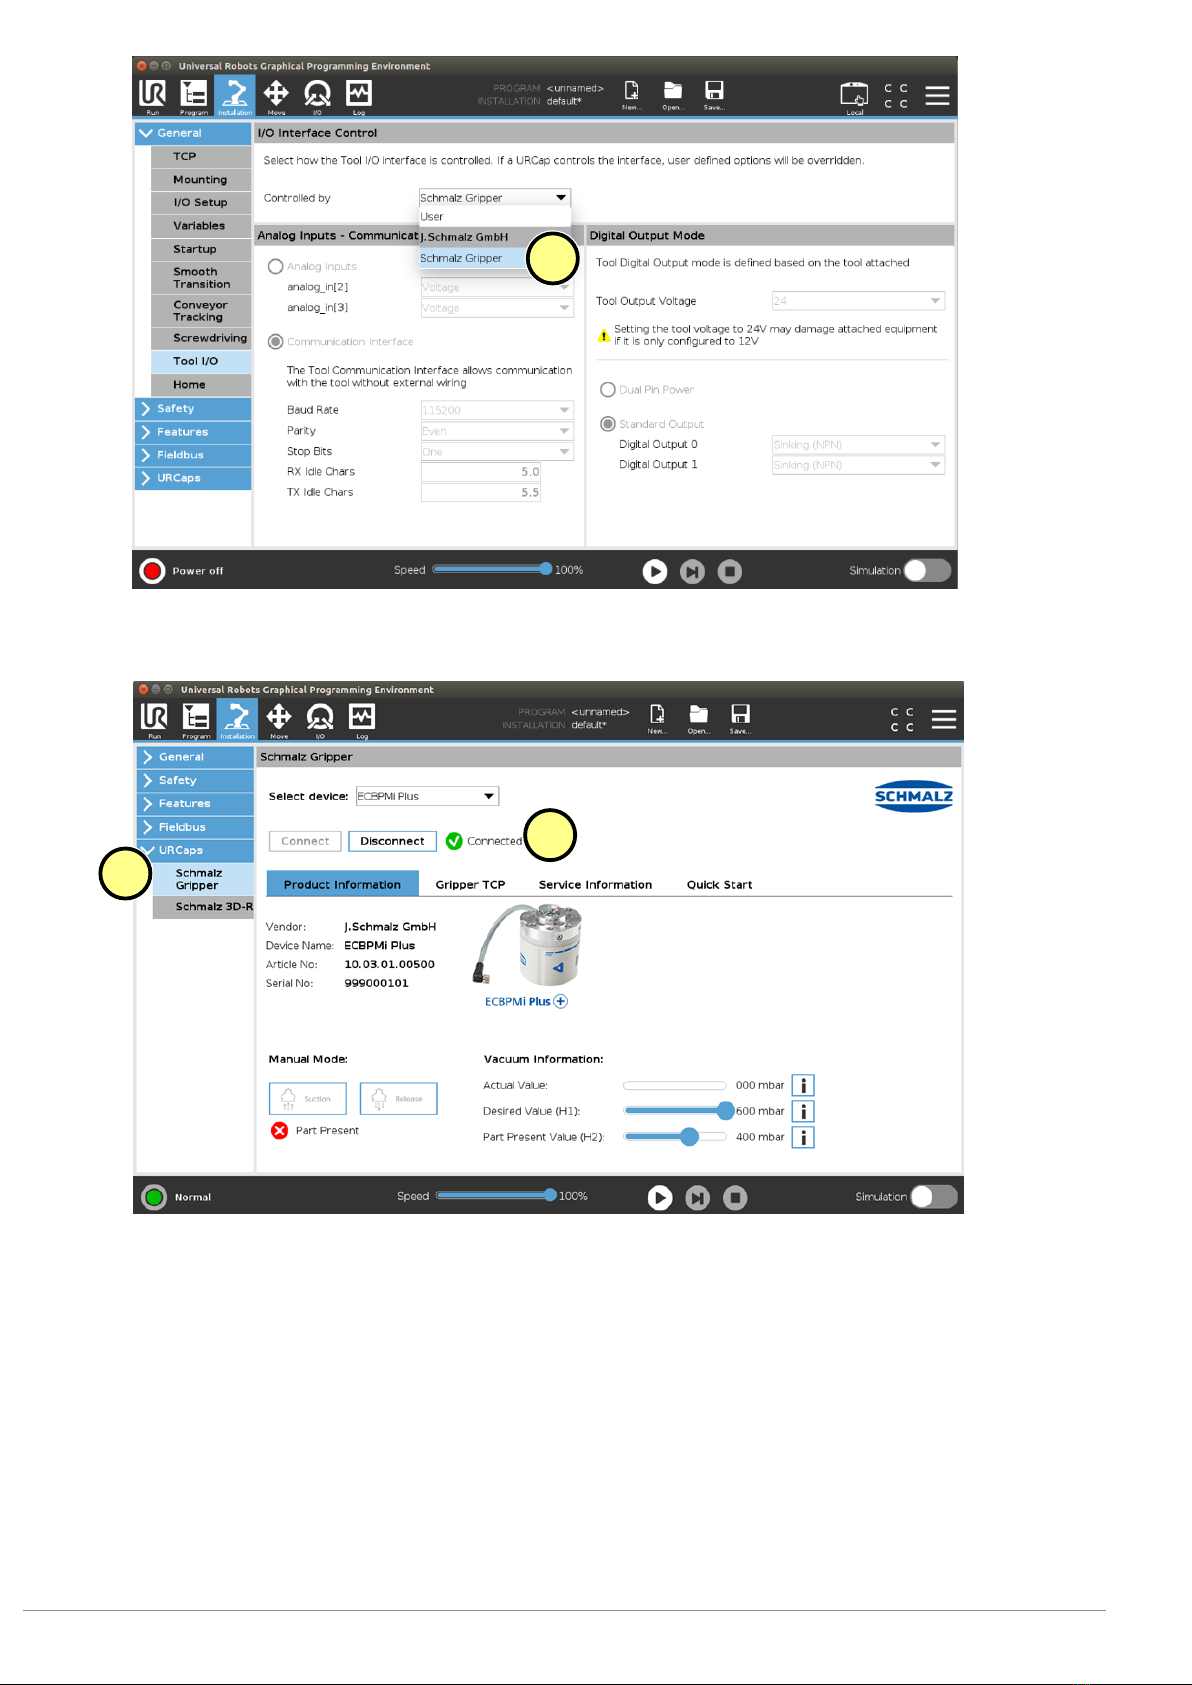
ECBPMi Plus verbunden (siehe Kapitel Konfiguration Status Connected)
1. Umfassen Sie den Greifer wie abgebildet (siehe
Bild): Beide Pfeiltasten sind abgedeckt.
2. Der Roboter wechselt nach 2 Sekunden automa-
tisch in den Freedrive-Modus.
ðDer LED-Ring leuchtet blau.
ðAuf dem UR Panel wird der Roboter-Status
„Freedrive“ (blaues ICON) angezeigt.
Im blauen „Freedrive-Modus" können sie nun den Roboter manuell führen um z. B. in ihrem UR-Pro-
gramm neue Wegpunkte zu definieren.
9 Betrieb
ECBPMi Plus verbunden (siehe Kapitel Konfiguration Status Connected)
•(1) Die Schaltfläche “Program” wählen
•(2) "URCaps" wählen
•(3) Das URCap „Schmalz Gripper“ wählen
• Das Roboter-Ablaufprogramm können Sie mit folgenden Funktionen durch mehrfache Auswahl aufbauen:
•(4) „SUCTION“: Greifen des Werkstückes (Saugen aktivieren)
DE · 30.30.01.02291 · 01 · 11/20 9 / 23