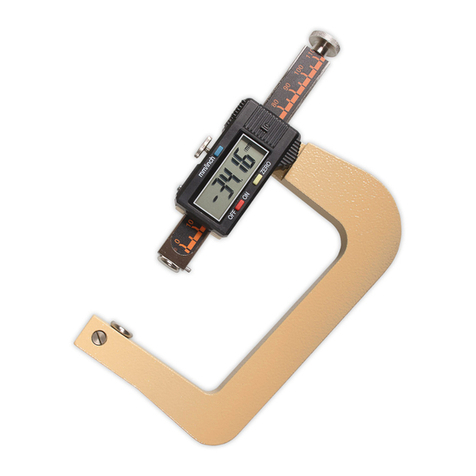
Schmidt D-2000 Series User manual

Thickness Gauge
D-2000 Series
Edition D-2000 01.5.E
Instruction Manual
Valid as of: 01.12.2015• Please keep the manual for future reference!
S C H M I D T
c o n t r o l i n s t r u m e n t s

2
Contents
1 Warranty and liability ............................................................................................... 3
1.1 Notices within the instruction manual..................................................................... 3
1.2 Responsibilities of the operating company............................................................. 3
1.3 Responsibilities of the personnel ........................................................................... 3
1.4 Informal safety measures....................................................................................... 4
1.5 Training of the personnel ....................................................................................... 4
1.6 Intended use .......................................................................................................... 4
1.7 Dangers in handling the device.............................................................................. 4
1.8 Copyright................................................................................................................ 4
1.9 EC declaration of conformity and WEEE Registration ........................................... 4
2 Available models ...................................................................................................... 5
2.1 Specifications ......................................................................................................... 5
2.2 Delivery includes .................................................................................................... 6
2.3 Unpacking .............................................................................................................. 6
2.4 Optional accessories.............................................................................................. 6
3 Measuring.................................................................................................................. 7
3.1 Notices before starting measurement .................................................................... 7
3.2 Operating elements................................................................................................ 7
3.3 Setup...................................................................................................................... 7
3.4 Preparations before measuring.............................................................................. 8
3.4.1 Setting the measurement parameters .............................................................. 8
3.4.2 Checking and setting the zero point ................................................................. 8
3.5 Operating procedures ............................................................................................ 8
3.6 Adjusting the thickness gauge to different materials.............................................. 9
3.6.1 Changing the feeler .......................................................................................... 9
3.6.2 Load change..................................................................................................... 9
3.7 Interface ................................................................................................................. 9
3.8 Software (optional) ................................................................................................. 9
3.8.1 Overview........................................................................................................... 9
3.8.2 Extracting the software..................................................................................... 9
3.8.3 User interface ................................................................................................. 10
3.8.4 Basic settings ................................................................................................. 11
3.8.5 Measurement series ....................................................................................... 11
4 Service and maintenance....................................................................................... 12
5 Cleaning................................................................................................................... 12
6 Correspondence ..................................................................................................... 12
7 Repairs..................................................................................................................... 12

3
1 Warranty and liability
In principle, the supply of the device is subject to our “General Conditions of Sale and
Delivery.” These have been provided to the operating company on conclusion of the
contract, at the latest.
Warranty:
- Thickness gauges are warranted for 12 months.
Parts subject to wear, electronic components and measuring springs are not covered by
the warranty. No warranty or liability will be accepted for bodily injury or property damage
resulting from one or several of the following causes:
- Misuse or abuse of the device.
- Improper mounting, commissioning, operation and maintenance of the device
(e.g. verification interval).
- Operation of the device if any safeguards are defective or if any safety and protection
precautions are not properly installed or not operative.
- Failure to comply with the notices in the instruction manual regarding transport,
storage, mounting, commissioning, operation, maintenance and setup of the device.
- Any unauthorized structural alteration of the device.
- Insufficient inspection of device components that are subject to wear.
- Opening the device or improper repair work.
- Disasters caused by the effects of foreign objects or by force majeure.
1.1 Notices within the instruction manual
The fundamental prerequisite for the safe handling of this device and its troublefree opera-
tion is the knowledge of the basic safety notices and safety instructions.
These instruction manual contains the most important notices for the safe operation of the
device.
These instruction manual, in particular the safety notices, must be observed by any person
who works with the device. In addition, the applicable local rules and regulations for the
prevention of accidents must be complied with.
The representations within the instruction manual are not true to scale.
The dimensions given are not binding.
General indications of direction, such as FRONT, REAR, RIGHT, LEFT apply when view-
ing the front of the device.
1.2 Responsibilities of the operating company
In compliance with the EC Directive 89/655/EEC, the operating company agrees to only
permit persons to work with the device who:
- are familiar with the basic regulations on industrial safety and accident prevention and
who have been trained in handling the device.
- have read and understood the chapter on safety and the warning notices in these
instruction manual and have confirmed this with their signatures.
- are examined regularly on their safe and conscientious working method.
1.3 Responsibilities of the personnel
All persons who work with the device agree to perform the following duties before starting
work:
- to observe the basic regulations on industrial safety and accident prevention.
- to read the chapter on safety and the warning notices in these instruction manual and to
confirm with their signatures that they have understood them.
4
1.4 Informal safety measures
The instruction manual must always be kept on hand where the device is operated.
Apart from the instruction manual, the applicable general and local regulations on
accident prevention and environmental protection must be provided and complied with.
1.5 Training of the personnel
Only trained and instructed personnel is permitted to work with the device. The responsi-
bilities of the personnel must be clearly defined for mounting, commissioning, operation,
setup, maintenance, and repair. Trainees may only work with the device under the super-
vision of experienced personnel.
1.6 Intended use
The device is intended exclusively to be used for measuring the thickness of textiles,
felt, geomaterials, paper, floor coverings, leather, foils, rubber. Any other use or any use
exceeding this intention will be regarded as misuse. Under no circumstances shall Hans
Schmidt & Co GmbH be held liable for damage resulting from misuse.
The intended use also includes:
- Complying with all notices included in the instruction manual and observing all
inspection and maintenance works.
1.7 Dangers in handling the device
The device has been designed according to the state of the art and the approved safety
standards. Nevertheless, its use may cause serious or fatal injury to the user or third
persons, and/or an impairment of the device or of other material assets.
The device may only be applied:
- For its intended use in a faultless condition with regard to the safety requirements.
- Malfunctions that could impair safety must be remedied immediately.
- Personal protective equipment must be used according to the EC Directive 89/686/EEC.
The device must not be operated in potential explosive areas and must not
come into contact with aggressive substances.
1.8 Copyright
The copyright on these instruction manual remains with the company
Hans Schmidt & Co GmbH.
These instruction manual is intended for the operating company and its personnel only.
They contain instructions and notices that may only be reproduced on the prior written
permission of
Hans Schmidt & Co GmbH
and under indication of the complete reference data.
Violations will be prosecuted.
1.9 EC declaration of conformity and WEEE Registration
In compliance with the EC Directive 2014/30/EU
Hans Schmidt & Co GmbH is registered in compliance with
the German Electrical and Electronic Equipment Act (ElektroG).

5
2 Available models
These instruction manual refer to Model D-2000-T of the D-2000 Series; they
are also applicable to the following models. The individual models of the D-2000
Series are also available with the following feelers and weights:
Model Standard Application Feeler cm² Test Pressure
D-2000-T DIN EN ISO 5084 textiles 20 0.1 kPa and 1 kPa
D-2000-V DIN EN ISO 9073-2 Fleece 25 0.1 kPa und 0.5 kPa
D-2000-G1 DIN EN ISO 9863-1 Geomaterials 25 2 kPa
D-2000-G2 DIN EN ISO 9863-1 Geomaterials 25 2 kPa, 20 kPa
and 200 kPa
D-2000-NW EN ISO 9073-2 Non-woven textiles 25 0.5 kPa and 1 kPa
D-2000-P DIN EN ISO 534 Paper 2 50 kPa and 100 kPa
D-2000-HY DIN EN ISO 54540 Toilet tissue 25 2 kPa
D-2000-L DIN EN ISO 2589 Leather 0.785 49,1 kPa
D-2000-Gi Rubber 10 5 kPa
Feeler
Calotte
D-2000-F DIN 53370 Foil R 30 mm 0.5 N
2.1 Specifications
Measuring range: 0 - 10 mm (Option 0 - 25 mm or 0 - 50 mm)
Resolution: 0.01 mm (Option 0.001 mm)
D-2000-P and D-2000-F: 0.001 mm (Standard)
Accuracy: ± 0.02 mm (up to ± 0.002 mm optional)
Units of measure: mm or inch (switchable)
Display: Digital
Measuring system: Capacitiv -->Sylvac
Measuring depth: 110 mm (centre of the stamp)
Feeler shape and
Surface pressure: According to international standards DIN, EN und ISO
Output signal: USB (Sub-D9 socket)
Temperature range: 10 - 45° C
Air humidity: 85 % RH, max.
Dimensions: 300 x 240 x 300 mm (L x W x H)
Weight, net (gross): Approx. 23 kg (26 kg)

6
2.2 Delivery includes
Thickness gauge
Instruction manual and certificate
Sub-D9/USB adapter cable
USB AC adapter
Instruction manual for dial gauge
Load table
1 or 2 additional weights, if applicable (depending on model, chapter 2)
2.3 Unpacking
Unpack the thickness gauge and inspect it for any shipping damage. Notices of defect
must be announced immediately, in writing, at the latest within 7 days on receipt of the
goods.
2.4 Optional accessories
Code R Higher resolution 0.001 instead of 0.01 mm
Code E25 Higher measuring range 0 ... 25 mm
Code E50 Higher measuring range 0 ... 50 mm
P-DMG Software for data acquisition and display on PC
Additional weights

7
3 Measuring
3.1 Notices before starting measurement
Have you read and understood the instruction manual, in
particular chapter 1 “Warranty and liability” ?
You are not permitted to operate the device before doing so.
Before working with the device you must put on your personal
protective clothing, if necessary. For example, eye protectors,
gloves, etc.
3.2 Operating elements
3.3 Setup
- Set up the thickness gauge on a horizontal, flat surface for use.
- Connect the instrument to a power supply:
connect the device with the Sub-D9/USB adapter cable to a PC
or
connect the thickness gauge with the adapter cable and USB AC adapter to a
power supply
- The start menu appears on the display.
USB interface
Lifting lever
for feeler
Fixture for
additional weight
Pressure die
Dial gauge
Sylvac
feeler
Measuring table

8
3.5 Operating procedures
Requirements:
- Check the zero adjustment.
- If required by the applicable standard, place the appropriate additional weight on the
fixture for additional weights.
- Choose the appropriate feeler required by the standard and attach it to the
pressure die.
- Select the required measuring unit (mm or inch).
Measuring:
1. Push the lifting lever back to raise the feeler.
2. Place the material to be measured on the measuring table.
3. Pull the lifting lever forward all the way and then release it. The feeler is
lowered at a constant speed until it makes full contact with the material to be
measured. You can now perform the test in accordance with the applicable standard.
4. The measured value is shown on the digital display.
5. Push the lifting lever back to raise the feeler.
6. Remove the measured material.
Start the next measurement from step 2.
When you are finished measuring, return the feeler
to its home position on the measuring table.
3.4 Preparations before measuring
3.4.1 Setting the measurement parameters
Set the parameters as described in the operating manual for the dial gauge.
3.4.2 Checking and setting the zero point
Requirement:
- Clean the measuring table and the bottom of the feeler.
Zero adjustment:
- Pull the lifting lever forward until the feeler makes contact with the
measuring table.
- If the reading on the display is not zero, press the set key on the indicator.
- After successful zero adjustment, the display shows the start menu.

9
3.6 Adjusting the thickness gauge to different materials
Using different combinations of test weight and feeler shape, you can adjust the
thickness gauge to check a wide variety of materials.
3.6.1 Changing the feeler
The feeler is screwed to the pressure die.
1. Hold the pressure die with one hand to prevent twisting.
2. Screw off the feeler with the other hand.
3. Place the feeler you want to use in the center of the measuring table.
Then lower the pressure die until it reaches into the threaded hole.
4. Hold the pressure die with one hand and screw the
feeler in by about ½ revolution.
5. Move the pressure die up, hold it with your hand and carefully
screw the feeler all the way in.
6. After a change of the feeler, zero adjustment has to be carried out.
The measuring table and the feeler have to be exactly parallel.
3.6.2 Load change
On some models (chapter 2) you can change the pressure applied to the material. This
is done by placing an additional weight on the fixture for additional weights.
Use only original weights supplied by the manufacturer to ensure that the
correct measuring force is applied according to the relevant standard.
3.8 Software (optional)
3.8.1 Overview
The software allows displaying and storing the measured data.
The following instruments are supported:
- D-1000, D-2000 and D-2005
The following storage options are available for the acquired data:
- No data storage
- Storage in Excel format
- Storage in CSV format
3.8.2 Extracting the software
- Extract the ZIP file from the supplied CD and save it to the appropriate folder.
- Double-Click P-DMG.exe to start the P-DMG application.
3.7 Interface
The measured data can be transferred to a PC over the COM port. Before you can use
this feature, you have to extract the P-DMG application on the PC (chapter 3.8).

10
If you want to store the measured data, you need to assign a Charge / Part
Number. This information is needed to make up the file name.
3.8.3 User interface
Display area
for readings
Maximum value of
measuring series
Minimum value of
measuring series
Average value of
measuring series Standard deviation
of measuring series
Current
actual value
of measuring
series
Batch or
part number
Number of
the current
measurement
Display of
data source
(chapter 3.8.4)
Name of file
for measured
data
Currently selected
port (chapter 3.8.4) Stops the
measurement
series
Opens the
Configuration dialog
box (chapter 3.8.4)

11
When you have made all your settings, you can close the dialog box. The parameters
are saved to the “DMGConfig.ini” file in the program directory and automatically loaded
the next time you start the software.
When the software is started for the first time, the data source and port
have to be specified.
3.8.5 Measurement series
Before starting a measurement series, enter a Charge / Part Number. This information is
needed to make up the file name.
The file name is made up of the elements “YYYYMMDD_HHMMSS_NNNNN”,
where:
Y ...Year (four digits)
M ...Month (two digits)
D ...Day (two digits)
H ...Hour (two digits)
M ...Minute (two digits)
S ...Second (two digits)
N ...Name entered in the “Part / Charge number” box
Data acquisition starts as soon as you click the “Init measurement” button. All the data
received from then on will be stored.
To stop the measurement series, click the “Stop measurement” button. You can now ac-
cess the stored data in the program directory.
3.8.4 Basic settings
Click the “Configuration” button (chapter 3.8.3) to open the Configuration dialog box.
- Choose the data source
Must be set to “Sylvac-Mode”
and “Simplex”
- Choose a data storage option:
No data storage, or data storage as
Excel or CSV file. The file is created
in the program directory.
- Choose the communication port
- Choose a language (English/German)
- Close the Configuration dialog box.

To avoid unnecessary follow-up questions, and the resulting loss of time or
possible misunderstandings, please return the instrument with a detailed fault
description to our service department. Please indicate in your order whether you
require an Calibration certificate done by an DAkkS (DKD) approved laboratory.
Hans Schmidt & Co GmbH
Schichtstr. 16
84478 Waldkraiburg
Germany
Service address:
7 Repairs
Shipping instructions:
We kindly ask for return free of charge for us, if possible by airmail parcel. All occurring
charges, if any (such as freight, customs clearance, duty etc.), will be billed to customer.
For return from foreign countries, we ask you to include a proforma invoice with a low value
for customs clearance only, e.g. 50 Euro, each and to advise the shipment in advance by
fax or eMail.
4 Service and maintenance
The instrument is easy to maintain. Depending on operating time and load, the
instrument should be checked according to the locally valid regulations and conditions.
5 Cleaning
For cleaning the unit, do not use any
AGGRESSIVE SOLVENTS
such as trichloroethylene or similar chemicals.
NO WARRANTY OR LIABILITY
shall be accepted for damage resulting from improper cleaning.
6 Correspondence
Should you have any questions regarding the instrument or instruction manual, or their use,
please indicate above all the following details which are given on the ID plate:
1) Model
2) Serial number
Mailing address:
P. O. B. 11 54
84464 Waldkraiburg Germany
Shipping address:
Schichtstr. 16
84478 Waldkraiburg Germany
Hans Schmidt & Co GmbH
Phone:
int. + 49 / (0)8638 / 9410-0
Fax:
int. + 49 / (0)8638 / 4825
int. + 49 / (0)8638 / 67898
More than 75 years - Worldwide -
e-mail:
Internet:
http://www.hans-schmidt.com
Table of contents
Other Schmidt Measuring Instrument manuals

Schmidt
Schmidt D-2005 Series User manual

Schmidt
Schmidt KLA User manual

Schmidt
Schmidt SC Series User manual

Schmidt
Schmidt DW-U User manual

Schmidt
Schmidt OS8000 User manual

Schmidt
Schmidt FGP 01.E User manual

Schmidt
Schmidt MZ Series User manual

Schmidt
Schmidt Q-10 User manual

Schmidt
Schmidt DXK User manual

Schmidt
Schmidt OS8000 User manual

Schmidt
Schmidt MK Series User manual

Schmidt
Schmidt FS Series User manual

Schmidt
Schmidt G4 User manual

Schmidt
Schmidt DX2-50 User manual

Schmidt
Schmidt SC Series User manual

Schmidt
Schmidt SS 20.515 LED User manual

Schmidt
Schmidt RS8000 User manual

Schmidt
Schmidt RM Series User manual

Schmidt
Schmidt G4 User manual

Schmidt
Schmidt G2 TRIGGER DEADMAN User manual