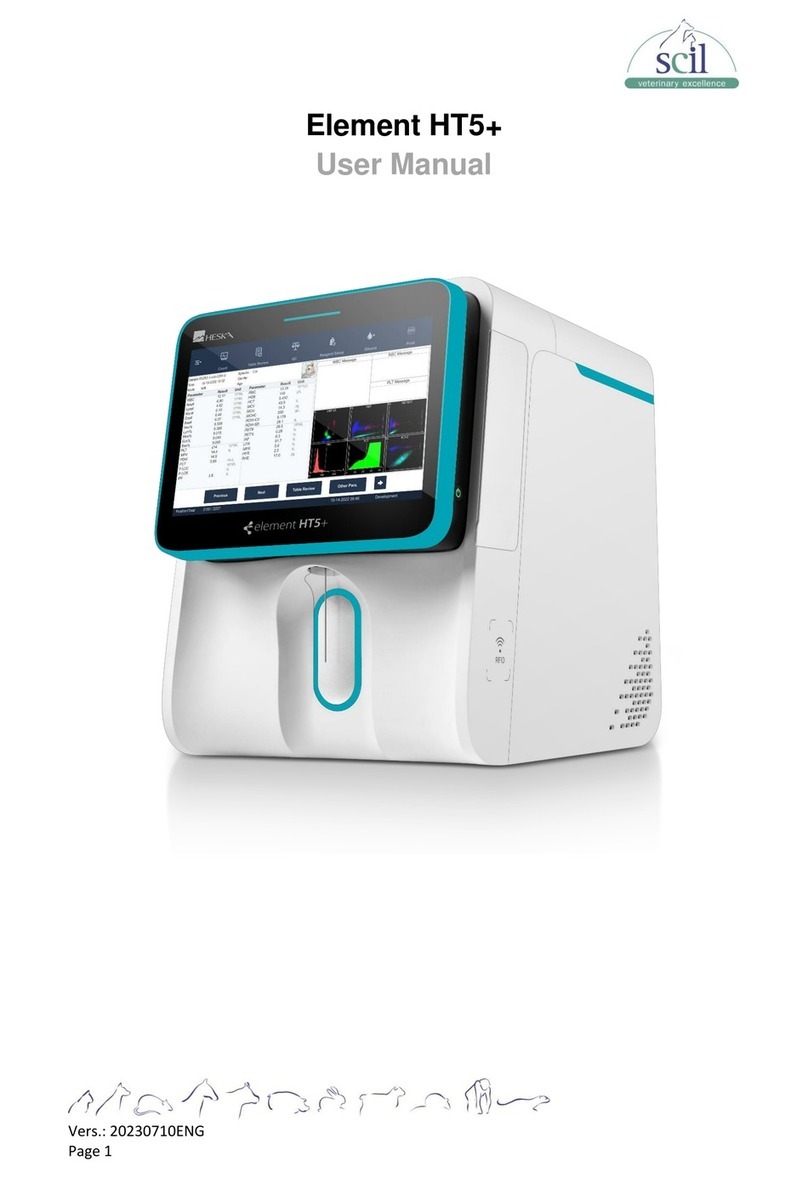
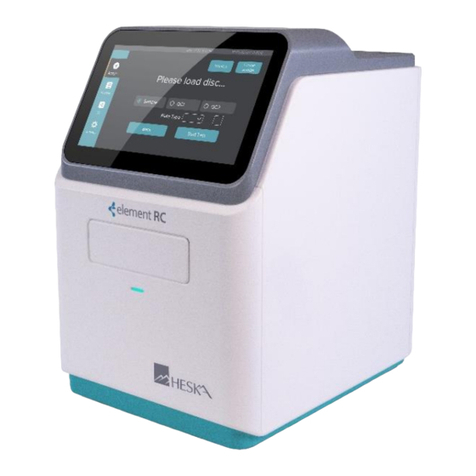
scil DB-1000 User manual

_________________________________________________________________________________
Vers.: 20220216_ENG 1
User Manual
Element DC
Clinical Chemistry Analyzer
For veterinary use

_________________________________________________________________________________
Vers.: 20220216_ENG 2
Copyright
© Copyright 2022 Element DC
The information in this manual is protected by copyright. Except as specifically permitted, no
portion of this document may be distributed or reproduced by any means, or in any form, without
the prior consent of Element DC.
The contents of this User’s Manual and product specifications are subject to change without
notice.
Correct Disposal of this Product
(Waste Electrical & Electronic Equipment)
(Applicable in Countries with Separate Collection Systems)
This marking on the product, accessories or literature indicates that the product and its electronic
accessories (e.g. charger, headset, USB cable) should not be disposed of with other household
waste at the end of theirworking life. To prevent possible harm to the
environment or human health from uncontrolled waste disposal, please separate these items from
other types of waste and recycle them responsibly to promote the sustainable reuse of material
resources.
Household users should contact either the retailer where they purchased this product, or their
local government office, for details of where and how they can take these items for
environmentally safe recycling.
Business users should contact their supplier and check the terms and conditions of the purchase
contract. This product and its electronic accessories should not be mixed with other commercial
wastes for disposal.
State of California Proposition 65 Warning (US only)
WARNING: This product contains chemicals known to the State of California to cause cancer and
birth defects or other reproductive harm.
Correct Disposal of Batteries in this Product
This marking on the battery, manual or packaging indicates that the batteries in this product should
not be disposed of with other household waste at the end of their working life. Where marked, the
chemical symbols Hg, Cd or Pb indicate that the battery contains mercury, cadmium or lead above
the reference levels in EC Directive 2006/66.

_________________________________________________________________________________
Vers.: 20220216_ENG 3
Table of Contents
Safety Warnings and Cautions ............................................................................................................ 6
1.1. User´s Manual and Labeled Symbols ..................................................................................... 6
1.2. Cautions for System Installation.............................................................................................. 8
1.3. Cautions for Moving the System ............................................................................................. 9
1.4. Cautions Before Use ............................................................................................................... 9
1.5. Cautions During Use ............................................................................................................. 10
1.6. Precautions for Preparing Blood Samples ............................................................................ 11
1.7. Precautions for Storage and Maintenance After Use............................................................ 11
1.8. EMC (Electromagnetic Compatibility) Information................................................................. 12
Introduction.......................................................................................................................................... 13
2.1. Intended Use ......................................................................................................................... 13
2.2. Analysis Principle .................................................................................................................. 14
2.3. What´s in the Box .................................................................................................................. 14
2.4. Introduction of Features......................................................................................................... 16
3.0. Installation................................................................................................................................ 18
3.1. Installation.............................................................................................................................. 18
3.2. Replacing Printer Paper ........................................................................................................ 18
3.3. Connecting Wi-Fi USB Dongle.............................................................................................. 20
4.0. Analyzing.................................................................................................................................. 21
4.1. Analyzing............................................................................................................................... 21
4.1.1. Turning Power On.......................................................................................................... 21
4.1.2. Preparing an Analysis.................................................................................................... 25
4.1.3. Canceling an Analysis in Progress................................................................................ 28
4.1.4. Analysis Completed....................................................................................................... 29
4.1.5. Viewing Analysis Results............................................................................................... 30
4.2. Viewing Results..................................................................................................................... 32
4.2.1. Viewing Results of a Patient´s Analysis ........................................................................ 33
4.2.2. Viewing QC Results (QC Material/Electronic)............................................................... 35
4.2.3. Searching Results.......................................................................................................... 37
4.2.4. Printing Results.............................................................................................................. 39
4.2.5. Printing analysis results by analytes.............................................................................. 41
4.2.6. Transferring Results ...................................................................................................... 44
4.2.7. Deleting Results............................................................................................................. 45
4.3. Quality Control....................................................................................................................... 47
4.3.1. Starting Quality Control ................................................................................................. 47

_________________________________________________________________________________
Vers.: 20220216_ENG 4
4.4. Analyzer Settings –General Operator Settings .................................................................... 50
4.4.1. Display Settings............................................................................................................. 52
4.4.2. Calibration (Touch Screen Calibration) ......................................................................... 52
4.4.3. LCD Brightness.............................................................................................................. 53
4.4.4. Screensaver Settings .................................................................................................... 53
4.4.5. LCD Off Settings............................................................................................................ 55
4.4.6. Volume Settings............................................................................................................. 55
4.5. Setting the Password............................................................................................................. 56
4.6. Print Settings ......................................................................................................................... 57
4.7. Barcode Settings ................................................................................................................... 59
4.8. Language Settings................................................................................................................. 60
4.9. Self-Test ................................................................................................................................ 61
4.10. Analyzer Settings –Administrator Settings ........................................................................... 64
4.11. Analysis Settings ................................................................................................................... 65
4.11.1. Unit Settings .................................................................................................................. 65
4.11.2. Change Order................................................................................................................ 66
4.11.3. Reference Range Settings ............................................................................................ 68
4.11.4. Registering Species....................................................................................................... 70
4.11.5. Deleting Species............................................................................................................ 71
4.12. QC Material............................................................................................................................ 72
4.12.1. Registering QC Material ................................................................................................ 72
4.12.2. Changing QC Material................................................................................................... 76
4.12.3. Deleting QC Material ..................................................................................................... 79
4.12.4. Importing QC Material ................................................................................................... 80
4.13.Lock Settings......................................................................................................................... 83
4.13.1. Locking Quality Control ................................................................................................. 83
4.13.2. Setting the Lock............................................................................................................. 84
4.13.3. Setting an Operator ID................................................................................................... 85
4.13.4. Creating an Operator ID ................................................................................................ 86
4.13.5. Editing an Operator ID................................................................................................... 86
4.13.6. Deleting an Operator ID................................................................................................. 87
4.13.7. Exporting Operator IDs.................................................................................................. 88
4.13.8. Importing Operator IDs.................................................................................................. 90
4.14. Network Settings ................................................................................................................... 93
4.14.1. Connecting to a Network ............................................................................................... 93
4.14.2. Setting Network Connections........................................................................................ 95

_________________________________________________________________________________
Vers.: 20220216_ENG 5
4.14.3. Setting EMR/Mobile....................................................................................................... 97
4.14.4. Setting Mobile Support .................................................................................................. 98
4.15. Setting Time........................................................................................................................... 99
4.16. Changing Time Format........................................................................................................ 100
4.17. System Settings................................................................................................................... 101
4.18. System Reset ...................................................................................................................... 102
4.19. USB Backup ........................................................................................................................ 103
4.20. Export Errors........................................................................................................................ 105
4.21. System Update.................................................................................................................... 107
4.22. License Notification ............................................................................................................. 108
4.23. Turning Power Off ............................................................................................................... 110
5. Maintenance................................................................................................................................ 111
5.1. Daily Maintenance............................................................................................................... 111
5.1.1. Care Instructions for Analyzer ..................................................................................... 111
5.1.2. Plunger Pad Maintenance ........................................................................................... 111
5.1.3. Camera and LED Window Maintenance ..................................................................... 112
5.1.4. Cartridge Inlet Maintenance ........................................................................................ 112
5.2. Maintenance for Extended Storage..................................................................................... 113
6. Troubleshooting......................................................................................................................... 114
6.1. Troubleshooting................................................................................................................... 114
6.1.1. Check Before Requesting Repair................................................................................ 114
6.1.2. Restoring Factory Settings .......................................................................................... 114
6.1.3. Well Contamination Cleaning Guide For Dust Removal (Error Code: 405007A)........ 114
6.2. Error List.............................................................................................................................. 116
7. Other Information....................................................................................................................... 128
7.1. Quality Control Policy .......................................................................................................... 128
7.1.1. Westgard Multi-rule Technique.................................................................................... 128
7.2. System Information.............................................................................................................. 128
7.3. Accessories (sold separately) Information .......................................................................... 129
7.4. Other Information................................................................................................................. 130
7.5. Warranty.............................................................................................................................. 130
7.6. Address and Information ..................................................................................................... 130

_________________________________________________________________________________
Vers.: 20220216_ENG 6
Safety Warnings and Cautions
Follow the safety warnings and cautions in this manual for safe and appropriate use of the analyzer
and its components. Repairs and maintenance work not discussed in this User Manual are to be
performed by a designated Element DC service provider. Any attempt to repair the product by the user
may result in injury. Do not use the product in an area with containing combustible gas or high levels
of contamination. Malfunctions and damage caused by any use other than specified in the User
Manual are excluded from the manufacturer’s warranty. If the equipment is used in a manner not
specified by the manufacturer, the protection provided by the equipment may be impaired.
1.1. User´s Manual and Labeled Symbols
Symbol
Explanation
Biohazard. A specimen as well as a used cartridge is potentially hazardous.
Handle with care.
Caution. To use this product safely, all safety precautions and cautions listed
in this manual must be followed.
Consult instruction for use
Temperature Limitation/Allowed Temperature Range Shows temperature
limit for storage or transport
Fragile/Fragile contents; handle with care
Keep dry
This direction up
Loading Unit/Avoid stacking more than the marked number of units
Serial number
Manufacturer

_________________________________________________________________________________
Vers.: 20220216_ENG 7
USB port
CE Mark
European Authorized Representative
Catalog number
Ethernet port
Power adaptor connector
Direct current
Power On
Power Off
Power button
This symbol indicates that the European Directive on Waste of Electrical and
Electronic Equipment (WEEE) must be adhered to and the device must not
be disposed of as unsorted municipal waste, but must be collected
separately.
Please contact an authorized representative of the manufacturer or an
authorized waste management company for information concerning the
decommissioning of your equipment.
Li/Pb/Cd/Hg
This separate collection symbol is affixed to a battery or its packing, to
advise that the battery must be recycled or disposed of in accordance with
local or country laws. The letters below the symbol indicate whether the
battery contains certain elements (Li=Lithium, Pb=Lead, Cd=Cadmium,
Hg=Mercury). All batteries removed from the equipment must be properly
recycled or disposed of.
Please contact an authorized representative of the manufacturer or an
authorized waste management company for information concerning the
decommissioning of your equipment.

_________________________________________________________________________________
Vers.: 20220216_ENG 8
1.2. Cautions for System Installation
–Install the analyzerin a secure location. Damage to the instrument orpersonal injury may
result if the analyzer is dropped.
–Use only the AC adaptors and powercables designated forthe instrument.
–Use regularvoltage. Use of incorrect voltage maycause damage to the instrument and increase
the risk of fire. Be sure to use the appropriate voltage (100 –240V).
–Do not place objects on top of the analyzer. This may cause the analyzer to malfunction and
falling objects may result in personal injury or damage to the analyzer.
–Maintain at least 15 cm of empty space between the wall and the analyzer for safety.The
product’s internal temperature may rise which could result in injury if touched.
–Do not use damaged power cables which may cause electric shock orfire.
–Do not disassemble, repair, or modify the product.
–Do not block theventilation intake at the bottom part of analyzerorput any- thing into the
ventilation intake. This maydamage internal parts and increase the chance of fire or electric
shock.
–Do not touch the power plug with wet hands. Keep the installation area dry.
–Connect the power cord to a groundedwall outlet. Failing to do so may result in electric shock
orinjury.
–Place the power supply plug within easy access. If instrument problems occur, turn the power
off completelyby unplugging the powersupply plug. The power button on the instrument does
not completelyturn the power supply off.
–Install the analyzer on a flatsurface.
–Indoor use
–Main supply voltage fluctuation: ±10%
–Overvoltage Category Ⅱ
–Pollution degree 2

_________________________________________________________________________________
Vers.: 20220216_ENG 9
1.3. Cautions for Moving the System
–Dropping the analyzerwhile moving orcarrying it may cause damage to the instrument.
–Avoid impact at all times when moving theanalyzer.
–When transporting the analyzer, use the shock absorber packaging.
First, turn off the power and disconnect the AC adaptor from the analyzer. Place one hand on the
handle at the rear of the instrument (marked by an arrow in the figure below) and support the unit
by placing the otherhand on the bottom surface of the instrument.
1.4. Cautions Before Use
–Check fordust or other impurities on a regularbasis.
–Always install the analyzer in a well-ventilated, clean, and dry area.
–Keep the analyzerawayfrom heat-emitting products (such as heaters),which may cause
deformation of the instrument, fire, oradverselyinfluence analysis results.

_________________________________________________________________________________
Vers.: 20220216_ENG 10
1.5. Cautions During Use
–This analyzer is foruse by experienced medical personnel, such as veterinarian.
–Avoid any outerimpact when analyzing blood samples.
–Do not open the covers while an analysis is being performed. The analysis will automatically
stop if the cover is opened.
–Do not place liquids near theinstrument.
If the analyzergets wet, unplug the instrument from the power outlet and contact product local
distributorforservice advice. Do not place the analyzerin an area contaminated with gas.
–Weargloves at all times to prevent the possibility of infection.
–Do not move the analyzer in the middle of an analysis.
–Always use designated power cables and AC adaptors. Do not unplug the instrument in the
middle of ananalysis.
–Insert cartridges correctly (top sideup).
–If the analyzermalfunctions, do not disassemble the instrument. Contact your dealer or Element
DC Technical Support.
–If the analyzerstops working forany reason (i.e. powerfailure), discard the used cartridge and
repeat the analysis with a new cartridge.
–Make sure that the QR codes on the cartridges have not been erased. Erased QR codes may
result in an abnormalanalysis.
–Ifyou wish to stop the analysis in progress without turning the analyzeroff, press the Cancel
button. After stopping an analysis in progress, throw away the used cartridge and replace it
with a newone.
–Operating temperature of the analyzeris 15 –32°C; the errorcode will appear when the
temperature is beyond the operating range.
–Disconnecting the Wi-Fi USB dongle while the analyzeris operating may result in a malfunction.
–Use only certified Wi-Fi USB dongle by country.
–Open and close the coverslowlyby holding the center. Otherwise, internal parts may be damaged
or noise can occur.

_________________________________________________________________________________
Vers.: 20220216_ENG 11
1.6. Precautions for Preparing Blood Samples
–You can use either plasma orserum forthe specimen.
–Referto the UserManual forthe amount of sample required.
–If more than the recommended amount of blood sample is inserted into the cartridge,
the analyzermay become contaminated ormay not work properly. Use only the amount
of clinical material stated in the cartridge manual.
–Start analysis immediately when the sample into the cartridge is injected.
1.7. Precautions for Storage and Maintenance After Use
–Do not store the analyzer in humid areas orareas influenced by temperature, humidity,
orwind.
–Store the analyzer on a flat surface and keep it awayfrom sources of vibration or impact.
–Do not store the analyzer in the same place as chemicals or gas.
–Operating conditions and temperature:15 –32°C, Humidity: 0 –85%
–Storage conditions and temperature: -20 –40°C, Humidity: 0 –85%
–If blood residues from a specimen orany contaminants are found in the cartridge inlet or on
the interior or exterior of the analyzer, remove the contaminant using a soft cloth dampened
with 30% isopropyl alcohol. Always use gloves when removing contaminants. Do not use
highly corrosive agents such as benzene or acetone. These agents may damage the
analyzer.
–Followall precautions and conditions forusing and storing the analyzeras specified in this
manual. Follow all precautions when moving the analyzer.
–A specimen may be contaminated with pathogens orviruses that cause infec- tious
disease such as Hepatitis B. All specimens must be considered and handled as
potential biohazards.
–Discard cartridges properly afteruse. Referto local Medical Waste Treatment Laws.

_________________________________________________________________________________
Vers.: 20220216_ENG 12
1.8. EMC (Electromagnetic Compatibility) Information
–Do not use any wireless devices, including cellular phones, near the system. All wireless
devices, whether they comply with the EMC standard or not, may emit electromagnetic
interferences and cause the system to malfunction when they are used nearby.
–If you do not use the designated cables and accessories, they may negatively affect the
performance of EMC.
–Do not use or put the analyzer near or on another device.

_________________________________________________________________________________
Vers.: 20220216_ENG 13
Introduction
–Automates processing for fast, convenient, and accurateanalysis.
–Provides a convenient UI (UserInterface)with minimal user interaction.
–Convenient maintenance
–Small analyzer size maximizes spaceefficiency.
–Self-Test function minimizes maintenance costs.
–Convenient mobile analysis
–Weight of approximately 2 kg makes it highlyportable.
–Analysis time
–Depending on the type of cartridge and the sample condition, analysis time might be varied.
–Additional time may be required with a complete inspection.
Product Code
Panel Name
Analysis time
103446
Pre-Surgical 10V
~ 7 min
103448
Liver 11V
~ 10 min
103451
Kidney 8V
~ 7 min
103449
Electrolyte 4V
~ 7 min
104683
Liver Monitoring 3V
~ 10 min
104682
Kidney Monitoring 4V
~ 7 min
105165
Large Animal 14V
~ 10 min
105453
Diabetes 4V
~ 7 min
105656
Comprehensive Plus 17V
~ 10 min
105655
Bovine 5V
~ 10 min
105657
Equine 16V
~ 10 min
2.1. Intended Use
The Element DC is intended for "Veterinary Use Only" and the in vitro quantitative determination of
clinical chemistry analytes in plasma or serum.
Use only the Element DC reagent cartridge with the Element DC analyzer. Please refer to the cartridge
package insert for available specimen and detailed information.
If the Element DC analyzer is used in anyway otherthan described in this manual, the analyzer

_________________________________________________________________________________
Vers.: 20220216_ENG 14
maynot operate as intended, mayproduce inaccurate orno results, and may pose a safety
hazard.
2.2. Analysis Principle
The spectrophotometer is used to measure the absorbance of reacted samples in the detection
portion of the cartridge. The analyzer's photometric detector detects the photometric changes caused
by absorbance changes.
When the specimen is injected into the cartridge's specimen inlet, the specimen moves to the
detection part of the cartridge (covered with reagents), through a micro-fluidic structure. There it reacts
with the reagents and changes absorbance. The photometric detector measures the changes in
absorbance after a specified time period, depending on the analytes, and calculates the analysis
results. Every step of the analysis process takes place within the analyzer, and the analyzer maintains
a constant temperature during an analysis to create the reaction.
2.3. What´s in the Box
Box Contents
USB Cable
Data Manager S/W
User Manual
Printer Paper
Plunger Pad

_________________________________________________________________________________
Vers.: 20220216_ENG 15
–Please check the contents of the box after purchase.
–If any of the contents are missing or damaged, do not use the analyzer. Contact
your retailer for a replacement.
–You need to centrifuge the sample for five minutes at the speed of 2500rpm to 3000rpm to
achieve blood separation.
The actual product may slightly vary from the image.
Sold Seperately
Sold Separately
Cartridge
Control Serum
Printer Paper
Barcode Scanner
Plunger Pad
Wi-Fi USB Dongle
Tip

_________________________________________________________________________________
Vers.: 20220216_ENG 16
2.4. Introduction of Features
Front
1. Body
2. LCD
3. Front Cover: Slide-type
4. Powerbutton
5. Printer
6. Printer Feedbutton
Front Cover Open
1. Plunger Pad
2. Cartridge Inlet
3. Camera and LED
3
2
1
1
2
3
4
5
6

_________________________________________________________________________________
Vers.: 20220216_ENG 17
Back
1. Powerswitch
2. Powerconnector
3. Ethernet port
4. USB port (Host)
5. USB port (Slave)
1
2
3
5
4

_________________________________________________________________________________
Vers.: 20220216_ENG 18
3.0. Installation
3.1. Installation
1. Carefully remove the analyzer from the packaging and check for any damage that may have
occurred during transport. If it is damaged, contact yourcourieror retailer immediately. Check
and make sure that the contents of the box match the contents described in the User Manual.
Contact your retailer if any component is missing.
2. Place the analyzeron a flat surface nearanAC poweroutlet. Connect the AC adaptor
and the powercable.
3. Connect the power cable to the AC poweroutlet. This analyzer uses freevoltage (100 –
240V).
4. Connect the AC adaptorto the powerconnector, located at the back of the analyzer.
5. LAN and USB cables are used forPC software (Data Manager) connections.
3.2. Replacing Printer Paper
1. Pull the leverupwith your hand and open the printer paper compartment.
2. Remove the empty roll. Unroll a new roll of printerpaperso that the loose end comes up from
underneath the roll towards thefront.
3. Place the new roll inside the paper holder of the printer. Hold the loose end of the paper with your
hand. Make sure that the loose end comes out of the front of the printer. An error may result if the
printer paper isn’t compatible with the printer.

_________________________________________________________________________________
Vers.: 20220216_ENG 19
4. Close the cover and check that the paper is located between the cover and the front of the
printer.

_________________________________________________________________________________
Vers.: 20220216_ENG 20
3.3. Connecting Wi-Fi USB Dongle
1. To connect to a wireless network, purchase a Wi-Fi USB dongle separatelyand connect it
to the USB port at the rearside of the analyzer.
2. Connect the dongle before turning on the analyzer and disconnect it after turning off the analyzer.
3. For more information on how to configure the analyzer, refer to the analyzer's network settings.
Check the following when connecting to a PC.
1. Disable firewall on Windows or vaccine programs
2. When using a router, make sure to use only one
This manual suits for next models
2
Table of contents
Other scil Measuring Instrument manuals
Popular Measuring Instrument manuals by other brands

Hanna Instruments
Hanna Instruments HI 96753C instruction manual

Opsis
Opsis LD500 Installation & user guide

Ashcroft
Ashcroft T5500 Installation and maintenance instruction

gefran
gefran KH-SIL2 Series Manual of Electrical Installation

Gossen MetraWatt
Gossen MetraWatt PROFITEST MBASE MTECH operating instructions

Anritsu
Anritsu CMA50 Specifications