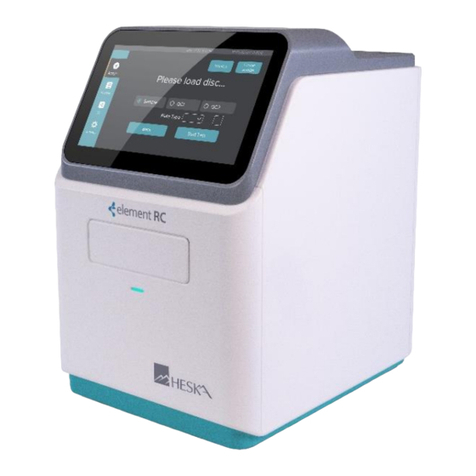
scil Element HT5+ User manual

Vers.: 20230710ENG
Page 1
Element HT5+
User Manual

Vers.: 20230710ENG
Page 2
Table of content
1 Safety information....................................................................................................... 6
1.1 Labels and symbols on the system.......................................................................... 6
1.2 General safety messages.......................................................................................10
2 Understanding the analyzer...........................................................................................12
2.1 Intended use ..........................................................................................................12
2.2 Blood sample parameters, histograms and scattergrams.......................................12
2.2.1 Parameters...........................................................................................................12
2.2.2 Histograms......................................................................................................13
2.2.3 Scattergrams...................................................................................................13
2.3 Product description.................................................................................................13
2.4 Overview of the software interface .........................................................................17
2.5 Reagents, controls and calibrators.........................................................................18
2.5.1 Reagents.........................................................................................................19
2.5.2 Controls and calibrators ..................................................................................19
3 Understanding the system principles.............................................................................20
3.1 Introduction............................................................................................................20
3.2 WBC measurement by the SF Cube Cell Analysis technology...............................20
3.3 HGB measurement.................................................................................................21
3.3.1 Colorimetric method........................................................................................21
3.3.2 HGB................................................................................................................21
3.4 RBC, PLT and RET measurement .........................................................................21
3.4.1 RBC and PLT: Sheath flow impedance method...............................................21
3.4.2 PLT and RET: SF Cube Cell Analysis technology...........................................22
3.4.3 Derivation of RBC - related parameters...........................................................22
3.4.4 Derivation of PLT - related parameters............................................................23
3.4.5 Derivation of RET –related parameters ..........................................................24
4 Installing the analyzer....................................................................................................24
4.1 Introduction............................................................................................................24
4.2 Installation requirements ........................................................................................24
4.2.1 Space requirements........................................................................................24
4.2.2 Power requirements........................................................................................25
4.2.3 General environment.......................................................................................25
4.2.4 Moving and installing the analyzer...................................................................26
4.3 Connecting the analyzer system.............................................................................26

Vers.: 20230710ENG
Page 3
4.3.1 Connection of the reagents.................................................................................26
4.3.2 Connection of the peripherals.............................................................................28
5 Operating the analyzer..................................................................................................29
5.1 Introduction............................................................................................................29
5.2 Initial checks...........................................................................................................30
5.3 Startup and login....................................................................................................30
5.4 Enter/exit from standby ..........................................................................................31
5.5 Sample collection and handling..............................................................................31
5.5.1 Sample preparation.........................................................................................32
5.5.2 Sample analysis..............................................................................................33
5.5.3 Processing analysis results.............................................................................34
5.6 Shutdown...............................................................................................................35
6 Reviewing sample results..............................................................................................36
6.1 Introduction............................................................................................................36
6.2 Browsing in the table review mode.........................................................................36
6.2.1 Table review....................................................................................................36
6.2.2 Graph review...................................................................................................37
6.2.3 Deleting a result..............................................................................................37
6.2.4 Editing information ..........................................................................................37
6.2.5 Searching a result...........................................................................................38
6.2.6 Calculating CV values.....................................................................................39
6.2.7 Printing results ................................................................................................39
6.2.8 Transmitting results (requires connection to LIS).............................................39
6.2.9 Exporting results (for administrators only) .......................................................39
6.2.10 Flags of analysis results..................................................................................40
7 Using the QC program...................................................................................................41
7.1 Introduction............................................................................................................41
7.2 QC program ...........................................................................................................42
7.2.1 Editing settings (for administrators only)..........................................................42
7.2.2 QC run ............................................................................................................42
7.2.3 Reviewing the results......................................................................................43
8 Calibrating the analyzer.................................................................................................44
8.1 Introduction............................................................................................................44
8.2 When to calibrate...................................................................................................44

Vers.: 20230710ENG
Page 4
8.3 How to calibrate .....................................................................................................45
8.3.1 Preparing the analyzer....................................................................................45
8.3.2 Calibration with calibrator................................................................................45
8.3.3 Verifying calibration factors .............................................................................45
8.3.4 Calibration history (for administrator only).......................................................45
9 Customizing the analyzer software................................................................................46
9.1 Introduction ...................................................................................................................46
9.2 Setting up the analyzer..................................................................................................46
9.2.1 System setup ..................................................................................................46
9.2.2 User management...........................................................................................47
9.2.3 Manage animal type........................................................................................47
9.2.4 Auxiliary setup.................................................................................................47
9.2.5 Parameter setting (for administrators only)......................................................47
9.2.6 Maintenance setup (for administrators only)....................................................48
9.2.7 Reagent setup.................................................................................................48
9.2.8 Gain setup (for administrators only).................................................................48
9.2.9 Auto startup/shutdown time (for administrators only) ..........................................48
10 Servicing the analyzer...................................................................................................50
10.1 Introduction............................................................................................................50
10.2 Reagent management............................................................................................50
10.3 Maintaining the analyzer ........................................................................................54
10.4 Touchscreen calibration.........................................................................................56
10.5 Viewing and exporting logs.....................................................................................56
11 Troubleshooting the analyzer ........................................................................................57
11.1 Introduction............................................................................................................57
11.2 Error information and handling ...............................................................................57
12 Appendices ...................................................................................................................63
A. Specifications...............................................................................................................63
A.1 Classification..............................................................................................................63
A.2 Reagents....................................................................................................................63
A.3 Application tubes........................................................................................................63
B. Sampling features.........................................................................................................63
B.1 Sample volumes required for each analysis................................................................63
B.2 Throughput.................................................................................................................63

Vers.: 20230710ENG
Page 5
C. Performance specifications ..........................................................................................64
C.1 Display range.............................................................................................................64
C.2 Background/blank count.............................................................................................64
C.3 Linearity Range..........................................................................................................64
C.4 Reproducibility............................................................................................................65
C.5 Carryover ...................................................................................................................66
D. Keyboard (optional)......................................................................................................66
E. External Barcode Scanner (optional)............................................................................66
F. Printer (optional)...........................................................................................................66
G. Interfaces.....................................................................................................................66
H. Power Supply...............................................................................................................66
I. Fuse...............................................................................................................................66
J. EMC description............................................................................................................67
K. Noise level....................................................................................................................67
L. Operating environment..................................................................................................67
M. Storage environment....................................................................................................67
N. Running environment...................................................................................................67
O. Dimensions and weight................................................................................................68
P. Contra-indications.........................................................................................................68
Q. Safety classification......................................................................................................68
Intellectual Property Statement.............................................................................................69

Vers.: 20230710ENG
Page 6
1 Safety information
1.1 Labels and symbols on the system
The following symbols are used to indicate danger and alert information.
Symbols
Description
Biological hazard
General warning/caution sign
The statement is alerting you to an operating hazard that can
cause personnel injury (warning) or to a possibility of analyzer
damage or unreliable analysis results (caution).
Laser beam
Warning
The sample probe is sharp and potentially biohazardous. Exercise
caution when working around it.
Protective ground
On (power)
Off (power)
USB connection
Computer network
Alternate current
Serial number
Date of manufacture
Temperature limit
Humidity limitation
Atmospheric pressure limitation

Vers.: 20230710ENG
Page 7
Symbols
Description
Fragile, handle with care
This way up
Keep dry
Do not roll
Stacking limit by number
The use of this symbol indicates that waste electrical and electronic
equipment must not be disposed of as unsorted municipal waste
and must be collected separately.
CE mark

Vers.: 20230710ENG
Page 8
No
Description
1
Biological risk
2
The sample prob is sharp and potentially
biohazardous. Exercise caution when
working around it.
No
Description
1
Warning
Connect only to a properly earth grounded
outlet.
To avoid electrical shock, disconnect power
prior to maintenance.
2
Biological risk

Vers.: 20230710ENG
Page 9
No
Description
1
Warning
To avoid personal injury do not put your hand
under the syringe or inside the slot.
2
Warning
To avoid personal injury do not put your hand
under the pipette or inside the slot.

Vers.: 20230710ENG
Page 10
No
Description
1
Class 3b laser radiation when open and
internal locks defeated.
Avoid exposure to the beam.
2
Laser radiation
Avoid exposure to the beam.
Class 3B laser product
Peak power: 10mW
Wavelength: 635 nm
1.2 General safety messages
BIOHAZARD
•All the samples, controls, calibrators, reagents, waste and areas contacted by them are
potentially biohazardous. Wear proper personal protective equipment (e.g., gloves, lab
coat, etc.) and follow safe laboratory procedures when handling them and the contacted
areas in the laboratory.
•If the analyzer leaks, the leak liquid is potentially biohazardous.

Vers.: 20230710ENG
Page 11
WARNING
•Please check the firmness of all the doors and covers before running the analyzer.
•Make sure all the safety measurements are adopted. Disabling any safety device or
sensor is prohibited.
•Please take action to address any alarm and problem indication immediately.
•Do not touch the moving parts.
•Contact scil animal care company or scil-authorized distributors if any damaged part is
found.
•Be careful when opening/closing and removing/installing the doors, covers and boards of
the analyzer.
•Discard the analyzer according to government regulations.
•Do not contact the patients’ sample blood directly.
•Be sure to dispose of reagents, waste, samples, consumables, etc., according to local
regulations.
•The reagents are irritating to eyes, skin and airway. Wear proper personal protective
equipment (e.g., gloves, lab coat, etc.) and follow safe laboratory procedures when
handling them and the contacted areas in the laboratory.
•If reagents accidentally spill on your skin or in your eyes, rinse the area with ample
amount of clean water; seek medical attention immediately.
•Keep your clothes, hair and hands away from moving parts to avoid injury.
•The sample probetip is sharp and may contain biohazardousmaterials. Exercise caution
to avoid contact with the probe when working around it.
•Before maintaining or servicing the analyzer, its surface or the sample probe and other
parts concerned must be cleaned and sterilized (it is recommended that the parts be
wiped with alcohol of which the concentration is 75%) to avoid biohazards or other
damages.
CAUTION
•Please use the analyzer strictly according to this manual.
•Please adopt proper measurements to prevent the reagents from being contaminated.
NOTE:
•Use the reagents specified by the manufacturer only. Store and use the reagents as
instructed by instructions for use of the reagents.
•Check if the reagent tubes are properly connected before using the analyzer.
•Class 3B laser:
oOptical density: OD4+
oRadiation exposure level: 56.77 mW/cm2
oMax. output: 10 mW
oWavelength: 625 nm
oStandard: IEC 60825-1
oPublication date: 2007.03
oUse goggles when necessary

Vers.: 20230710ENG
Page 12
2 Understanding the analyzer
2.1 Intended use
This analyser provides complete blood count, leukocytes differential, hemoglobin
concentration measurement and reticulocytes measurement for animal blood samples.
2.2 Blood sample parameters, histograms and scattergrams
The analyzer provides 33 parameters measurement, 3 histograms and 4 scattergrams.
2.2.1 Parameters
Parameter group
Name
Abbreviation
WBC group (11)
White Blood Cells count
WBC
Basophils count
Bas#
Basophils percentage
Bas%
Neutrophils count
Neu#
Neutrophils percentage
Neu%
Eosinophils count
Eos#
Eosinophils percentage
Eos%
Lymphocytes count
Lym
Lymphocytes percentage
Lym%
Monocytes count
Mon#
Monocytes percentage
Mon%
RBC group (8)
Red Blood Cells count
RBC
Haemoglobin concentration
HGB
Mean Corpuscular Volume
MCV
Mean Corpuscular Hemoglobin
MCH
Mean Corpuscular Hemoglobin Concentration
MCHC
Red Blood Cell Distribution Width - Coefficient of
Variation
RDW-CV
Red Blood Cell Distribution Width - Standard Deviation
RDW-SV
Haematocrit
HCT
PLT group (7)
Platelet count
PLT
Mean Platelet Volume
MPV
Platelet Distribution Width
PDW
Plateletcrit
PCT
Platelet-large cell ratio
P-LCR
Platelet-large cell count
P-LCC
Immature Platelet Fraction
IPF
RET group (7)
Reticulocyte count
RET#
Reticulocyte percentage
RET%
Reticulocyte Hemoglobin Expression
RHE
Immature Reticulocyte Fraction
IFR
Low Fluorescent Ratio
LFR
Middle Fluorescent Ratio
MFR
High Fluorescent Ratio
HFR

Vers.: 20230710ENG
Page 13
2.2.2 Histograms
Name
Abbreviation
White Blood Cells Histogram
WBC Histogram
Red Blood Cells Histogram
RBC Histogram
Platelets Histogram
PLT Histogram
2.2.3 Scattergrams
Name
Abbreviation
Differential Scattergram
DIFF Scattergram
Reticulocytes Scattergram
RET Scattergram
Optical Platelet Scattergram
PLT-O Scattergram
Reticulocytes –Extension Scattergram
RET-EXT Scattergram
2.3 Product description
Element HT5+ Hematology Analyzer includes the Sample Processing Unit (SPU), Data
Managing Unit (DMU), Result Output Unit (ROU) and accessories. The appearance of the
product is featured below.
WARNING
Ensure reagent door is closed before operating the analyzer.

Vers.: 20230710ENG
Page 14
No.
Name
Description
1
Status indicator
Ready: the indicator stays in green.
Running: the indicator flickers in green.
Sample probe piercing: the indicator flickers fast.
Error: the indicator stays in red.
Standby: the indicator stays in orange
Shutdown: the indicator is off.
2
Touchscreen
/
3
Sample probe
/
4
Aspirate key
/

Vers.: 20230710ENG
Page 15
No
Name
1
USB port (protocol 3.0)
2
USB prot (protocol 2.0)
3
Network interface
4
V-6 DR DILUENT inlet
5
V-6 LD LYSE inlet
6
V-6 LH LYSE inlet
7
V-6 Solution Reagent inlet
8
V-6 DS DILUENT inlet
9
Waste outlet
10
Waste sensor
11
Power inlet
12
Power switch

Vers.: 20230710ENG
Page 16
No
Name
1
Dye compartment door
2
Standby button
No
Name
1
USB port (protocol 2.0)
2
Standby button
CAUTION
Do not turn on/off the switch repeatedly in a short time to avoid damaging the analyzer.
USB/Network port:
The USB port and network port are on the back of the analyzer. They can be used to connect
a printer, etc. and to transmit data.
Contact scil animal care company or scil-authorized distributors for a list of supported printer
models.

Vers.: 20230710ENG
Page 17
2.4 Overview of the software interface
1. Menu
Tap the “Menu” button at the top left of the software screen to display the systemmenu.
2. Utility button area
Name
Icon
Count
Table Review

Vers.: 20230710ENG
Page 18
QC
Reagent Setup
Diluent
Print
3. Operation area
This area displays contents of the screen.
For example, on the “Count” screen, the area displays function buttons related to
sample analysis as well as the sample analysis results.
4. Other information
This area displays the current system time.
When error occurs, the area displays the error message.
When logged in as an administrator, the area displays “Administrator”.
5. Auxiliary information area
This area displays auxiliary information of the current screen.
For example, on the “Count” screen, the area displays the ID and analysis mode of
the next sample; on the “Table Review” or “Graph Review” screen, the area displays
position of the current sample and total number of samples.
2.5 Reagents, controls and calibrators
As the analyzer, reagents, controls and calibrators are components of a system, performance
of the system depends on the combined integrity of all components. You must only use the scil
animal care company-specified reagents, controls, and calibrators which are formulated
specifically for the fluidic system of your analyzer in order to provide optimal system
performance. Do not use the analyzer with reagents, controls, and calibrators from multiple
suppliers. In such case, the analyzer may not meet the performance specified in this manual
and may provide unreliable results.

Vers.: 20230710ENG
Page 19
All the reagents, controls, and calibrators mentioned in this manual refer to the reagents,
controls and calibrators specifically formulated for this analyzer. You must buy those reagents,
controls, and calibrators from scil animal care company-authorized distributors.
When you need to buy reagents and consumables, please contact the commercial service
department.
2.5.1 Reagents
All reagents used with the analyzer are special supporting reagents for scil animal care
company equipment. Please refer to Appendice A2: Reagents to obtain more details on
reagents.
Use for any other purposes is prohibited.
Please use and store each type of reagents correctly according to their instructions.
2.5.2 Controls and calibrators
The controls are commercially prepared whole-blood products used to verify that the analyzer
is functioning properly. Please refer to Appendice A2: Reagents to obtain more details on
controls and calibrators.
They are available in low, normal, and high levels. Regular controls in accordance to the local
quality control guidelines verifies the operation of the analyzer and ensures reliable results are
obtained. The calibrators are commercially prepared whole-blood products used to calibrate
the analyzer. Store and use the controls and calibrators as instructed.
All references related to controls and calibrators in this manual refer to the controls and
calibrators specifically formulated for this analyzer provided by scil animal care company.

Vers.: 20230710ENG
Page 20
3 Understanding the system principles
3.1 Introduction
The measurement methods used in this analyzer are: sheath flow impedance method for
determining the RBC and PLT data; colorimetric method for determining HGB concentration
and SF Cube Cell Analysis technology (laser flow cytometry and fluorescent staining) for
determining the WBC differential data and the RET data. Other parameter results are obtained
via calculation.
3.2 WBC measurement by the SF Cube Cell Analysis technology
In normal peripheral blood, WBC can be classified into five categories: lymphocytes,
monocytes, neutrophils, eosinophils and basophils. However, under the influence of certain
diseases, the peripheral blood may contain various abnormal cells apart from the five
subpopulations of normal cells, such as atypical lymphocytes, immature cells, etc. Most of
these abnormal cells are different kinds of immature cells in the cell generation process.
Nevertheless, they have in common a great deal of nucleic acid (DNA and RNA), the content
of which decreases as the cell gets more mature. Therefore, normal cells and immature cells
can be differentiated by detecting the content of nucleic acid in the cells by using a fluorescent
staining and a laser beam: the SF Cube Cell Analysis technology.
Table of contents
Other scil Measuring Instrument manuals
Popular Measuring Instrument manuals by other brands

Hanna Instruments
Hanna Instruments HI 96753C instruction manual

Opsis
Opsis LD500 Installation & user guide

Ashcroft
Ashcroft T5500 Installation and maintenance instruction

gefran
gefran KH-SIL2 Series Manual of Electrical Installation

Gossen MetraWatt
Gossen MetraWatt PROFITEST MBASE MTECH operating instructions

Anritsu
Anritsu CMA50 Specifications