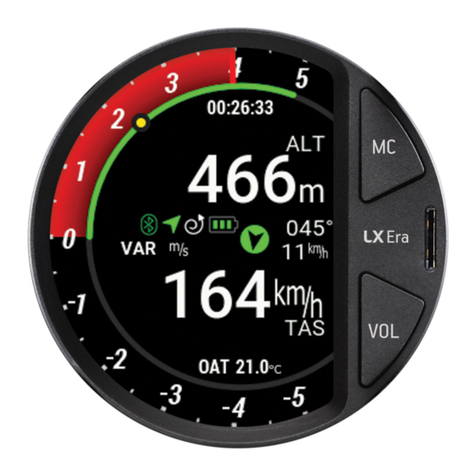
LX Navigation Era 57 User manual


Document Name:
LX Era 57/80 user’s manual
Version: 0.9H
Page 1 of 52
LX Era
User’s manual
(version 0.9H)
Refers to LX Era 57/80 FW version 0.9H
For standalone use and for use in an LX Zeus configuration.
Tkalska ulica 10
SI 3000 Celje
Tel.: 00 386 3 490 46 70
Fax.: 00 386 3 490 46 71
info@lxnavigation.si
www.lxnavigation.com

Document Name:
LX Era 57/80 user’s manual
Version: 0.9H
Page 2 of 52
CONTENTS
PART ONE –INTRODUCTION ...............................................................................................................................................4
1.1 Preamble .................................................................................................................................................................. 4
1.2 Introduction ............................................................................................................................................................. 5
1.3 Operation ................................................................................................................................................................. 7
PART TWO –INSTALLATION.................................................................................................................................................8
2.1 Mechanical installation.................................................................................................................................................... 8
2.2 Pneumatic connections ................................................................................................................................................... 8
2.3 Electrical installation........................................................................................................................................................ 9
2.4 External switch installation ........................................................................................................................................... 10
2.5 Installation options ........................................................................................................................................................ 11
Configurations...................................................................................................................................................................... 11
LX Era –OUDIE ................................................................................................................................................................. 11
LX Era –Flarm .................................................................................................................................................................. 11
LX Era –Flarm –OUDIE.................................................................................................................................................... 11
LX Era –Flarm –OUDIE –2nd seat –2nd OUDIE............................................................................................................... 12
Wirings for radio .............................................................................................................................................................. 13
2.6 Update procedure ......................................................................................................................................................... 14
2.7 Technical specifications................................................................................................................................................. 14
PART THREE –INTERFACE..................................................................................................................................................15
Front panel interface ........................................................................................................................................................... 15
PART FOUR –SOFTWARE...................................................................................................................................................18
4Main pages.................................................................................................................................................................. 18
4.1 Vario page .............................................................................................................................................................. 20
4.2 Thermal assistant page.......................................................................................................................................... 21
4.3 Flarm radar page.................................................................................................................................................... 22
Flarm select............................................................................................................................................................ 22
Flarm warning ........................................................................................................................................................ 23
4.4 TP navigation page................................................................................................................................................. 23
4.5 Airport navigation page......................................................................................................................................... 24
4.6 Task navigation page ............................................................................................................................................. 25
4.7 G-Force page.......................................................................................................................................................... 26
4.8 GPS info page ......................................................................................................................................................... 27
4.9 Logbook / statistic page......................................................................................................................................... 27
Logbook ............................................................................................................................................................. 27
4.10 Statistics ................................................................................................................................................................. 28
4.11 Setup....................................................................................................................................................................... 29
Pilot................................................................................................................................................................ 29
Vario/SC......................................................................................................................................................... 30

Document Name:
LX Era 57/80 user’s manual
Version: 0.9H
Page 3 of 52
Polar .............................................................................................................................................................. 31
Units .............................................................................................................................................................. 32
Indicators ...................................................................................................................................................... 33
Logger............................................................................................................................................................ 34
Warnings ....................................................................................................................................................... 34
Voice.............................................................................................................................................................. 35
Transfer ......................................................................................................................................................... 36
Inputs............................................................................................................................................................. 39
NMEA............................................................................................................................................................ 40
Pages ............................................................................................................................................................ 41
Password ....................................................................................................................................................... 41
Info ................................................................................................................................................................ 41
Shutdown ...................................................................................................................................................... 42
PART FIVE –CONNECTIVITY...............................................................................................................................................43
5Wi-Fi/Bluetooth module ............................................................................................................................................ 43
5.1 Pairing with PNA and Android devices ................................................................................................................. 43
5.2 Supported data transfers ...................................................................................................................................... 43
5.3 Usage...................................................................................................................................................................... 43
6User port..................................................................................................................................................................... 43
6.1 Supported data transfers ...................................................................................................................................... 44
7SD card ........................................................................................................................................................................ 44
Additional information ......................................................................................................................................................44
PART FIVE –FLYING WITH ERA ..........................................................................................................................................47
Flight preparation on ground .............................................................................................................................................. 47
Before take off ..................................................................................................................................................................... 47
During flight.......................................................................................................................................................................... 47
Set QNH............................................................................................................................................................................ 47
Wind calculation .............................................................................................................................................................. 47
Influence of wind in final glide........................................................................................................................................ 47
Event function.................................................................................................................................................................. 48
Task start .......................................................................................................................................................................... 48
After landing......................................................................................................................................................................... 48
Downloading flights ......................................................................................................................................................... 48
Revision history.................................................................................................................................................................49

Document Name:
LX Era 57/80 user’s manual
Version: 0.9H
Page 4 of 52
PART ONE – INTRODUCTION
1.1 Preamble
Why LX Navigation?
LX Navigation is one of the oldest glider navigation brands. Its founders started experimenting with glider
computers way back in the 70's and the Company has been working on improving your flight performance
ever since.
Throughout the last 40 years or so it has been working on instruments that most pilots will have used at
some time. In fact our equipment can be found in almost any gliding club!
Our equipment has always been ground-breaking.
Our motto?
Be the first. Be the best. Be different.
Why Era?
Because Era is the latest breakthrough in the world of electronic variometers. The 3.5’’ large transflective
LCD display will show you the way when flying tasks, cross-country flights, or just plain airfield soaring.
With the Wi-Fi/Bluetooth module inside, you are stepping into the age of connectivity. The Era of
connectivity, if you will.
Always know your position and heading, with clearly visible lift or sink, thanks to our gradient digital needle.
The ERA 80 is a miniature package that includes everything a glider pilot needs, from navigation, to statistics,
AHRS, G-meter, up to the very root of this device –the vario function. All this comes with a backup battery
and IGC certified logger. What more do you need?
Devices
We offer a wide range of instruments suitable for both club and competition soaring.
Our systems combine two components:
First, a glider computer (LX Zeus) which is used for calculating and displaying all of the key information used
by pilots. This glider computer is the brain of the operation.
The second part of the system is a variometer (Era, Helios, and Era). Its job is to gather the information
which the Zeus uses. The vario has pressure connections as well as the GPS antenna connection which is
required for IGC logs.
There is a wide variety of choice for varios and for LX Zeus display sizes.

Document Name:
LX Era 57/80 user’s manual
Version: 0.9H
Page 5 of 52
All our varios are standalone devices which can be used without a glider computer for displaying flight
parameters such as final glide information, Speed Command (SC) as well as basic navigation. Our varios also
have an internal battery which means that your IGC logs do not depend on your glider`s batteries.
System extensions (second seat unit, remote control (LX Joy), compass, NavBox, MOP, Flap sensor, AHRS ...)
are also possible. Everything is connected using a CAN bus (single cable for power and data). All connections
are plug and play, which means no specialist is required to install the system.
1.2 Introduction
The LX Era is an “all-in one” standalone speed-to-fly variometer, flight recorder, final glide calculator and
navigation system with an internal backup battery, audio warnings, vario beeps and voice messages.
The unit is capable of providing APT (airport), TP (turnpoint) and TSK (task) navigation on three dedicated
navigational pages. Navigation pages feature Navboxes showing bearing to point, track, distance and final
glide with airspace shown graphically, airports and turnpoints.
The vario is designed to fit a standard 80mm aviation cut-out hole. It is able to supply PDA/PNA units with 5
V/500 mA and 3.3 V/100 mA output on User output connector.
LX Era has built-in high precision digital sensors based on latest MEMS technology for altitude, vario, speed,
3-axis gyro and 3-axis accelerometer sensors. A minimum sampling rate of 100 Hz is applied to all sensors.
The digital needle can be assigned to show one of multiple parameters (vario, netto, g-force, speed command
etc.). By default, it is shows vario value.
As an integral part, it has a 3.5” sunshine readable transflective LCD display to show all user defined data
during flight. For accessing all system options, two rotary/push knobs are used. A voice module is also built in
for audio warnings.
A double seater installation is possible by installing an LX Era Repeater and connecting it to the system via a
CAN bus.
An integral IGC approved flight recorder with ENL level detector will record flight to internal solid-state
memory (8GB). All flights can be copied to an external SD card after flight.
For backup and safety reasons, it has an internal battery which will provide power to the Era for three to five
hours after the main power supply is disconnected. The integral charger will charge the backup battery when
external power supply is connected (12V).
LX Era features are:
- 3.5˝ transflective technology sunlight readable display
- Integrated G-meter (g-forces recorder)
- 3-axis gyroscope
- 3-axis accelerometers
- 50ch GPS receiver as an integral part of the system
- Completely new design using latest pressure transducers technology
- Extremely fast vario data acquisition
- Rotary knob with push function, for simple and effective handling
- Nearly unlimited memory space for flight recorder
- ENL (Environment Noise Level) sensor
- 5 user defined status inputs (SC, VP, gear, brakes and ballast)

Document Name:
LX Era 57/80 user’s manual
Version: 0.9H
Page 6 of 52
- OAT probe input (outside air temperature)
- Internal beeper (for Flarm warning)
- Flarm port (input of Flarm data)
- User port for PDA/PNA/Radio/transponder, supplies navigation and Flarm data to PNA/PDA
- Bluetooth interface
- Voice module as an integrated part of the system
- CAN Bus, for connection to LX Zeus or other LX devices.
- External SD Card interface, for firmware updates, flight downloads and TP/TSK/APT/Airspace
transfers
- Standard 80/57 mm size
- The unit can be used as stand-alone, or as a part of LX Zeus system
- Built-in rechargeable battery provides three to five hours of autonomy
- Internal battery (charged from the instrument power supply)
- Pre-loaded polar database
Functions:
- Variometer, TE compensation (TE probe or electronic compensation).
- Speed-to-fly function
- Final glide calculator based on GPS data (for TP and TSK)
- Complete TP/APT/TSK navigation with airspace information and warnings
- High level IGC approved flight recorder
- Flarm radar screen
- Thermal assistant screen
- System extensions: Second seat configuration, Remote control operation (LX Joy)
- Logbook
- Flight information with Barograph
- Multi pilot support
- Accurate wind calculation in straight flight and circling
- Voice alerts
- User warnings
The term "back-up mode" will be used in this manual to define the situation where main power is lost in
flight and the LX Era is used as part of the LX Zeus system. The LX Zeus will turn off, and the LX Era will use
its internal backup battery to continue working. All functions of the LX Era are operational in backup mode
so the pilot can safely navigate back to home or complete the task.
LX Era can be used in two different configurations:
- As a standalone: LX Era provides a vario navigation system and has all its options active. The unit
will turn on when the enter push/rotary knob is pressed.
- LX Zeus configuration: LX Era serves as the vario system controlled from LX Zeus. The unit will turn
on automatically when the main switch (Zeus) is turned on. Flarm radar settings and thermal
assistant settings are set on LX Era while all other settings are controlled by settings on the LX Zeus.
Some options are disabled on the LX Era (setup, task edit) but all options become active when
backup mode is detected.
Unit has the capability to be updated to any later FW release free of charge. (see: www.lxnavigation.si)
When used as a standalone system please refer to Setup/Transfer/Update to learn how to update the
system.
When used as part of a LX Zeus configuration, the LX Zeus will automatically update LX Era if required to
latest version, so no extra action is required.

Document Name:
LX Era 57/80 user’s manual
Version: 0.9H
Page 7 of 52
1.3 Operation
Switching the unit on
There are two different ways of turning the unit on.
Standalone units are turned on by pressing the lower push/rotary knob until the LX logo appears.
Varios used alongside a Zeus are turned on automatically when the main unit (the Zeus) is turned on.
The device name with serial number and software version information will follow after the logo appears. After
the boot procedure, the initial setup with pilot selection and elevation/QNH setup will be shown. If the device
is used with the LX Zeus, the initial setup screen does not appear, since the initial setup is done on the LX Zeus
unit.
Switching the unit off
When on the ground (in this situation the flight recorder will not be running), disconnecting the main power
supply will turn it off. LX Era will start to count down 3 seconds before it turns itself off. You can also turn the
unit off by going to the Setup page and scrolling down to Shut down. After selecting the shutdown option, you
will be asked to confirm. After the confirmation, the unit will perform a 3 second countdown and then turn
off.
In flight mode (in this situation the LX Era detects IAS and the flight recorder will be running) it will not switch
off until the flight has ended, unless the Shutdown option in Setup menu is used. Otherwise, the flight will end
automatically 10 min after landing or if manually selected by the user.
To manually end the flight, refer to the instructions found in the statistics page section.

Document Name:
LX Era 57/80 user’s manual
Version: 0.9H
Page 8 of 52
PART TWO – INSTALLATION
2.1 Mechanical installation
LX Era fits in a standard 80 or 57 mm instrument hole so no extra cut out is required. To fit LX Era into the
instrument panel, unscrew the two mounting screws (black) with a screwdriver and remove the two rotary
knobs.
To remove the rotary knobs do not use force. First, remove the press-in cover to access the screw. Loosen
the screw and pull off the knob. Place the LX Era in the hole in the instrument panel and first screw in the
two black screws and then install the two rotary knobs. Do not forget to tighten the screw of each fixing
knob and put the press-in covers back on.
2.2 Pneumatic connections
Three pressure connectors are fitted to the back of LX Era. A label shows their functions.
Ptot = Pitot or Total pressure
TE = TE probe
Pst = Static
Electronic TE compensation schematics (Set TE 100%)
TE… Static
Pst… Static
Ptot… Pitot or Total pressure
TE tube installation schematics (Set TE 0%)
TE... TE probe
Pst... Static
Ptot... Pitot or Total pressure

Document Name:
LX Era 57/80 user’s manual
Version: 0.9H
Page 9 of 52
2.3 Electrical installation
Pin out on all connectors:
Pin 1 to pin 6 or 8 (on picture from left to right).
User port (RJ11 –6pin connector) Flarm port (RJ11 –6pin connector)
Pin number
Description
1
12 V out
2
Not connected
3
Not connected
4
RS 232 data in
5
RS 232 data out
6
GND
INPUT (RJ11 –6pin connector) CAN port (RJ45 –8pin connector)
Pin number
Description
1
Input 1
2
Input 2
3
Input 3
4
Input 4
5
Input 5
6
Common ground (GND)
SD card port (RJ11 –6pin connector)
Not in use, use the microSD card slot on the front panel.
GPS antenna
Connect the external GPS antenna to this connector. The Era must have this external antenna connected all
the time, otherwise the internal flight recorder will not work.
Wi-Fi/Bluetooth antenna
Connect the external Wi-Fi/Bluetooth antenna to this connector. The Era must have an external antenna
connected all the time, otherwise Wi-Fi/Bluetooth will have no range.
SPOT antenna
The SPOT module (which is offered as an option) requires an antenna connection in order to work.
Pin number
Description
1
12 V out
2
Not used
3
GND
4
RS 232 data in
5
RS 232 data out
6
GND
Pin number
Description
1
12 V
2
12 V
3
12 V
4
CAN_L
5
CAN_H
6
GND
7
GND
8
GND
BT/WIFI Antenna
SPOT antenna
Pin 1
Audio output
(3.5 mm jack)
OAT input
(2.5 mm jack)
GPS antenna
Pin 1
Pin 6
Main power
Pin 6

Document Name:
LX Era 57/80 user’s manual
Version: 0.9H
Page 10 of 52
2.4 External switch installation
Up to five external switches can be connected to LX Era. To
connect an external switch to LX Era you have to use the
external switch interface board (included in package).
Every slot available has a signal input and ground input.
The configuration of inputs can be set under Setup ->
Inputs.
User can use two different connection styles:
- 2 wire connection: Connect switch signal and ground
wires to interface board.
- 1 wire connection: Connect switch ground wire to glider
common ground and connect switch signal wire to
interface.
Be careful not to connect signal wire to common ground
input (see picture showing common ground inputs)
The common ground is connected to the glider common
ground via power supply cable (GND).
All inputs except SC will be “active” when the switch is closed (i.e.: signal and ground are in short circuit). If
“Inv” (Invert) is checked on input setting then “active” means when the switch is open.
Example: airbrake warning will be active when switch is not closed and Era is in flight mode. Warning will
disappear when switch is closed.
SC input has its own setting under Vario/SC menu and can be set to be active on when selected to “on”,
“off” or “toggle”.
Example of both connections (1 and 2 wire)

Document Name:
LX Era 57/80 user’s manual
Version: 0.9H
Page 11 of 52
2.5 Installation options
LX Era is compatible with all LX CAN based devices (LX Zeus, LX Joy, LX Era Repeater, CAN Compass, AHRS,
and others). LX Era has an integrated CAN terminator so no other terminator should be used. Only one CAN
terminator should be used (be careful when using LX Era with LX Zeus). (if in doubt please ask your dealer)
Configurations
LX Era –OUDIE
OUDIE LX Era PNA Power & Data LX Era
LX Era –Flarm
LX Era 1:1 1:1 Flarm Colour Display II (optional)
LX Era –Flarm –OUDIE
OUDIE LX Era PNA Power & Data LX Era
LX Flarm
splitter
Flarm / RedBox
MiniBox / Flarm Mobile
FlarmMouse
1:1
1:1
Flarm / RedBox
MiniBox / Flarm Mobile
FlarmMouse
1:1

Document Name:
LX Era 57/80 user’s manual
Version: 0.9H
Page 12 of 52
LX Era –Flarm –OUDIE –2nd seat –2nd OUDIE
OUDIE LX Era PNA Power & Data LX Era
OUDIE LX Oudie Power LX Era Repeater
1:1
Flarm / Eagle /
RedBox
MiniBox / Flarm Mobile
1:1
Bluetooth
connection

Document Name:
LX Era 57/80 user’s manual
Version: 0.9H
Page 13 of 52
Wirings for radio
ERA
ERA

Document Name:
LX Era 57/80 user’s manual
Version: 0.9H
Page 14 of 52
2.6 Update procedure
In order to update the device, please follow the steps below:
- Find and download the update file on www.lxnavigation.com
- Send your device’s serial number to update-service@lxnavigation.si and an update code will be sent
to you
- Save the downloaded update file to the supplied microSD card
- Insert the microSD card into the Era
- Turn the device on
- Go to Setup > Transfer > Updates and select the downloaded update file
- Type in the provided password
- Copying of the file, and with it the update process, will commence automatically
- The device will turn off and require another turn on (if it is a standalone version). Zeus versions turn
themselves on automatically)
- ˝LX updating˝ screen will appear
- After the updating process has ended the unit will start itself normally. The user should check if the
correct version is displayed on the greeting screen.
Note!
First update releases (up to version 1.0) do not require an update code, hence all code related steps can be
ignored. When prompted for the update password, simple type in 00000.
2.7 Technical specifications
The picture below represents the Era with all of its main components. A large 3.5-inch (for the Era 80) or 2.5-
inch (for the Era 57) transflective LCD display shows all flight-relevant information to the pilot. The Era boasts
a digital needle, which clearly shows current lift, SpeedToFly or other flight parameter.
Two push/rotary knobs and two push buttons are used for all pilot to Era communication.
Dimensions
82 mm x 82 mm x 63 mm
Mass
290 grams
Input Voltage Range
9.0 –18.0V DC
Average Current
150 milliamps @ 12V DC
Wi-Fi / Bluetooth range
100 metres / 20 metres

Document Name:
LX Era 57/80 user’s manual
Version: 0.9H
Page 15 of 52
PART THREE – INTERFACE
Front panel interface
Below is a representation of the main page
The Era features 6 status indicators described below in their respective order:
- Flarm indicator –appears only when a Flarm device is connected to the Flarm port and
communicating with the Era
- Bluetooth indicator –appears only when a Bluetooth device is connected and communicating with
the Era
- Wi-Fi indicator –appears only when a Wi-Fi device is connected and communicating with the Era
- GPS indicator –is always displayed, a green arrow indicates good GPS signal, and a red one indicates
bad GPS signal
- Circling/SC mode indicator –indicates whether Era is in Speed Command (SC) or Vario mode
- Battery status indicator –shows the current state of the glider`s battery. White battery outline
indicates it is using the glider`s battery. A red battery outline indicates it is using its built-in battery
UTC
time
Indicators
(1~2)
Digital
scale
Digital
needle
MacCready
value
SpeedToFly
Wind direction (in
regards to plane)
Wind speed
and direction
MicroSD card
reader
Indicator value
Indicator unit
Status
indicators
Outside Air
Temperature
Mode
Indicator name
Indicators
(3~4)
Upper
rotary/push
knob
Upper push
button
Lower push
button
Lower
rotary/push
knob

Document Name:
LX Era 57/80 user’s manual
Version: 0.9H
Page 16 of 52
Use of rotary switches
To move around and access all functions of the unit, two rotary knobs with push buttons are used.
The upper push/rotary knob serves the function of Cancel and from now on will be referred to as ‘’Cancel’’.
Pressing the upper push/rotary knob will exit from a menu and cancel the settings. Turning the rotary knob
in most pages will change the volume.
In situations when you are choosing a value (e.g. QNH and altitude in the initial setup) it will change the
value by 10-fold.
The lower push/rotary knob serves the function of Enter and from now on will be referred to as ‘’Enter’’.
Pressing the lower push/rotary knob will enter a menu, or enter a value, or open a hidden menu.
Turning the rotary knob will swipe through pages, menus, or change values by 1, depending on the situation.
To change the value of a parameter, enter must be pressed to activate the rotary keyboard (appears on the
left).
Use the lower rotary knob to input the desired value and confirm it by pressing enter.
To exit edit mode, fill out all of the fields (when a number is in question) or simply choose the enter sign (↵).
For quick change (multiplication by 10 steps) press enter button and while holding it pressed, rotate the
rotary switch.
The upper push knob is used for zooming in on all navigation pages. When choosing a value, it will behave
the same as the upper push/rotary knob –it will increase the value by 10-fold.
The lower push knob is used for zooming out on all navigation pages. When choosing a value, it will behave
the same as the upper push/rotary knob –it will decrease the value by 10-fold.
A red cross across a page is a standard aviation notification, which indicates
that this page is either not available or not working for some reason. On
navigational pages, it is usually due to bad GPS connection and on AHRS page,
it is indicating that you do not have an AHRS unit connected to your Era.
Connecting the missing module or antenna, or allowing the antenna to get a
GPS connection will eliminate this symbol. Pages that are not used can be
hided, as explained in section 4.11.12.

Document Name:
LX Era 57/80 user’s manual
Version: 0.9H
Page 17 of 52
To exit from any subpage or list, a pilot has 3 options:
- Select “Exit” option which is always located at the end of each page / list
- Move to the top of each page / list where a blue circle with a black backward arrow is located (←).
Exit option is highlighted, when this circle becomes filled with blue.
- Press the upper push/rotary knob
Exit at the bottom.
Exit at the top.
Value can’t be changed (grey lettering).
Value can be changed (white lettering).
Grey rectangle indicates the character which is being
edited. Edit character with rotary switch.

Document Name:
LX Era 57/80 user’s manual
Version: 0.9H
Page 18 of 52
PART FOUR – SOFTWARE
4Main pages
Initial setup
After power on the Initial setup appears. This screen is used to input basic information which can often
change daily
- Select pilot (offers the selection of different user created pilot profiles)
- Set elevation (set the elevation of your current location)
- Set QNH (set the current QNH pressure)
If used in LX Zeus configuration, all these settings are done on LX Zeus and this screen is not visible on LX
Era.
All information is provided by turning the push/rotary knob. By pressing enter, the current value is selected
and the next parameter is shown.
Structure of main pages
To switch between main pages use left/right rotation of the lower rotary switch. The complete structure of
the main pages can be seen in the figure below.
Vario - main page
Thermal assistant page
Flarm radar page

Document Name:
LX Era 57/80 user’s manual
Version: 0.9H
Page 19 of 52
TP navigation page
APT navigation page
TSK navigation page
G –force page
AHRS page **
GPS info page
* When used as a part of an Era
–Zeus system, not all options are
present.
** Only when AHRS module is
detected on CAN bus.
Logbook page
Setup page*
This manual suits for next models
1
Table of contents
Other LX Navigation Measuring Instrument manuals
Popular Measuring Instrument manuals by other brands

M-Sure
M-Sure MS-200 Series user manual

Spengler
Spengler TEMPO EASY JXB-182 user manual

Chauvin Arnoux
Chauvin Arnoux C.A 6240 user manual

Sekonic
Sekonic C-7000 SDK Reference manual

Endress+Hauser
Endress+Hauser Levelflex M FMP40 Description of Device Functions

Anritsu
Anritsu VNA Master MS203 A Series Maintenance manual