Scorpio SR-i800 Guide

SR-i800
Motorcycle Security System
INSTALLATION MANUAL
AND USER’S GUIDE
Table of Contents
Installation
•Component List ---------------------------------------------------------------- P ge 3
•Pl nning The Inst ll tion ---------------------------------------------------- P ge 3
•Mounting The Components ----------------------------------------------- P ge 4
•Color Codes --------------------------------------------------------------------- P ge 5
•Connections --------------------------------------------------------------------- P ge 5
•Using the T-t p ------------------------------------------------------------------ P ge 6
User’s Guide
•St nd rd Fe tures ------------------------------------------------------------ P ge 2
•Tr nsceiver B ttery ------------------------------------------------------------ P ge 3
•Viol tion Displ y --------------------------------------------------------------- P ge 6
•Oper ting the tr nsceiver -------------------------------------------------- P ge 7
•Adjusting G Sensor ------------------------------------------------------------ P ge 7
•Selecting Arming Modes ---------------------------------------------------- P ge 7
•Al rm Triggers ------------------------------------------------------------------- P ge 8
•M nu l Override Code ----------------------------------------------------- P ge 8
•Encoding Tr nsceiver ----------------------------------------------------- P ge 1
•Troubleshooting Guide ------------------------------------------------------- P ge 10
Accessories
•Option l Accessories ------------------------------------------------------ P ge 2
•Perimeter Sensor (SN-5) ------------------------------------------------------ P ge 9
Warranty and FCC Information
•Limited W rr nty ------------------------------------------------------------- P ge 11
•FCC Notice ---------------------------------------------------------------------- P ge 11
•Cont ct inform tion ---------------------------------------------------------- P ge 11
Encoding a Transceiver
1. Unplug HAR-1 from the MCM-9 nd plug it b ck in, the siren will chirp 2 times nd
the lights will fl sh 2 times.
2. Within 6 seconds of plugging in the HAR-1, turn ignition switch “ON” nd “OFF” 3
times.
3. If step 2 is done correctly nd within the time llowed , the siren will chirp 2 times
nd the lights will fl sh n ddition l 2 times to confirm th t the system is in
“Le rn Mode”.
4. Press nd hold the button until the system chirps 2 times nd the lights fl sh 2
times to indic te th t the MCM h s le rned the code.
5. Turn ignition “ON” nd “OFF” to exit “Le rn Mode”.
**It is not recommended to clip the remote to your ignition key. Attaching the
remote to your key may damage the remote and/or scratch your bike**
1
Note:
The t
ransceivers a
re programmed from the factory.
Encoding
is only necessary should
the transceiver lose its code and will not arm or disarm the security system or if a
replacement remote is obtained.

Standard Features
•Ultr low power dr in MCM
•Built-in An log Devices ccelerometer
•Remote sensor control
•B ttery s fegu rd with “sleep mode”
•Viol tion displ y
•Select ble uto/ m nu l rming / dis rming
•Fl shes sign l lights
•Integr ted 120 dB multi-tone siren
•Remote p nic fe ture
•Soft chirp rming
•Three-St ge Perimeter Sensor
•Select ble Perimeter Sensor rming
•Fl sh input for di gnostics nd possible future upgr des
•Progr mm ble override code to dis rm l rm
•Built in b ck up b ttery
ptional Accessories
•
Ignition disa le and anti-hijack kit
- Allows remote dis bling of the
motorcycle’s electric l system should someone force you off your bike. Also
prevents the engine from being st rted when the system is rmed.
•
Factory Connector Kits
–OEM style connectors th t simply plug into the
motorcycle’s f ctory wiring h rness. Connector kits re v il ble for select
motorcycle models.
2
Components List
MCM (Main Control Module)
*
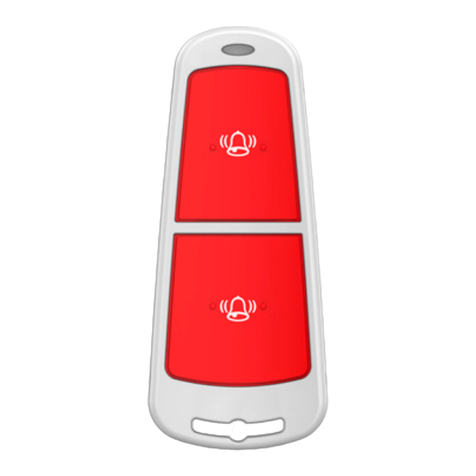
Remote Transceiver
Generic Installation Kit (GEN-1)
Accessory Harness (ACC-1)
Main Harness (HAR-1)
RFID Module
*This remote tr nsceiver uses CR2032 b ttery. To repl ce the b ttery pry the c ses p rt
using fl the d screwdriver t the sm ll end of the remote. Then slide the screwdriver
tow rds the button until the c se h lves come p rt. Now pull the circuit bo rd out of
the re r c se h lf nd repl ce the b ttery. L st, sn p the circuit bo rd b ck into the re r
c se nd the two c se h lves b ck together nd you’re done.
Planning the Installation
It is very import nt th t before st rting the inst ll tion of the security system, you c refully
re d the inst ll tion instructions nd spend time pl nning the inst ll tion. By pl nning
he d you will be ble to select the best ppro ch in pl cing, securing nd wiring the
system to your specific motorcycle. Although the inst ll tion is not difficult there re
number of steps th t must be t ken for the system to oper te properly. We suggest you
re d the steps on the following p ge.
3

Note: If the perimeter sensor is armed for more than 10 days, the attery safeguard will
automatically disa le the perimeter sensor.
Note: Although the system will work in any position or mounting angle, try to avoid placing the
MCM with the ell of the siren facing toward either side of the ike; this may reduce sensitivity
(Planning the Installation cont)
1. Check th t your motorcycle b ttery is fully ch rged nd th t ll electric l circuits re
in good working condition.
2. Check the l yout nd construction of the motorcycle to decide wh t sp ce is
v il ble to pl ce the components.
3. Verify th t no moving p rts interfere with the components or their wires.
4. Do not route wires ne r sh rp edges, which could cut wires nd c use short.
5. Do not mount components ne r extreme he t re s such s exh ust pipes
6. Allow t le st n inch or two of sl ck t ll connection points to reduce the ch nce
th t connection will bre k p rt due to vibr tion.
7 Do not drill ny holes; mount the components with the provided Velcro nd c ble ties.
Mounting the Components
Select suit ble loc tion under the se t or in side cover. Mount the MCM using Velcro
or c ble ties. M ke sure th t it is not exposed or e sily re ched.
Routing the RFID Antenna
M ke sure to pl ce the RFID ntenn s close s possible to where the remote will be
when you re turning your key on to dis rm the l rm. The RFID r nge depending on
obstructions is 2-3 feet.
Routing the Antenna Wire
The MCM includes n 18” ntenn wire. The first 12” is co xi l wire; the rem ining 6” is
the ctu l ntenn wire. When routing, try to void running the ntenn long or ne r
met l. For best perform nce, try to h ve t le st portion of the ntenn wire exposed.
Wire Connections
The MCM is equipped with two connectors. One is for the m in h rness (HAR-1) nd the
other is for the option l ccessories.
Accessory Harness
Plug in the ccessory h rness to the m tching connector on the MCM. E ch one of the
connectors on the ccessory h rness is unique nd c n only be connected to the correct
ccessory. If no options re being used plug in the supplied dust cover.
4
Main Harness
If the optional factory connector kit is being used, please disregard this section of the
instructions and refer to the instructions that were supplied with the factory connector kit.
The m in h rness consists of two h rnesses. One is l beled (HAR-1) nd the second is
l beled (GEN-1). Plug in the white 4 pin connector from the (HAR-1) into the m tching 4
pin connector from the (GEN-1). The (HAR-1) lso h s w terproof connector th t plugs
into the MCM. The wires should be connected s follows:
HAR-1
Bl ck wire with fuse nd ring termin l – To b ttery Positive (+).
GEN-1
Bl ck wire – To ground (-).
Grey wire – To turn sign l power wire (Left).
Grey wire – To turn sign l power wire (Right).
Or nge wire – To t il light wire OR ny other wire th t is hot (+) when ignition is ON (NOTE:
this is n input to the l rm this connection is not designed to fl sh the t il light).
Note: When the main harness (HAR-1) is plugged in, the siren should chirp and turn signals should
flash twice. If the siren does not chirp; check the fuse, battery power (+) and ground (-) connections.
If the turn signal lights do not flash make sure that the grey wires are connected to the turn signal
power (+) wires. Connecting these wires incorrectly may damage the system.
Color Codes:
Ground (-) Tail Light Left Turn Signal Right Turn Signal
Honda Green wire Brown wire Or nge wire Blue wire
Kawasaki Bl ck wire Red wire Green wire Grey wire
Suzuki Bl ck/White
Brown wire Green or Bl ck Grey wire
Yamaha Bl ck wire Blue wire Green wire Brown wire
Harley Davidson
Bl ck wire Blue wire Brown wire Purple wire
Ducati
Bl ck wire Yellow wire
White/Bl ck
wire
White/Green
wire
Fuse
To Battery (+)
Accessory
HAR-1 Connector
GEN-1
Black – To Ground (-)
MCM Grey – To Turn Signal
Grey – To Turn Signal
range – To Tail Light
5

Note: Connect the (HAR-1) harness to the MCM only after installation is completed.
If the battery is to be removed, disconnect this connector first. Reconnect only after battery
terminals are reconnected.
Using the T-tap Connectors
1) Pl ce fem le T-t p connector over wire to be t pped, close nd squeeze until it sn ps.
2) Now slip m le T-t p connector over hinged end of the fem le connector.
Motorcycle Wire
1)
Fem le T-t p
2) Fem le T-t p
M le T-t p
Motorcycle
Wire
Wire from (GEN-1)
peration Instructions
Violation Display
When the system is dis rmed the turn sign ls will fl sh to indic te th t there h s been n
l rm trigger. The lights will fl sh once to indic te th t the system h s been dis rmed nd
ddition l fl shes indic te the following trigger h s occurred:
1 fl sh then 1 ddition l fl sh = Shock Trigger
1 fl sh then 2 ddition l fl shes = Tilt Trigger
1 fl sh then 3 ddition l fl shes = Perimeter Sensor Trigger
1 fl sh then 5 ddition l fl shes = Ignition Trigger
6
peration Instructions (Cont.)
Selecting Arming Modes
The SR-i800 c n be m nu lly rmed nd dis rmed by using the button on the remote or
utom tic lly rmed nd dis rmed by turning your ignition key on nd off. When the
l rm is first inst lled the l rm will rm 5 seconds fter the HAR-1 h rness is inst lled. The
def ult setting is to rm with the perimeter sensor (SN-5) on.
Autom tic Arming
By keeping the remote with you nd turning your key on the l rm will recognize the
remote nd dis rm the l rm. Once you turn the key off the l rm will w it 5 seconds nd
rm g in.
M nu l Arming- Press nd hold the button for 1 second. When you m nu lly dis rm the
l rm, you re turning the uto rm off. To turn uto b ck on simply rm the l rm with
the remote nd go b ck to using the key to rm nd dis rm.
M nu l Arming with Perimeter Sensor- Press nd hold the button for 5 seconds. The turn
sign ls will fl sh norm lly then will fl sh left-right twice to confirm the system is rmed with
the Perimeter Sensor ctive.
While rmed double t p the button on your remote nd the l rm will chirp 1 time nd
the turn sign l lights will fl sh 1 time. Now the l rm is m nu lly dis rmed nd will not
utom tic lly rm. Now the l rm will only rm when you push nd hold the button on
the remote for 1 second. To return to utom tic rming, simply rm the l rm nd go
b ck to using the key.
Setting Perimeter Sensor Default
1.
To select between perimeter sensor on nd off you must first double t p the
button on the remote to m nu lly dis rm the l rm.
2.
Next turn your ignition key on-off-on then double t p the button quickly nd
the siren should chirp 2 or 3 times to let you know whether the perimeter
sensor is on or off.
Perimeter On: 2 Chirps
Perimeter Off: 3 Chirps
3.
Turn your ignition key off to s ve nd exit progr m mode.
4.
M nu lly rming the Perimeter Sensor will not ch nge the def ult. The next
time the system rms utom tic lly, it will go b ck to the def ult setting.
(see Arming with Perimeter Sensor bove)
Adjusting G sensor Sensitivity (Shock and Tilt Triggers)
The sensitivity is on a scale from 1-5 indicated by 1-5 chirps or turn signal
flashes with 5 being most sensitive.
(If equipped with optional siren)
1. M nu lly dis rm the l rm by double t pping the button.
2. Turn your ignition key on-off-on nd then hold the button, the siren should chirp to
let you know its current sensitivity level. (Def ult is level 3)
3. Press the button to ch nge sensitivity.
4. Turn ignition key off to s ve nd exit. The siren will give 1 chirp to indic te the
s ve.
7

Note: Once an alarm trigger has occurred and the siren duration is completed the system will remain
armed and accept any additional triggers.
Alarm Triggers
1. If bike is bumped, the siren will sound for 5 Seconds nd the turn sign l lights will fl sh.
2. If the bike is tilted, the siren will sound for 30 seconds nd the turn sign l lights will fl sh.
3. If the ignition switch is turned “on”, the siren will sound for 30 seconds nd the turn sign l
lights will fl sh.
Manual verride Procedure
Programming Personal verride code
A person l override code will be sequence of left – right - left turn sign l fl shes th t c n
be used if the remote is lost to dis ble the l rm:
Enter progr mming Mode
1. M nu lly dis rm system.
2. Turn ignition on – off – on – off – on.
3. Press nd hold the button until the siren chirps 3 times.
Select number of fl shes for Code
The code will be combin tion of left-right-left-right turn sign l count.
1. Turn on left turn sign l to desired number of fl shes. (up to 9)
2. Turn on right turn sign l to desired number of fl shes. (up to 9)
3. Turn on left turn sign l to desired number of fl shes. (up to 9)
4. Turn on right turn sign l once to exit mode. (Will only register one fl sh)
5. The bike will fl sh the code in the s me sequence entered.
*This feature is not compati le with every motorcycle on the market.
*Some ikes are easier than others to program and operate this
feature, make sure to test the code once it is programmed.
Using code in c se of lost remote
1. Turn ignition key to on position. Let l rm go thru full cycle until the turn sign l
lights stop fl shing. (If siren is turned off, you do not need to wait for a full cycle)
2. Enter code s origin lly entered.
3. When correct code is entered the l rm will de ctiv te
8
Perimeter Sensor (SN-5)
Mounting the SN-5
The Perimeter Sensor uses high frequency microw ve technology to detect m ss density
movement round the motorcycle. The sign l c n tr nsmit through the se t, fibergl ss,
le ther nd pl stic, but not met l. It is recommended to pl ce this sensor under the se t
s close s possible to the center of the motorcycle. With the provided Velcro, you c n
mount this sensor on top of the b ttery or ny fl t surf ce, m king sure th t the top side of
the sensor is f cing upw rds.
Adjusting the Sensor
Although the sensor is pre-set from the f ctory, it m y be necess ry to djust the sensitivity
to suit your specific pplic tion.
1. St nd t le st 10’ w y from the motorcycle nd rm the system.
2. W lk tow rds the motorcycle nd try to le n over the top of it. Once the sensor
detects movement, the siren will begin to chirp slowly. If you b ck w y from the
motorcycle, the siren will stop chirping. If you continue to move closer to the
motorcycle, the siren will st rt to chirp f ster nd f ster nd then go into full l rm.
3. Sensitivity c n be djusted by removing the pl stic c p nd tuning the djustment
screw. To incre se sensitivity, turn djustment screw clockwise. To decre se sensitivity,
turn the djustment screw counter clockwise.
4.
The Perimeter sensor h s n intern l tuning control, which h s been set t the f ctory.
This tuning control should only be ch nged if the sensor c n not be properly set s
described in #3 bove, ple se c ll Aritronix’ technic l support.
9
Pl stic C p:
Remove to
djust sensitivity
To Accessory H rness on
M in Control Module (MCM)
Note:
Do not turn sensitivity above half way. Doing so may cause false alarms.

Troubleshooting Guide
10
Limited Warranty
Limited Warranty
Products m nuf ctured by Aritronix, Ltd re w rr nted by the comp ny to the origin l consumer
purch ser to be free from defects in workm nship nd m teri ls. Should product be found
defective Aritronix sh ll rep ir or repl ce the product or ny p rt of the product th t Aritronix grees
is defective without ch rge during the first 12 months from the d te of origin l purch se if the
product is returned to Aritronix freight prep id nd ccomp nied by copy of the purch se receipt.
This w rr nty does not pply to ny product d m ged by ccident, physic l or electric l misuse or
buse, improper inst ll tion, lter tion, ny use contr ry to its intended function, fire, flood,
un uthorized rep ir or ny other cts of God.
Aritronix sh ll not be responsible for remov l nd/or reinst ll tion ch rges or theft of the motorcycle
or its contents or ny incident l or consequenti l d m ges c used by ny f ilure of the product to
function properly. Under no circumst nces should this w rr nty or the product covered by w rr nty
be construed s n insur nce policy g inst loss or d m ge of ny kind.
Aritronix neither ssumes nor uthorizes ny person or org niz tion to m ke ny w rr nties or ssume
ny li bility in connection with the s le, inst ll tion, or use of this product.
This completes Aritronix w rr nty nd no other w rr nty exists.
What should you do if you experience a pro lem with a Scorpio product?
First cont ct Aritronix, Ltd [Proof of purchase, installer and motorcycle information will e requested].
If fter ssist nce from our tr ined st ff it is determined th t the Aritronix product m y be f ulty then
you will be provided with det iled inform tion on processing w rr nty cl im nd instructions on
how to send the product into our rep ir office. All w rr nty cl ims must cont in return m teri l
uthoriz tion (RMA). Aritronix will not ccept ny p ck ge th t h s not been pproved for w rr nty
rep ir/exch nge nd been issued n RMA. Shipping charges may apply.
FCC Notice
This device complies with P rt 15 of FCC rules. Oper tion is subject to the following two
conditions: (1) This device m y not c use h rmful interference, nd (2) This device must
ccept ny interference th t m y c use undesired oper tion.
Ch nges or modific tions not expressly pproved by the p rty responsible for
compli nce could void the user’s uthority to oper te this device.
For technic l ssist nce, ple se cont ct Aritronix:
www.scorpio l rms.com
support@ ritronix.com
Toll Free
(800)428-0440
International
(480)951-1109
Aritronix Ltd
16055 N Dial Blvd B-10
Scottsdale, AZ 85260
Table of contents
Other Scorpio Security System manuals

