manuals.online logo
Brands
  1. Home
  2. •
  3. Brands
  4. •
  5. Scout
  6. •
  7. Outdoor Cart
  8. •
  9. Scout Scout Cart User manual

Scout Scout Cart User manual

1
Congratulations on becoming a Scout
Cart® owner. You will come to identify
Scout by its fine engineering, precise
construction, quality materials and ease of
use. You will love the many ways Scout
Cart® enhances your daily life, saving you
valuable time and energy. Please read this
User Guide to learn about key features
and for your safety and long-term
enjoyment of the Scout Cart®.
SCOUT
Upper Basket
(Small)
Basket
Base
Frame Release
Button
Handle
Telescoping
Frame
Main Frame
Rear Wheels
Front Wheel
Assembly
Lower
Basket
Attaching the Rear Wheels
Leave the frame in the folded position to attach the rear
wheels. Each rear wheel has a metal pin protruding from the
center hub (Fig. 1.) Insert the wheel pin into the pin
receptor located on the rear wheel arm (Fig. 2). Do the same
with the second rear wheel.
Figure 2
Figure 3
If the pin does not slide easily into the receptor, press the
wheel release button near the attachment point (Fig. 3).
Then push the wheel into place.
Attaching the Front Wheels
Attach the front wheels by
inserting the front wheel
assembly into the receptor on
the frame (Fig. 4).
Figure 4.
Figure 1
CAUTION: Scout Cart® is not
designed to transport children. DO
NOT ALLOW CHILDREN to ride on the
frame or in the baskets.
2
If the pin does not slide easily into the receptor,
press the button on the frame near the
attachment point.
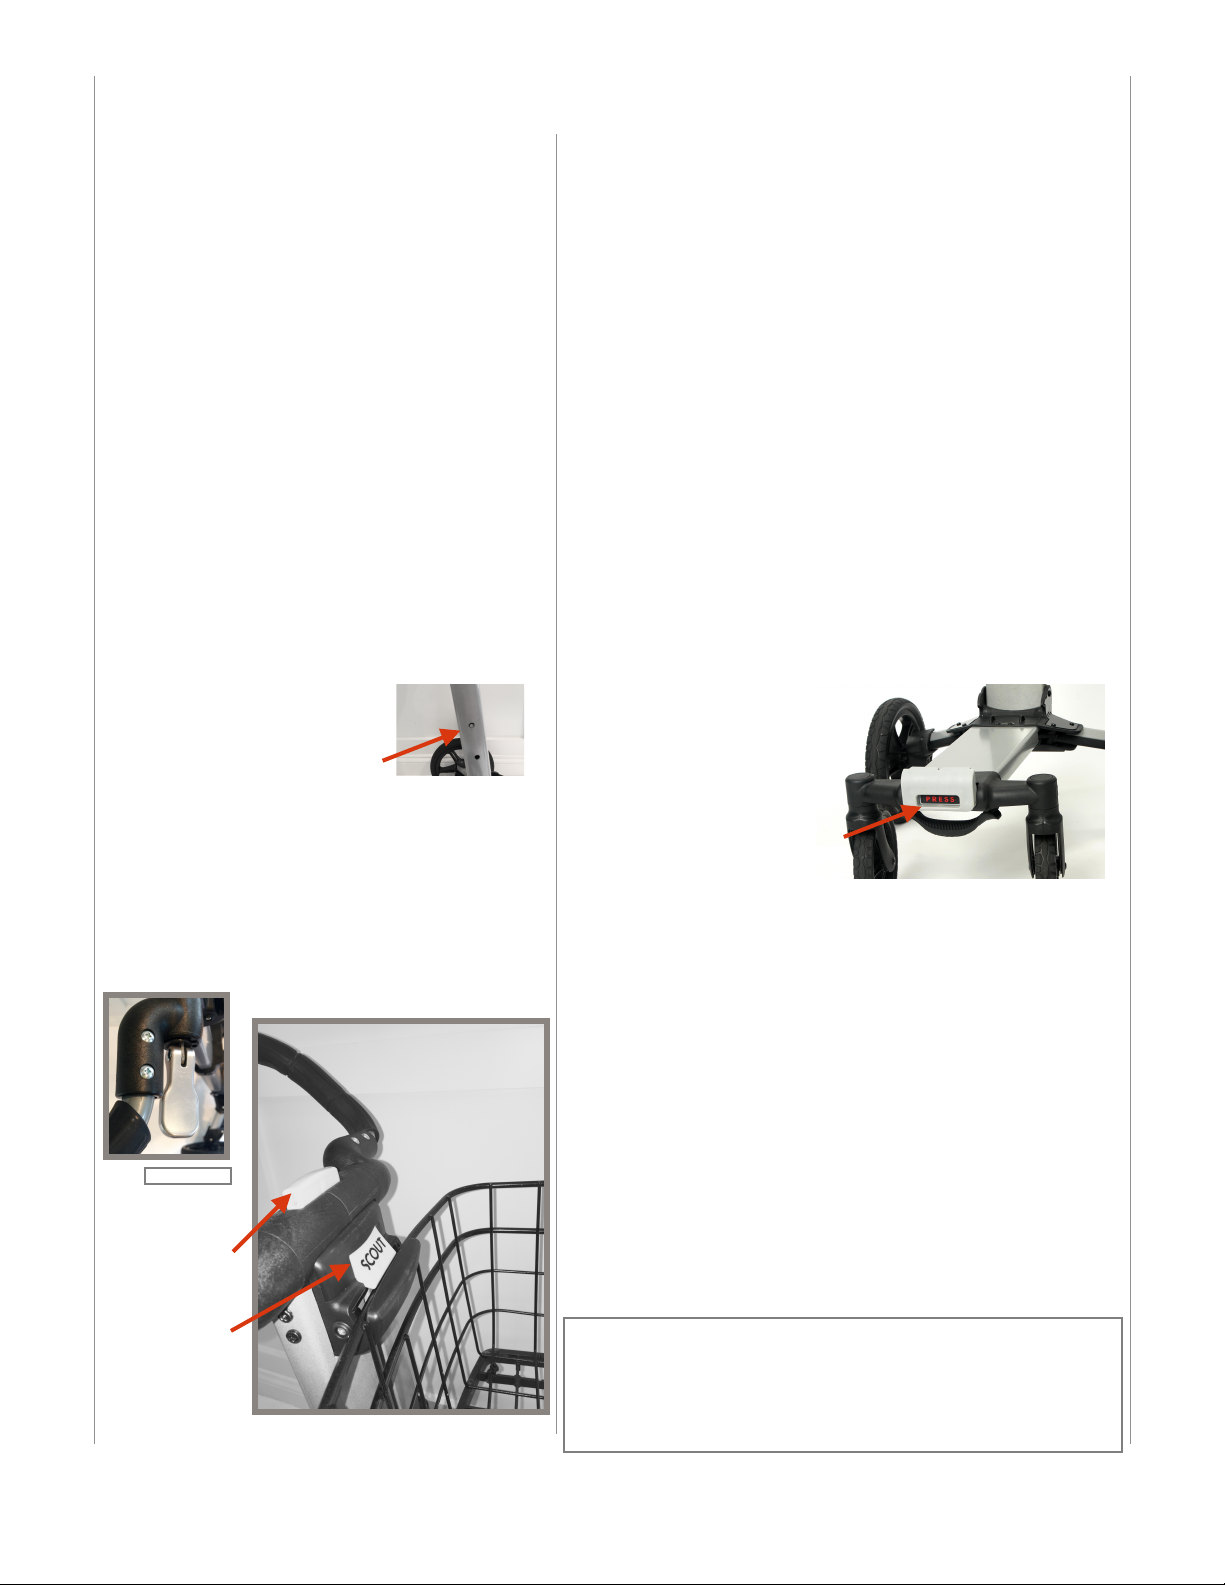
Detaching the Front and Rear Wheels
Press the wheel release buttons by the
attachment points on the left and right rear
wheels to release (Fig. 3). Release the front
wheels by pressing the grey buttons on the
frame near the attachment points.
Unfolding the Frame
To unfold the frame, grasp the base of the
handle and lift. The back wheels will expand.
Press the telescoping frame release button (Fig.
7) and pull upward to raise the telescoping
frame. The frame is correctly positioned when
the lock pin protrudes slightly from the top hole
on the side of main frame (Fig. 5).
Adjusting & Locking the Handle
The handle is adjusted and locked into place by
the metal thumb lever (Fig. 6). Place the handle
in your preferred position, then push the thumb
lever down to lock the handle into place. To
lower the handle, lift the thumb lever upward.
Attaching and Removing the Top Basket
Align the wide opening along the rim of the smaller basket
with the hook on the cart front (Fig. 8). Press the basket rim
into the hook and lock. Next, fit the top basket base into the
mounting bracket on the main frame. To remove the top
basket, press the lock tab above basket hook downward.
While holding the basket at both ends, lift upward.
Attaching and Removing the Bottom Basket
To attach the bottom basket, first release the lock
mechanism by pushing the PRESS button located on the
front of the cart frame (Fig. 8). Place the basket under the
hooks near the main frame. Align the basket wire with the
groove on the lock mechanism and then push the sliding
lock shut. The basket is locked into place when the PRESS
button and the sliding lock align (Fig. 8). To remove the
bottom basket, push the PRESS button. Slide the bottom
basket out of the rear hooks and lift.
Lock
Pin
Hook
& Lock
Telescoping
frame release
Important: Do not push the telescoping frame release
button (Fig. 8) when the top basket is attached to the cart.
Always remove the top basket before lowering the
telescoping frame section.
Figure 5.
Figure 7.
Figure 6.
Figure 8..
Using the Foot Brake
Press downward on the
foot brake to engage the
lock. Press again to release
the lock. Engage the brake
before folding and storing
the cart to prevent it from
rolling.
Locking the Folded Frame
Lock the folded frame to store the Scout Cart® in a
standing position. After folding the frame, grasp the
handle near the thumb lever and pull the telescoping
section forward until the upper basket hook (Fig. 7) locks
into the lower basket lock mechanism (Fig. 8). To unlock
the folded frame, press the frame release button, which
allows the telescoping section to slide out of the locked
position.
Enjoy Your Scout Cart.®

Popular Outdoor Cart manuals by other brands

Sealey WS454.V3 quick start guide

Sealey

Sealey WS454.V3 quick start guide

Forest-Master ZERO BARROW manual

Forest-Master

Forest-Master ZERO BARROW manual

Unicol AVECTA TROLLEY quick start guide

Unicol

Unicol AVECTA TROLLEY quick start guide

Trinity TBFZ-0902 owner's manual

Trinity

Trinity TBFZ-0902 owner's manual

Mec T-CART Assembly instructions

Mec

Mec T-CART Assembly instructions

A.M.Leonard WBST6 manual

A.M.Leonard

A.M.Leonard WBST6 manual

XPOtool 61905 Operation manual

XPOtool

XPOtool 61905 Operation manual

Metro DataVac MYCART Series Instructions for use

Metro DataVac

Metro DataVac MYCART Series Instructions for use

Harbor Freight Tools 90662 Assembly & operating instructions

Harbor Freight Tools

Harbor Freight Tools 90662 Assembly & operating instructions

KitchenAid KFFU271TSS00 parts list

KitchenAid

KitchenAid KFFU271TSS00 parts list

HOLZMANN MASCHINEN PW1000 user manual

HOLZMANN MASCHINEN

HOLZMANN MASCHINEN PW1000 user manual

Omni cubed PRO-DOLLY HD1 user guide

Omni cubed

Omni cubed PRO-DOLLY HD1 user guide

Fantom PROCART 340 Assembly manual

Fantom

Fantom PROCART 340 Assembly manual

BGS technic 4102 quick start guide

BGS technic

BGS technic 4102 quick start guide

Strongway 52880 owner's manual

Strongway

Strongway 52880 owner's manual

Vestil AIR-800-D instruction manual

Vestil

Vestil AIR-800-D instruction manual

SGS STCC450 owner's manual

SGS

SGS STCC450 owner's manual

DOMPEL ESTETICA instruction manual

DOMPEL

DOMPEL ESTETICA instruction manual

manuals.online logo
manuals.online logoBrands
  • About & Mission
  • Contact us
  • Privacy Policy
  • Terms and Conditions

Copyright 2025 Manuals.Online. All Rights Reserved.