Seahorse XF96 User manual

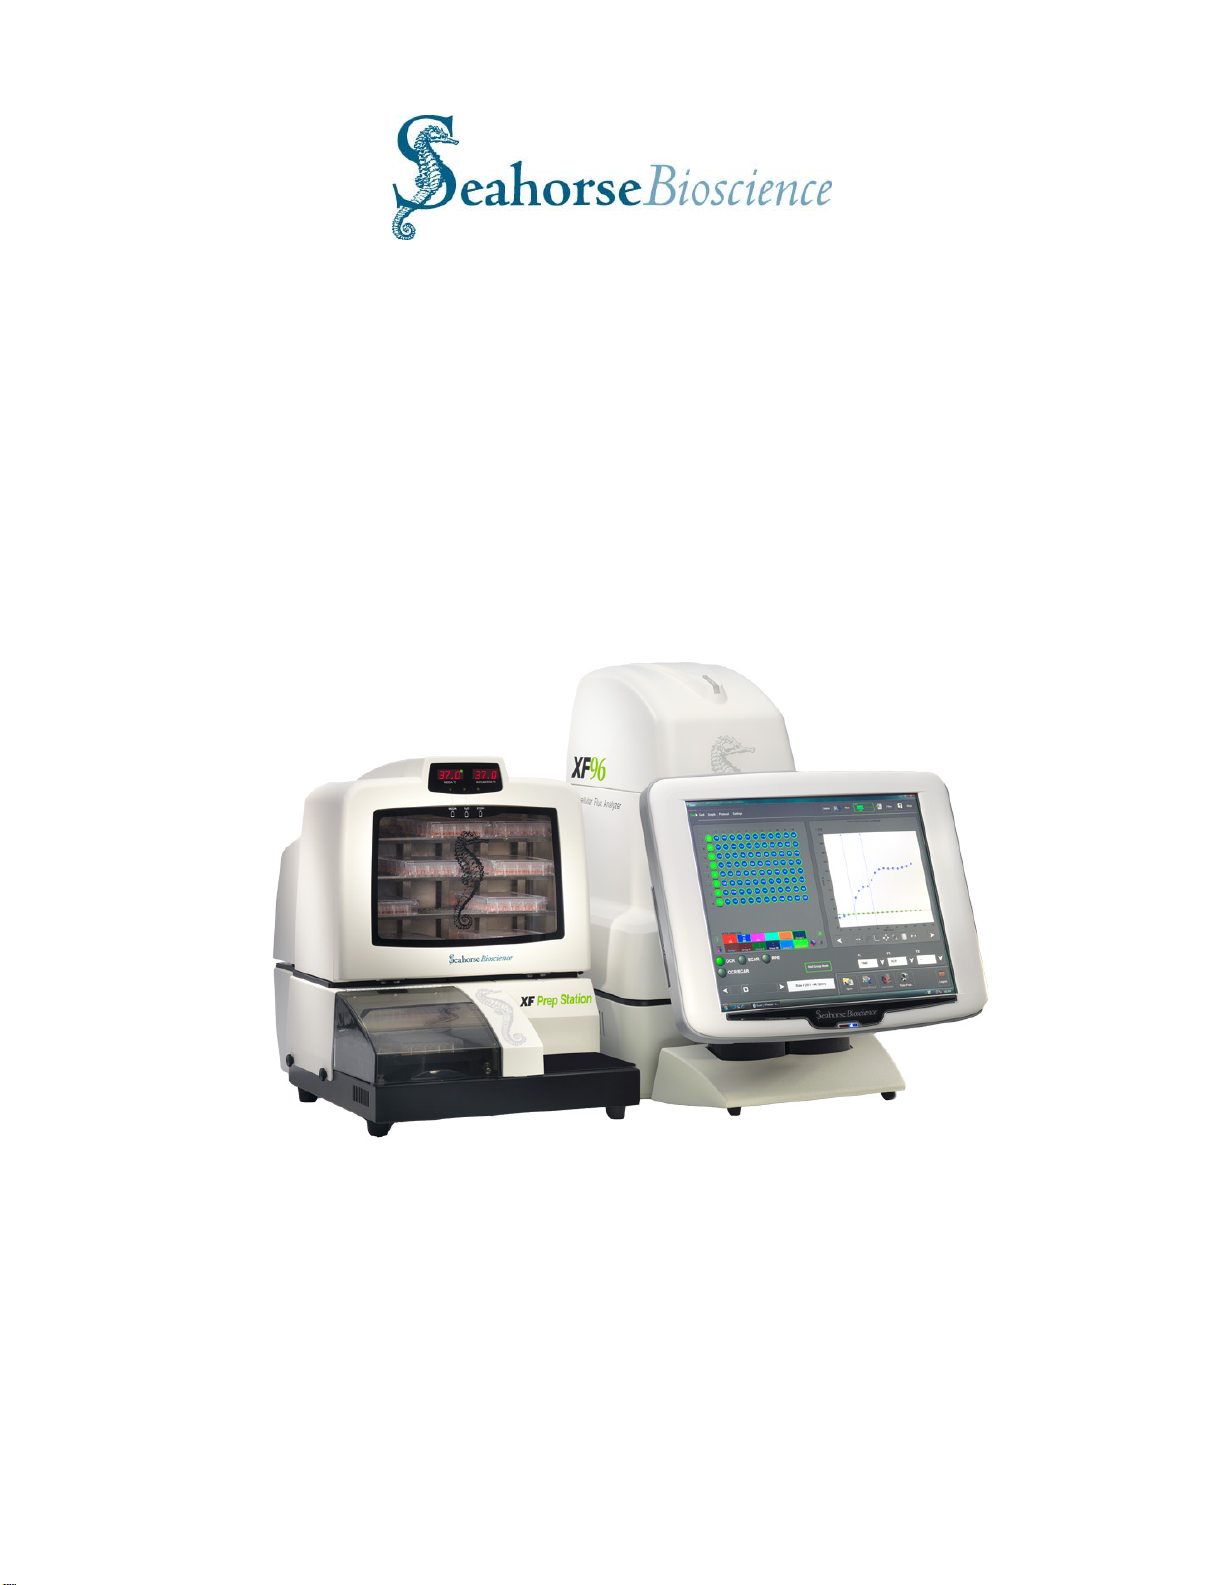
XF96 Extracellular Flux Analyzer
and Prep Station
Installation and Operation Manual
100900-400_MANUAL XF96 W/ PREP STATION_RA

100900-400_MANUAL XF96 W/ PREP STATION_RA 2
First Edition:
February 2009, SHB & GWR
Revision history:
REV_A RELEASED PER ECO #0161 02/11/10 JD
Copyright:
Copyright ©2009 Seahorse Bioscience Inc. All rights reserved.
Trademark Information:
Microsoft, Windows, Excel, and Vista are registered trademarks of Microsoft
Corporation. All other trade names are properties of their respective companies.
Patents applied for:
Seahorse Bioscience Inc.
16 Esquire Road
N. Billerica, MA 01862
(800) 671-0633
(978) 671-1611 Fax
Northwest Research Center
16000 Mill Creek Blvd., Suite 205
Mill Creek, WA 98012
425-338-4703
Submit technical support questions or comments about our documentation to:
For the latest information on products, visit our web site at:
www.seahorsebio.com
Printed in U.S.A.
General Assay Flow Chart for XF96 Assays

100900-400_MANUAL XF96 W/ PREP STATION_RA 3

100900-400_MANUAL XF96 W/ PREP STATION_RA 4
Quick Reference
XF96 Analyzer Protocol
**Please refer to the XF96 Manual for detailed instructions**
1. Pre-incubate sensor cartridges overnight in XF96 Calibrant solution in a non-CO2
incubator at 37ºC.
2. Leave XF96 Analyzer on overnight with XF96 software running and logged in to
ensure temperature is at 37ºC on the day of the assay.
3. Warm all media and compounds to 37ºC and adjust pH to 7.4. Filter to ensure
sterility.
4. Using the Prep Station, perform XF Assay media change on cell plate and incubate in
a non-CO2incubator at 37ºC for ~20 minutes before running on XF96 Analyzer. Final
volume per well should be 150-200 µl.
5. Load XF Assay template into XF96 software or make a new template using the Assay
Wizard. Use the table below to program the optimal mix, wait and measure cycle times.
When working with a new or unknown cell line, start with a 2 minute mix and 5 minute
measure cycle. Verify instrument protocol commands, export preferences and any
instrument settings that may have changed.
6. Load 25 µl pre-warmed compounds (diluted in XF Assay media) at pH 7.4 into
appropriate ports on the sensor cartridge. Optimal injection volume is 25 µl. All wells of
each port used need to be loaded with either compound or media control, including
temperature correction wells. If the sensor cartridge is allowed to cool down (more than
5 minutes), return to incubator for 10 minutes to allow it to heat back up before starting
the calibration.
7. Load sensor cartridge and Utility plate into the right side of the instrument tray.
8. After calibration is complete, replace Utility plate with the pre-incubated cell plate.

100900-400_MANUAL XF96 W/ PREP STATION_RA 5
Table of Contents
Quick Reference XF96 Assay Protocol 3-4
Table of Contents 5
Introduction 9
1. Seahorse Bioscience XF96 Instrument Overview 9
2. Technical Specifications 10
3. XF Instrument, Controller and PS Installation Procedure 12
Unpacking and Component identification 12
Suitable Locations for the instrument 16
Removing the Shipping Cartridge 17
Internal Components of the XF96 18
Set-up and Interconnects: Cable Installation 19
Keyspan Adapter Installation and Configuration 20
Unpacking the Prep Station 22
Installing the PS Manifold and Connecting the Hose Systems 22
Testing the Prep Station 27
Temperature settings for the PS incubator 28
Safety Considerations 29
4. Basic Operation of the XF96 Instrument 30
Power and Warm-up 30
XF Software and Login 31
Introduction to the XF software and Graphic User Interface 32
Cleaning and routine maintenance 38
Performing the XF Assay 39
5. Seahorse Bioscience Cell Culture Overview 39
6. XF assay Day 1 - Seeding Cells in XF96 Cell Culture Plates 39
7. XF assay Day 1 - Preparing Sensor Cartridge for the XF96 Assay 40
8. XF assay Day 2 - Preparing Cell Plate for the XF96 Assay 41
Media Changes and Maintenance of cells growing in XF plates 41

100900-400_MANUAL XF96 W/ PREP STATION_RA 6
9. Operation of the Prep Station for Media exchange 41
10. XF assay Day 2 - Loading the Sensor Cartridge with compounds 44
11. XF assay Day 2 - Calibrating the sensors and running the experiment 46
XF Experimental Results: Using the XF Data Viewer 48
12. Basic Operation of the XF Data Viewer and Graphic Analysis 48
Well Grid Features and Options 50
Basic Graphing Features and Options 52
13. Analysis of XF Experimental Data – General Guidelines 56
Basic Analysis 56
Intermediate Analysis 57
Advanced Analysis: Level Data 59
Sample protocols for using the XF96 analyzer 62
14. Cell titration and uncoupling experiment, C2C12 myoblast cells 63
15. Metformin-Enhanced Fatty Acid Oxidation Experiment using
C2C12 myoblast cells 68
Appendices 74
I. The XF Assay Wizard and Creating XF Assay Templates 74
General Tab 74
CellsTab 74
Media and PPR Tab 76
Compounds Tab 77
Background Correction Tab 78
Groups and Labels Tab 79
Protocol Tab 80
About Mix, Wait and Measure Times 81
End Tab and Saving XF Template Files 82
Quick Pick Text and XF Protocol Save Features 83

100900-400_MANUAL XF96 W/ PREP STATION_RA 7
II. OCR, ECAR and PPR: Information on Rates Calculations 84
OCR calculations: The “(Level) Direct (Ksv) Method 84
ECAR Calculations and Settings 87
PPR Calculations and Settings 88
Measuring the Experimental Buffer Capacity of XF Assay media 91
III. Group Statistics and AUC analysis 92
Group Statistics Feature 92
AUC Analysis using Multiple t-tests 94
AUC analysis: Excel Configuration 94
ANOVAAUCanalysis 97
IV. Advanced Graphing Options and Features 103
Topics:
Groups on the X-axis, Aligning the Y1 and Y2 axes, Resizing Graph
elements, Displaying the assay date, Custom graph titles, Grid
lines, Graph Legends, Injection Markers and Labels, Time Axis
Origin Options, Interactive Adjustment of Axes, Custom Text
Labels.
Data Threshold Option 113
Working with Multiple Data Sets 116
Multi-View and Multi-Graph Display 119
Saving and Exporting Graph Data 121
Copying, Saving and Exporting Graph and Well-Grid Images 123
V. The Media, Cell, & Compound Database and 124
Additional Features and Options
Option to save Media, Cell, and Compound definitions 124
User Login and User Profile Preferences 126
Refresh, File Menu, and File Filter 130
Pop-up Menus, Temperature, and Auto Data Recovery 131
VI. Reagent and Solution Preparation 133
XF Assay medias: DMEM, KHB 133
Stock Compounds: oligomycin, FCCP, DNP, Rotenone, 2-DG 137

100900-400_MANUAL XF96 W/ PREP STATION_RA 8
Preparation of Palmitate-BSA complex 139
VII. XF Cell Plate Coating Methods 141
VIII. XF96 Trouble-Shooting and FAQs 141
IX. XF96 Training Class Test 141
X. Support Contact and Ordering Information 144

100900-400_MANUAL XF96 W/ PREP STATION_RA 9
Introduction
1. Seahorse Bioscience XF96 Instrument Overview and Intended Use
The Seahorse Bioscience XF96 instrument measures the rate of change of analytes
dissolved oxygen and pH in the media immediately surrounding living cells cultured in a
microplate. Changes in the extracellular media are caused by the consumption or
production of analytes by the cells. Therefore, a sensitive measurement of the media
flux can be used to determine rates of cellular metabolism with great precision and in a
totally non-invasive, label-free manner.
A unique feature of the XF technology is its ability to make accurate and repeatable
measurements in as little as five minutes. This is accomplished by isolating an
extremely small volume (less than 3 μl) of media above the cell monolayer. Cellular
metabolism causes rapid, easily measured changes to the “microenvironment” in this
small volume.
Typically, a measurement cycle is performed for 5-8 minutes. The media is gently
mixed and the analyte levels are then measured until the oxygen concentration drops
approximately 20-30% and media pH declines approximately 0.1-0.2 pH units. The
measurement is performed using 96 optical fluorescent biosensors embedded in a
sterile disposable cartridge that is placed into the Seahorse 96 well tissue culture
microplate.
Baseline metabolic rates are typically measured 3-4 times, and are reported in pmol/min
for OCR (and PPR) and in mpH/min for ECAR. Compound is then added to the media
and mixed, and then the post-treatment OCR and ECAR measurements are made and
repeated. As cells shift metabolic pathways, the relationship between OCR and ECAR
(PPR) changes.
Because XF measurements are non-destructive, cells can be profiled over a period of
minutes, hours or days.
The XF96 system include a bench top analyzer and touch screen controller, a plate
preparation station (PS) for exchanging media in the tissue culture plate, disposable
measurement / compound delivery cartridges, and microplates for cell culture,
calibration media and XF96 software.
Consumable cartridges, microplates and calibration reagents are packaged and sold in
sets named “Fluxpaks”. One Fluxpak contains the materials for 18 assays.

100900-400_MANUAL XF96 W/ PREP STATION_RA 10
2. Technical Specifications
Model XF96 Prep Station
Dimensions:
Controller:
Analyzer:
Width x height x depth
18” x 22 (max)” x 14”
46 cm x56 cm x 36 cm
16” x 24”x 17”
41 cm x 61 cm x 43 cm
Width x height x depth
14” x 19” x 20”
36 cm x 41 cm x 51 cm
Weight: Controller: 20 lbs. / 9 Kg
Analyzer: 35 lbs, / 14 Kg
35 lbs. / 16 Kg
Power
Requirements 100-120V AC 50/60Hz (220-240VAC
50/60Hz export)
6A (3A) Analyzer
1.8A (0.9A) Controller
100-150V AC 50/60Hz, (220-240VAC
50/60Hz export)
Power cord rating 3- wire (grounded) AC power cord rated
10A or greater 3- wire (grounded) AC power cord
rated 10A or greater
Power fuse ratings 10A (5A export) in each of Analyzer and
Controller 5A
Environmental
Conditions “Normal” Environmental conditions-
indoor use, altitude to 2000 m “Normal” Environmental
conditions- indoor use
Room
Temperature
Range
+60°to 86°F / +15°C to +30°C
No direct sunlight
Humidity less than 80% for temp up to
31°C, decreasing linearly to 50% at 40°C
+60°to 86°F / +15°C to +30°C
No Direct Sunlight
Internal
Temperature and
Environment
Controlled to user selected temperature
not less than 10 °Cabove ambient temp
No CO2control
Incubator and bottle holder
calibrated and set to 37°C, (user
may change both)
No CO2control
Software OS Windows Vista Windows Vista
Data Interface RS232c (internal)
TCP/IP (external) RS232c > USB (1 cable, with
separate Serial to USB adaptor)

100900-400_MANUAL XF96 W/ PREP STATION_RA 11

100900-400_MANUAL XF96 W/ PREP STATION_RA 12
3. XF96 Instrument, Controller and PS Installation Procedure
Unpacking and Component Identification
The XF96 system is packaged in three boxes.
On receipt, immediately check each box for damage. Shipping damage must be
reported to the transportation company and Seahorse Bioscience using the contact
information on page 2 of this document.
The following items are included in an XF96 system:
XF96 Analyzer- The analyzer is a temperature controlled instrument that contains all
optical and electronic measurement components to measure oxygen and proton flux
of cells grown in XF96 cell culture plates. The analyzer is used in conjunction with
XF96 sensor cartridges.
Plate Preparation Station (PS) – The PS is required for accurately exchanging growth
media for assay media in the tissue culture plate wells. It also contains a
temperature controlled oven for incubating the cell culture plates in a 37°C/non-CO2
environment after the media exchange and a temperature controlled dry bath for
warming and incubating the assay media.
Controller. Operation of the Analyzer is done through a high resolution color LCD touch
screen that may be located in front or beside the XF96 analyzer (a separate
keyboard and mouse (included) may also be used). The controller communicates
with the analyzer using a single digital communication (RS232) cable and a single
Serial > USB cable and communicates with the PS via a single Serial > USB cable.
Prep Station (PS) and XF96 Flux Analyzer
The XF96 and Prep Station require two people to lift and handle safely.
Each person should firmly grasp the base of the unit at opposite ends to one another. Use OSHA
standards for lifting techniques.

100900-400_MANUAL XF96 W/ PREP STATION_RA 13
The following items are included in the XF96 instrument and controller boxes
Instrument/Controller Number
XF96 Instrument 1
XF Controller 1
XF Controller Stand 1
Power Cord (instrument) 1
Power Cord (controller) 1
Power Supply (controller) 1
RS232 Cable 1

100900-400_MANUAL XF96 W/ PREP STATION_RA 14
RS232 > USB Cable 1
Wireless Mouse/Keyboard 1 set
USB Extension Cable 1
Extra Fan Filters 2
Excel 2007 CD 1
USB drive 1
The following items are included in the Prep Station Box:
Prep Station Number
Prep Station 1
8 channel Manifold

100900-400_MANUAL XF96 W/ PREP STATION_RA 15
XF Plate Tray
Power Cord 1
RS232 Cable 1
RS232>USB adaptor
and USB cable 1
Reagent Bottles 5
Reagent Bottle Top/Tube
(with white check valve) 2
Reagent Bottle Top/Tube
(without check valve) 2

100900-400_MANUAL XF96 W/ PREP STATION_RA 16
Waste Bottle 1
Bottle Hose Assembly
(with red check valve) 1
Media Hose Assembly
(with red check valve) 1
Waste Hose Assembly
(with waste
bottle top)
1
Vacuum Filter/muffler 1
Suitable Locations for the XF96 system
The XF96 is designed for laboratory use. The internal environment of the analyzer is
controlled to a preset temperature by the user, and therefore, laboratory room
temperature must be maintained within the range listed in the specification table.
Analyzer temperature control performance can be monitored using the status display on
the right side of the analyzer.
The XF96 uses optical detection technology to measure extremely low levels of
fluorescent emission from analyte sensors. While the analyzer has been designed to

100900-400_MANUAL XF96 W/ PREP STATION_RA 17
shield room light, excessive light such as direct sunlight is likely to influence
measurements and should be avoided.
The XF96 system is intended to be used with a non-CO2, 37°C incubator that is a built
in component of the Prep Station. This allows cell culture plates to remain warm during
transport from the incubator to the analyzer.
Removing Shipping Protection Components from the XF Analyzer
The analyzer is shipped with protection components that must be removed prior to use.
To prevent damage during shipping, the instrument is shipped with a cartridge loaded
onto the probe head and lowered onto a plate on the tray. These items must be
removed prior to running your first assay by doing the following:
1) Power on both the controller and
instrument. Launch the XF96 Analysis
software. The software will initialize the
instrument and raise the probe head.
2) Click on the “Instrument” button, and
then the “plate manager” button as
shown to the right.
3) Click on the “strip cartridge” button.
The tray on the instrument will open
and you will be prompted to put a plate
in the tray. Since there is already one
present, just click “OK”.
4) The shipping cartridge will be
stripped from the probe head and then
the cartridge and plate will be ejected
from the instrument. When the tray
opens, you will be prompted to remove
the cartridge and plate. Once
removed, click OK.

100900-400_MANUAL XF96 W/ PREP STATION_RA 18
Internal components of the XF96 Analyzer
The measurement enclosure is the heart of the XF96 Analyzer. Removing the side
doors reveals the measurement chamber in which the assay is conducted. The electro-
optics hardware is enclosed in a card cage in the rear chamber and this is connected to
the probe head through a set of bundles of fiber optic cables. The base of the enclosure
contains the primary controller board and heater assembly. The following describes
each of the hardware features pointed out in the images below.
1LCD Message screen—Displays current instrument action and internal
temperature.
2Cover latches—Push buttons to lift gull wing doors (not shown) up to expose
the internal components of the instrument
3 Tray and Heat Sink
4Probe Head and Injection Manifold—The probe head consists of 96 “light
pipes” to carry the optical signals to and from the sensors. The Injection
Manifold uses compressed air to inject compounds loaded into Sensor
Cartridge ports
5 Fiber Bundles
6Front Stripper Arm—Used for Sensor Cartridge removal at the end of assay
runs, there are 4 total Stripper Arms, 2 in front and 2 in rear.
7 Bar Code Reader—Reads bar code on Sensor Cartridge and cell plate
8Circulating Fan—Helps to stabilize environment inside XF96
XF96 Front/Side View XF96 Front View
1
2
3
4
5
6
7
8

100900-400_MANUAL XF96 W/ PREP STATION_RA 19
Setup and Interconnects: Cable Installation
The XF96 Analyzer is operated from a touch screen computer mounted to a stand that
fits up against the front of the instrument. Two RS-232 cables handle the
communication of commands and data between the instrument and the computer.
The controller may be connected to an external network. A mouse and keyboard have
been provided to allow the use of software other than the XF96 instrument control
application.
Refer to the list and pictures on
pages 13-16 to identify each cord,
and refer the diagrams on the right
to identify the sockets.
1. Connect power cords:
One power cord is used to
connect the instrument to a
grounded AC (mains) outlet. A
second power cord is used to
connect the controller power
supply module to the AC supply.
The power supply module is then
connected to the socket at the
bottom of the controller (lay the
controller on a flat surface to
expose the connectors). Repeat
this procedure to connect the PS
using a power cord and power
supply module.
2. Connect the data cables
One RS 232 cable connects the
controller serial port to the
analyzer socket labeled “COM 1”
A second cable (serial to USB,
no separate adaptor) connects
the analyzer socket labeled
“COM 2” to the USB port on the
Controller Ports (underside)
XF96 Rear Panel
PS Rear Panel
AC input
Serial Port USB Ports (4)
Network
Port
AC input Serial Ports
Power
Switch Fan
Power
Switch
AC input
Serial Port

100900-400_MANUAL XF96 W/ PREP STATION_RA 20
controller directly adjacent to the
network (Ethernet) port. This port
must be used for proper
functioning of the instrument and
barcode reader (see diagram to
right).
A third cable (RS232 serial cable
with a separate USB adaptor)
connects the PS serial port to the
USB port (Com 3) which is
directly below the Com 2 USB
port on the controller. This port
must be used for proper
functioning of the instrument and
Prep Station (see diagram to
right).
Connect the USB extension cable to one of the USB ports on the controller to allow
for easy access to the USB port for data transfer to a USB memory device.
3. Connect external network cables. The controller may be networked via the Ethernet
port on the controller.
4. Connect the Mouse and Keyboard: Open the mouse and keyboard set and insert the
batteries properly. Insert the wireless USB module into one of the USB ports on the
controller. (Note: the mouse and keyboard should function properly without inserting
the accompanying CD into the controller.)
Note that you may be required to install the Keyspan USB Serial Adapter software in
order for the controller and PS to communicate with each other. Please see below for
detailed instructions on installation and set up of the Keyspan adapter.
Keyspan USB Serial Adapter Installation and Setup
The Keyspan USB serial adapter is designed to connect
the Plate Preparation station to the controller or separate
computer. It is a communications pass through that is
required for the Plate Preparation station to be operated by
a computer.
Controller USB Ports for Com 2
and Com 3 connections
USB Port for
Com 2
(Barcode
Reader)
Network
Port
USB Port for
Com 3
(Prep Station)
Table of contents