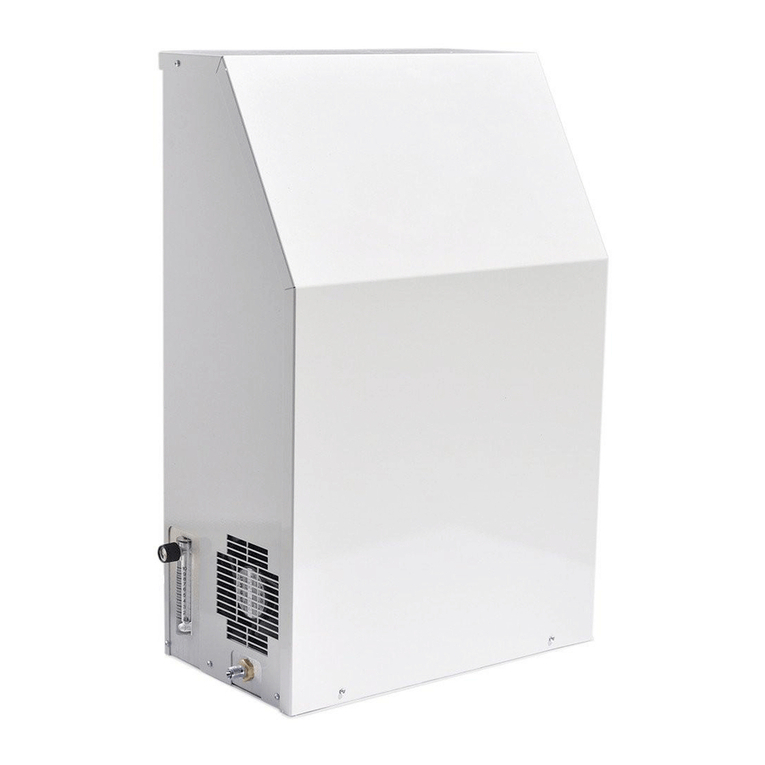
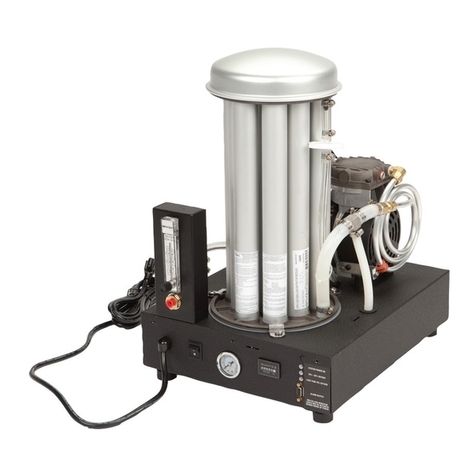
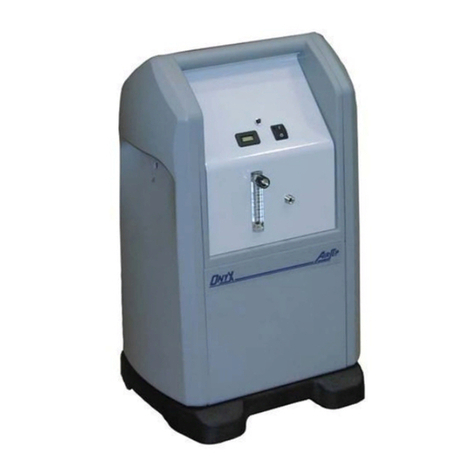
AirSep AS-20 User manual

Suggested List Price $75.00 (U.S.D.)
AirSep®Corporation
PSA Oxygen Generator
Models AS-20–1000
Instruction Manual
MN011-1 A12/02
AirSep®Corporation •260 Creekside Drive •Buffalo, NY 14228-2075 USA
Phone: (716) 691-0202 •Fax: (716) 691-1255


Ownership Data
Please take a moment to note below important information about your AirSep®Corporation
PSA Oxygen Generator. Retain this instruction manual, along with your invoice, to serve as
a permanent record of your purchase.
PSA Oxygen Generator
Model Number:
Serial Number:
Invoice Date:
Start-up Date:
AirSep Representative
Company:
Contact:
Address:
City/Town: State: Zip:
Country: Fax:
Phone: Telex:
Before you attempt to install, operate, or repair the oxygen generator,
read and thoroughly understand this instruction manual. Improper
operation can result in severe bodily injury, damage to the oxygen
generator, or poor performance.


AirSep®Corporation 12/02
AS-20—1000 Instruction Manual table of contents - i
Table of Contents
1.0 Introduction ..................................................................................... 1-1
1.1 General .............................................................................................1-1
1.2 Warnings, Cautions, and Notes ........................................................1-1
1.3 Symbols ............................................................................................1-2
1.4 References to Controls and Indicators with Tags or Labels .............1-2
2.0 Safety................................................................................................ 2-1
2.1 General .............................................................................................2-1
2.2 Potential Hazards .............................................................................2-1
2.3 Safety Publications ...........................................................................2-3
3.0 Plant Description............................................................................. 3-1
3.1 General .............................................................................................3-1
4.0 Component Descriptions................................................................ 4-1
4.1 External Components .......................................................................4-1
4.1.1 Adsorbers 4-2
4.1.2 Enclosure 4-2
4.1.3 Control Panel 4-2
4.1.4 Connections 4-3
4.2 Manifold Components.......................................................................4-4
5.0 Installation ....................................................................................... 5-1
5.1 Handling and Unpacking...................................................................5-1
5.2 Pre-installation Guidelines ................................................................5-2
5.3 Installation Instructions .....................................................................5-3
6.0 Operation ......................................................................................... 6-1
6.1 Initial Start-up....................................................................................6-1
6.2 Operation ..........................................................................................6-3
6.3 Shutdown..........................................................................................6-3
6.4 Normal Start-up ................................................................................6-4

04/02 AirSep®Corporation
table of contents - ii AS-20—1000 Instruction Manual
6.5 Extended Shutdown..........................................................................6-4
6.6 Start-up after an Extended Shutdown...............................................6-4
7.0 Maintenance..................................................................................... 7-1
7.1 Daily Monitoring ................................................................................7-1
7.2 Monthly Monitoring ...........................................................................7-1
7.3 Removing the Front Cover of the Enclosure (Not available on AS-450
— AS-1000 models) .....................................................................................7-2
7.4 Depressurizing the Filters .................................................................7-3
7.5 Changing Filter Elements .................................................................7-4
7.6 Depressurizing the Oxygen Generator .............................................7-5
7.7 Adjusting the Feed Air Regulator......................................................7-6
7.8 Adjusting the Pressure Switch ..........................................................7-6
8.0 Troubleshooting .............................................................................. 8-1
AAppendix Technical Data............................................................... A-1
Specifications .............................................................................................. A-1
Operating Data ............................................................................................ A-9
Drawings.................................................................................................... A-10
BAppendix Warranty/Returns .......................................................... B-1
Product Warranty......................................................................................... B-1
Limits of Liability .......................................................................................... B-2
Returning the Oxygen Generator or a Component for Service ................... B-2
CAppendix Parts List........................................................................ C-1
AS-20 Parts ................................................................................................. C-2
AS-45 Parts ................................................................................................. C-3
AS-80 Parts ................................................................................................. C-4
AS-160 Parts ............................................................................................... C-5
AS-250 Parts ............................................................................................... C-6
AS-450 Parts ............................................................................................... C-7
AS-750 Parts ............................................................................................... C-8
AS-1000 Parts ............................................................................................. C-9
AirSep®Corporation 12/02
AS-20—1000 Instruction Manual list of illustrations - i
List of Illustrations
Figure 4-1 External Components — Front View ...................................... 4-1
Figure 4-2 Control Panel — AS-45 and AS-80 Models ............................ 4-3
Figure 4-3 Manifold Components — AS-160 and AS-250 Models .......... 4-4
Figure 4-4 Manifold Components — AS-750 Model ................................ 4-5
Figure 5-1 Typical Installation Arrangement............................................ 5-3
Figure 5-2 120 Gallon Oxygen Receiver................................................... 5-5
Figure 7-1 Interior View of AS-45 and AS-80 Models ............................. 7-3
Figure 1 General Arrangement Drawing – AS-20 ................................ A-11
Figure 2 Flow Schematic – AS-20 ......................................................... A-12
Figure 3 Electrical Schematic – AS-20 (120V)...................................... A-13
Figure 4 Electrical Schematic – AS-20 (220V)...................................... A-13
Figure 5 General Arrangement Drawing – AS-45 ................................ A-14
Figure 6 General Arrangement Drawing – AS-80 ................................ A-15
Figure 7 General Arrangement Drawing – AS-160 .............................. A-16
Figure 8 General Arrangement Drawing – AS-250 .............................. A-17
Figure 9 Flow Diagram – AS-45 through AS-250 ................................. A-18
Figure 10 Electrical Diagram – AS-45 through AS-250 (120V)............ A-19
Figure 11 Electrical Diagram – AS-45 through AS-250 (220V)............ A-19
Figure 12 General Arrangement Drawing – AS-450 ............................ A-20
Figure 13 General Arrangement Drawing – AS-750 ............................ A-21
Figure 14 Flow Diagram – AS-450 through AS-750 ............................. A-22
Figure 15 Electrical Schematic – AS-450 through AS-750 (120V) ...... A-23

04/02 AirSep®Corporation
Figure 16 Electrical Schematic – AS-450 through AS-750 (220V) ...... A-23
Figure 17 General Arrangement Drawing– AS-1000 ............................ A-24
Figure 18 Electrical Schematic – AS-1000 (120V)................................. A-25
Figure 19 Electrical Schematic – AS-1000 (220V)................................. A-25
Figure 20 Flow Diagram – AS-1000........................................................ A-26
ii - list of illustrations AS-20—1000 Instruction Manual

AirSep®Corporation 12/02
AS-20—1000 Instruction Manual 1-1
1.0 Introduction
1.1 General
This instruction manual provides descriptions of the AirSep Corporation PSA
Oxygen Generator Models AS-20, AS-45, AS-80, AS-160, AS-250, AS-450, AS-
750, and AS-1000, as well as instructions for their installation, operation, and
maintenance. The Appendix of this instruction manual also includes pertinent
drawings and component literature.
To ensure safe operation and proper maintenance of the oxygen generator, AirSep
Corporation recommends that you keep this instruction manual readily available for
reference.
1.2 Warnings, Cautions, and Notes
As you read this instruction manual, pay special attention to the WARNING,
CAUTION, and NOTE messages. They identify safety guidelines or other important
information as follows:
Provides information that can prevent severe bodily injury or
death.
Cautions against the risk of electric shock.
Provides information important enough to emphasize or repeat.

12/02 AirSep®Corporation
1.3 Symbols
IEC 417, No. 5019 Protective conductor terminal
IEC 417, No. 5007 On (supply)
IEC 417, No. 5008 Off (supply)
ISO 3864, No. B.3.6 Caution, risk of electric shock
ISO 3864, No. B.3.1 Caution (refer to accompanying
documents)
1.4 References to Controls and Indicators
with Tags or Labels
This instruction manual uses uppercase characters (e.g., ON/OFF switch) to refer
to controls and indicators identified by tags or labels. Numbers inside parentheses
(e.g., V-2) identify manually operated flow controls (e.g., manual valves). Refer to
Chapter 4 for a description of the oxygen generator components.
1-2 AS-20—1000 Instruction Manual

AirSep®Corporation 12/02
AS-20—1000 Instruction Manual 2-1
2.0 Safety
2.1 General
Oxygen, the most abundant of the elements, makes up approximately 50 percent
of the earth’s crust. In its free state, oxygen forms approximately one-fifth of our air by
volume. Although classified as a non-flammable gas, oxygen supports combustion.
As an active element, it combines directly or indirectly with all elements except the
rare gases. Oxygen is an invisible gas that is colorless, odorless, and tasteless.
To ensure your safety, thoroughly read and familiarize yourself with this entire
section of this instruction manual. In addition, AirSep Corporation strongly
recommends that you review this section periodically.
2.2 Potential Hazards
Oxygen vigorously accelerates the burning of combustible
materials. In an oxygen-enriched atmosphere, many materials
that do not burn in normal air require only a slight spark or
moderate heat to set them aflame.
To reduce the risk of fire or explosion, keep gasoline, kerosene,
oil, grease, cotton fibers, wood, paint, and other combustible
material away from all parts of the oxygen generator.
Do not allow smoking, open flame, or usage of electronic
devices that may generate sparks (e.g., cellular telephones)
within 15 m (50 feet) of any part of the oxygen generator.
Post “NO SMOKING OR OPEN FLAMES” signs conspicuously
near the location of the oxygen generator.
Take extreme care to keep all oxygen piping and vessels clean.
To avoid fire or explosion, oxygen clean all surfaces that can
come in contact with the product oxygen. Check all oxygen fittings
for leaks with an oxygen-compatible, leak-detecting solution.
To prevent fire or electrical shock, locate the oxygen generator
indoors, away from rain or any other type of moisture.

12/02 AirSep®Corporation
2-2 AS-20—1000 Instruction Manual
Before you attempt to install, operate, or repair the oxygen
generator, read and thoroughly understand this instruction
manual and the component manuals located in Appendix D of
this instruction manual. Improper installation, operation, or
repairs can result in severe bodily injury, damage to the oxygen
generator, or poor performance.
The interior of the oxygen generator control cabinet contains
electrical parts that can produce an electrical shock hazard if
not handled properly. To prevent electrical shock, read and
thoroughly understand Section 8 — Troubleshooting in this
instruction manual before you service the oxygen generator.
AirSep oxygen generators are sold for use in industrial
applications only. Contact AirSep Corporation or an authorized
AirSep representative before you use this unit for any medical
application.
Disconnect power before servicing oxygen generator.
Do not disconnect protective earth:

AirSep®Corporation 12/02
2.3 Safety Publications
The safety section of this instruction manual is not a complete summary of
required safety precautions. Review the following publications for additional
information on the safe handling of oxygen:
“Standard for Bulk Oxygen Systems at Consumer Sites;” NFPA No. 50; National
Fire Protection Association; 1 Batterymarch Park; P.O. Box 9101; Quincy,
Massachusetts 02269-9101 USA.
“Oxygen;” Pamphlet G-4; Compressed Gas Association; 1725 Jefferson Davis
Highway; Arlington, Virginia 22202-4102 USA.
“Cleaning Equipment for Oxygen Service;” Pamphlet G-4.1; Compressed Gas
Association; 1725 Jefferson Davis Highway; Arlington, Virginia 22202-4102
USA.
AS-20—1000 Instruction Manual 2-3


AirSep®Corporation 12/02
AS-20—1000 Instruction Manual 3-1
3.0 Plant Description
3.1 General
The AirSep Corporation PSA Oxygen Generator is a self-contained unit that utilizes
Pressure Swing Adsorption (PSA) technology to produce oxygen on site. The
oxygen generator uses compressed air as a feed gas to produce oxygen. The
compressed air flows through a filter assembly before the air enters the adsorber
vessels. A particulate filter removes condensed water, oil, dirt, scale, etc. from the
feed air, then in most models, a separate coalescing filter removes additional oil
and water vapor.
The oxygen generator uses in its adsorber vessels an inert ceramic material called
molecular sieve to separate compressed air into oxygen and other gases. The
unique properties of molecular sieve allow it to attract, or adsorb, nitrogen
physically from air under pressure. This allows oxygen to exit the adsorbers as a
product gas. The process valves on the oxygen generator then direct the oxygen to
the oxygen receiver for storage until needed by your application.
While one adsorber produces oxygen, the other depressurizes to exhaust the
waste gases it adsorbed (collected) during the oxygen production cycle. The entire
oxygen generating process is completely regenerative, which makes it both reliable
and virtually maintenance-free. The molecular sieve does not normally require
replacement when maintained and used according to this instruction manual.
Refer to the illustrations, located in Appendix A of this instruction manual, for a
detailed flow diagram, an electrical schematic, and general arrangement drawings
of all oxygen generator models referenced in this instruction manual as well as
typical cycle sequences and operating pressure levels.


AirSep®Corporation 12/02
AS-20—1000 Instruction Manual 4-1
4.0 Component Descriptions
The drawings in this section illustrate the location of the main components of the
various oxygen generator models. All models include similar components unless
noted otherwise; however, the location and size of these components varies
among the different models. Refer to Appendix A of this instruction manual for
general layout drawings and specifications for all oxygen generator models
referenced in this instruction manual. In addition, the oxygen generator requires use
of an oxygen receiver to provide stable flow and purity for short-term surges of feed
oxygen above the rated capacity of the oxygen generator.
4.1 External Components
Figure 4-1 below illustrates on two models the external components viewed from
the front of the oxygen generator.
A
dsorbers
Control Panel
Enclosure
AS-45 Model AS-750 Model
Figure 4-1 External Components — Front View

12/02 AirSep®Corporation
4-2 AS-20—1000 Instruction Manual
4.1.1 Adsorbers
The adsorbers, or beds, are vessels that contain the molecular sieve used to
adsorb (attract) nitrogen from compressed air and allow oxygen to pass through as
the product gas.
4.1.2 Enclosure
The enclosure protects the control system components of the unit (e.g., circuit
board, pressure switch, fuses, and transformer).
Disconnect power before opening and/or removing enclosure.
Power Cord
(U.S. units) The power cord, and its grounded plug, connects the oxygen
generator to a properly grounded electrical outlet to supply electrical power to
the oxygen generator.
(CE units) A fully qualified electrician must install the appropriate electrical
connection on the end of the power cord for a properly grounded electrical
outlet to supply electrical power to the oxygen generator.
Fuse Holder
The fuse holders contain fuses to protect the electrical components of the oxygen
generator. On the AS-450 through AS-1000 models, the fuse holders are mounted
in the control panel.
Fuses must be replaced with the same type and amp rating as
the original fuses.
4.1.3 Control Panel
The control panel on the oxygen generator contains the controls needed to operate
the oxygen generator and monitor its operation. Examples of typical control panels
are shown in figure 4-3. Not all components are available on every generator. On
the AS-450 through AS-1000 models, the gauges are mounted directly on the
manifolds and the hour meter is inside the control panel.

AirSep®Corporation 12/02
AS-20—1000 Instruction Manual 4-3
Feed Air
Pressure Gauge
A
uto/Manual
Switch
Oxygen
Receiver
Pressure
Gauge
On/Off Switch
Cycle Pressure
Gauge
Manual Drain
Button
Hour Meter
Figure 4-2 Control Panel — AS-45 and AS-80 Models
On/Off Switch
The l/O power switch starts and stops the operation of the unit. The green indicator
light illuminates to indicate that the oxygen generator is receiving electrical power.
Auto/Manual Switch
The AUTO/MANUAL switch selects the operating mode for the oxygen generator.
In the AUTO position, the oxygen generator cycles on and off to meet oxygen
demand. In the MANUAL position, the oxygen generator cycles continuously. The
amber indicator light on the AUTO/MANUAL switch illuminates only when the
oxygen generator produces oxygen.
Manual Drain Button
The oxygen generator uses an automatic valve to periodically drain excess
moisture extracted from the feed air. The manual drain button allows you to
operate the automatic drain valve manually at any time during operation.
Hour Meter (Not available on AS-20 model)
The hour meter indicates the total number of hours the oxygen generator cycles.
FEED AIR PRESSURE Gauge (Not available on AS-450 — AS-1000 models)
The FEED AIR PRESSURE gauge indicates the pressure of the feed air as the air
enters the generator prior to the feed air regulator.
CYCLE PRESSURE Gauge (Not available on AS-450 — AS-1000 models)
The CYCLE PRESSURE gauge indicates the pressure of the feed air before the air
enters the adsorbers. The feed air regulator controls the pressure indicated on the
CYCLE PRESSURE gauge.
ADSORBER PRESSURE Gauges (AS-450 — AS-1000 models only)
The adsorber pressure gauges indicate the pressure in the two adsorbers.
OXYGEN RECEIVER PRESSURE Gauge
The OXYGEN RECEIVER PRESSURE gauge indicates the oxygen pressure in the
oxygen receiver.
4.1.4 Connections

12/02 AirSep®Corporation
4-4 AS-20—1000 Instruction Manual
The oxygen generator provides the connections described below.
Air Inlet
The feed air inlet provides a connection for the feed air hose from the air
compressor.
Oxygen Outlet
The oxygen outlet provides a connection for the oxygen hose to the oxygen
receiver.
Condensate Drain Outlet
The condensate drain outlet provides a connection for a hose to drain condensate
from the oxygen generator filters.
4.2 Manifold Components
Figure 4-4 below illustrates the manifold components of the oxygen generator.
The location and presence of components may vary between the various models
of generators.
Feed Air Regulator
Particulate Filter
Circuit Board
Coalescing Filter
Manual Filter outlet Valve
Waste Valves
Muffler
Feed Air Valves
Equalization Valves
Manual Air Inlet
Valve Pressure Switch
Product Valve
Check Valves
Flow Controller
Filter Drain Valve
Figure 4-3 Manifold Components —
AS-160 and AS-250 Models
This manual suits for next models
7
Table of contents
Other AirSep Oxygen Equipment manuals

AirSep
AirSep Focus Portable User manual

AirSep
AirSep NewLife Elite User manual

AirSep
AirSep ImPulse Elite User manual

AirSep
AirSep Topaz User manual

AirSep
AirSep FreeStyle 5 User manual

AirSep
AirSep FreeStyle User manual

AirSep
AirSep Focus Portable User manual

AirSep
AirSep FreeStyle User manual

AirSep
AirSep Onyx User manual

AirSep
AirSep NewLife Elite User manual
Popular Oxygen Equipment manuals by other brands

Invacare
Invacare Perfecto2 V user manual

Suburban
Suburban OXYGEN THERAPY DOOR 12155-00-DRDRAA owner's manual

Precision Medical
Precision Medical 1900 Series user manual

ResMed
ResMed Swift FX Nano user guide

sorin
sorin LILLIPUT2 ECMO Instructions for use

Invacare
Invacare Platinum IRC5LXAW Operator's manual