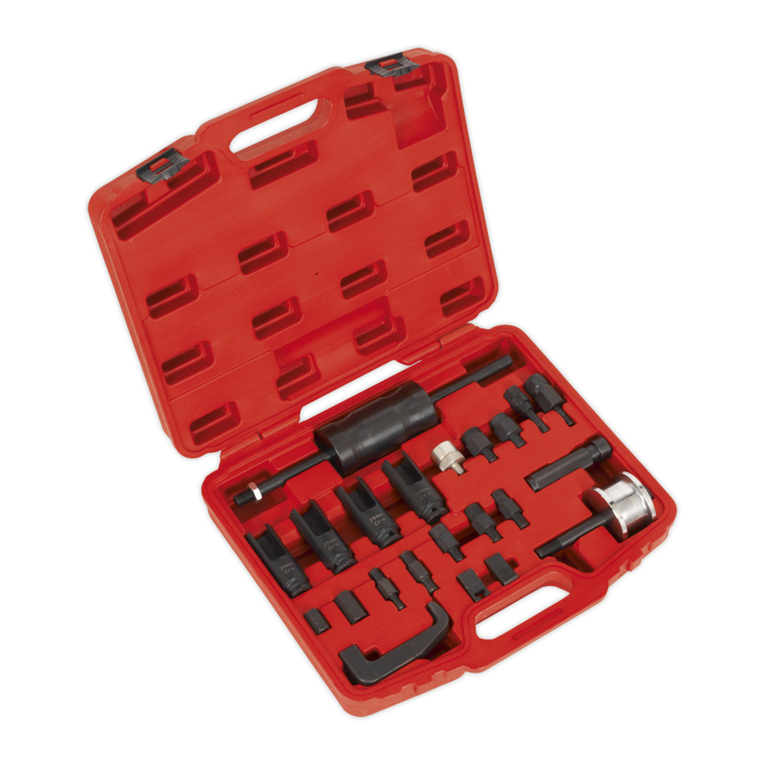
PNEUMATIC DIESEL INJECTOR PULLER
MODEL NO: VS2080
Thank you for purchasing a Sealey product. Manufactured to a high standard, this product will, if used according to these instructions,
and properly maintained, give you years of trouble free performance.
IMPORTANT: PLEASE READ THESE INSTRUCTIONS CAREFULLY. NOTE THE SAFE OPERATIONAL REQUIREMENTS, WARNINGS & CAUTIONS. USE
THE PRODUCT CORRECTLY AND WITH CARE FOR THE PURPOSE FOR WHICH IT IS INTENDED. FAILURE TO DO SO MAY CAUSE DAMAGE AND/OR
PERSONAL INJURYAND WILL INVALIDATE THE WARRANTY. KEEP THESE INSTRUCTIONS SAFE FOR FUTURE USE.
1. SAFETY
WARNING! Ensure Health and Safety, local authority and general workshop practice regulations are adhered to when using tools.
WARNING! Always use caution when working around fuel systems. The fuel in the fuel rail may be pressurised even if the engine is
not running.
IMPORTANT: These instructions are provided as a guide only. Always refer to the vehicle manufacturer’s service instructions, or a
proprietary manual, to establish the current procedure and data, also any warnings or cautions particular to the vehicle.
8DO NOT use the set if any parts are missing or damaged.
8DO NOT use this tool for any purpose other than that for which it is designed.
9Switch off vehicle’s ignition and disconnect the battery before commencing work under the bonnet.
9You must follow the vehicle’s service manual cautions when working around the air bag system. If the cautions are not followed the air
bag may deploy unexpectedly even after the ignition is turned ‘OFF’, resulting in personal injury.
9Never lay tools on the vehicle’s battery. This may short the terminals together, causing harm to yourself, the tools, or the battery.
9Operate in a well ventilated area. DO NOT inhale fuel vapours.
9Wear approved eye protection.Afull range of personal safety equipment is available from your Sealey stockist.
9Wear suitable clothing to avoid snagging. DO NOT wear jewellery and tie back long hair.
9Keep children and other unauthorised persons away from the working area.
9Keep yourself, tools, and test equipment away from hot engine parts.
9Always keep a fire extinguisher that is suitable for fuel/electrical/chemical fires close by,
WARNING! NEVER smoke or have open ames near vehicle.
9Always relieve fuel pressure before disconnecting fuel lines from injectors.
9Use a cloth to cover fuel line fittings when connecting or disconnecting fuel lines. Avoid contact with fuel.
9Clean up all fuel spills immediately and dispose of all used cloths properly.
9Maintain the tool components in good and clean condition for best and safest performance.
9When work on the vehicle is finished, ensure all connections on vehicle are restored, and that there are no tools left in the engine bay.
9Replace tools in the carrying case and store in a safe, dry, childproof location.
9Air under pressure can cause severe injury.
9 Always shut o air supply, drain hose of air pressure and disconnect tool from air supply when not in use, before changing accessories
or when making repairs.
9Never direct air at yourself or anyone else.
9 Whipping hoses can cause severe injury. Always check for damaged or loose hoses and ttings.
9Cold air shall be directed away from the hands.
8DO NOT exceed the maximum air pressure stated on the tool.
8DO NOT carry an air tool by the hose.
9Exposure to vibration can cause disabling damage to the nerves and blood supply of the hands and arms.
9Wear warm clothing when working in cold conditions and keep your hands warm and dry.
9Operate and maintain the power tool as recommended in the instructions handbook, to prevent an unnecessary increase in
vibration levels.
8DO NOT use worn or ill-tting sockets or extensions, as this is likely to cause a substantial increase in vibration.
9Slips, trips and falls are major causes of workplace injury.
9Be aware of slippery surfaces caused by the use of the tool and also of trip hazards caused by the air line or hydraulic hose.
9Proceed with care in unfamiliar surroundings. Hidden hazards, such as electricity or other utility lines, can exist.
9Use only sizes and types of accessories and consumables that are recommended by the manufacturer; DO NOT use other types or
sizes of accessories and consumables.
9When using a power tool for, the operator can experience discomfort in the hands, arms, shoulders, neck, or other parts of the body.
9 While using the tool, the operator should adopt a comfortable posture while maintaining secure footing and avoiding awkward or o-
balanced postures.
9The operator should change posture during extended tasks, which can help avoid discomfort and fatigue.
9If the operator experiences symptoms such as persistent or recurring discomfort, pain, throbbing, aching, tingling, numbness, burning
sensations or stiness, these warning signs should not be ignored. The operator should tell the employer and consult a qualied health
professional.
WARNING!:The use of the tool can expose the operator’s hands to hazards including crushing, impacts, cuts and abrasions and heat.
Wear suitable gloves to protect hands.
Refer to
instruction
manual
Wear a face
shield Wear protective
clothing
VS2080 Issue 1 16/10/2023
Original Language Version
© Jack Sealey Limited
Wear protective
gloves Wear ear
protection


