manuals.online logo
Brands
  1. Home
  2. •
  3. Brands
  4. •
  5. Sealey
  6. •
  7. Sander
  8. •
  9. Sealey SM750 User manual

Sealey SM750 User manual

1. SAFETY INSTRUCTIONS
IMPORTANT: PLEASE READ THESE INSTRUCTIONS CAREFULLY. NOTE THE SAFE OPERATIONAL REQUIREMENTS, WARNINGS & CAUTIONS.
USE THE PRODUCT CORRECTLY AND WITH CARE FOR THE PURPOSE FOR WHICH IT IS INTENDED. FAILURE TO DO SO MAY CAUSE
DAMAGE AND/OR PERSONAL INJURY AND WILL INVALIDATE THE WARRANTY. PLEASE KEEP INSTRUCTIONS SAFE FOR FUTURE USE.
Thank you for purchasing a Sealey product. Manufactured to a high standard this product will, if used according to these instructions
and properly maintained, give you years of trouble free performance.
INSTRUCTIONS FOR:
BELT/DISC SANDER 25 x 762mm 250W/230V
MODEL No: SM750
1.1. ELECTRICAL SAFETY
WARNING! It is the responsibility of the owner and the operator to read, understand and comply with the following:
You must check all electrical products, before use, to ensure that they are safe. You must inspect power cables, plugs, sockets and any other
connectors for wear or damage. You must ensure that the risk of electric shock is minimised by the installation of appropriate safety devices. A
Residual Current Circuit Breaker (RCCB) should be incorporated in the main distribution board. We also recommend that a Residual Current
Device (RCD) is used. It is particularly important to use an RCD with portable products that are plugged into a supply which is not protected
by an RCCB. If in any doubt consult a qualified electrician. You may obtain a Residual Current Device by contacting your Sealey dealer.
You must also read and understand the following instructions concerning electrical safety.
1.1.1. The Electricity at Work Act 1989 requires that all portable electrical appliances, if used on business premises, are tested by a
qualified electrician, using a Portable Appliance Tester (PAT), at least once a year.
1.1.2. The Health & Safety at Work Act 1974 makes owners of electrical appliances responsible for the safe condition of those appliances
and the safety of the appliance operators. If in any doubt about electrical safety, contact a qualified electrician.
1.1.3. Ensure that the insulation on all cables and on the appliance is safe before connecting it to the power supply. See 1.1.1. and 1.1.2.
and use a Portable Appliance Tester.
1.1.4. Ensure that cables are always protected against short circuit and overload.
1.1.5. Regularly inspect power supply cables and plugs for wear or damage and check all
connections to ensure that none is loose.
1.1.6. Important: Ensure that the voltage marked on the appliance matches the power supply
to be used and that the plug is fitted with the correct fuse - see fuse rating at right.
1.1.7. DO NOT pull or carry the appliance by the power cable.
1.1.8. DO NOT pull the plug from the socket by the cable.
1.1.9. DO NOT use worn or damaged cables, plugs or connectors. Immediately have any faulty
item repaired or replaced by a qualified electrician. When a BS 1363/A UK 3 pin plug is
damaged, cut the cable just above the plug and dispose of the plug safely.
Fit a new plug according to the following instructions (UK only).
a)Connect the GREEN/YELLOW earth wire to the earth terminal ‘E’.
b)Connect the BROWN live wire to the live terminal ‘L’.
c)Connect the BLUE neutral wire to the neutral terminal ‘N’.
d)After wiring, check that there are no bare wires, that all wires have been correctly
connected, that the cable outer insulation extends beyond the cable restraint and that the
restraint is tight.
Double insulated products, which are always marked with this symbol , are fitted with live (brown) and neutral (blue) wires only.
To rewire, connect the wires as indicated above - DO NOT connect either wire to the earth terminal.
1.1.10. Products which require more than 13 amps are supplied without a plug. In this case you must contact a qualified electrician to ensure
that a suitably rated supply is available. We recommend that you discuss the installation of an industrial round pin plug and
socket with your electrician.
1.1.11. If an extension reel is used it should be fully unwound before connection. A reel with an RCD fitted is preferred since any appliance
plugged into it will be protected. The cable core section is important and should be at least 1.5mm2, but to be absolutely sure that the
capacity of the reel is suitable for this product and for others which may be used in the other output sockets, we recommend the use
of 2.5mm2 section cable.
RECOMMENDED
FUSE RATING: 5 AMP
©Jack Sealey Limited Original Language Version SM750 Issue No.1 27/11/12
1.2. GENERAL SAFETY
WARNING! Ensure all Health and Safety, local authority, and general workshop practice regulations are strictly adhered to.
WARNING! Disconnect from the mains power supply before changing accessories, servicing or performing any maintenance.
WARNING! DO NOT sand any materials containing asbestos.
Ensure the operating voltage stated on the ratings plate corresponds to your mains power supply.
Check the belt and disc sander and the electrical connections for any damage and DO NOT use the tool if the sander or the cable is
damaged.
Ensure that the belt and disc sander is switched off before plugging in to the mains power supply.
Persons with limited physical, sensory or mental abilities are not allowed to use the unit, unless they are fully supervised and briefed on
safety issues by a qualified person.
Use the belt and disc sander according to this manual and only for the purpose for which it is designed.
Before starting up, make sure that no spanners or adjusting keys are attached to the machine.
Avoid contact with grounded surfaces such as radiators, pipes etc.
Maintain correct balance and footing, ensure that the floor is not slippery and wear non-slip rubber soled footwear.
NOTE: Remember that the disc and belt will still be moving for several seconds whilst slowing down, after switching off.
Familiar yourself with your working area and be alert for possible hazards, which you might not hear due to machine noise.
Inspect the work piece and remove all nails and screws before sanding.
Be aware that sparks may ignite the dust or fumes.
Switch off the belt and disc sander before making any adjustments and when the unit is not in use.
After finishing work and maintenance, disconnect the power lead from the mains supply.
In the event of an electrical or mechanical malfunction, immediately switch off the sander and do not use it further.
Always keep your work area clean.
Never use the power cable to carry the belt and disc sander. Keep the cable away from hot, sharp edges and moving parts.
WARNING! Always wear gloves and safety goggles and a dust mask as some coatings and wood dust may be harmful and toxic.
©Jack Sealey Limited Original Language Version SM750 Issue No.1 27/11/12
Always work in a well ventilated area. Whenever possible use
the dust collection outlets provided on the machine.
Take care that the belt and disc sander cannot tip over or move
while sanding long or heavy objects. If necessary, fasten the
belt and disc sander to a supporting surface.
Ensure that the sanding belt is running in the correct direction
and ensure that the sanding disc or sanding belt is not
damaged.
DO NOT allow children or untrained persons to operate the
sander. Keep them away from the work area.
Ensure the sanding belt is correctly positioned and adjusted so
that it cannot run off the pulleys.
DO NOT remove the safety guard whilst sander is in use.
Remove ill fitting clothing, ties and loose jewellery and tie back
long hair. Keep hands and body clear of the worktable when
operating the sander.
DO NOT use the belt and disc sander near flammable liquids,
gases or dust.
DO NOT disassemble the machine and do not try to repair it
yourself. Have the unit repaired by a professional or contact
your local Sealey dealer. Always use original replacement parts.
DO NOT touch the sanding belt immediately after operation; it
may be extremely hot and cause burns. The sanding belt is
sharp-edged.
DO NOT use excessive force against the sanding belt or disc.
DO NOT operate the sander when you are tired, under the
influence of alcohol, drugs or intoxicating medication.
 DO NOT get the sander wet or use in damp or wet locations or
areas where there is condensation.
DO NOT switch the sander on while the workpiece is in
contact with the abrasive and DO NOT leave the sander
running unattended.
2. INTRODUCTION
3. TECHNICAL SPECIFICATION
Model No: ................................................................................. SM750
Belt Size: ...........................................................................25 x 762mm
Belt Speed:..........................................................................845mtr/min
Disc Size: ..................................................................................125mm
Disc Speed: ............................................................................ 2850rpm
Table Size:.......................................................................128 x 185mm
Table Tilt: ...................................................................................... 0-45°
Motor Power: ................................................................... 250W - 230V
Supply:.......................................................................................... 230V
Dust Extraction: ..................................................................2 x Ø45mm
Weight: .........................................................................................7.4kg
Replacement Sanding Belts:..............................................................
Model No: ................................................................................. Grade:
SM750B60G............................................................. (Pack of 5) 60Grit
SM750B80G............................................................. (Pack of 5) 80Grit
SM750B120G......................................................... (Pack of 5) 120Grit
Replacement Sanding Discs:.............................................................
Model No: ................................................................................. Grade:
SM750D80G................................................................................80Grit
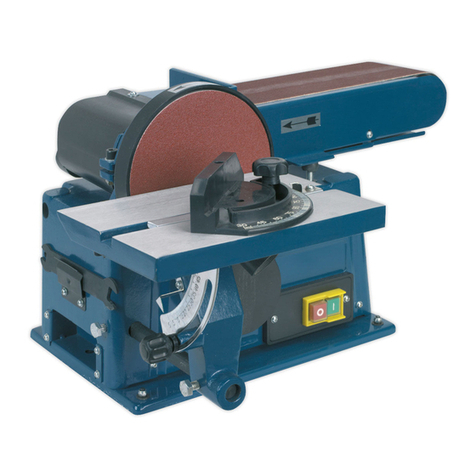
Bench mounting semi-portable belt and disc sander suitable for
general woodworking applications. Powerful induction motor with
smooth, bearing-mounted drive pulleys gives quiet operation. Sanding
disc table tilts to 45° and is supplied with mitre gauge for accurate
angle sanding. Sanding belt is positioned vertically.
fig.1
1 Cover clamp knob
2 Clear protective cover
3 Vertical sanding belt
4 Adjustable sanding table
5 Table locking lever
6 Lever fixing screw
7 Disc table clamp knob x 2
8 Adjustable angle guide
9 Dust exhaust outlet x 2
10 Sanding disc table
11 Sanding disc
12 On/Off switches
13 Sanding belt tracking knob
14 Table levelling screw
15 Belt cover fixing screw
4. ASSEMBLY & ADJUSTMENT
4.2 Attaching the sanding disc table.
4.2.1 On each inner mounting face of the sanding table adjustment
scales there is a spigot which acts as a hinge point when
adjusting the angle of the table. See fig.3(P). Hold the sanding
table (T) in the position shown in fig.3 above, slide the

WARNING! Ensure that the sander is disconnected from the
mains power supply before beginning assembly.
4.1 Attaching the sanding disc dust extractor.
4.1.1 Attach the dust extractor plate (E) over the lower part of the
sanding disc using the four screws provided as shown in fig.2.
fig.3
fig.2
©Jack Sealey Limited Original Language Version SM750 Issue No.1 27/11/12
spigots into the 'L' shaped slots either side of the sanding disc
until the table stops, then lift the table up until the spigots stop
at point (S) on either side. Retaining the table in this position,
insert a clamping knob (K) through the curved slot in one of the
sanding table adjustment scales and screw it into the threaded
hole provided in the flange around the disc. Tighten the knob to
hold the table in position and then screw the second knob 'K'
into position on the other side of the table.
4.2.2 Place the adjustable, horizontal angle guide into the slot in the
table when required and adjust the angle to your needs.
4.3 Attaching the sanding belt backing plate.
4.3.1 Referring to fig.5, position the backing plate (A) behind the belt
and insert the two socket cap screws provided through the
slots in the plate and screw them down, finger tight. See
fig.5(F) The plate should just touch the back of the belt without
applying any pressure to it. Finally tighten the two screws with
a 3mm hex key.
4.7 Dust extraction.
4.7.1 Both the belt and the disc are provided with dust extraction
ports for connection to a workshop extractor system or a
vacuum cleaner and it is recommended that these facilities be
used if they are available.
4.7.2 If no extraction facilities are available you must wear suitable
respiratory protection. Contact you local Sealey dealer for a full
range of protective equipment.
5.1 PREPARATION.
5.1.1 If the sander is to be used in a temporary work environment
ensure that the rubber feet are attached in order to keep it
stable in use. Wear suitable respiratory protection.
5.1.2 The sander can also be permanently installed in a workshop
environment by removing the feet and bolting the unit to a
bench using the same fixing holes as used for the feet. Ideally
the sander should be connected to a dust extraction system or
vacuum cleaner.
5.1.3 DO NOT allow two people to use the sander at the same
time.
5.2 OPERATION.
5.2.1 Adjust the angle of the appropriate table and/or guide as
required by the job in hand.
5.2.2 Plug the sander into the mains power supply.
5.2.3 Switch on the sander using the green ON button. See fig.1(12).
5.2.4 Remember that even though you are using only one of the
sanding facilities, the other is still turning and could
represent a hazard to you or other people nearby.
5.2.5 Allow the belt or disc to reach full speed before bringing the
workpiece into contact with it. Do not use excessive force to
remove material but allow the abrasive material to do its job.
5.2.6 Switch off the sander using the red OFF button. See fig.1(12).
5.2.7 Allow the disc and belt to come to a standstill before leaving
the sander.
5.2.8 DO NOT leave the sander running unattended.
5.2.9 Unplug the sander from the mains power supply when no
longer required.
4.6 Adjusting the sanding belt.
4.6.1 The sanding belt supplied with the machine is factory set to run
in alignment with the drive wheels. Should the belt begin to run
out of true it can be re-centred using the tracking knob shown
in fig.5(C). Turn the knob clockwise to move the belt to the
right, (when facing the machine). Turn the knob counter
clockwise to move the belt to the left.
4.4 Attaching the sanding belt table. (See fig.4).
4.4.1 Take the sanding belt table (A) in the orientation shown in fig.4
and allow the sanding belt to pass the through the slot and into
the hole in the middle of the disc. Lower the disc down until
the adjusting slot (B) is adjacent to the fixing nut on the corner
of the main casting.
4.4.2 Fix the table in position by passing the threaded portion of the
inner fixing (C) through the adjusting slot (B) and into the fixing
nut. Hand tighten at this stage.
4.4.3 Push the locking lever (D) onto the inner fixing (C) so that it
engages with the castellations on the end of the fixing.
4.4.4 Slide the spring (E) onto the plain portion of the socket capped
bolt (F) and insert the bolt into the hole in the locking lever (D).
Using a 3mm hex key, carefully screw the bolt into the end of
the inner fixing (C). Do not overtighten.
4.4.5 To overcome the limited arc of movement of the locking lever,
disengage it from the inner fixing by pulling it away from the
table and rotate it in the direction required. Release the lever
so that it re-engages with the inner fixing. You can now, further
tighten or loosen the fixing as required.
4.5 Setting the table at 90°to the belt. (See fig.1).
4.5.1 At the back of the belt table is a recessed, socket capped grub
screw which is used as a stop to quickly allow the table to be
returned to 90° having been set at another angle. See fig.1(14).
4.5.2 To set the stop, partially loosed the table and using a small set
square, set the table surface at 90° to the belt.
4.5.3 Using a 3mm hex key, screw the grub screw downwards until it
just touches the body of the unit without moving the table.
There is a nut on the grub screw on the underside of the table.
When you are satisfied that the stop is correctly positioned,
lock it in place by tightening the nut up to the underside of the
table.
5. OPERATING INSTRUCTIONS
fig.5
fig.4
©Jack Sealey Limited Original Language Version SM750 Issue No.1 27/11/12
NOTE: It is our policy to continually improve products and as such we reserve the right to alter data, specifications and component parts without prior notice.
IMPORTANT: No liability is accepted for incorrect use of this product.
WARRANTY: Guarantee is 12 months from purchase date, proof of which will be required for any claim.
INFORMATION: For a copy of our latest catalogue and promotions call us on 01284 757525 and leave your full name and address, including postcode.
01284 757500
01284 703534
sales@sealey.co.uk
Sole UK Distributor, Sealey Group,
Kempson Way, Suffolk Business Park,
Bury St. Edmunds, Suffolk,
IP32 7AR
www.sealey.co.uk
Web
email
6.6 Changing the sanding belt.
6.6.1 Referring to fig.1, remove the cover clamp knob (1) and lift off
the clear protective cover (2).
6.6.2 Referring again to fig.1, remove the two belt cover fixing
screws (15) and lift off the black plastic side cover to reveal
the belt and drive wheels as shown in fig.5.
6.6.3 Wheel (E) is spring loaded to hold the belt at the correct
tension.
6.6.4 Push the tracking knob (D) forwards to relieve the tension and
ease the belt off the drive wheels.
6.6.5 Place the new belt onto the upper and lower wheels. Push
knob (D) forwards again and ease the belt back onto wheel (E).
6.6.6 Turn the belt by hand to see if it is running true and make any
necessary adjustments using the tracking knob (C) as
described in Section 4.6.1.
6.6.7 Re-fit the black plastic side cover over the belt and drive
wheels and fix in place using the two fixing screws.
6.6.8 Refit the clear protective cover (2) and hold it in place with the
clamp knob (1).
6.7 Changing the sanding disc.
6.7.1 The abrasive sanding disc has an adhesive backing in order to
attach it to the metal sanding disc.
6.7.2 If fitted, remove the adjustable angle guide from the groove in
the sanding table.
6.7.3 Unscrew and remove the two clamp knobs from either side of
the sanding disc table. Take hold of the front edge of the disc
and pull it away from the disc to remove it.
6.7.4 Remove the four screws that hold the dust extractor cover in
place and put it to one side.
6.7.5 Insert a blade between the back of the abrasive disc and the
surface of the metal disc, taking care not to damage the
metal surface. Ease the abrasive disc away from the metal
surface until you can get hold of it and then peel it away from
the metal disc. Remove any excess adhesive from the surface
of the disc. Peel off the backing from a new abrasive disc and
stick it to the metal disc ensuring it is centred.
6.7.6 Re-attach the exhaust cover and sanding table as described in
Sections 4.1 and 4.2.
6. MAINTENANCE
Environmental Protection.
Recycle unwanted materials instead of disposing of them as
waste. All tools, accessories and packaging
should be sorted, taken to a recycle centre and disposed of in
a manner which is compatible with the environment.
WEEE REGULATIONS. Dispose of this product at the end of
its working life in compliance with the EU Directive on Waste
Electrical and Electronic Equipment. When the product is no
longer required, it must be disposed of in an environmentally
protective way.

Other Sealey Sander manuals

Sealey ER230P User manual

Sealey

Sealey ER230P User manual

Sealey SM100 User manual

Sealey

Sealey SM100 User manual

Sealey SA7/SAS User manual

Sealey

Sealey SA7/SAS User manual

Sealey SM914 Firmware update

Sealey

Sealey SM914 Firmware update

Sealey SM31.V3 User manual

Sealey

Sealey SM31.V3 User manual

Sealey Power Tools SA19/S.V2 User manual

Sealey

Sealey Power Tools SA19/S.V2 User manual

Sealey SA18/S.V2 User manual

Sealey

Sealey SA18/S.V2 User manual

Sealey SBS35 User manual

Sealey

Sealey SBS35 User manual

Sealey OS400 User manual

Sealey

Sealey OS400 User manual

Sealey SA7T User manual

Sealey

Sealey SA7T User manual

Sealey SM1300 User manual

Sealey

Sealey SM1300 User manual

Sealey SA355A User manual

Sealey

Sealey SA355A User manual

Sealey CP108VDSBO User manual

Sealey

Sealey CP108VDSBO User manual

Sealey SA77.V4 User manual

Sealey

Sealey SA77.V4 User manual

Sealey DWS215 User manual

Sealey

Sealey DWS215 User manual

Sealey BG150BS User manual

Sealey

Sealey BG150BS User manual

Sealey SA354 Firmware update

Sealey

Sealey SA354 Firmware update

Sealey DAS149 User manual

Sealey

Sealey DAS149 User manual

Sealey MA20.V2 User manual

Sealey

Sealey MA20.V2 User manual

Sealey SM750.V2 User manual

Sealey

Sealey SM750.V2 User manual

Sealey SA35.V2 User manual

Sealey

Sealey SA35.V2 User manual

Sealey MS925PS.V2 User manual

Sealey

Sealey MS925PS.V2 User manual

Sealey MS700PS User manual

Sealey

Sealey MS700PS User manual

Sealey SA7/S User manual

Sealey

Sealey SA7/S User manual

Popular Sander manuals by other brands

Dynabrade 57700 Operating, maintenance and safety instructions

Dynabrade

Dynabrade 57700 Operating, maintenance and safety instructions

Lagler ELAN Operation, maintenance, safety manual

Lagler

Lagler ELAN Operation, maintenance, safety manual

Makita 9910 instruction manual

Makita

Makita 9910 instruction manual

Craftsman 351.226711 owner's manual

Craftsman

Craftsman 351.226711 owner's manual

National Flooring Equipment 550 Service manual

National Flooring Equipment

National Flooring Equipment 550 Service manual

King Canada KC-701C instruction manual

King Canada

King Canada KC-701C instruction manual

Pacific Rhino PFS 8 Owner's manual & operating instructions

Pacific

Pacific Rhino PFS 8 Owner's manual & operating instructions

Rupes LHR 15III instruction manual

Rupes

Rupes LHR 15III instruction manual

VEVOR KD-68081 user manual

VEVOR

VEVOR KD-68081 user manual

Black & Decker 7558 instruction manual

Black & Decker

Black & Decker 7558 instruction manual

Ewbank FP80 Care & use instructions

Ewbank

Ewbank FP80 Care & use instructions

Clarke American 12 Operator's manual and parts list

Clarke

Clarke American 12 Operator's manual and parts list

Workzone WDS-130 Original manual

Workzone

Workzone WDS-130 Original manual

Ingersoll-Rand 319A Product information

Ingersoll-Rand

Ingersoll-Rand 319A Product information

Haussmann PT110636 Operator's manual

Haussmann

Haussmann PT110636 Operator's manual

Far Tools S 150C Original manual translation

Far Tools

Far Tools S 150C Original manual translation

Ingersoll-Rand 313 instructions

Ingersoll-Rand

Ingersoll-Rand 313 instructions

Delta SA180 instruction manual

Delta

Delta SA180 instruction manual

manuals.online logo
manuals.online logoBrands
  • About & Mission
  • Contact us
  • Privacy Policy
  • Terms and Conditions

Copyright 2025 Manuals.Online. All Rights Reserved.