INSTRUCTIONS FOR:
EXHAUST FUME EXTRACTION SYSTEM
230V - 0.5hp - SINGLE HOSE & DOUBLE HOSE
MODEL No's: EFS100F & EFS101 & EFS102
Thank you for purchasing a Sealey product. Manufactured to a high standard this product will, if used according to these instructions
and properly maintained, give you years of trouble free performance.
IMPORTANT: PLEASE READ THESE INSTRUCTIONS CAREFULLY. NOTE THE SAFE OPERATIONAL REQUIREMENTS, WARNINGS AND CAUTIONS.
USE THE PRODUCT CORRECTLY AND WITH CARE FOR THE PURPOSE FOR WHICH IT IS INTENDED. FAILURE TO DO SO MAY CAUSE DAMAGE
AND/OR PERSONAL INJURY AND WILL INVALIDATE THE WARRANTY. PLEASE KEEP INSTRUCTIONS SAFE FOR FUTURE USE.
1. SAFETY INSTRUCTIONS
Original Language Version EFS100F + EFS101 + EFS102 Issue No.1 - 02/12/11
3. CONTENTS
3.1. Unpack the equipment and check against the list below for
missing or damaged items. In the event of a fault contact the
supplier.
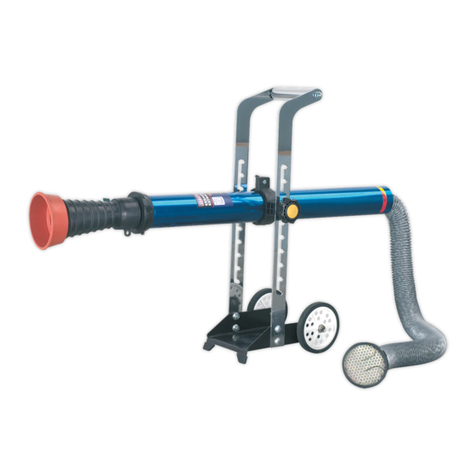
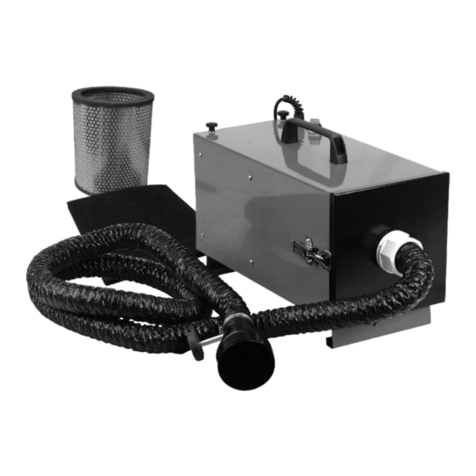
1. Extractor unit.
2. Extractor cone & flange inlet assembly.
3. Exhaust hosing (5mtr).
2. INTRODUCTION & SPECIFICATION
Wall mounted electric fan fitted with heat resistant hosing and
exhaust gas analyser port. Ideal for bikes, cars and car derived vans.
Requires installation onto workshop wall and ducting to appropriate
exhaust. Does not include electrical switch gear. Ideal for smaller
garages and workshops where space is limited.
Specification:
Motor ........................................................................ 0.5hp 230V 50Hz
Hose Size ......................................................................Ø75mm x 5mtr
4. INSTALLATION
4.1. WE RECOMMEND THAT ELECTRICAL INSTALLATION
SHOULD ONLY BE CARRIED OUT BY A QUALIFIED
ELECTRICIAN.
Note: This product is designed to be hard wired into a building
electrical circuit.
4.1.1. The power cable (not supplied) is wired to the unit through the
power supply connection box (refer to Fig.2 & Fig.3). A wiring
diagram (Fig.1) is embossed inside the power supply
connection box cover as a guide to the correct connection of
the power cable.
4.2. WALL MOUNTING. The exhaust extractor should be mounted
in such a position that it will not cause an obstruction or
present a hazard in the work area.
4.2.1. The exhaust extractor should be fixed to a brick or concrete
wall through the wall mounting holes in the extractor main
body using fixings that will adequately support the weight of
the unit and the hosing. If in any doubt, seek professional
advice.
4.2.2. Suitable ducting (not supplied) should be used to pass the
exhaust gases from the outlet (refer to Fig.2 & Fig.3) to a safe
environment. The ducting should be kept as straight and level
as is practical to allow unrestricted egress of the exhaust
gases.
4.2.3. Attach the heat resisting hosing to the inlets (refer to Fig.2 &
Fig.3) and to the cones using the clamps supplied.
1.1. ELECTRICAL SAFETY
WARNING! It is the responsibility of the owner and the operator
to read, understand and comply with the following:
You must check all electrical products, before use, to ensure that they
are safe. You must inspect power cables, plugs, sockets and any
other connectors for wear or damage. You must ensure that the risk
of electric shock is minimised by the installation of appropriate safety
devices. A Residual Current Circuit Breaker (RCCB) should be
incorporated in the main distribution board. We also recommend that
a Residual Current Device (RCD) is used. It is particularly important
to use an RCD with portable products that are plugged into a supply
which is not protected by an RCCB. If in any doubt consult a
qualified electrician. You may obtain a Residual Current Device by
contacting your Sealey dealer. You must also read and understand
the following instructions concerning electrical safety.
1.1.1. The Health & Safety at Work Act 1974 makes owners of
electrical appliances responsible for the safe condition of
those appliances and the safety of the appliance operators. If
in any doubt about electrical safety, contact a qualified
electrician.
1.1.2. Ensure that the insulation on all cables and on the appliance
is safe before connecting it to the power supply.
1.1.3. Ensure that cables are always protected against short circuit
and overload.
1.1.4. Regularly inspect power supply cables and plugs for wear or
damage and check all connections to ensure that none is loose.
1.1.5. Important: Ensure that the voltage marked on the appliance
matches the power supply to be used.
1.1.6. DO NOT use worn or damaged cables, plugs or connectors.
Immediately have any faulty item repaired or replaced by a
qualified electrician.
1.2. GENERAL SAFETY
WARNING! Ensure Health & Safety, local authority, and
general workshop practice regulations are adhered to when
using this equipment.
Familiarise yourself with the application, limitations and
potential hazards of the extractor.
WARNING! Disconnect the unit from the mains power
before servicing or performing any maintenance.
Maintain the extractor in good condition (use an authorised
service agent).
Replace or repair damaged parts. Use genuine parts only.
Unauthorised parts may be dangerous and will invalidate the
warranty.
Locate the extractor in a suitable working area, keep area clean
and tidy and free from unrelated materials. Ensure there is
adequate lighting.
Ensure there are no flammable or combustible materials near
the work area.
WARNING! The exhaust gases from the outlet of the fan
will be hot.
Ensure that ducting is not located close to any flammable
materials
Ensure that the material used for the ducting from the outlet is
heat resistant and flame retardant.
Ensure that the exhaust gases are released outside of the
workshop building.
Regularly check exhaust hosing and ducting for leaks.
Ensure that there is a vacuum at the extractor cone before
connecting to the vehicle exhaust pipe.
Keep children and unauthorised persons away from the working area.
DO NOT use the extractor for a task it was not designed to
perform.
.
DO NOT operate the extractor if any parts are damaged or
missing as this may cause failure or possible personal injury
DO NOT get the extractor wet or use in damp or wet locations
or areas where there is condensation.
DO NOT allow untrained persons to operate the extractor.
DO NOT operate the extractor when you are tired or under the
influence of alcohol, drugs or intoxicating medication.
DO NOT use the extractor where there are flammable liquids,
solids or gases such as paint solvents, etc.
DO NOT leave the extractor operating unattended.
When not in use switch the extractor off and disconnect
from the power supply.
